Kali Linux (formerly known as BackTrack) is an open-source Linux distro developed and funded by Offensive Security.
It’s basically an ethical hacker's dream operating system, because it has most of the tools you'll ever need built-in. From Metasploit to JohntheRipper to the one and only Aircrack-ng, this OS has it all.
But enough of the history lesson. Let’s jump right in and learn how to install Kali Linux on your computer.
Requirements
Before we carry on, you should know that this is the process for installing on the bare system itself and you should do this with extreme caution.
If you wish to dual boot your machine, you will need to partition your hard drive to give Kali at least 20 GB of hard disk space and then install it on that partition.
Now you are going to need some ingredients for this masterpiece:
- A Computer (Minimum Requirements: 20GB Hard Disk space, 2GB RAM, Intel Core i3 or AMD E1 equivalent)
- A USB stick (6 GB or more)
- A Kali .iso file
- Rufus (To create a bootable drive)
- A really cool head (Trust me, you’ll need it 🥶)
How to Install Kali Linux on Your Computer – Step by Step
Step 1: Download the iso file
Go to kali.org and hit the download button.

What you're trying to get is an iso file, which is just a way of packaging software. Operating systems are usually packed like this (but also malicious software, so be careful where you get them💀).
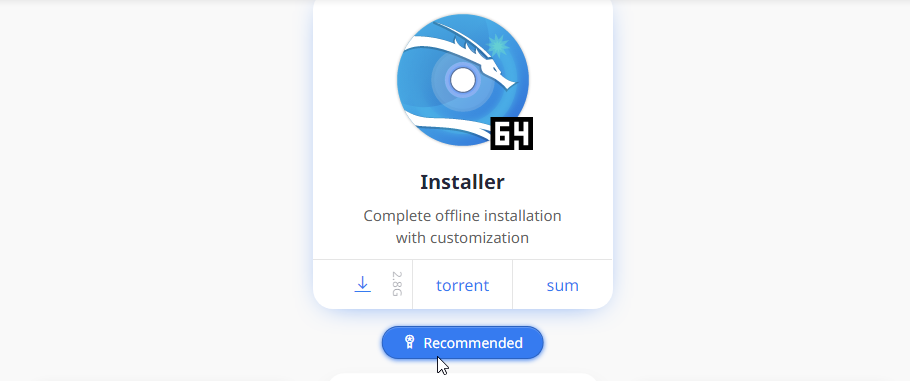
Here you are given a lot of options, but go for the ‘Bare Metal’. There are options for 64-bit, 32-bit, and Apple M1 here (though I have no clue why the last one exists). Choose the tab applicable to your system, and download the Installer. For torrent lovers, the torrent is also available.
Step 2: Create a bootable drive
You can download Rufus from rufus.ie (Rufus 3.18 as at the time of writing). In order to make the stick bootable, we are going to run Rufus and make a few changes.
Connect the stick and select it under the ‘Device’ options. Under ‘Boot selection’ select your newly downloaded Kali iso file. Now for the tricky part.
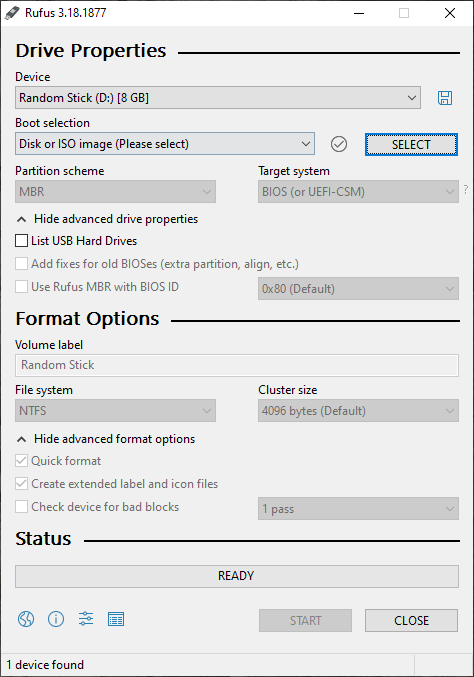
Before we proceed, a quick lesson: a partition scheme/table is the format in which a hard disk saves data. Think of it like your video files saved in .mp4 or .mkv – they are both videos but different formats.
Most computers have one of the following formats: GPT (GUID Partition Table) or MBR (Master Boot Record). You may not be able to boot your drive if you pick the wrong option here.
Summary of it all: Pick the MBR option if the computer is old or using a legacy BIOS. Pick GPT if it is a newer computer and using a UEFI BIOS. If the drive doesn’t show up in the boot menu, change to the other option and try again.
You could also go to the advanced drive properties and check the box with ‘Add fixes for old BIOSes’. This should make the drive more compatible with your computer if it is a very old one. And by old, I mean ancient 👴.

Back to easier ground now, you can leave the default format options. Hit the Start Button and wait for the image to be written to the stick (This takes some time so, relax 😌).
Step 3: Access the Kali Installer Menu
To boot the computer from the new Kali USB stick, you’ll need to disable secure boot if it is enabled in the BIOS settings.
You may need to do a little research into how to access your BIOS and boot menu. It usually involves spamming (continuously pressing) a key on your keyboard when the computer starts to boot.
As mentioned before, if you are dual booting, take note of the partition size you made for Kali so you don’t overwrite your other OS (been there, done that 😢).
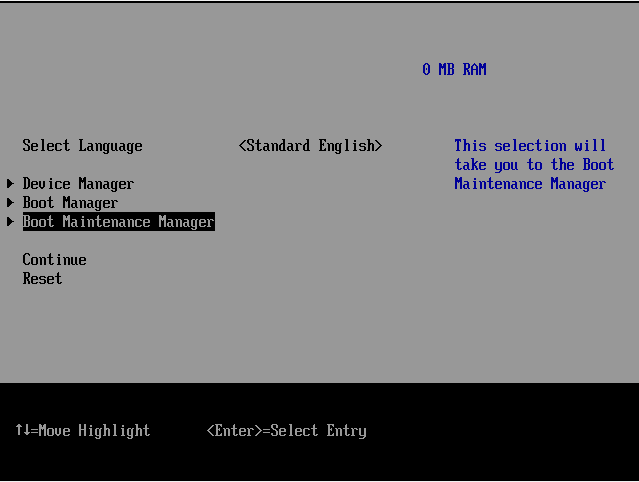
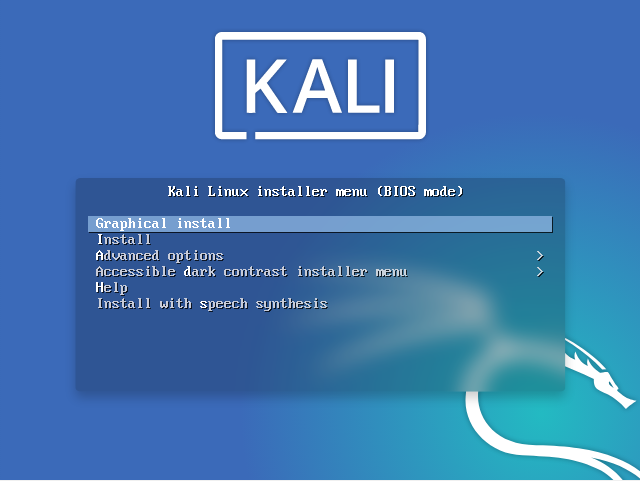
After disabling secure boot, we can finally boot to the drive. At startup, you’ll have to access the boot menu and then choose the stick you just made. You should be welcomed with the Kali Installer Menu.
Note: You can also edit the boot menu configuration in the BIOS menu, but that is permanent and may need to be changed post-installation. It is usually preferred to find a way to access the boot menu when starting up the computer, as this will only be a temporary configuration.
The installer menu only allows the keyboard for input so you’ll have to use the arrow keys, Enter, and Esc to navigate it.
Step 4: Begin the installation
Select graphical install, and you can now use your mouse. Select your preferred language, region, and keyboard layout in the following menus:
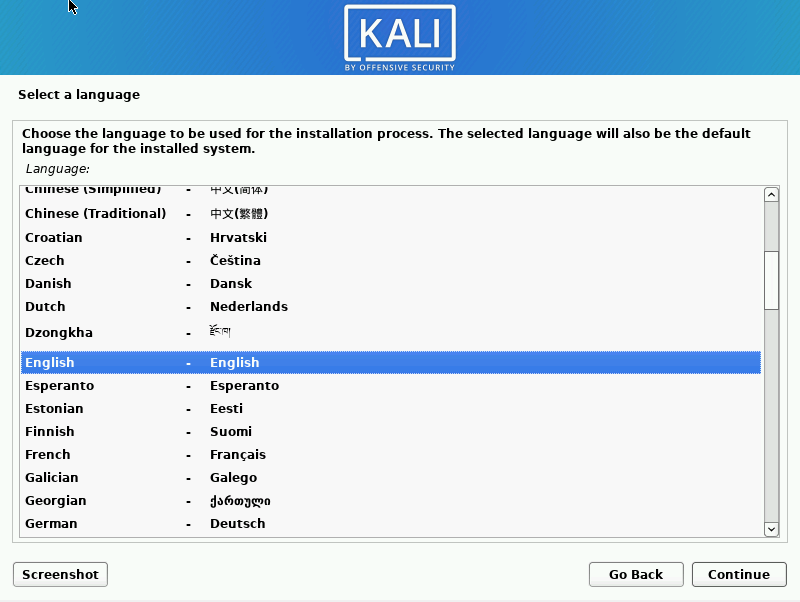

You computer will attempt to make some network configurations, but you can easily skip that as it won’t be needed for an offline install.
Fill in a hostname as this will identify your computer on a public network. You can skip the domain name part as this isn’t necessary. Next, type in your full name for your new user account.
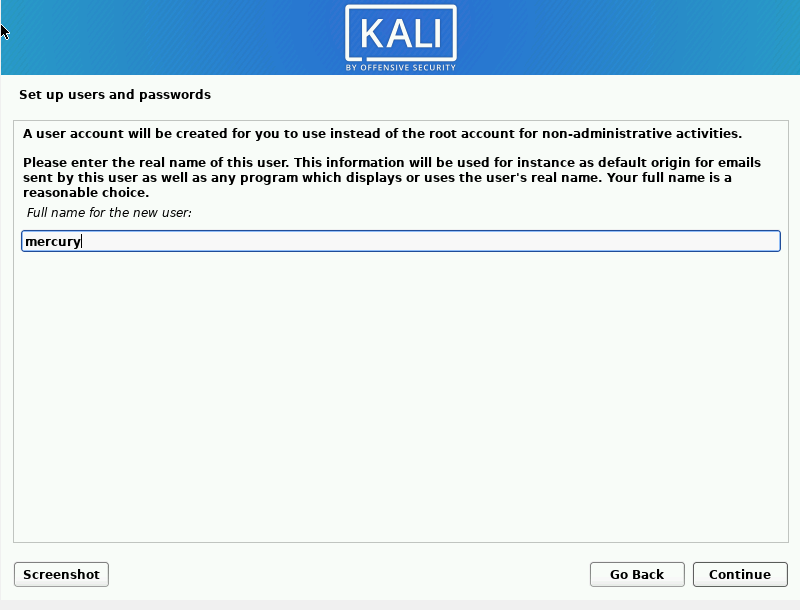
Quick lesson: On the terminal, Linux allows you to send and receive emails with commands. However, Gmail and Yahoo make sending a lot easier these days. You may never have to use this feature in your lifetime.
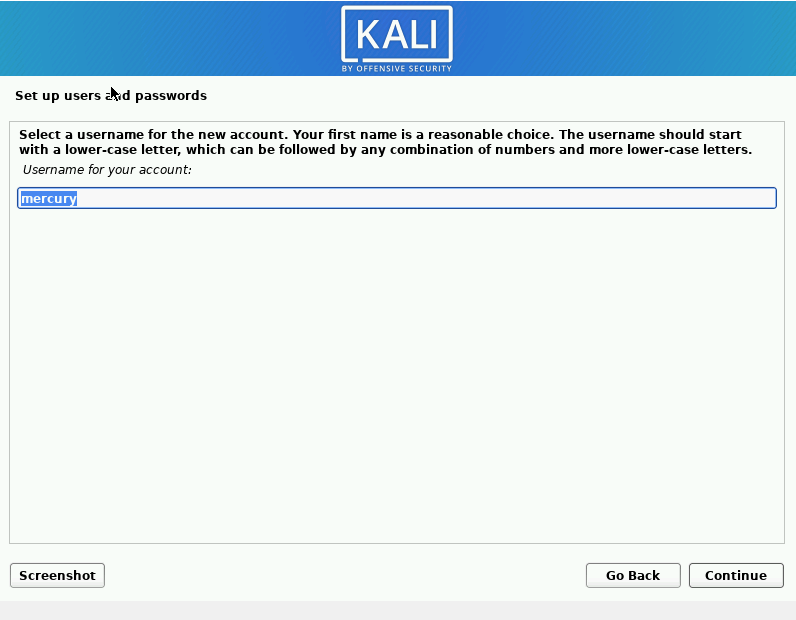
Next type, in the username for your account (This could be your hacker alias 😎).
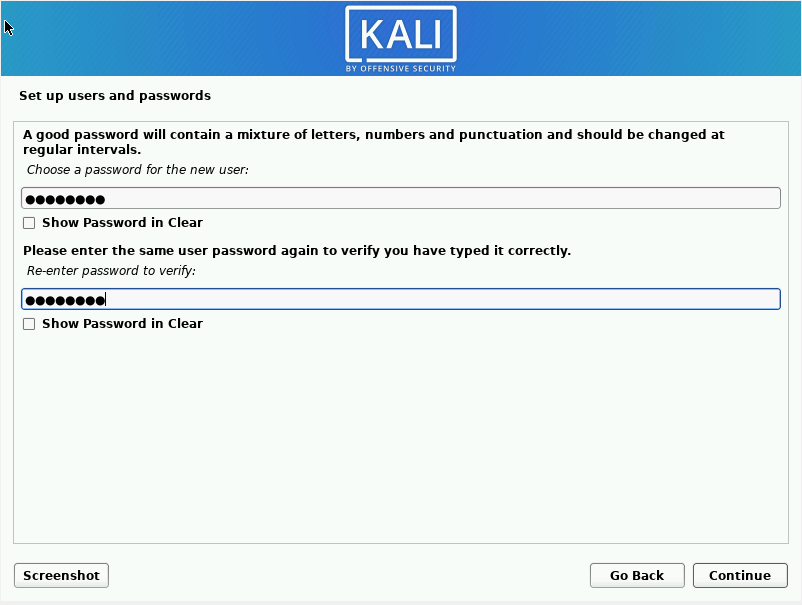
Choose a strong password/passphrase to input in the next menu.
Select your time zone. This is important as it could affect your network configurations post-installation.

Step 5: Set up the storage
Next would be to select the partitioning method. Now for the cool head mentioned earlier. If you want to format the entire hard drive for Kali, the Guided options will be best.
LVM (Logic Volume Management) is a feature that allows you to have relatively flexible partitions. This means that you can extend, shrink or even merge partitions while the OS is being run. It's a pretty nifty feature.
The encrypted LVM feature keeps your data safe if someone unauthorized gets access to your hard drive. Just note that there is a trade-off here: your hard drive will tend to be slower than if it wasn’t encrypted. So most people go with the ‘Guided -use entire disk’ option.
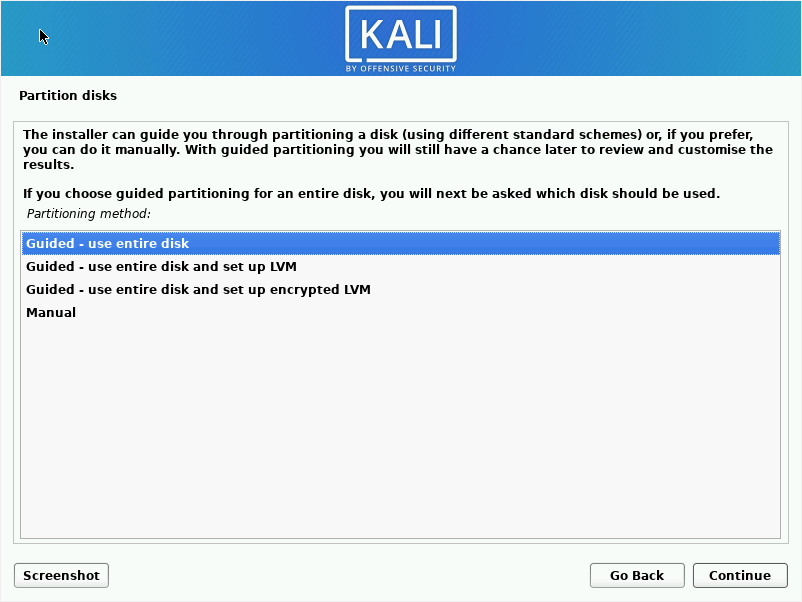
If you are dual-booting, though, you will need to choose the manual option and make the necessary configurations. I’ll go with the use entire disk option here.
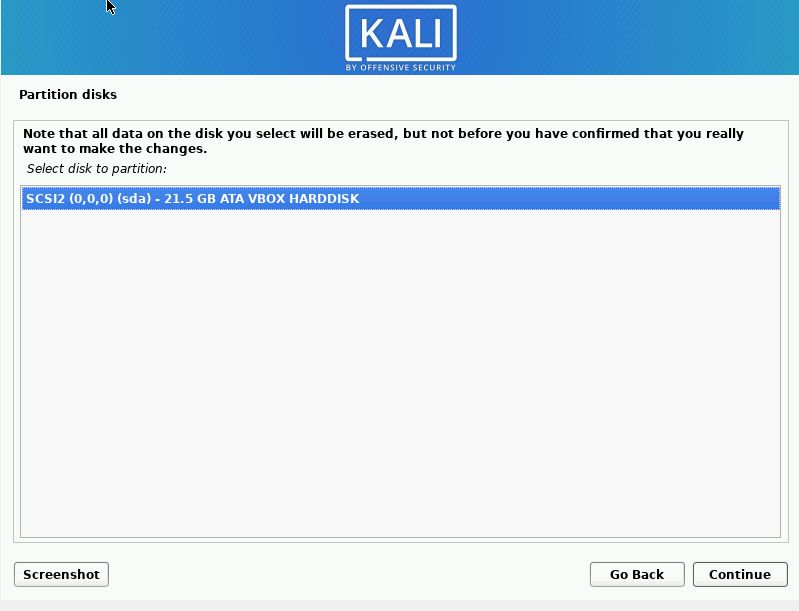
Choose the hard drive you want to install Kali on. I’m using a virtual machine so my only option is a small 21 GB drive.
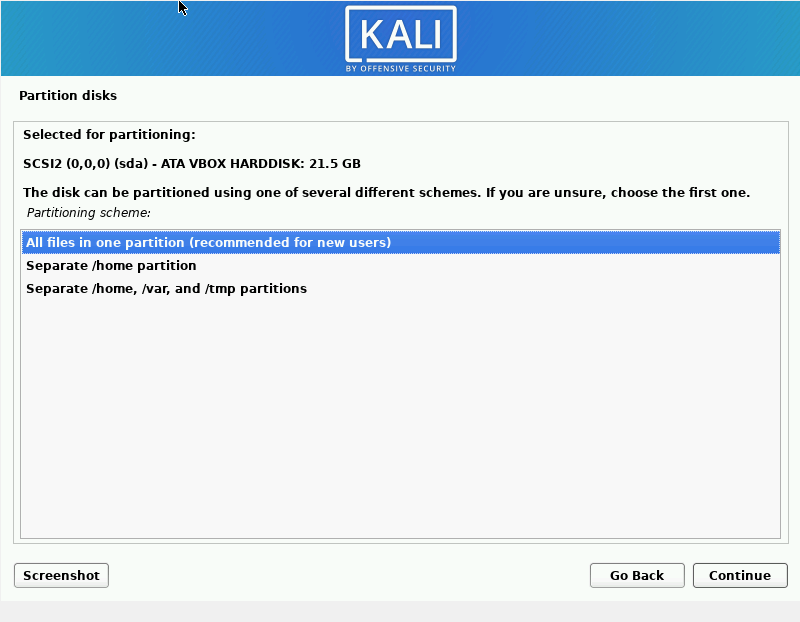
Choose how you want your files to be partitioned. Each option differs by separating certain important directories in separate partitions (More on that in a later post).
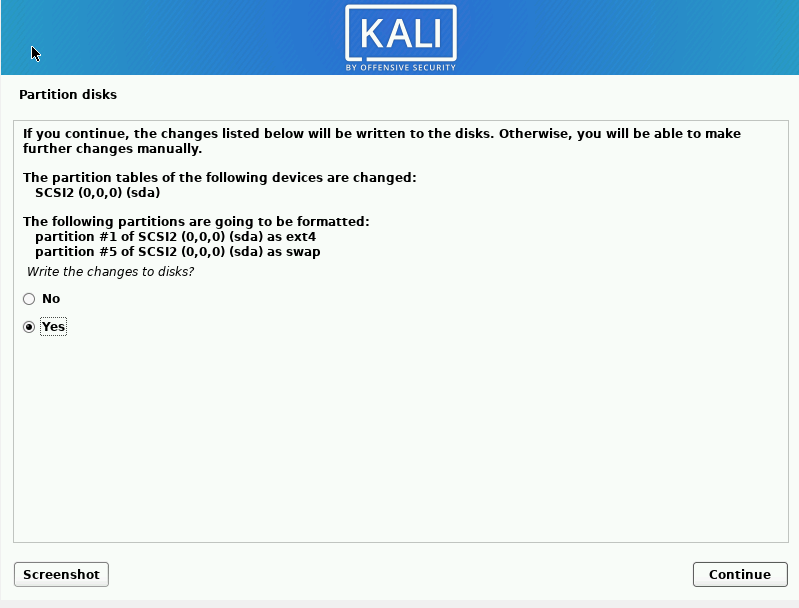
Finish up the partitioning changes.

Select ‘Yes’ to write the changes to the disk.
Step 5: Chose software and a desktop look
Now, choose the software you wish to install. Check the desktop environment and collection of tools options, as these will help you avoid having to install a lot of things later.
Desktop environments are basically the way the desktop looks to the user. Kali offers Xfce (most common), Gnome, and KDE. I’m a sucker for Gnome so I went with that option. You can still install all three and later configure your computer to choose the one you’d like.
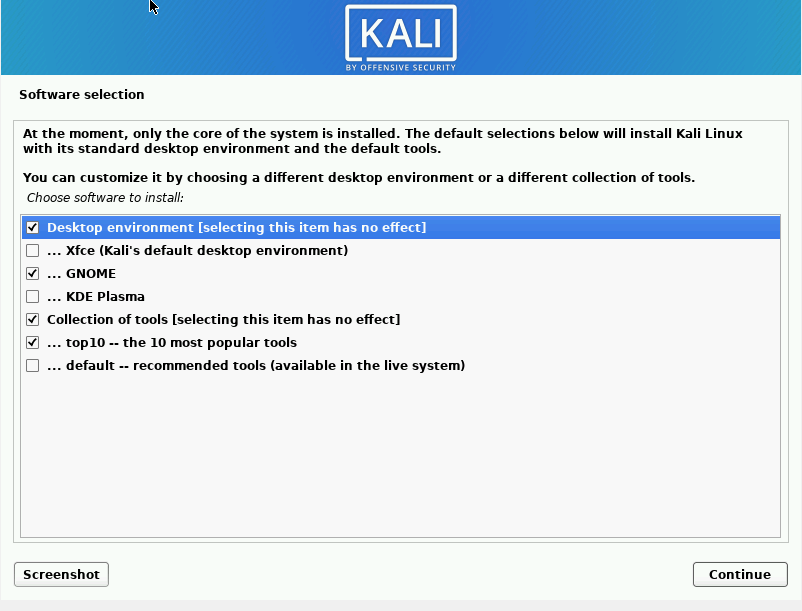
You can check the sixth box to install the top 10 most popular tools on Kali. These are:
1. Aircrack-ng
2. Burpsuite
3. Crackmapexec
4. Hydra
5. Johntheripper (jtr)
6. Metasploit
7. Nmap (Network Mapper)
8. Responder
9. Sqlmap
10. Wireshark
As a hacker, you’re definitely going to need one of these sooner or later, so it’s best if you check that box. You can check the ‘default — recommended tools’ box if you want a whole bunch of tools on your system, but note that this will take a lot of time and space. Hit continue and wait.
Quick tip: It is generally recommended that you only have the tools you absolutely need on your computer. This is because additional tools could slow your computer down, you could waste data updating tools you never use, and you are likely to be more vulnerable if there is an active exploit on the loose.
Step 6: Install the GRUB bootloader
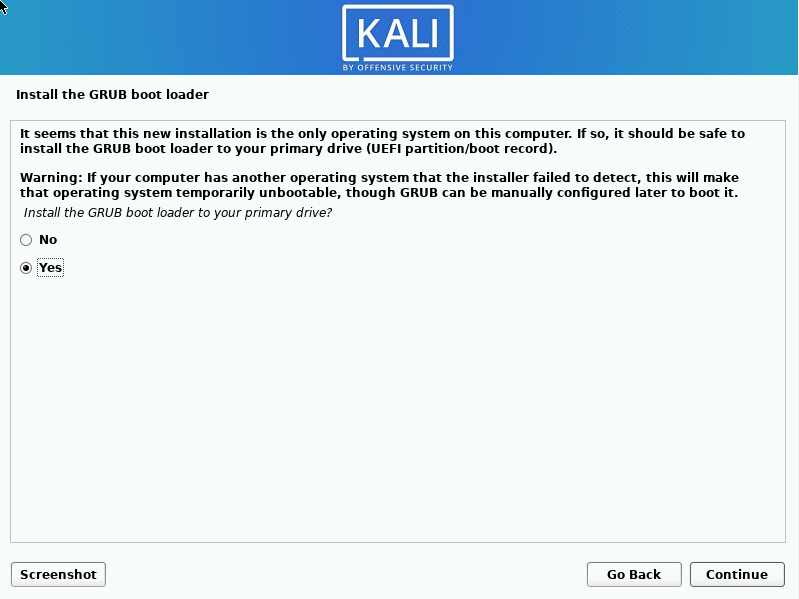
The GRUB boot loader is a piece of software that allows you to pick which OS to boot from when the computer starts up. For both single boot readers and dual boot readers, the best option here is ‘Yes’.
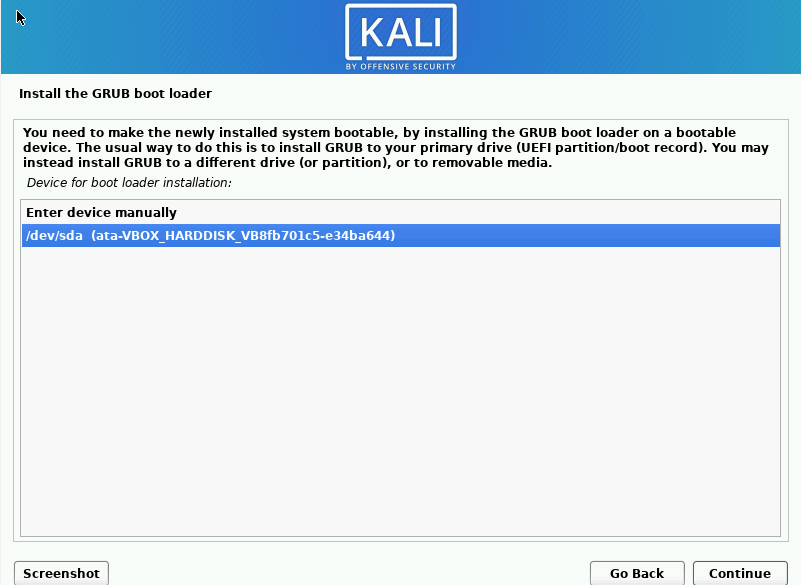
Select the your hard drive.
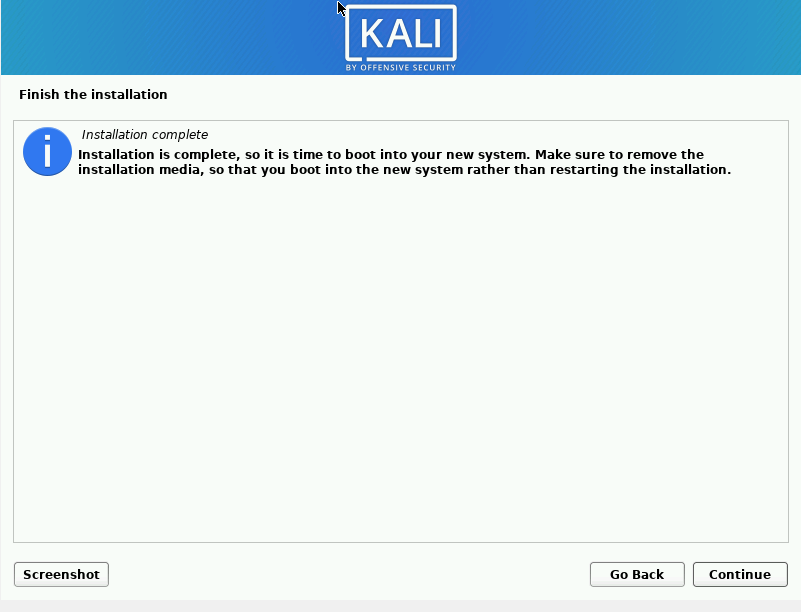
Mission Accomplished 🎉🥂. You have successfully installed your Kali Linux OS. Hit continue to clean up and reboot your computer.
Note: If you performed dual boot, you may need to change the boot menu to load Kali first before Windows so you have the option of choosing which OS to use.
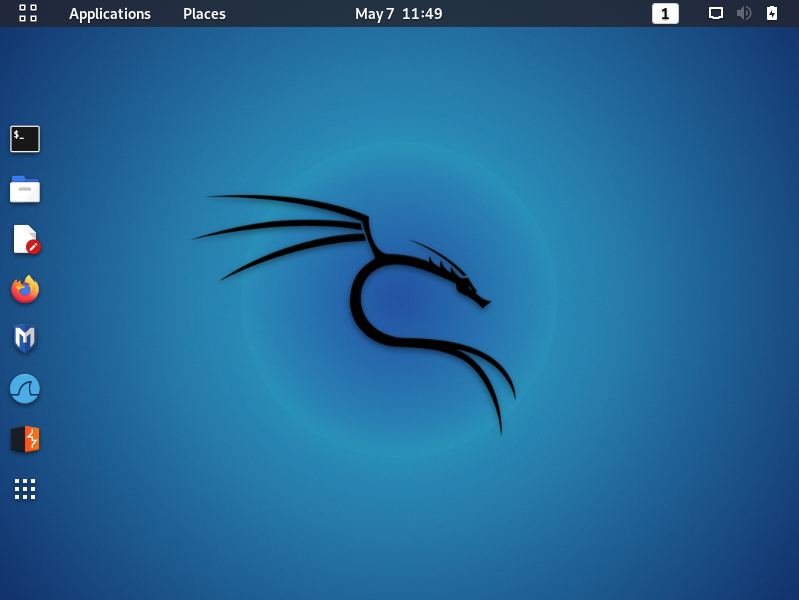
Once booted up, your screen should be like the one below.

If you installed the xfce desktop environment, you will have to put in your username, enter your password, and you should have a nice looking desktop.
Conclusion
Alright so let's do a quick recap of what we did:
- Downloaded the iso file
- Created a bootable drive
- Accessed the Kali Installer Menu
- Began the installation
- Set up the Storage
- Installed the GRUB bootloader
And finally, enjoy your new OS. Happy hacking! 🙃
Helpful Resources
- Kali website: kali.org
- You can read about the difference between MBR and GPT in this freeCodeCamp article.
- Here's an article from Kali Linux about how to change your desktop environment
Acknowledgements
Thanks to Chinaza Nwukwa, Holumidey Mercy, Georgina Awani, and my family for the inspiration, support and knowledge used to put this article together. You’re the real MVPs.

