

The NVIDIA Compute Unified Device Architecture (CUDA) Toolkit is a software platform that allows developers to tap into the computing power of NVIDIA processing and GPU-accelerated applications.
CUDA is also a programming model and an API that enables programmers to write code that can run on both the CPU and GPU while also handling data transfer between them.
By using the CUDA Toolkit, you can improve performance, scalability, and efficiency across a range of applications. These include computing, deep learning, computer vision, gaming, and more.
The toolkit supports programming languages like C, C++, Fortran, Python, and Java. It seamlessly integrates with frameworks and libraries such as TensorFlow, PyTorch OpenCV, and cuDNN.
Also, the use of the CUDA Toolkit extends across different domains, such as healthcare finance, robotics, the automotive industry, and entertainment. If you're looking to speed up image processing or natural language processing, enhance cryptography, or advance ray tracing techniques, the CUDA Toolkit empowers you to solve problems faster and more efficiently.
In terms of compatibility, the CUDA Toolkit offers support for Linux distributions, including Ubuntu, Debian, Fedora, CentOS, and OpenSUSE.
In this article, I will guide you through the process of installing the CUDA Toolkit on Ubuntu 22.04, which happens to be the LTS (Long Term Support) version of Ubuntu.
Prerequisites
To install the CUDA Toolkit on Ubuntu 22.04, you need the following:
In this guide I will be using a Paperspace GPU instance with Ubuntu 22.04 LTS operating system.
Please note that you can use any other Cloud Service provider, like Google Cloud and Vultr, or even your own computer, as long as it meets the requirements listed above.
To get started, you'll need to create a new user, like seconduser and then switch to the new user.
Install CUDA Toolkit
You can install CUDA using the release file or alternatively, by using Conda. In this guide, we will be installing CUDA with the release file from the official Toolkit Archive.
Step 1: Download the CUDA release file.
$ wget https://developer.download.nvidia.com/compute/cuda/12.0.1/local_installers/cuda_12.0.1_525.85.12_linux.run
Step 2: Execute the release file.
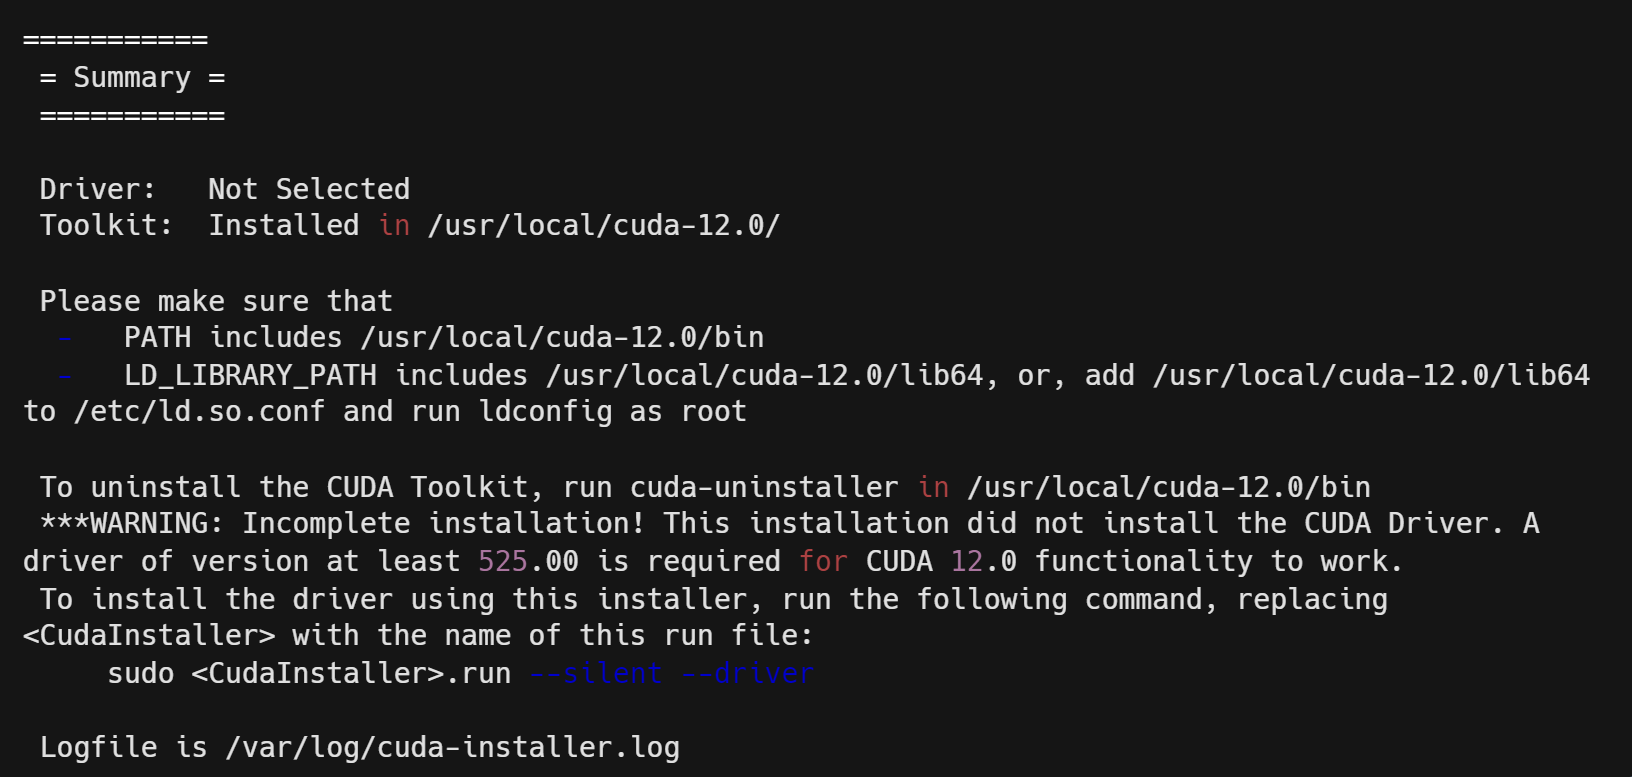
$ sudo sh cuda_12.0.1_525.85.12_linux.run
You will be prompted to accept the End User License Agreement, then press Enter to configure your installation.
Once the installation is complete, you should see an output similar to this:
Configuration and Verification
Step 1: Configure the server
Configure the server to work with the CUDA toolkit. Move the CUDA path to the system’s PATH, then add the CUDA Toolkit library path to the LD_LIBRARY_PATH so that the CUDA toolkit link loader will be updated with the location of shared libraries.
$ echo "export PATH=/usr/local/cuda-12.0/bin${PATH:+:${PATH}}" >> /home/seconduser/.bashrc
$ echo "export LD_LIBRARY_PATH=/usr/local/cuda-12.0/lib64${LD_LIBRARY_PATH:+:${LD_LIBRARY_PATH}}" >> /home/seconduser/.bashrc
Step 2: Activate Environment
After configuring the server to work with the CUDA toolkit, activate the environment variable changes so that the system can find and use CUDA.
$ source /home/seconduser/.bashrc
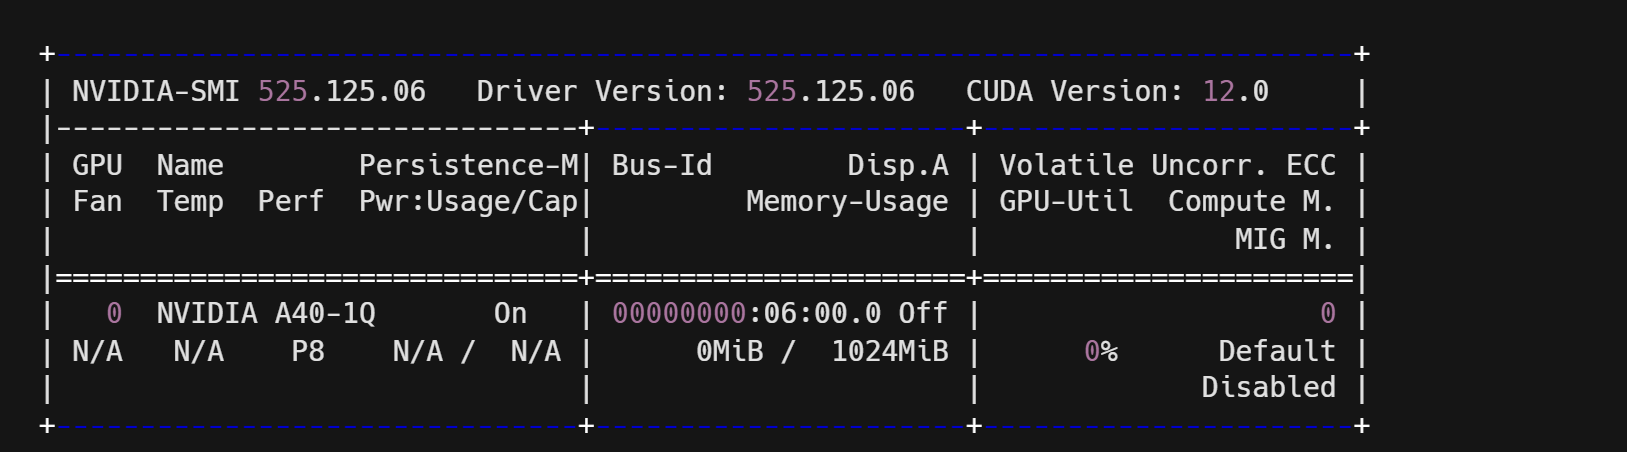
Step 3: Verify Installation
$ nvidia-smi
Output:
Step 4: Check Package Installation.
Verify that the package from the CUDA Toolkit is successfully installed on your server.
$ nvcc --version
Output:

Testing
To test your newly installed CUDA programs, you will use some already-made test scripts by CUDA that will allow you to comprehensively verify the compatibility and functionality of your CUDA-enabled environment.
Step 1: Clone the test scripts repository
$ git clone https://github.com/NVIDIA/cuda-samples.git
Step 2: Go to the directory containing the deviceQuery sample script.
$ cd cuda-samples/Samples/1_Utilities/deviceQuery
Step 3: Compile the script.
$ make
Step 4: Run the script.
$ ./deviceQuery
Your output should look similar to the one below if your CUDA program ran the script successfully:

Conclusion
In this article, you learned how to install the CUDA Toolkit on Ubuntu 22.04.
Some of the best practices for using CUDA on Ubuntu are:
Keep your system and NVIDIA drivers up to date to ensure the compatibility and stability of the CUDA Toolkit.
Use the CUDA APT PPA to install and update the CUDA Toolkit easily and quickly.
Use the nvcc compiler options and flags to optimize and debug your CUDA code.
Use the CUDA libraries and tools to enhance and simplify your CUDA development process.
Follow the CUDA coding standards and best practices to write efficient and maintainable CUDA code.
Here are some resources to learn more about CUDA: