
Before trying to run any Python program in your Windows operating system, you'll need to check if you have Python installed and added to the environment's path variable correctly.
In this article, I will show you how you can check whether you have Python installed successfully in your operating system or not. If not, then I will also show you how you can install it properly for Windows.
In this article, I am going to use Windows 11 as that's the latest version of Microsoft Windows. But the same method is also applicable for the other versions of Windows as well. So without further ado let's get started.
How to Check if You Have Python Installed in Your Windows Operating System
Open the CMD or PowerShell and check the version of Python by using this command:
python --version

If you get the version of Python in the output like you see above, then your computer is perfectly okay for running any Python program. In your case, the version of Python might be different.

But if you get this type of output that you see above, then it can mean any of the following:
- You did not have Python installed on your computer, or
- Python's directory has not been added to the path of the Environment Variables.
For now let me assume that you do not have Python installed in your computer. Then I will also introduce you how you can add Python's directory to the path of the Environment Variables later in this article.
How to Install Python on Windows
First of all, we need to go to the official website of Python.

Click on the Downloads section.
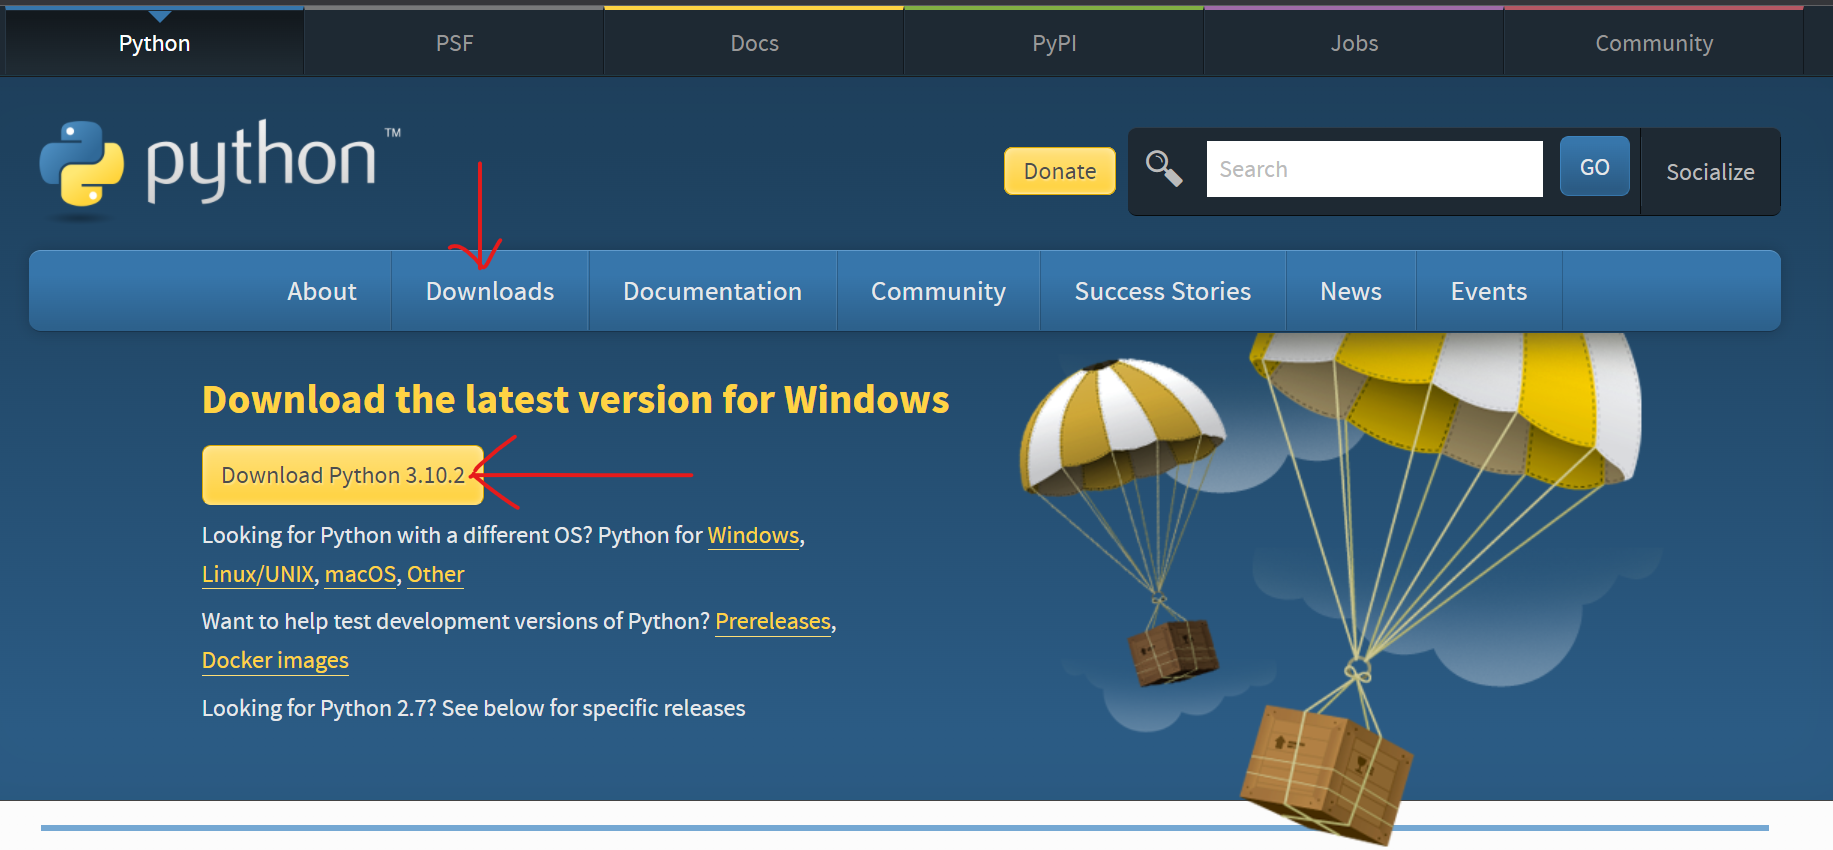
Here you will get the latest version. Just click on the Download Python 3.10.2. By the time you are reading this article, Python might have been updated, in which case the version would be different. Simply download the version it shows you.
Keep in mind that here it will always show you the latest version of Python at the top.

After downloading the file, we will get an executable file like this. Simply double click on that file and the installation wizard will open.
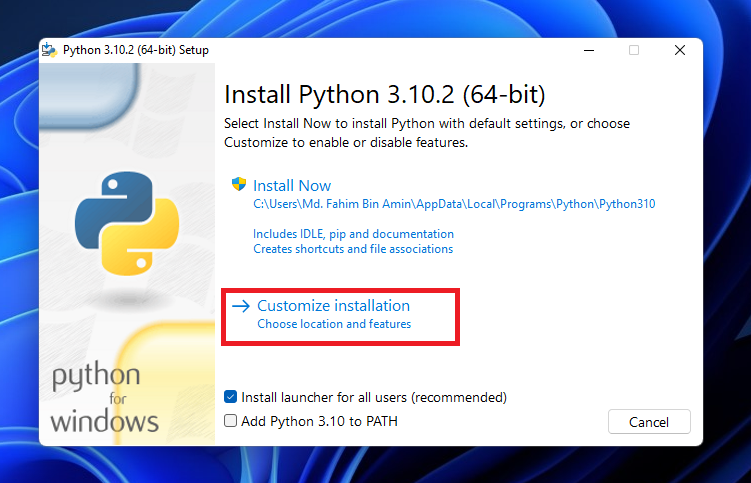
Click on Customize installation.

Make sure to check all of the boxes, like above. Then click Next.
Then you'll see the below screen. If you want, then you can check all of the boxes. I do not need the debugging symbols and the debug binaries. So, I will not check the last two boxes.

I would also recommend that you not change the location of the installation. Remember the install location as you might need that later. We are adding Python to the environment variables here directly.
Then click Install.

Let the installation process finish up...

If you get this type of prompt to disable the path length limit, then simply click on that box. It disables the path length limit by removing the limitation on the MAX_PATH variable.

This change will not break anything, or make any negative changes. It will just allow Python to use long path names. It is recommended to disable the path length limit.

The installation has been finished successfully.
How to Check the Python Version
Now we need to check again whether Python has been successfully installed and added to the path of the environment variables or not.
To check that, we need to open the CMD or the PowerShell. Then we need to apply the following command:
python --version

Python has been installed and the path has also been added in the environment variables successfully!
How to Check the Path of the Environment Variables
If you want to check the path variables manually, then you have to open the Advanced System Settings. You can either search for Advanced System Settings, or you can open that from the Control Panel as well.

If you search using the keyword Advanced system settings, you will get that directly here like this.
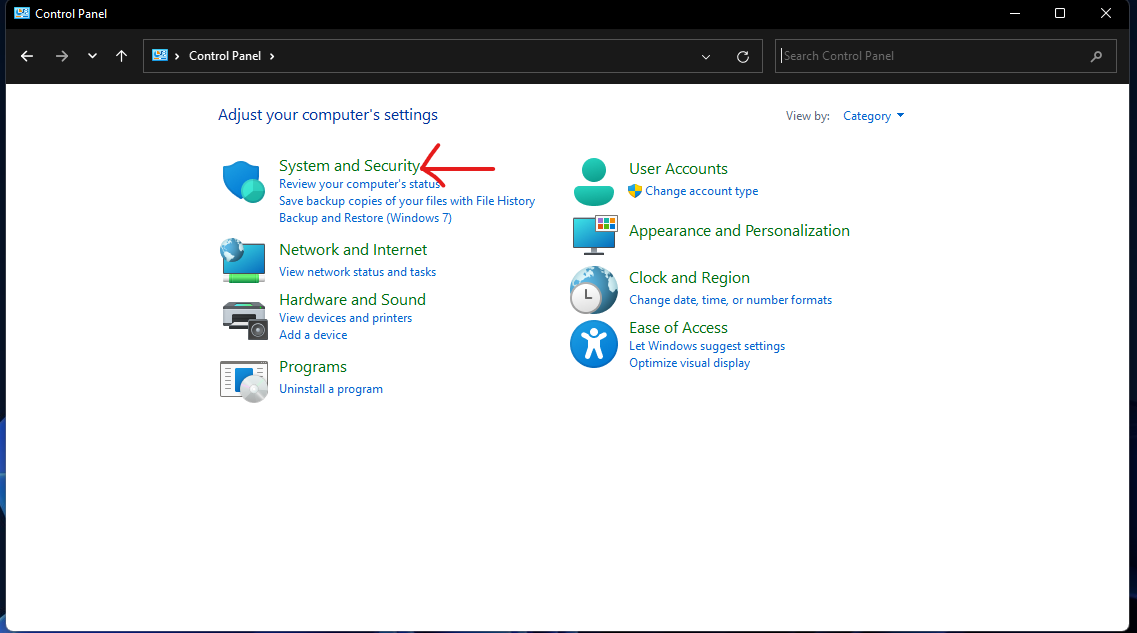
If you want to open that from the Control Panel, then, first of all, you need to open the control panel.

Go to System and Security.
Click on System.
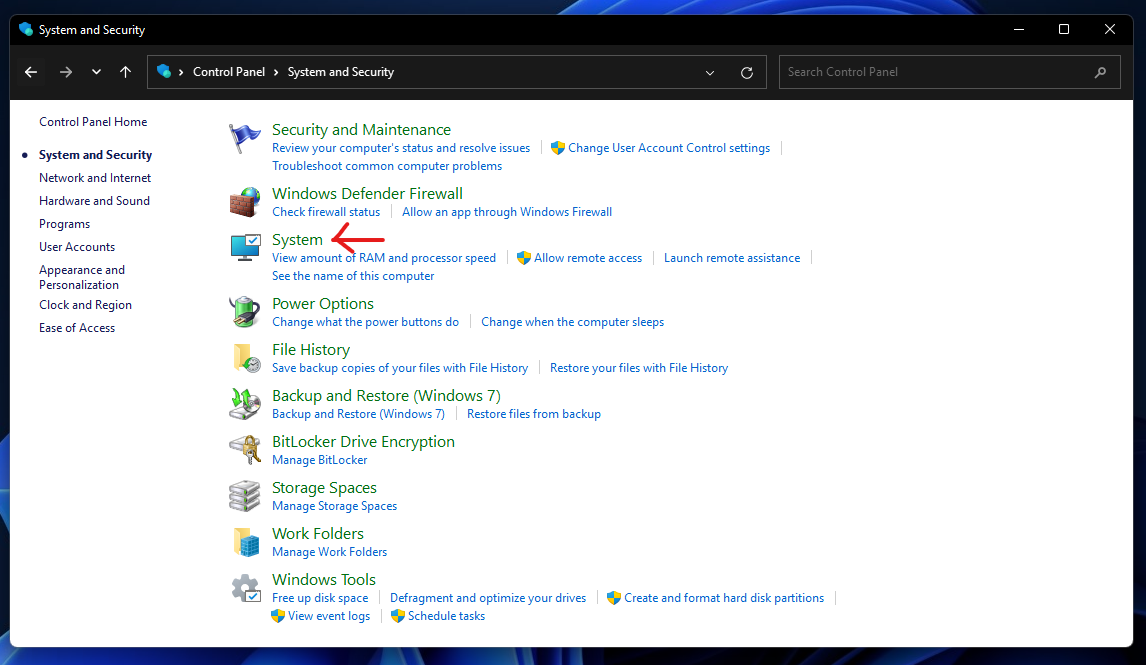
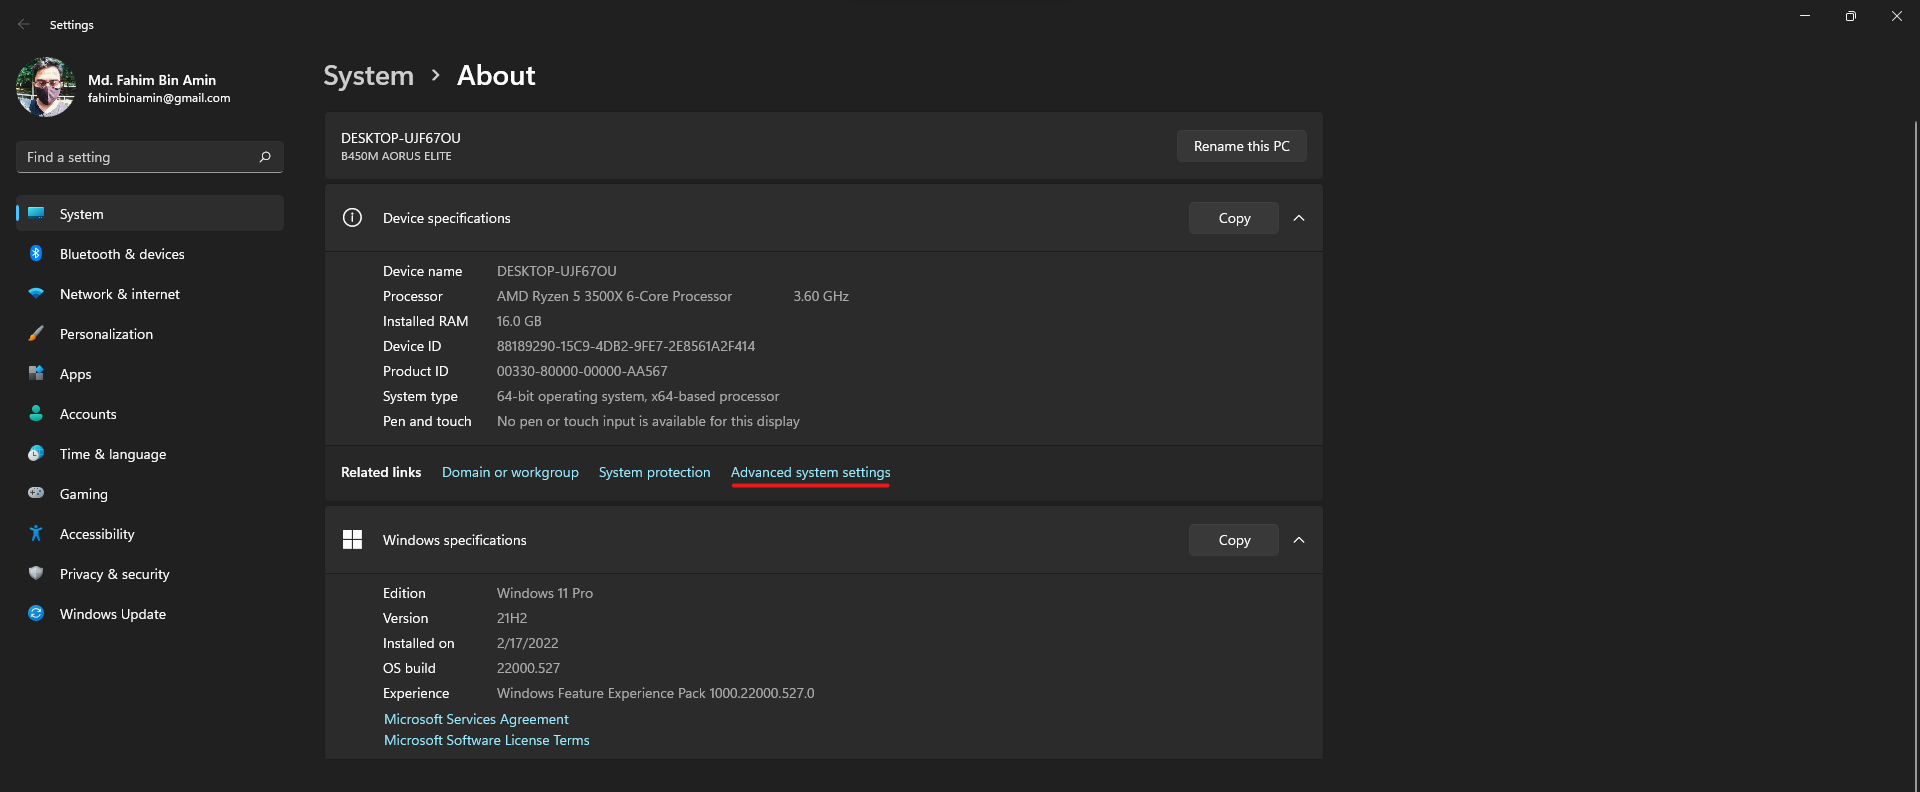
From here, click on Advanced System Settings.
Click on Environment Variables.

Click on Path and then click Edit.
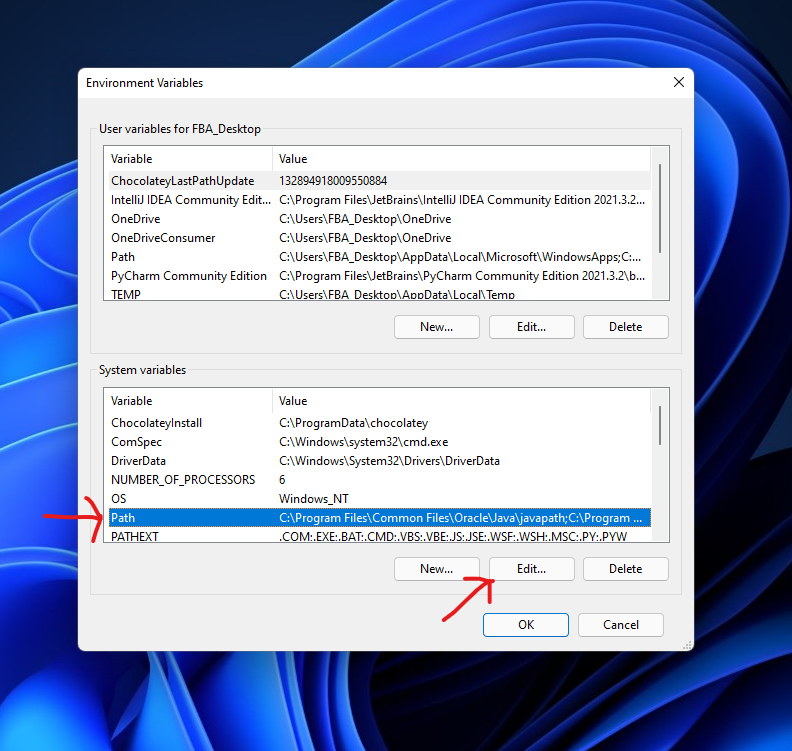
You will see that the root directory of Python310 and the scripts directory of Python310 have already been added in the installation process, as we checked the box to do these during the installation.
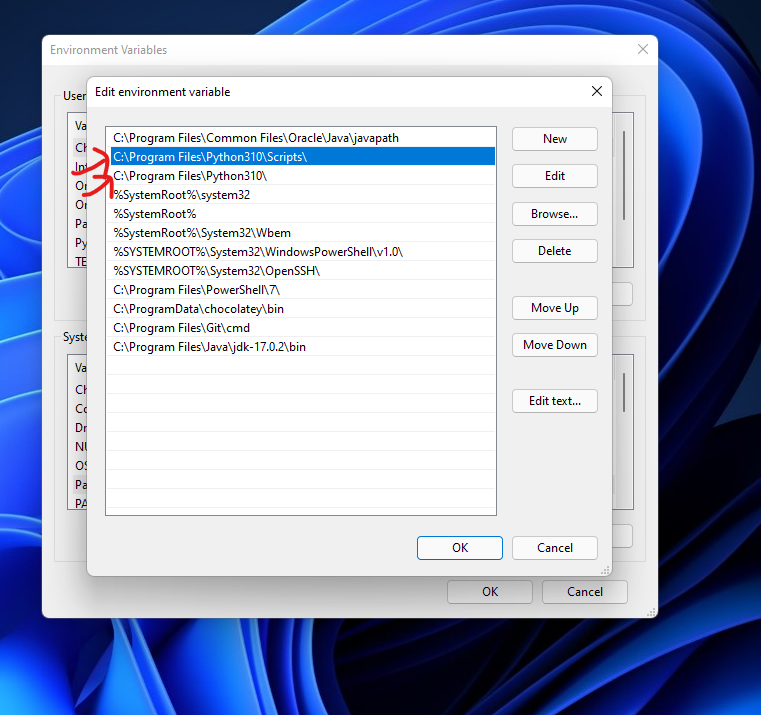
If you wanted to do that manually, then you would need to copy and paste the two directories here by clicking New and pasting the two directories into two blank boxes (one box appears each time you click New). Then simply click on OK to all of the opened boxes and close all the opened windows.
I have also made a video where I show all of the processes mentioned above. If you want, then you can check the video here.
Conclusion
Thanks for reading the entire article. If it helps you then you can also check out other articles of mine at freeCodeCamp.
If you want to get in touch with me, then you can do so using Twitter, LinkedIn, and GitHub.
You can also SUBSCRIBE to my YouTube channel (Code With FahimFBA) if you want to learn various kinds of programming languages with a lot of practical examples regularly.
If you want to check out my highlights, then you can do so at my Polywork timeline.
You can also visit my website to learn more about me and what I'm working on.
Thanks a bunch!