

Lots of people still use static websites, from family-run businesses who don't need to update information that often, to large teams who need to release something quickly without spending too much time and effort on it.
You might also want a static website for these reasons:
- Speed: pages load quickly
- Minimal skills required: Web developers who don't have much experience can easily work on the project
- Hosting is easy: today's market offers a variety of options to host your static website (like AWS S3, Azure Storage, Netlify, and others)
So far we've talked about why you might choose a static website and what they're good at.
But what if you want to add content quickly to your website or update just a section of it? What if you want to add a blog to your website to get new visitors?
That's an issue I've had to deal with in the past several times: clients asked me to add dynamic content to their websites and they had no budget or time to create a new project. Fortunately, WordPress helped me find a solution. Let's see how.
How WordPress helped me
WordPress is the standard in the Industry for blogging and publishing content quickly. The dashboard is intuitive and easy to use. Admins can also add new users and specify – by selecting the appropriate role – their permissions.
WordPress exposes Rest APIs to help developers build integrations with WordPress itself and third parties services.
So I decided to integrate a WordPress blog with my client's static website by calling the /wp/v2/posts endpoint provided by WordPress APIs. In the next steps, I'll explain how I did it and why.
Project Setup
First of all, I want to share the website I'll work on during this article. Nothing too fancy: I picked this Bootstrap static template:
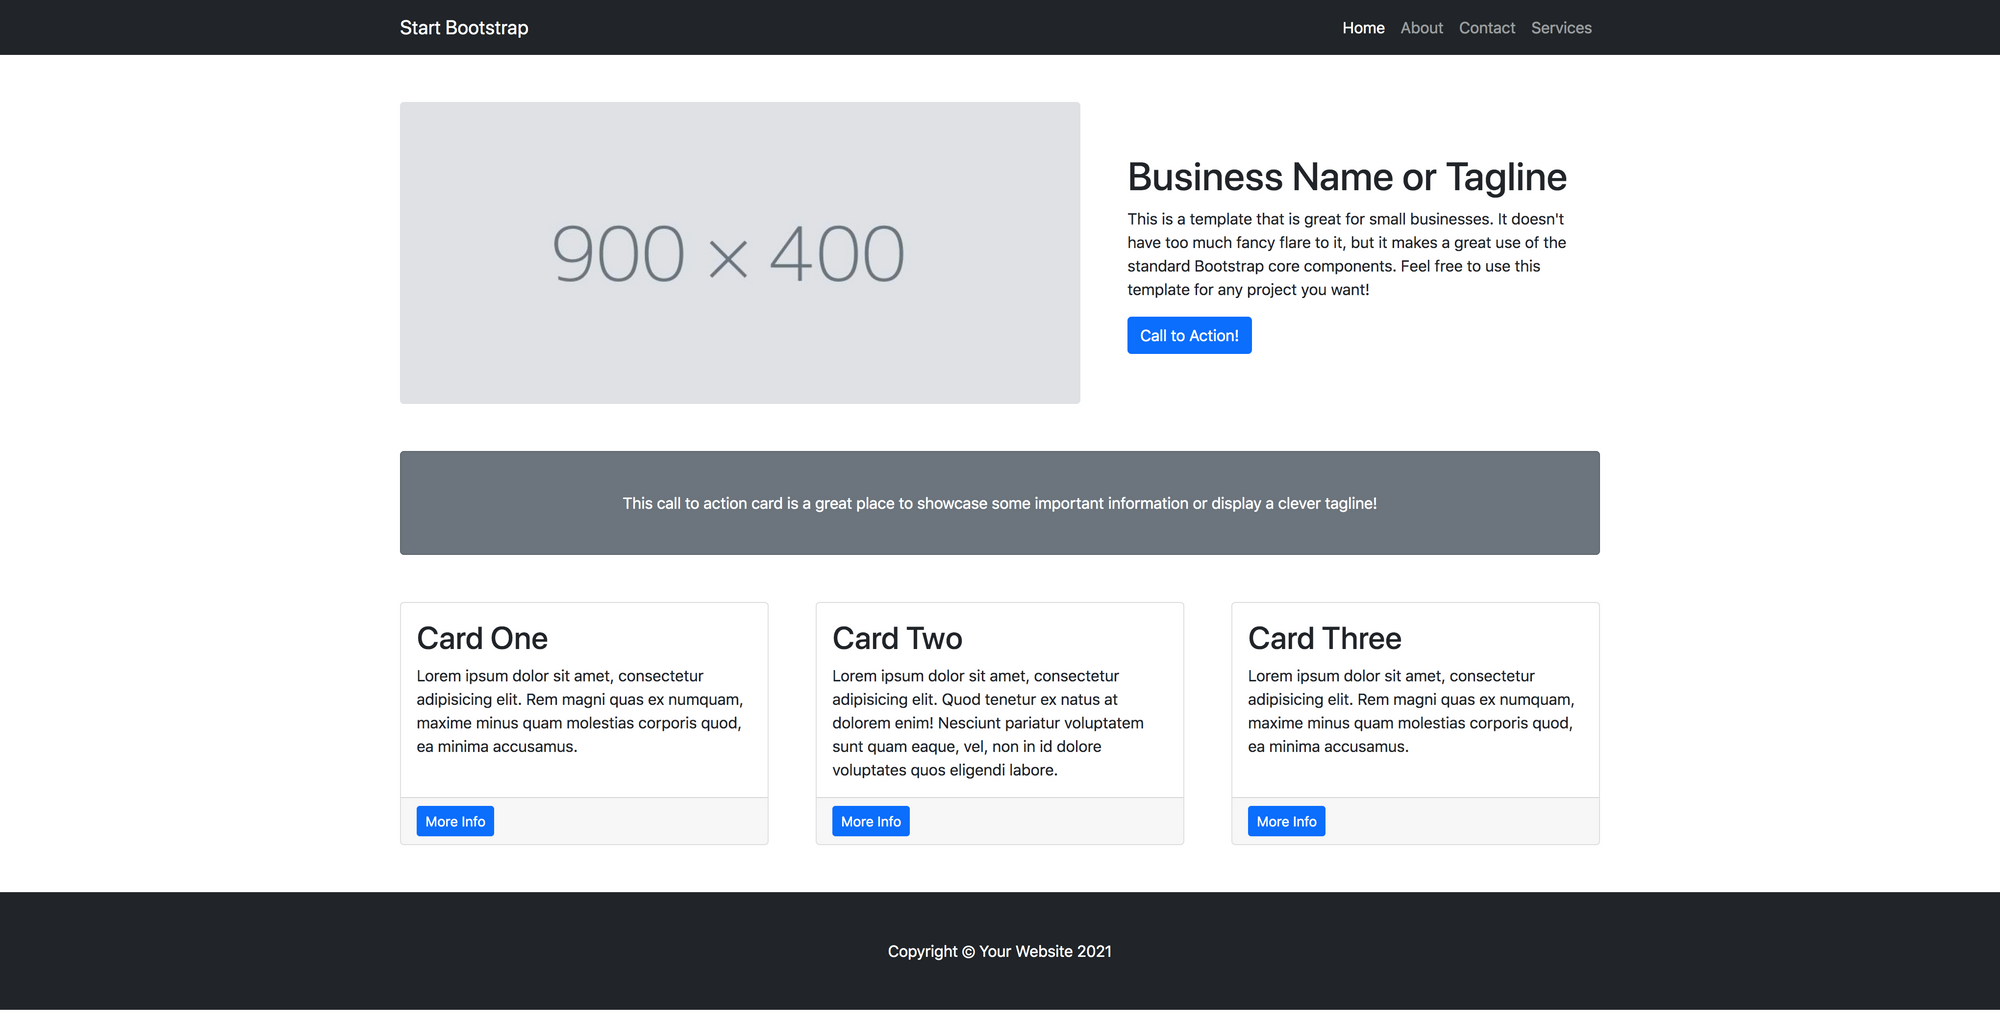
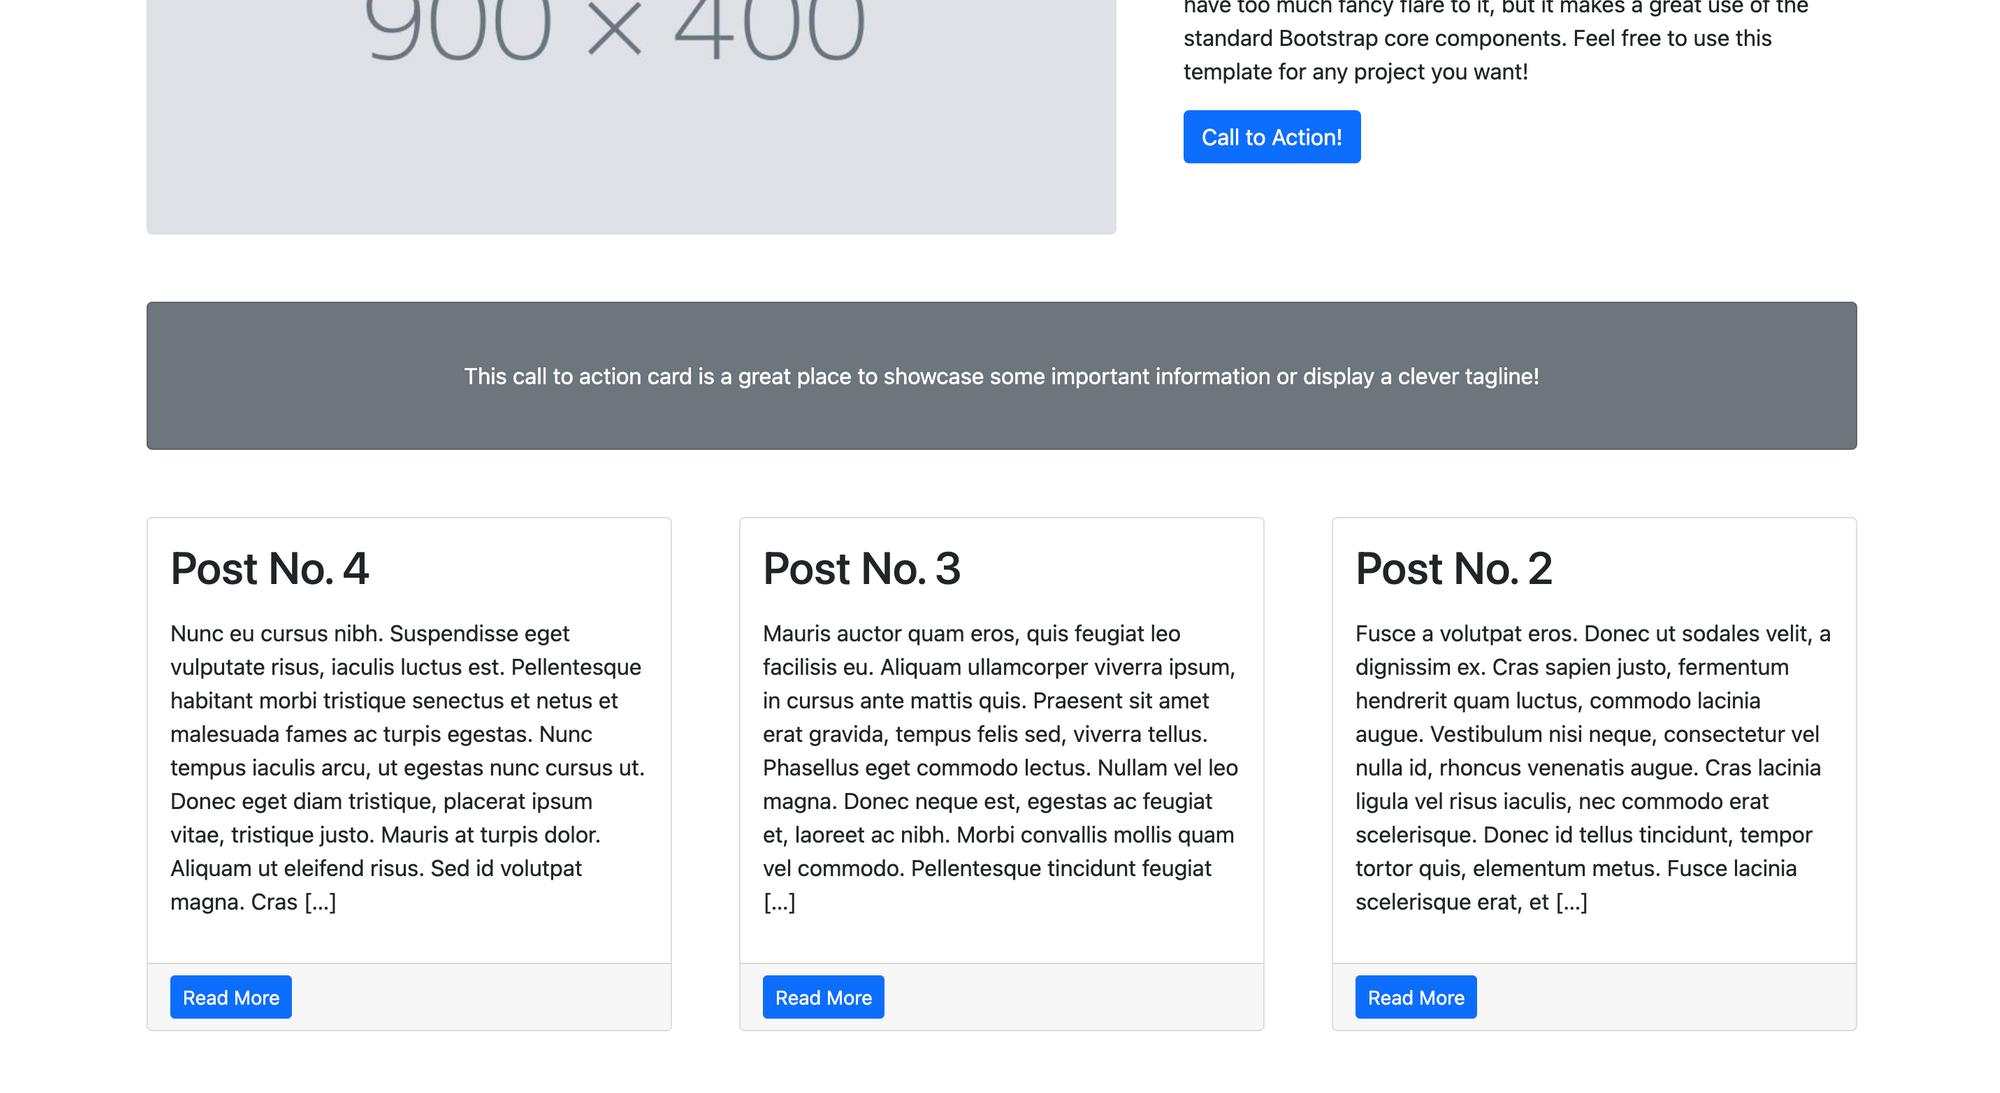
As you can see, we can divide the page into three different main sections:
- Company's presentation (image + tagline)
- A call to action card (the grey area in the middle)
- A row with three cards
I'll integrate our WordPress blog in the third section.
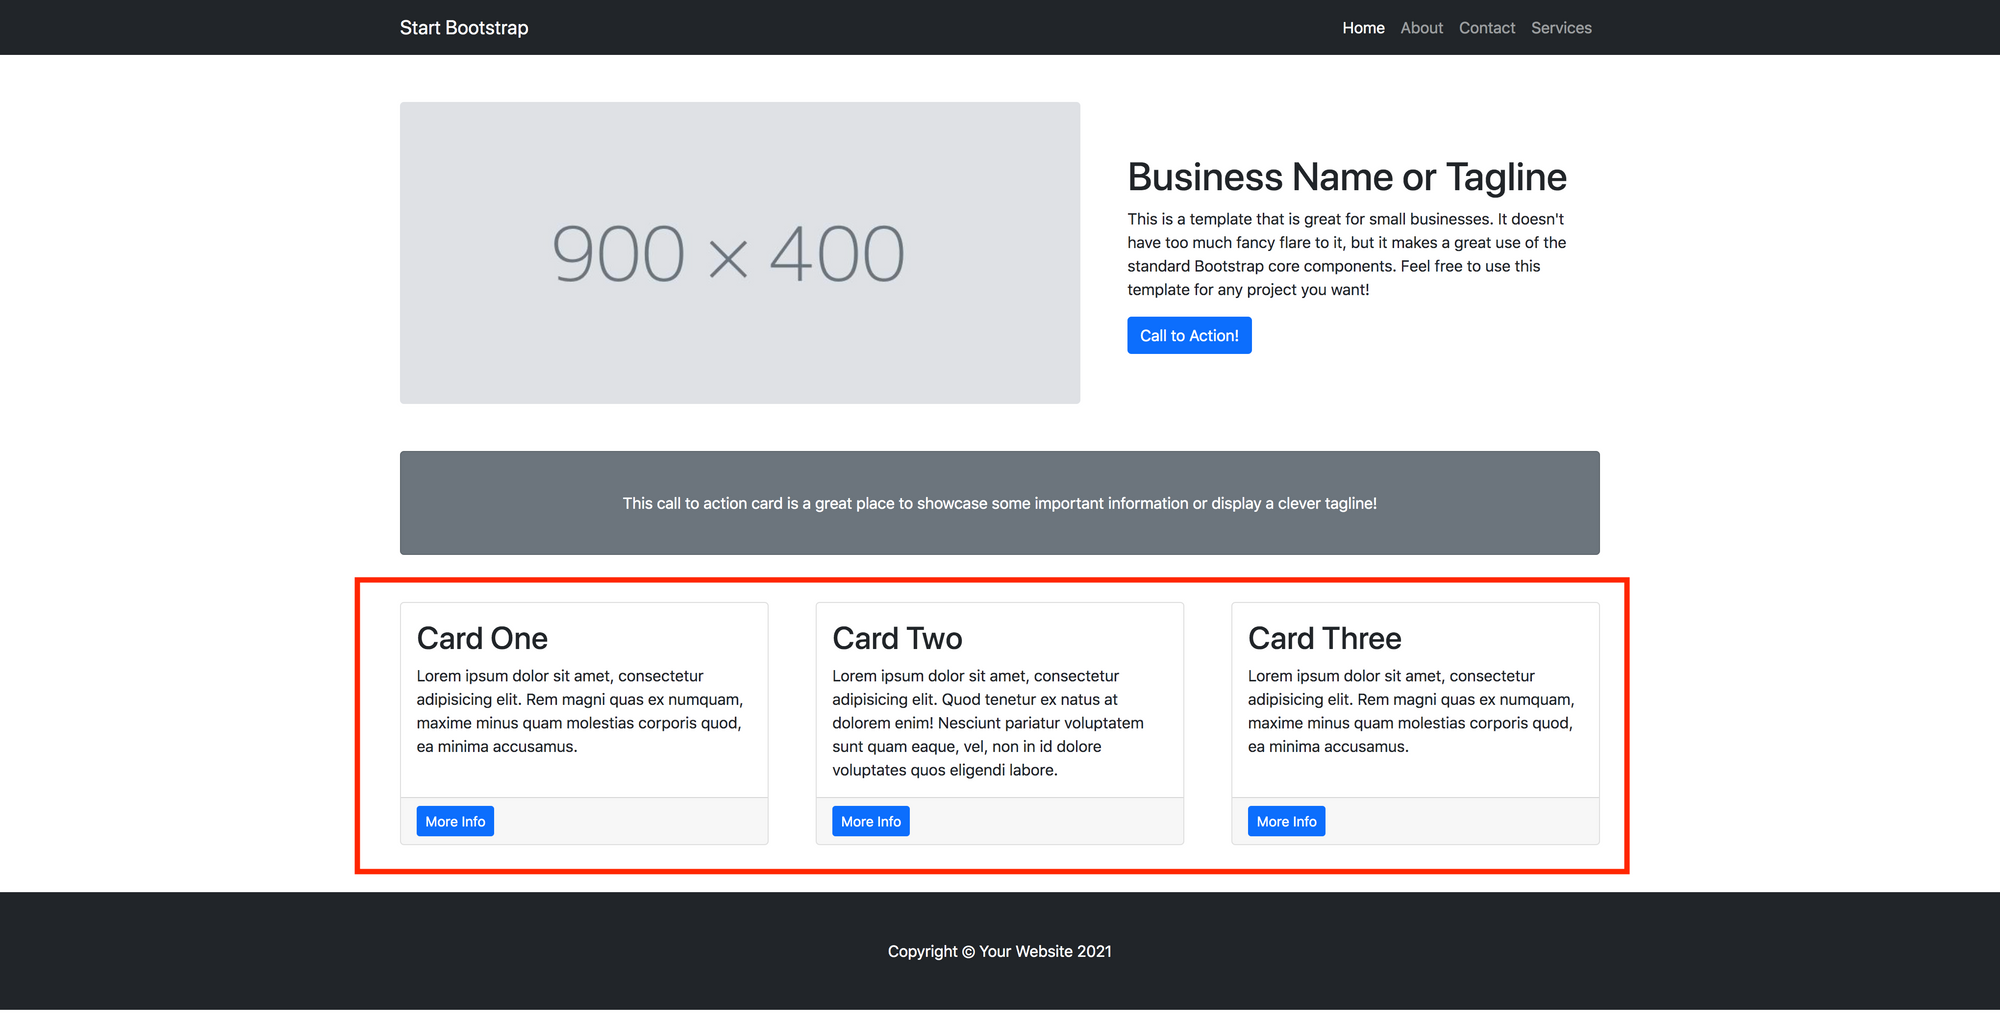
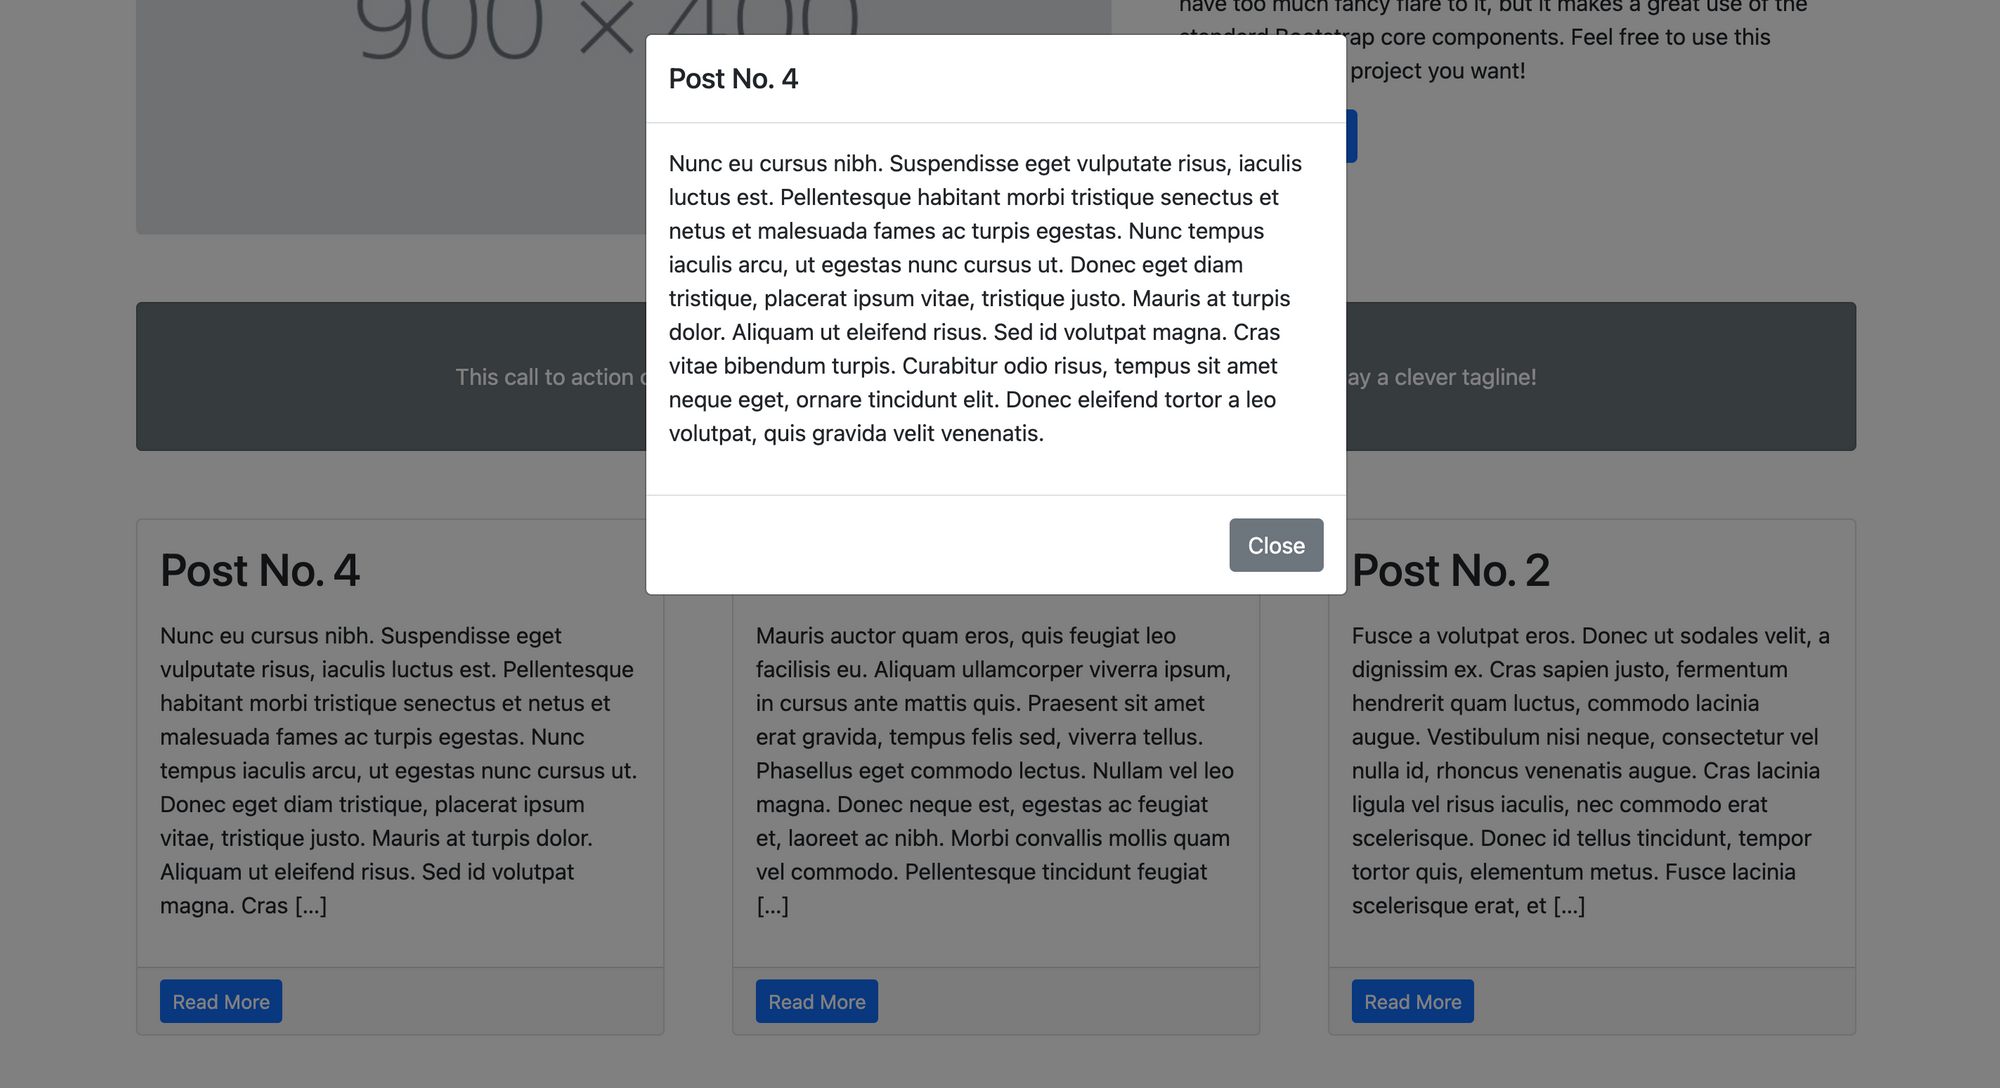
Every post will be represented by a card, where users will be able to read the post title, the excerpt, and go to the post content by clicking the blue button "Read more". The button will open a modal where the post content will be displayed.
Let's see how our WordPress instance works
Let's have a look at our WordPress instance and see what we have. If I log into the dashboard and go to the posts section, I see that I've published three posts: Post No. 1, Post No. 2, and Post No. 3.
Every article has some "Lorem ipsum" content. So, at the end of this article, I expect these posts to be displayed in three different cards as mentioned above.

How to work with WordPress APIs
WordPress APIs are well documented and maintained by a huge and enthusiastic community. Let's see how I can handle posts with the APIs available.
So, once on the documentation page, I hit "Endpoint Reference" and then "posts". As I said before, I want to retrieve all the posts I published on my instance. I go to the "List Posts" and read "Query this endpoint to retrieve a collection of posts. The response you receive can be controlled and filtered using the URL query parameters below."
Sounds like this is what I'm looking for. According to the documentation, this is the request:
https://<BASE_URL>/wp-json/wp/v2/posts
Before starting the implementation, I test it using Postman. This is what I get:
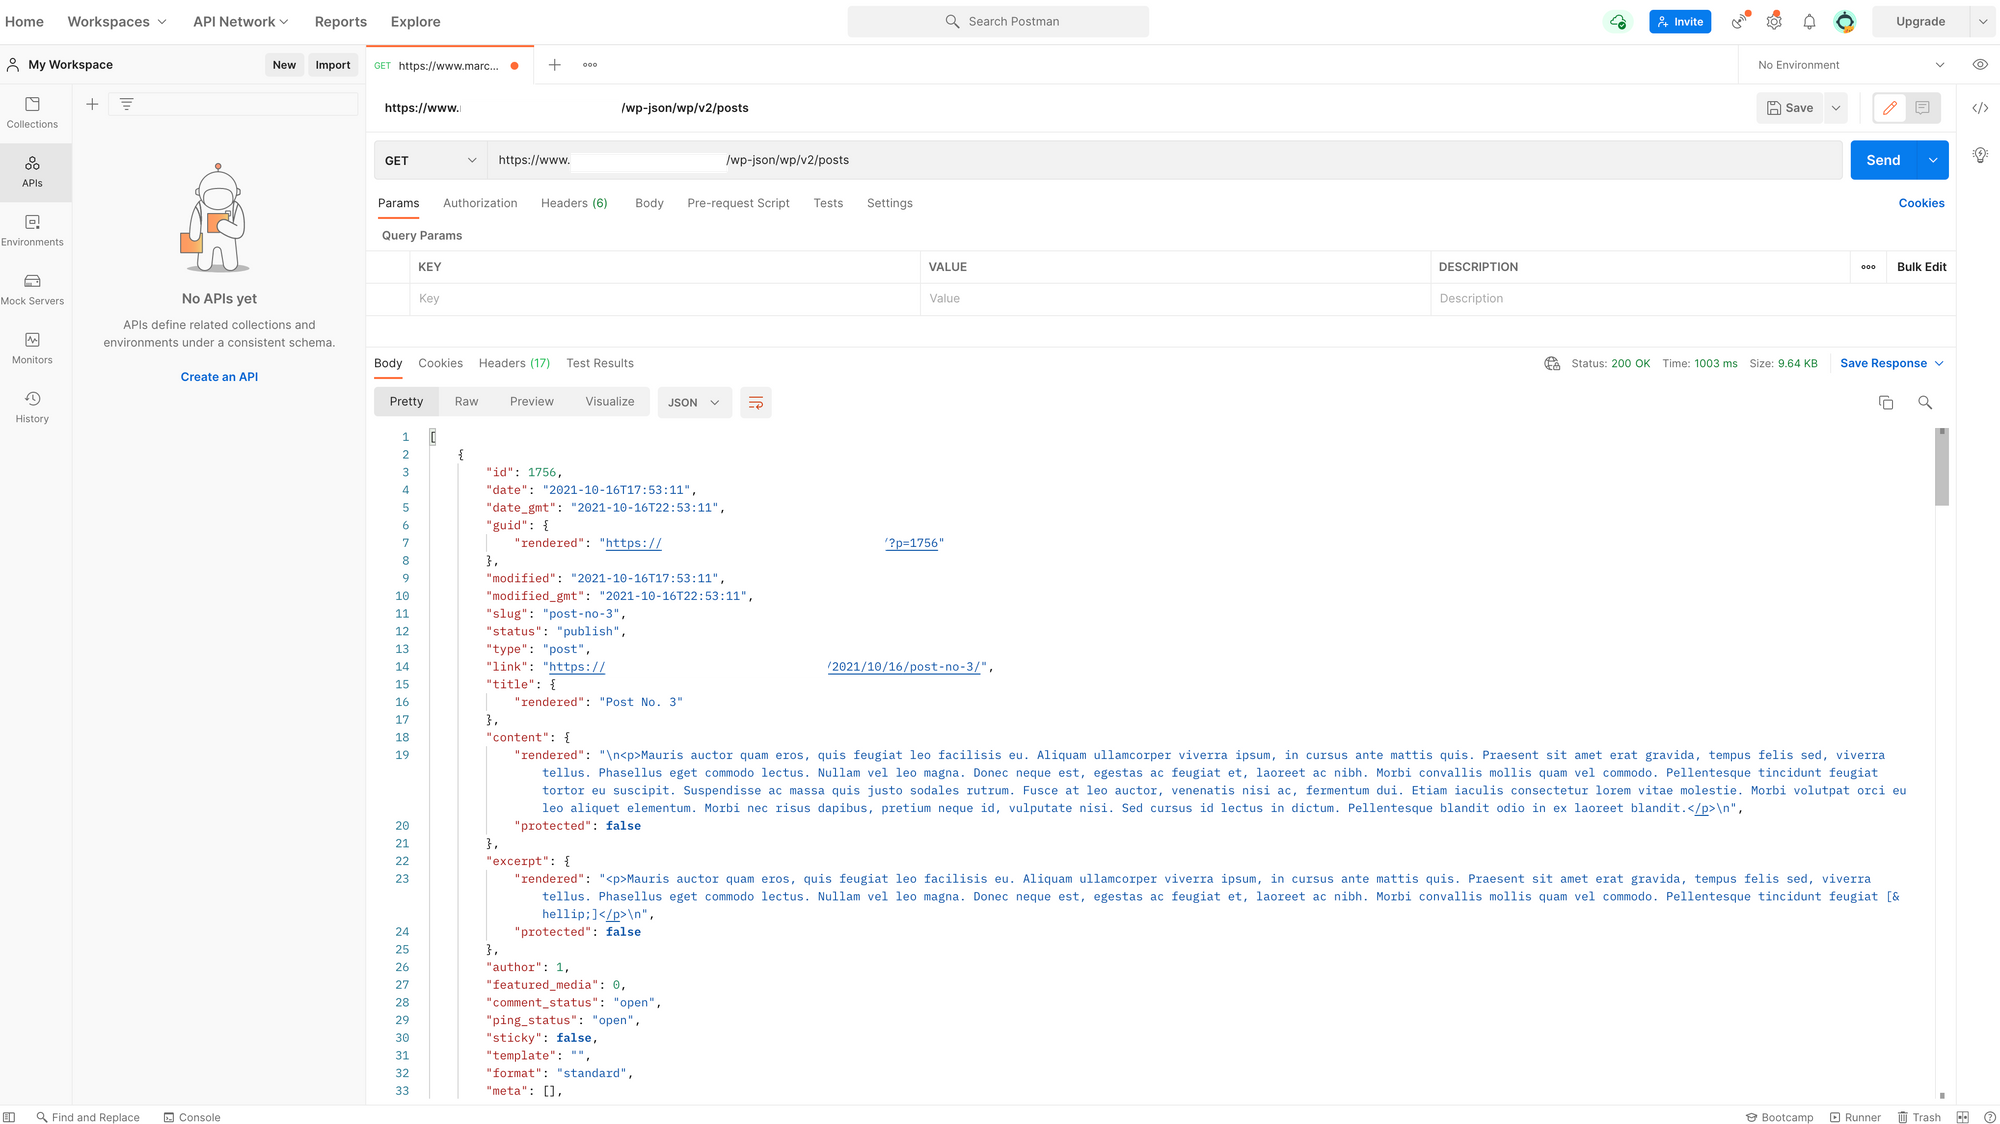
As expected, I get a JSON with the information related to the posts I created on my WordPress instance.
Time to Code
To complete this implementation, I'll edit index.html and I'll create a new file called blog.js.
In index.html, I'll remove the static cards, add a loader to make it appear while waiting for the API call response and, and add an id – "wrapper" – to the DOM element I want the posts' cards to appear in. It looks like this:
<div id="wrapper" class="row gx-4 gx-lg-5">
    <div id=spinner class="text-center">
        <div class="spinner-grow spinner-grow-lg">
            <span class="visually-hidden">Loading...</span>
        </div>
    </div>
</div>
In the blog.js file I fetch the URL and the first .then() checks if the response is ok:
fetch('https://<BASE_URL>/wp-json/wp/v2/posts').then(function (response) {
    if (response.ok) {
        return response.json();
    } else {
        return Promise.reject(response);
    }
})
using a second then() I remove from the DOM the spinner and map both the card and the modal for each post I find in the JSON. I choose to display just the latest three articles of the blog. It looks like this:
.then(function (data) {
    spinner.remove()
    for (let i = 0; i < 3; i++) {

        cardCreation = '<div class="col-md-4 mb-5">'
        cardCreation += '<div class="card h-100">'
        cardCreation += '<div class="card-body">'
        cardCreation += '<h2 id="test" class="card-title">' + data[i].title.rendered + '</h2>'
        cardCreation += '<p class="card-text">' + data[i].excerpt.rendered + '</p>'
        cardCreation += '</div>'
        cardCreation += '<div class="card-footer"><button type="button" class="btn btn-primary btn-sm" data-toggle="modal" data-target="#modal-' + data[i].id + '">Read More</button></div>'
        cardCreation += '</div>'
        cardCreation += '</div>'

        modalCreation = '<div class="modal fade" id="modal-' + data[i].id +'" tabindex="-1" role="dialog" aria-labelledby="exampleModalLongTitle" aria-hidden="true">'
        modalCreation += '<div class="modal-dialog" role="document">'
        modalCreation += '<div class="modal-content">'
        modalCreation += '<div class="modal-header">'
        modalCreation += '<h5 class="modal-title" id="exampleModalLongTitle">' + data[i].title.rendered + '</h5>'
        modalCreation += '</div>'
        modalCreation += '<div class="modal-body">' + data[i].content.rendered + '</div>'
        modalCreation += '<div class="modal-footer">'
        modalCreation += '<button type="button" class="btn btn-secondary" data-dismiss="modal">Close</button>'
        modalCreation += '</div>'
        modalCreation += '</div>'
        modalCreation += '</div>'
        modalCreation += '</div>'

        document.querySelector("#wrapper").insertAdjacentHTML("beforeend",cardCreation)
        document.querySelector("#wrapper").insertAdjacentHTML("beforeend",modalCreation)
      }
})
In the end, I use the catch() method to handle errors. I decided to add a Bootstrap danger banner where I explain something went wrong and add a link to resources that users can find useful:
.catch(function (err) {
    spinner.remove();
    errorMsg = '<div class="alert alert-danger" role="alert">'
    errorMsg += 'Sorry, we can\'t retrieve posts at the moment. Please visit www.ourblog.com'
    errorMsg += '</div>'

    document.querySelector("#wrapper").insertAdjacentHTML("beforeend",errorMsg)

    console.warn('Something went wrong.', err);
});
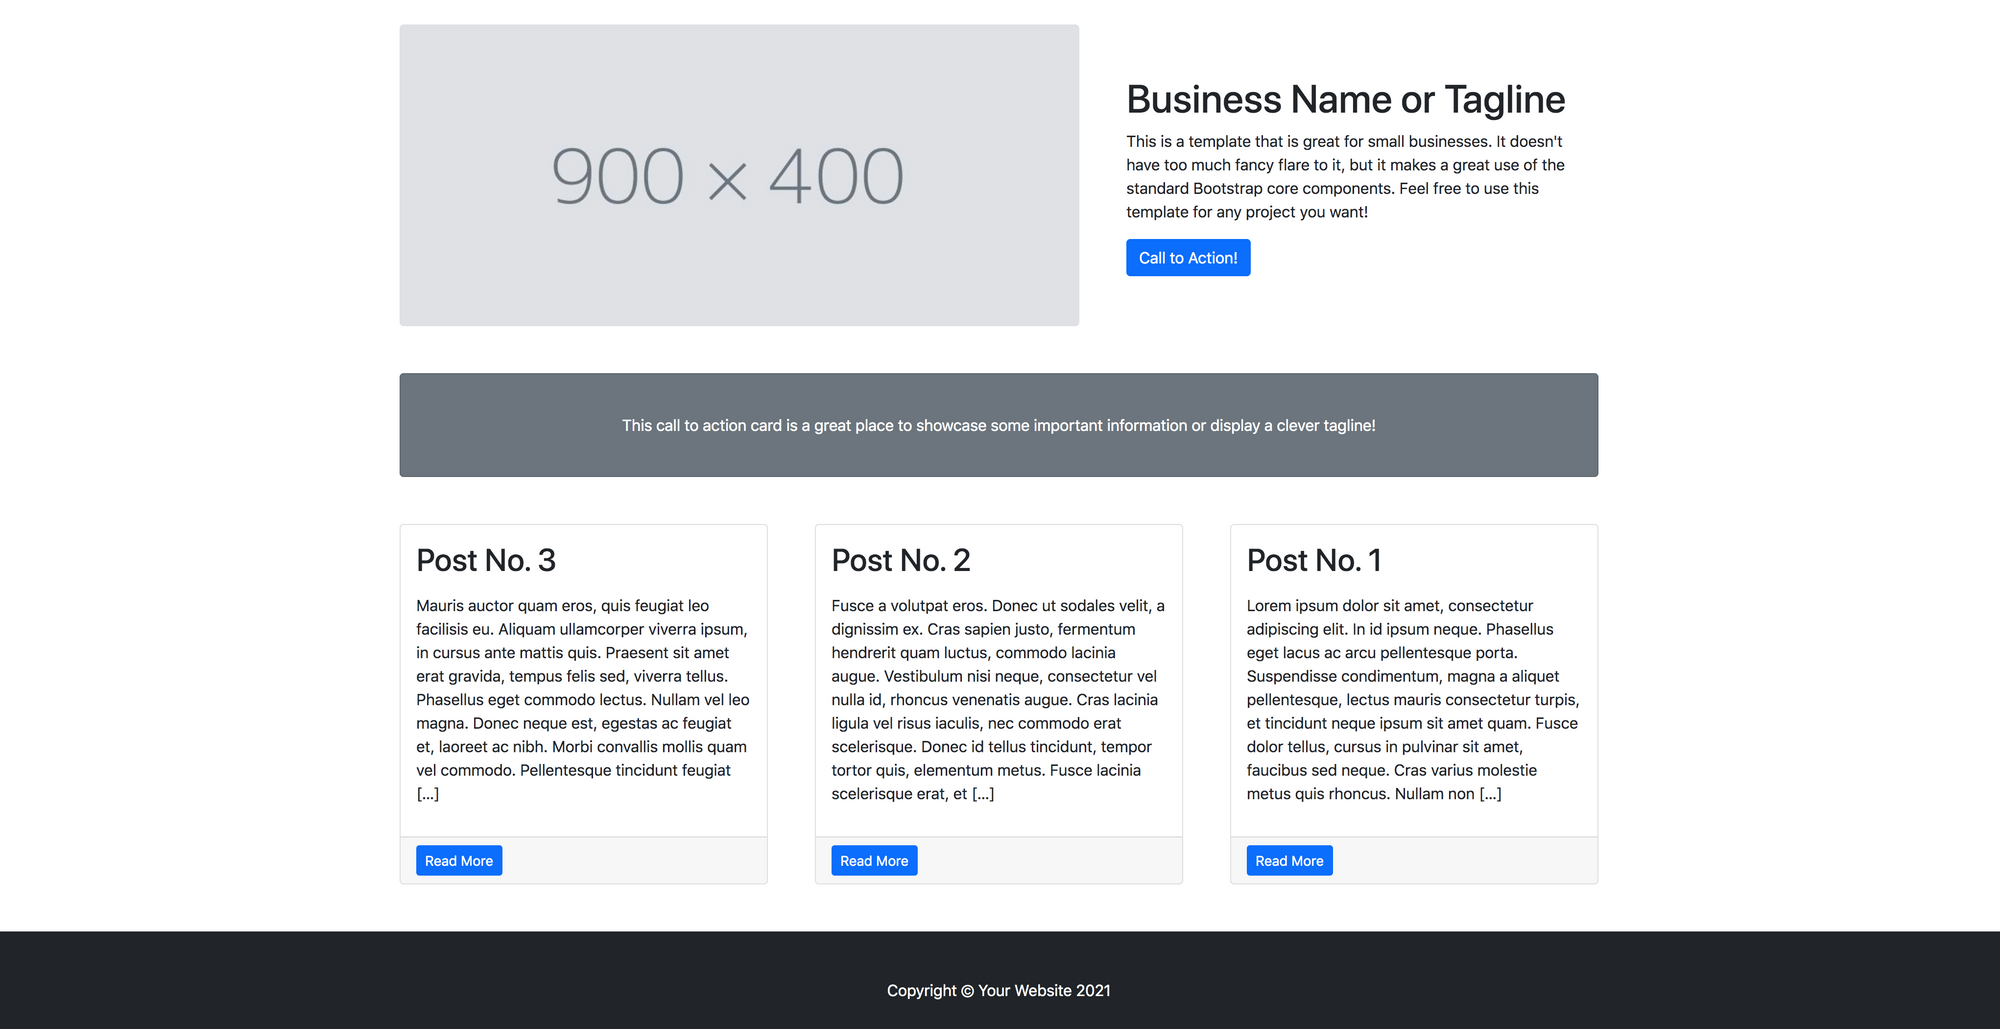
I open the index.html file with my browser and now I see the cards displaying the posts from my WordPress blog
To test if everything is working fine, I add a new post to my blog. This is what I see on my static website:
And if I hit "Read more", I see the full content of the post in a modal:
This is how I integrated a static website and a WordPress blog. You can find the full code here. I hope you found this article useful. Feel free to share it! 😀