By Victor Eke
Optimizing the assets you use on your websites – like lazy loading images – is one of the most effective ways to improve web performance.
Doing this helps you make sure that your websites are fast, they have great SEO, and it helps enhance the user experience.
In this article, you'll learn how to lazy load images in a React application. We'll talk about the benefits of doing this, and how to implement it in your code.
But before we begin, what is lazy loading, and how does it work?
What is Lazy Loading?
Lazy loading is a strategy that delays the loading of some assets (e.g., images) until they are needed by the user based on the user's activity and navigation pattern. Typically, these assets are only loaded when they are scrolled into view. (Source: MDN Docs)
You can see an excellent example of this on Unsplash when we scroll through the list of images. Initially, we see a blurred low-quality image placeholder LQIP, and when we scroll within view, the whole image gets fully loaded to the page.

The idea behind this process is to postpone the loading of images outside the viewport to reduce bandwidth usage, improve user experience, and speed up page loading.
Lazy loading an image/iframe today is as easy as adding the attribute loading=" lazy" inside the img/iframe element, like this:
<img src="image.jpg" alt="Image Alt" loading="lazy" />
<iframe src="iframe" loading="lazy"></iframe>
And it works without any further configuration.
Sadly, lazy loading images this way is not widely supported in all browsers according to caniuse.com. Also, for browsers like Firefox, the loading= "lazy" attribute doesn't work in an iframe element. In those cases, you'll need to use/combine it with other libraries or tools.
Getting Started with Lazy Loading
This article will utilize a JavaScript library called React Lazy Load Image Component. This popular library provides image rendering capabilities and effects that you can implement quickly and easily in your own React applications.
The code for this demo is available on GitHub here.
Step 1 – Install React Lazy Load Image Component
The first thing we need to do is install the React lazy load image component library using NPM:
// Yarn
$ yarn add react-lazy-load-image-component
or
// NPM
$ npm i --save react-lazy-load-image-component
Step 2 – Import the component
We'll just import our image and the lazy load component. But you may use an external URL if you like. In my case, I'm importing it as a component from the images directory.
import Image from "../images/bird.jpg";
import { LazyLoadImage } from "react-lazy-load-image-component";
Step 3 – Declare the image
To start using it, instead of declaring your images with an img tag, replace that with LazyLoadImage and declare the image with an src attribute as you would normally.
Here's what that looks like in code:
import React from "react";
import Image from "../images/bird.jpg";
import { LazyLoadImage } from "react-lazy-load-image-component";

export default function App() {
  return (
    <div>
      <LazyLoadImage src={Image}
        width={600} height={400}
        alt="Image Alt"
      />
     </div>
  );
}
Also, we explicitly defined the width and height of the image. This helps to avoid issues like cumulative layout shift(CLS).
To see the effects of the component, open up the network tab in your developer tools using Ctrl + Shift + J on Windows and Linux, and Cmd + Opt + J on Mac. Then set the throttling to a lower network (3G), disable the cache, and refresh the page.
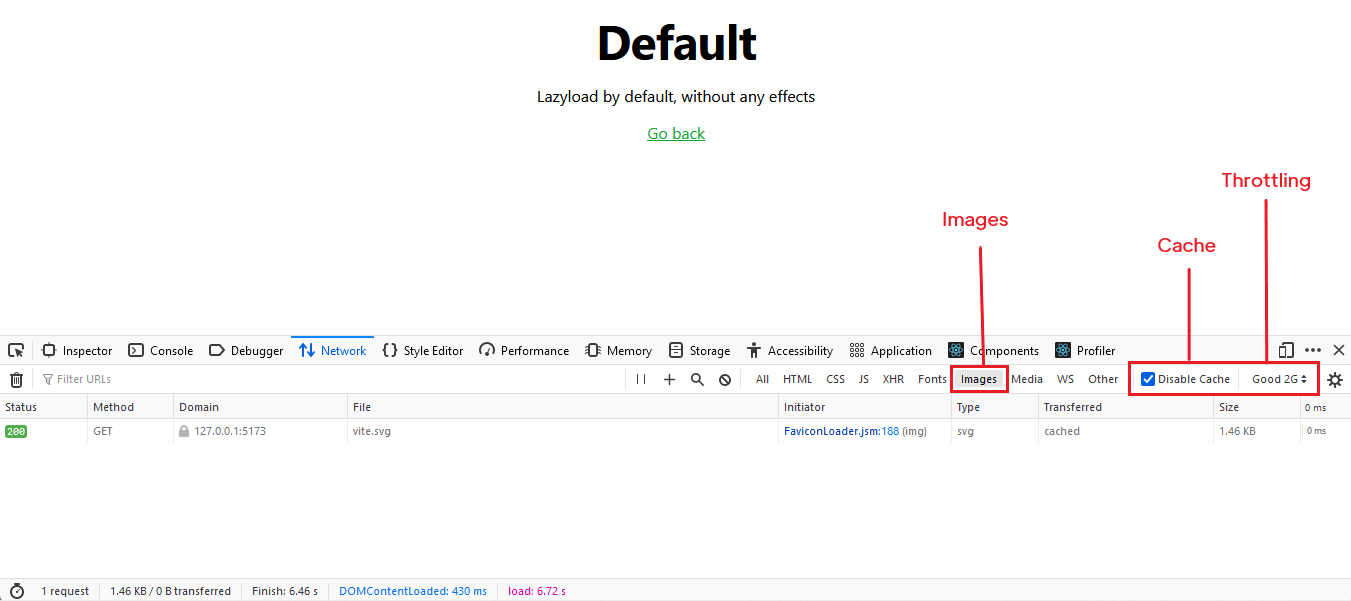
Here's the result:
By default, you can see that the image hasn't loaded on the screen because it is not visible on the viewport. Once we start scrolling and the image is within view, the lazy load is disabled, and we can see the image now.
Step 4 – Add a placeholder image
Alternatively, we can preview a low-resolution image first while waiting for the main image to load. This helps fill the image area so users know a picture is loading. We refer to this placeholder image as a low-quality image placeholder (LQIP).
Doing this not only looks good but also gives the user some idea about what the actual image looks like.
To get a smaller image size, I like using squoosh.app. Import the image and experiment with the resolution and quality until you're comfortable with the size.
Some other image tools you can use include:
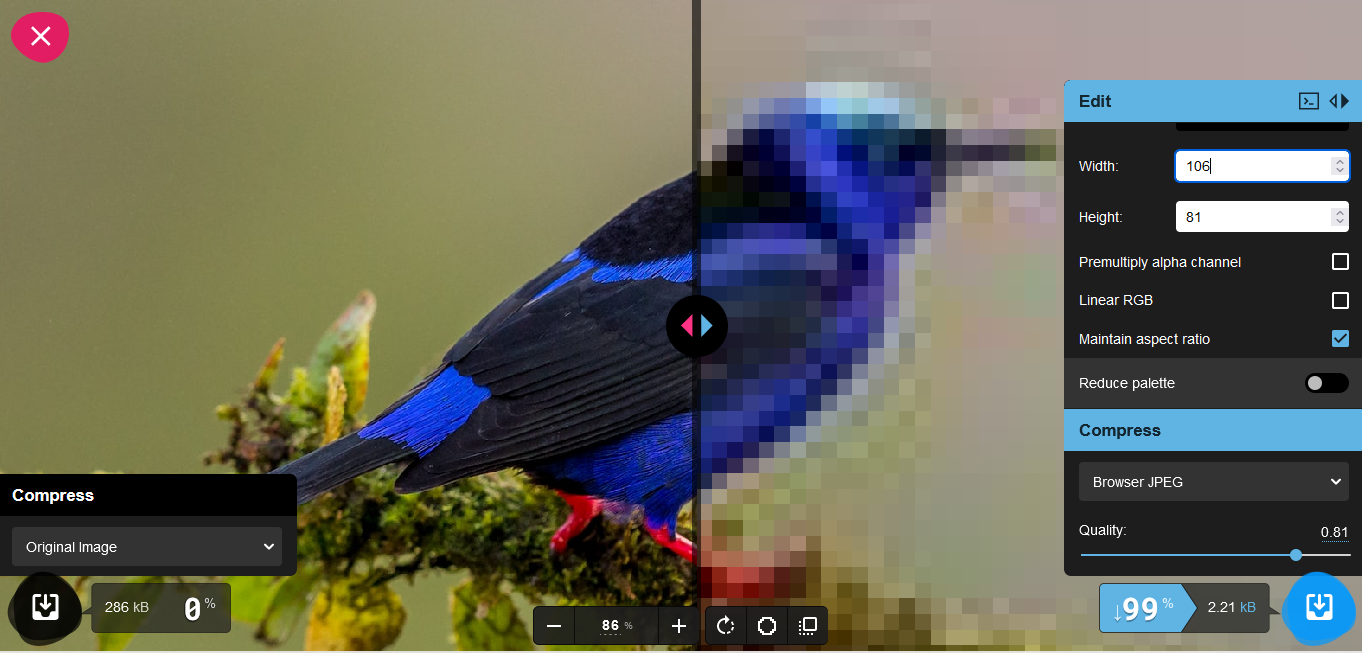
Initially, our image was 288KB, but we've successfully compressed it to a low-res version of 2.41KB. To use the placeholder image, add a PlaceholderSrc attribute to the image with the value of the image.
import Image from "../images/bird.jpg";
import PlaceholderImage from "../images/placeholder.jpg";

<LazyLoadImage src={Image}
    width={600} height={400}
    PlaceholderSrc={PlaceholderImage}
    alt="Image Alt"
/>
You can see how it loaded the placeholder image initially, and after it finished loading, it was replaced by the main image.
Step 5 – Add image blur
LazyLoadImage also provides a plugin to make an image blur initially before it loads and removes the blur after the image loads completely.
Combining this with the placeholder image will improve the overall look and provide a better output.
In order to use the blur effect, we need to import the CSS file that controls it:
import Image from "../images/bird.jpg";
import PlaceholderImage from "../images/placeholder.jpg";
import { LazyLoadImage } from 'react-lazy-load-image-component';
import 'react-lazy-load-image-component/src/effects/blur.css';

<LazyLoadImage src={Image}
    width={600} height={400}
    PlaceholderSrc={PlaceholderImage}
    effect="blur"
/>
Why Should You Lazy Load Your Images?
You might be wondering why you should go through the trouble of lazy loading off-screen images in your web application. Is it worth it, and why should you care about the points shared in this article?
Here's a list of reasons:
1. Lazy Loading Saves Data and Bandwidth
Since images out of the viewport are not downloaded immediately, lazy loading conserves extra bandwidth usage. This is good for performance, especially for mobile users.
2. Lazy Loading Lowers the Cost of a CDN
Media content services like Cloudinary or Imagekit offer paid plans for media storage. Lazy loading images ensures that only images requested from the CDN are loaded, reducing server costs.
3. Lazy Loading Improves SEO
Page speed is a critical factor that influences SEO (and makes search engines more likely to recommend your page). Because your page load time is very low, search engines will love your site.
Conclusion
Optimizing images is a good skill I believe every web developer should cultivate. It creates a better experience for users, especially those on mobile devices.
Here's the Code File for this article on GitHub.
That's it for this article. If you read up to this point, then I'm sure you'll like my other content. Check out my blog or follow me on twitter @victorekea for more.