
While reading some technical articles on various platforms, I kept noticing the Table of Contents section in the sidebar. Some were interactive and some were just links to those sections.
A Table of Contents usually ends up being pretty helpful to readers. It lets you easily skim through what an article will cover and find the section you're interested in. It also lets you know if the article contains the information you’re looking for, and it's a big win for accessibility.
Taking inspiration from all these various platforms, I tried to build my own Table of Contents functionality. I wanted it to dynamically list all the H2 headings along with their bookmark links. I also wanted the headings to get highlighted as they get scrolled in the view. I’m excited, let’s start.
Note: I couldn’t use Codepen, as it uses iframes to preview results – and as of now, Intersection Observer acts quite finicky in iFrame. Here's the gist for this code.
Prerequisites
To get the most out of this tutorial, you should be familiar with:
HTML5/CSS3/JavaScript
Intersection Observer API
Alright, now let's dive in.
Setting Up the Project
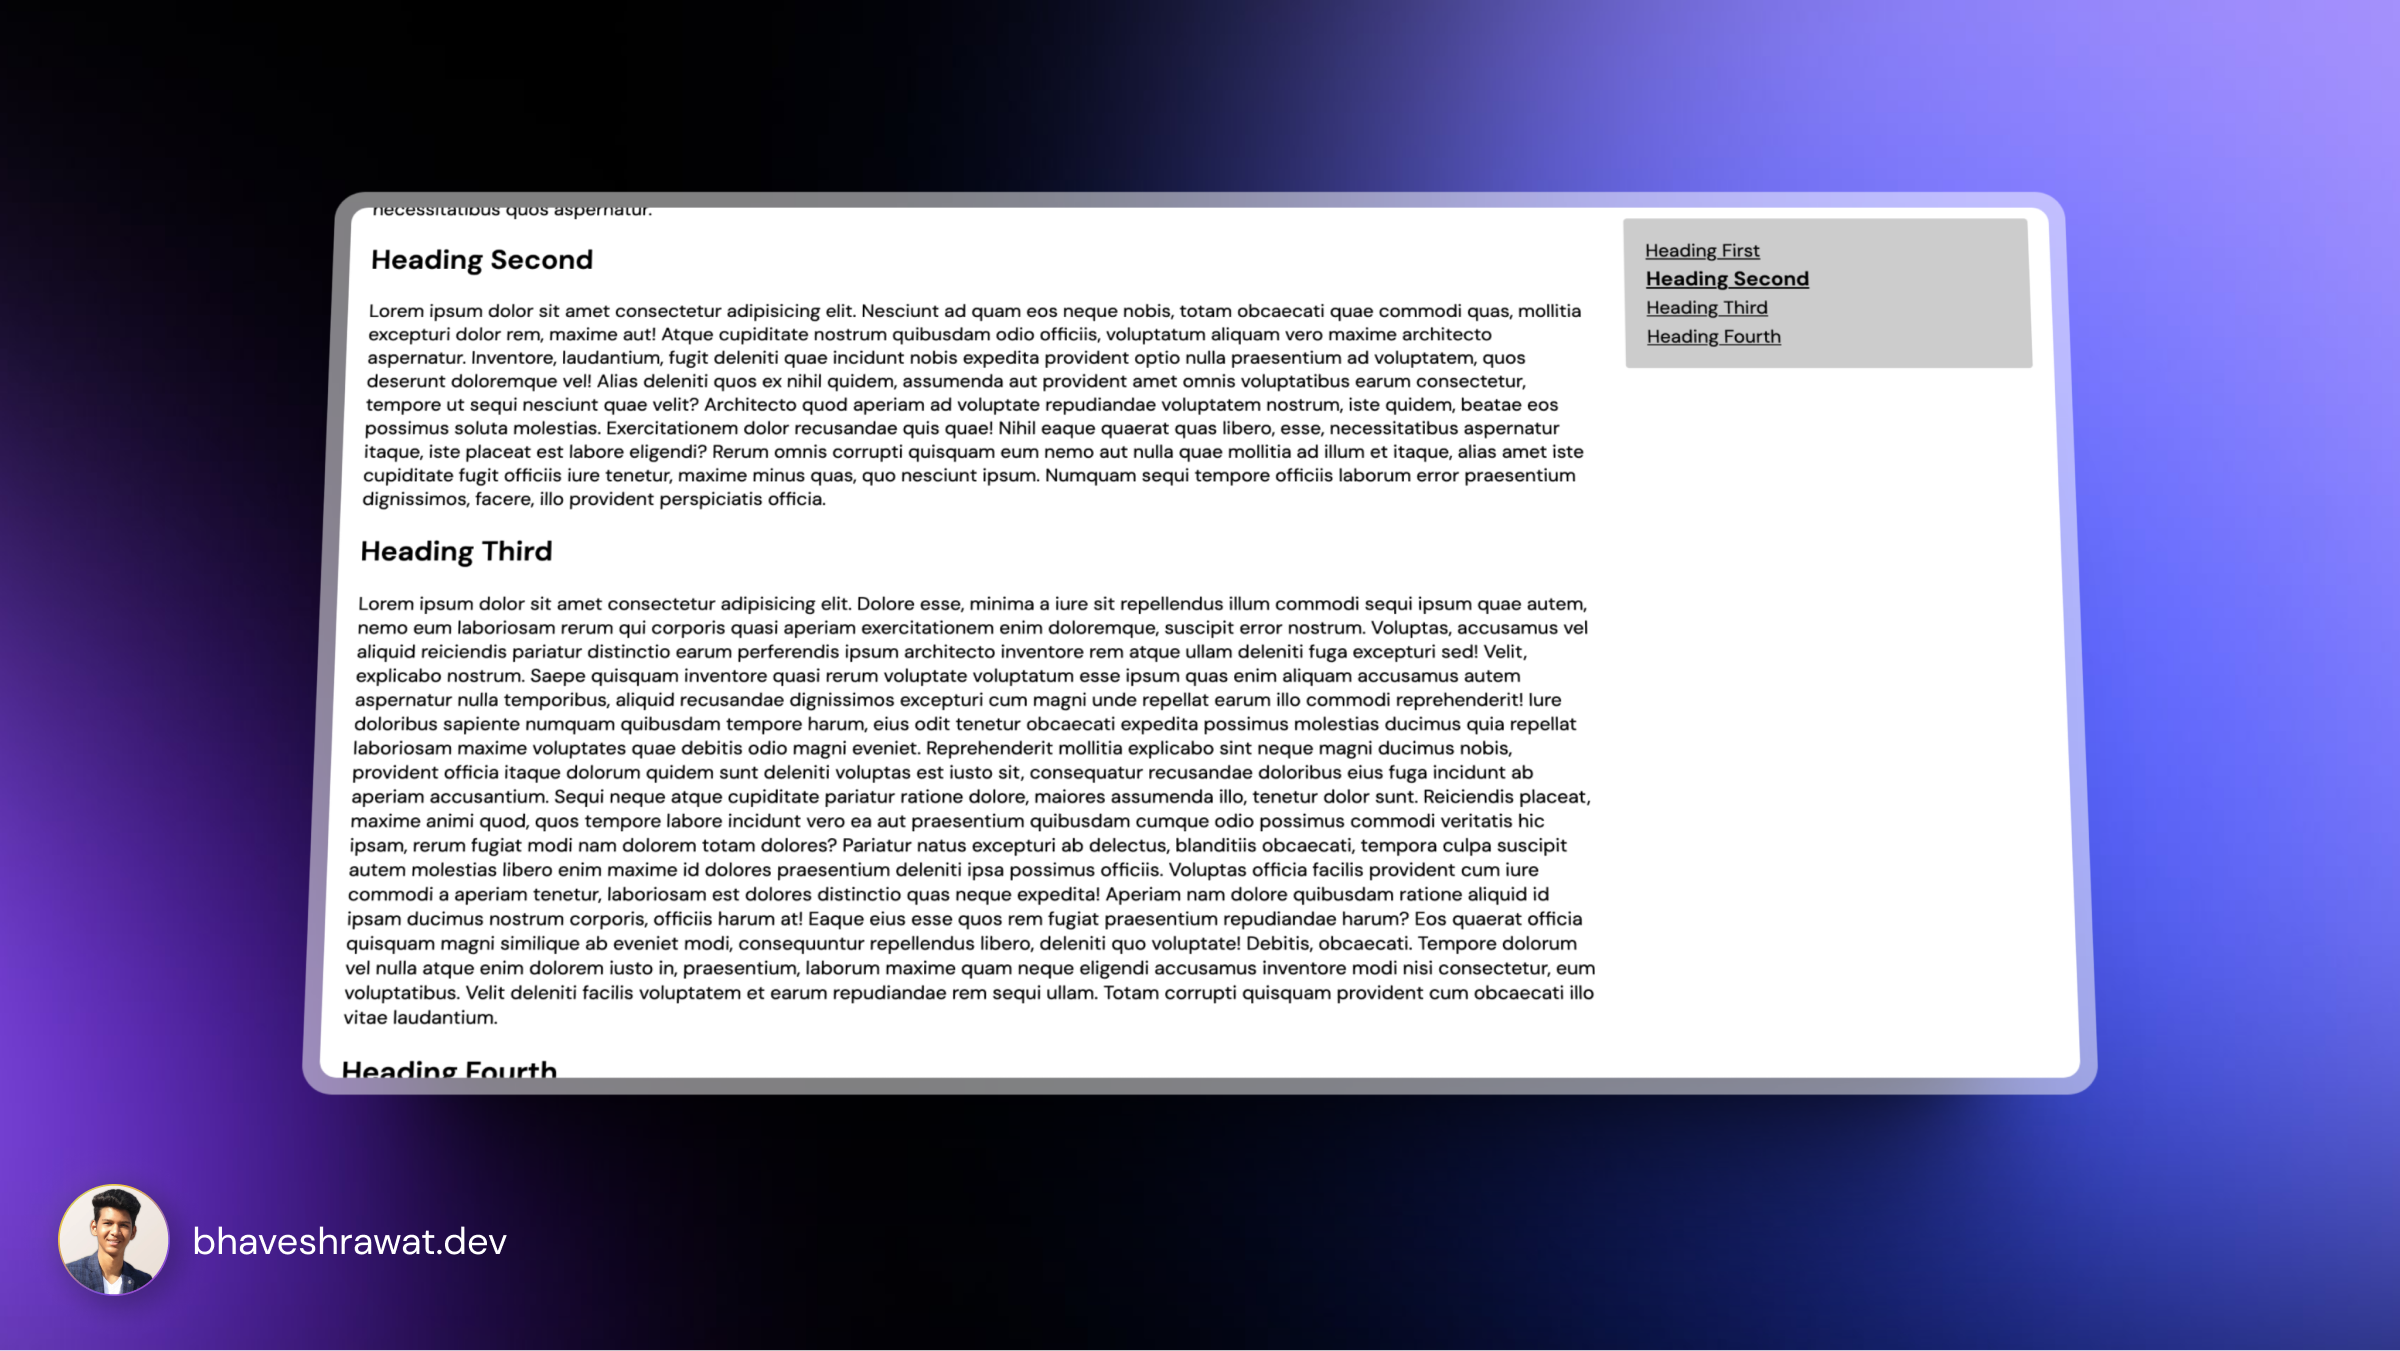
First things first, let’s set up the HTML structure for our Table of Contents. It'll be nothing fancy – just an <article> tag wrapping all the content stuff, with an <aside> tag as a sibling, all being wrapped up by the <main> tag.
Here's what that'll look like:
<main>
    <article>
        <h1>Main Heading</h1>
        <h2>Heading First</h2>
        <p>Lorem ipsum dolor sit...</p>
        <h2>Heading Second</h2>
        <p>Lorem ipsum dolor sit...</p>
        <h2>Heading Third</h2>
        <p>Lorem ipsum dolor sit...</p>
    </article>
    <aside></aside>
</main>
The <aside> tag is empty as it will get populated depending upon the content in the <article> using JavaScript.
We're done with the structure part. Let's do some styling, which will help us distinguish between the inactive and active links.
How to Add the Styling
I have imported a Google font called DM Sans for this mini-project. In my CSS, I'm using native nesting.
@import url('https://fonts.googleapis.com/css2?family=DM+Sans:wght@400;600&display=swap');

html {
    scroll-padding: 3.125rem;
    font-family: 'DM Sans', sans-serif;
  }
  main {
    display: grid;
    gap: 2rem;
    grid-template-columns: 3fr 1fr;
  }
  aside {
    align-self: start;
    position: sticky;
    top: 0.625rem;
    ul {
      li {
        a {
          transform-origin: left;
          transition: transform 0.1s linear;
          &.active {
            font-weight: 600;
            transform: scale(1.1);
          }
        }
      }
    }
  }
  @media (max-width: 767px) {
    main {
      grid-template-columns: 1fr;
  }
    aside {
      display: none;
    }
  }
I used display: grid; to put a layout together where the content takes up three quarters of the container (in this case, the viewport) space, and Table of Contents takes up the remaining fourth of the space.
I'm keeping the <aside> sticky so that it stays in the view while the content is being scrolled. We need to experience the interactivity and behavior of the 'Table of Contents, don't we?
How to Build the Logic
Now, here comes the fun part – and definitely the most important part. Let's start with what we can achieve easily and build upon that.
Build the dynamic table of contents feature
First, we need to store all the H2 elements in a variable, and that's what we'll do in the first line. Next, we will select the aside elements, as we have to populate it with something. Then, we'll create a new ul element and store it in the variable ul. After doing that, we append the newly created ul element as a child of the aside element.
Here's what that looks like:
const headings = Array.from(document.getElementsByTagName("h2"));
const aside = document.querySelector("aside");
const ul = document.createElement("ul");
aside.appendChild(ul);
headings.map((heading) => {
    const id = heading.innerText.toLowerCase().replaceAll(" ", "_");
    heading.setAttribute("id", id);
    const anchorElement = `<a href="#${id}">${heading.textContent}</a>`;
    const keyPointer = `<li>${anchorElement}</li>`;
    ul.insertAdjacentHTML("beforeend", keyPointer);
});
Now, we use the map function to iterate over and perform a function for every H2 element. First, we create an id for each h2 element by converting the text content to lowercase and replacing spaces with underscores. This id is used for linking to the corresponding section.
Next, lets use the id we just created, and set it as the value of the 'id' attribute. Then we create an anchor element (<a>) with an href attribute pointing to the generated id. The anchor text is set to the text content of the h2 element.
Now, we can create a list item (<li>) containing the previously created anchor element and then that list item is appended as HTML to the end of the unordered list (ul).
Make the ToC interactive
Alright, we're halfway up there! Right now, we have a dynamic Table of Contents that automatically lists all the h2 elements with their bookmark links.
Now, we just have the interactive part left. We want our link to get highlighted when the corresponding section is in the page view.
So, now that aside element is populated and contains anchor tag, we will store all those anchors and name it tocAnchors.
const tocAnchors = aside.querySelectorAll("a");
Next, we will declare an arrow function named, obFunc which will later be used in Intersection Observer. Intersection Observer is basically an API that is provided by the browser. It lets us observe the changes in the intersection of the elements we want with the document viewport or the root element of your choice.
const obFunc = (entries) => {}
Now, we have defined a function obFunc that takes an array of entries as its parameter. The function will be executed whenever the observed elements (specified later) intersect with the viewport.
Within the forEach loop for entries, we check if an observed element is intersecting with the viewport. If the condition is satisfied, then we find the index of the intersecting element (represented by entry.target) within the headings array.
entries.forEach((entry) => {
        if (entry.isIntersecting) {
            const index = headings.indexOf(entry.target);
        }
}
Using a new forEach loop, we iterate through all anchor elements (tocAnchors) and removes the "active" class from each of them so that the active class doesn't persist on more than one element at one time.
tocAnchors.forEach((tab) => {
    tab.classList.remove("active");
});
And, now we add the active class to the anchor element that is intersecting at that moment. In addition to that, we use the scrollIntoView method that scrolls the page to bring the active anchor element into view. The option { block: "nearest" } ensures that it scrolls to the nearest position both vertically and horizontally.
tocAnchors[index].classList.add("active");
    tocAnchors[index].scrollIntoView({
        block: "nearest"
});
Now, we define an object, oboption that will act as a config for Intersection Oberserver. rootMargin specifies the margins around the root (in this case, the viewport), and threshold sets the threshold at which the callback function is triggered.
const obOption = {
    rootMargin: "-30px 0% -77%",
    threshold: 1
};
The rootMargin option is very important here. You're basically setting a pesudo-viewport by creating an offset from the original viewport. This becomes the surveillance area (sort of).
This option takes values the same way margin does – except when we use negative values here, it accounts for it by moving towards the center of the screen. You can definitely use same values as mine and achieve an ideal area, or you can play around with the values until you get your ideal behavior.
At last, all we have to do is create a new Intersection Observer instance with the previously defined function (obFunc) as callback and options (obOption). And then we'll use the forEach loop to iterate over all the H2 elements and put them on observation using .observe() method.
const observer = new IntersectionObserver(obFunc, obOption);
headings.forEach((hTwo) => observer.observe(hTwo));
When any of these elements intersect with the viewport, the obFunc callback function will be executed.
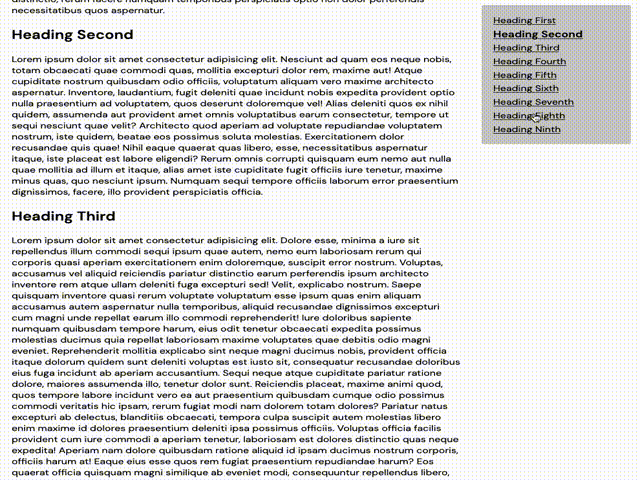
Project demo showing the ToC on the right while we scroll the text
Wrapping Up
Now, you have a fully interactive and dynamic Table of Contents. Hope this tutorial helped you. Let me know if you can build upon this or improvise further on this project. Cheers!