

In this article, you'll learn how to build a racing game in Python using the Turtle library in just 39 lines of code.
Here's what we're going to create:
 Turtle Racing Game Project Overview
🧵 Prerequisites
Very basic knowledge of Python programming will be enough to go through this tutorial. Also, I assume that you don't know anything about this turtle library. I will teach you everything from scratch.
🛠 Tools we'll use
First, if you don't have Python installed on your machine, go to python.org to download latest version of Python and then install it right away.
For writing the program, we will be using PyCharm which is the most popular integrated development environment (IDE) for Python. After installing PyCharm on your machine, you are ready to build this amazing game from scratch.
⛳ Project Goals
Concretely, we'll write a program that moves a turtle object horizontally until it reaches our calculated finish line. Then we will create seven unique replicas of this turtle object using a for loop along with different colors and random moving speeds.
We'll also add a background image (roads with lanes for the turtles to race in) to create something like a real racing environment.
Then we'll compute different values along the vertical or Y-axis to define their starting locations.
Finally, we will prompt the user to enter their bet (turtle color) so that if a user's bet color matches our winner turtle's color, we will display Winner! on the screen. Otherwise, we'll display You Lost! on the screen.
Note: for screen readers or anyone who is interested in getting the full source code of this project, you can access it in my GitHub Repository here.
So are you exited to build this game? I'm too. Let's begin!
👩💻 How to Set Up the Project
Open your PyCharm IDE. Then click New Project.
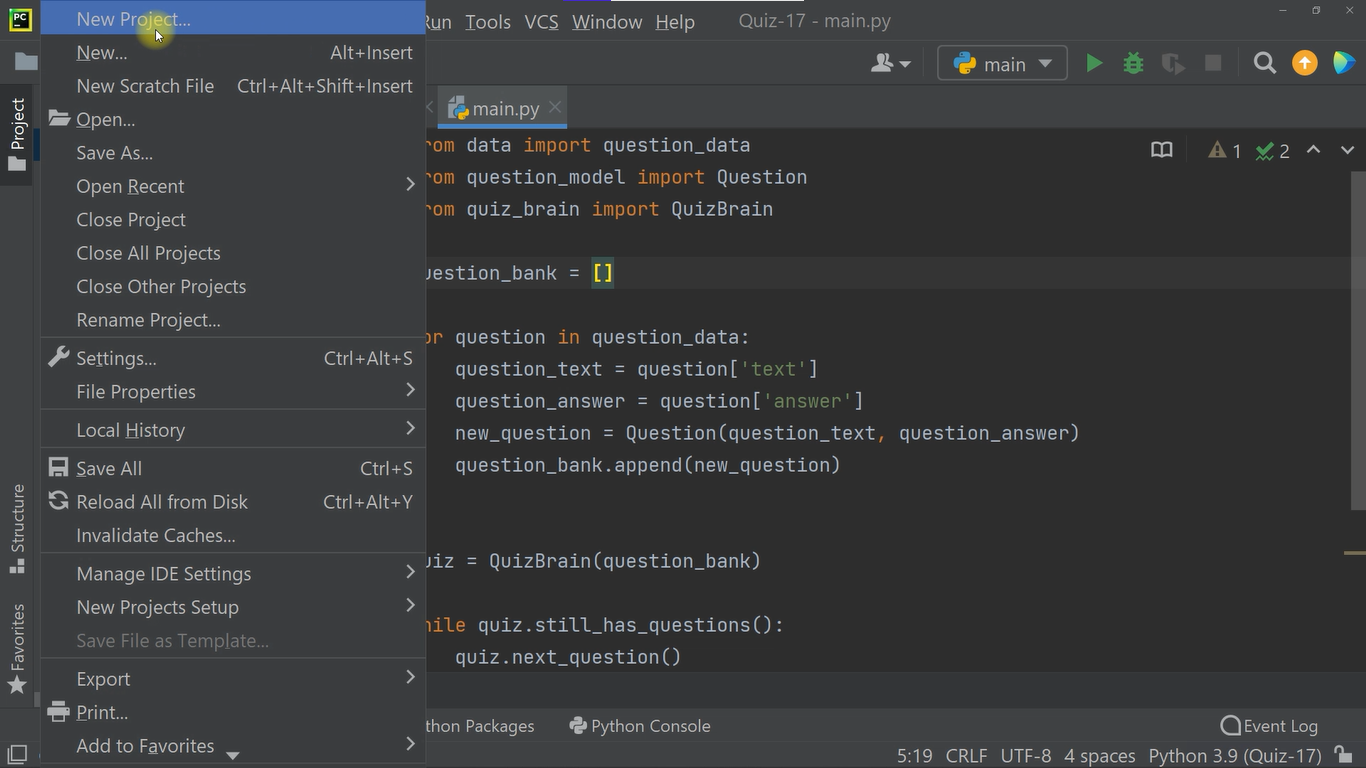 creating a new project
Let's call it racing-game and click create.
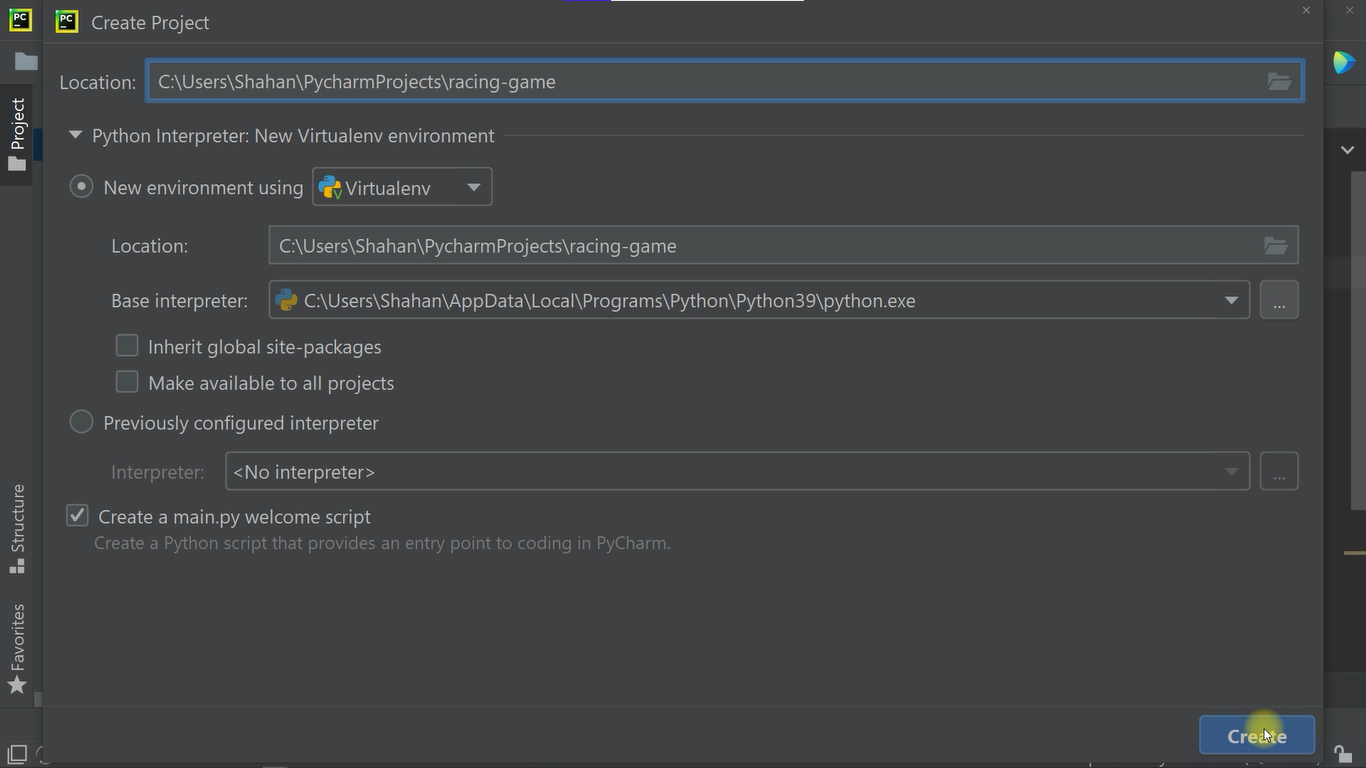 Project name
Then, add a new Python file called main.py.
📂 How to Use the Turtle Library
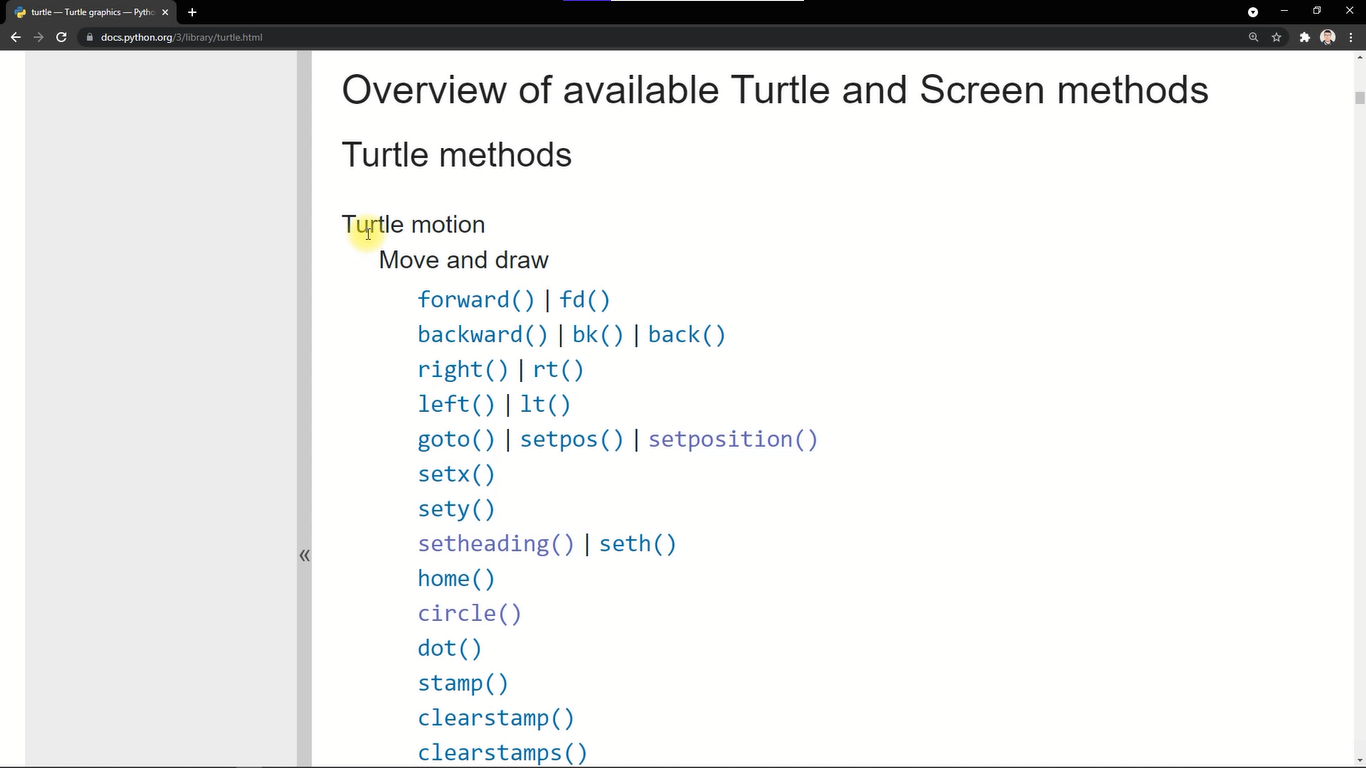
Now, let's go to turtle-graphics python documentation. Here you will find the full details about this library.
Let's scroll down and go to the Turtle methods section. You will see different types of methods that we can use for many different purposes. We will use a few of them in our current project.
I recommend reading this documentation at least once before jumping into the code. But don't worry, I will simplify it for you while we're writing the program.
 turtle docs
Import the Library
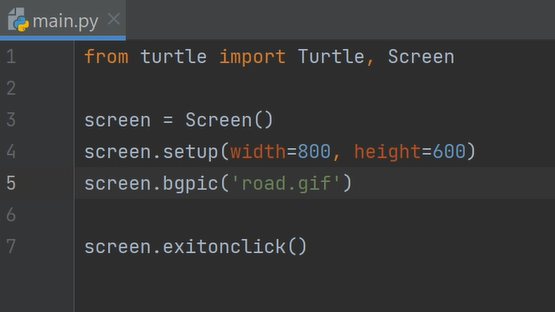
So let's import Turtle and Screen from the turtle module. Call this Screen in a new variable called screen. Then, call the screen.exitonclick() function to stop the program when we click on the screen.

🔳 How to Define the Game Canvas
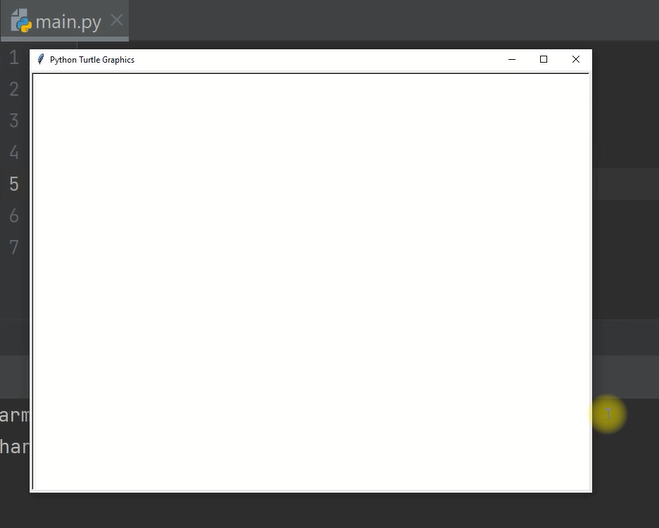
Now, let's work with the screen object to define our game canvas. So, let's set the width to 800 pixels and height to 600 pixels.

Here is the result:
How to Add Background Graphics
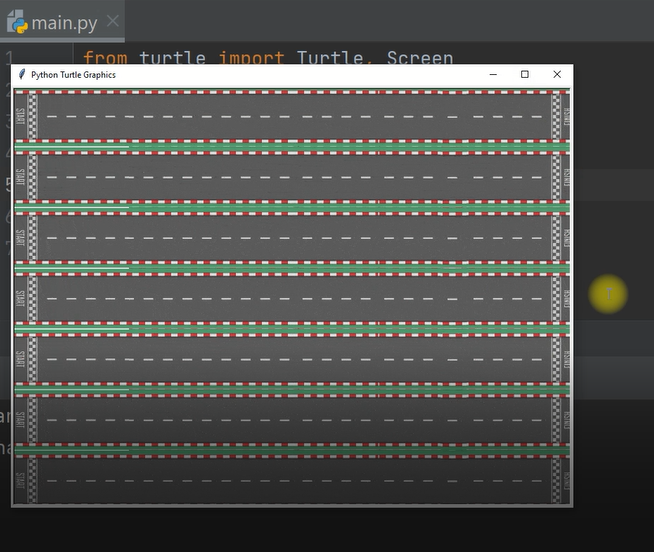
It's time to load our background image for our canvas. So let's drag our road.gif file into our racing-game project. Click this link to download the graphics.
Let's add this image using screen.bgpic('road.gif').
Here is the result:
🐢 How to Work with Turtle Objects
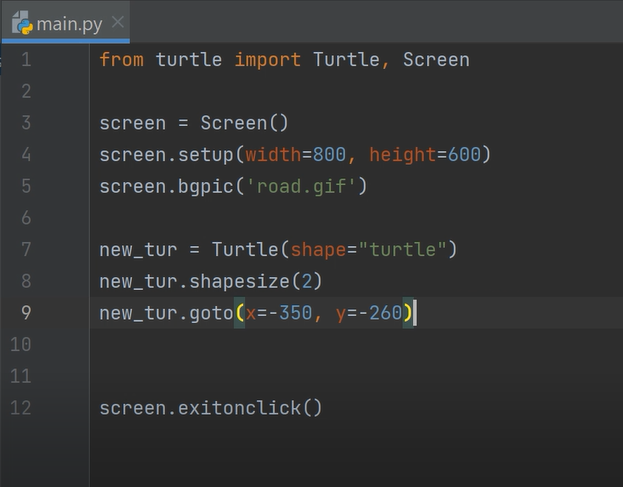
Now, let's create a turtle instance using the Turtle() method with the shape called turtle.
But it will seem really small. So we need define shapesize(2).
How to position the turtles
Now we need to change our turtle's location to the left bottom corner using goto(x=-350, y=-260).
So here we set x for moving the turtle horizontally and y for vertically along with the computed values with respect to our canvas.

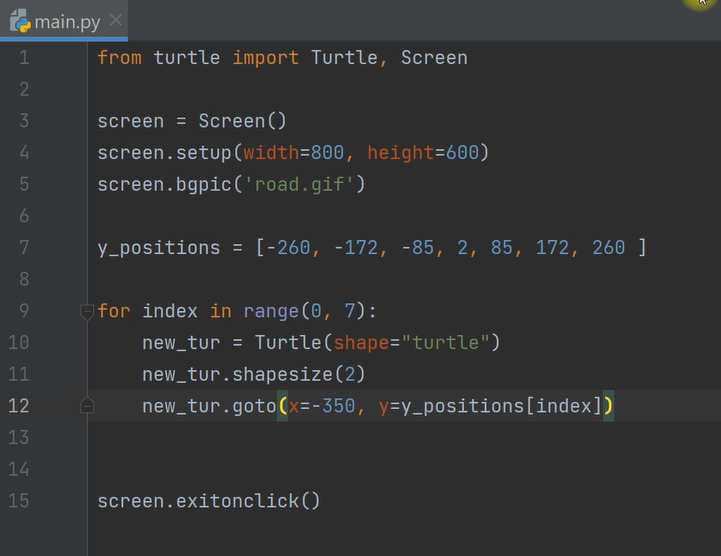
Here you can see that the turtle has moved to our desired location. So, we can take the y position in a global variable and add different types of values for positioning our turtles on their respective roads.
How to create the turtle replicas
Now, we have to create seven different types of turtle objects. For this reason, we will use a for loop.
So for index in range(0, 7) and then move our existing turtle instance in this loop. And of course, we have to change y to our global y positions variable and get their indexes in order.
Here is the result:

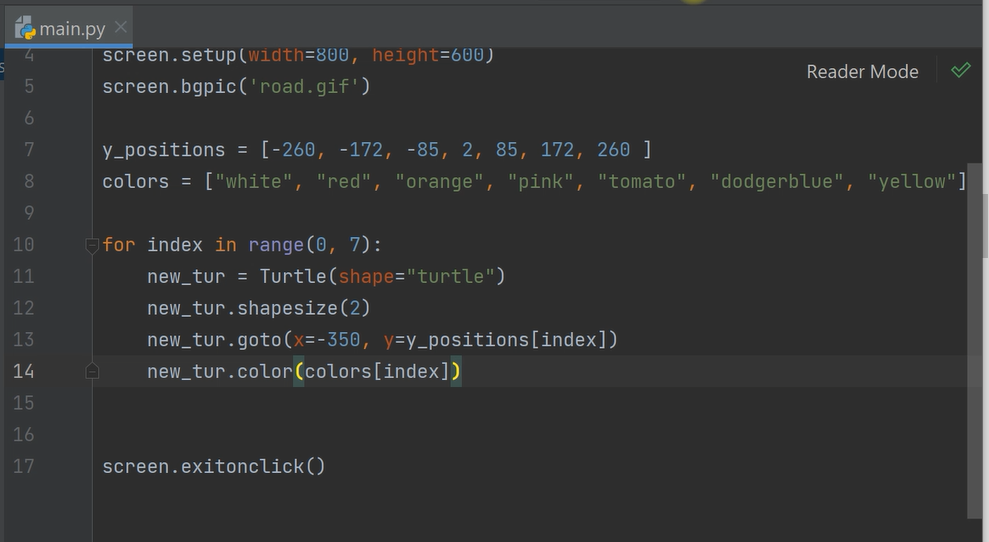
How to define the turtle colors
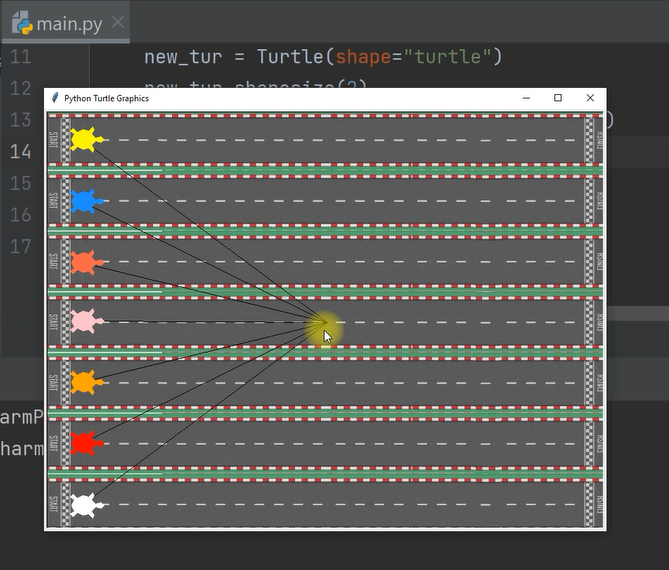
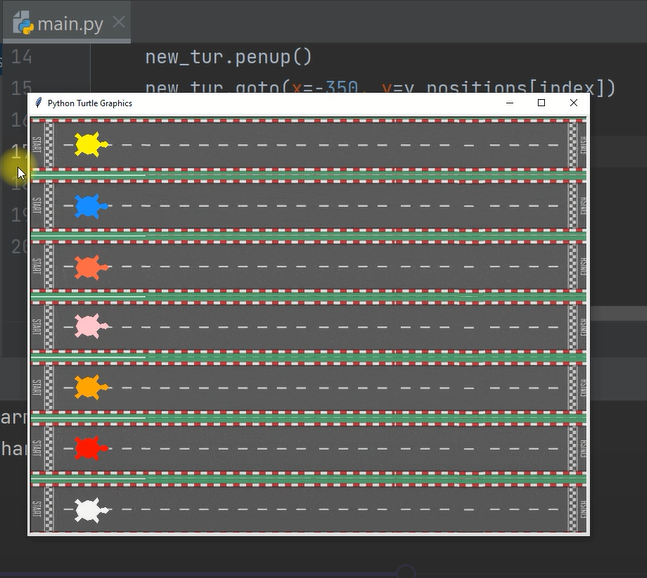
So as you can see, we have seven turtle instances created equally with different y locations. Let's add some random colors by using a global colors variable as we did for the y positions. Then use the color(colors[index]) method with their indexes.
Here is the result – beautiful!
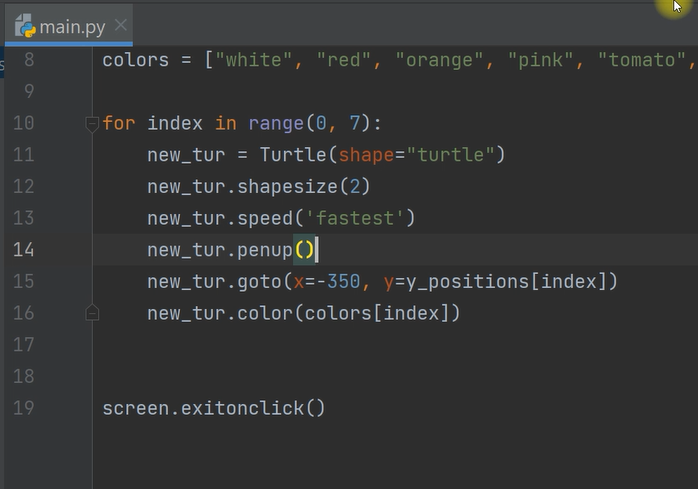
How to remove the ugly lines
You may see that there are some ugly lines that point towards the middle, and the move direction is very slow. So we can use the speed('fastest') and penup() methods to solve these problems. Have a look!
How to move the turtles forward
Now, what else do we need? Yeah, you got it! We need to define a random pace for every turtle. But before doing that, how can we move a single turtle forward?
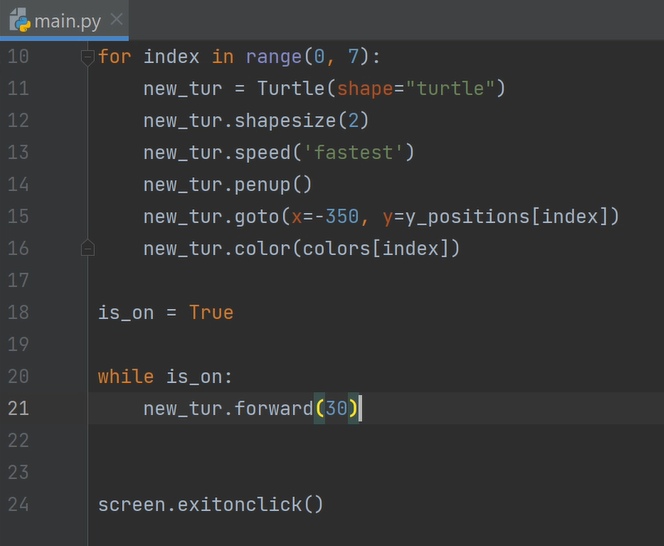
Well, you can use the forward() method to do this. Let's say we need to move our turtles forward 30 pixels.
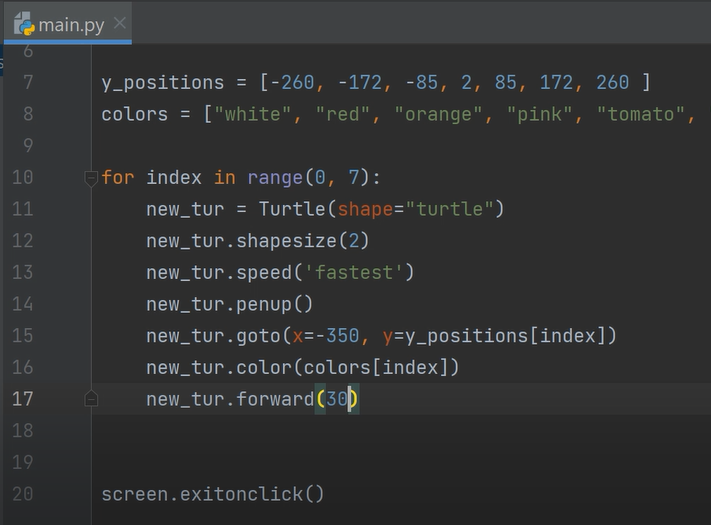
Here is the result:
But they are not moving continuously. What else can we do here? Think about it and come back to see my solutions.
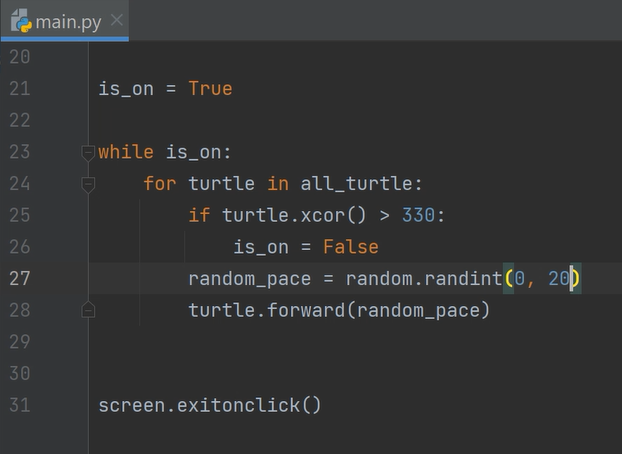
So, to solve this problem, we take a variable called is_on and set it to True. Now we will continuously execute our program until we break it using a while loop.
Now, we have the opportunity to move our turtle forward continuously with 30 pixels in every step.
Here is the result:
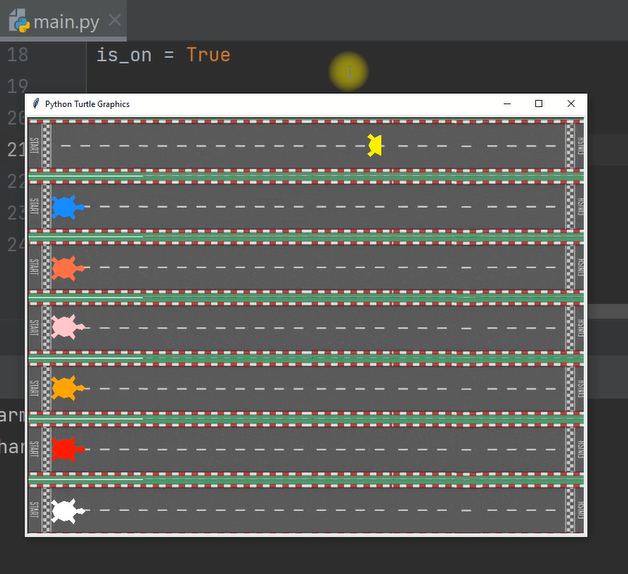
It's moving like a plane because we set forward to 30.
How to run multiple turtles in sync
Now we need to target all the turtle objects, not just a single one. But how can we do it? Think about it and come back to see my solution.
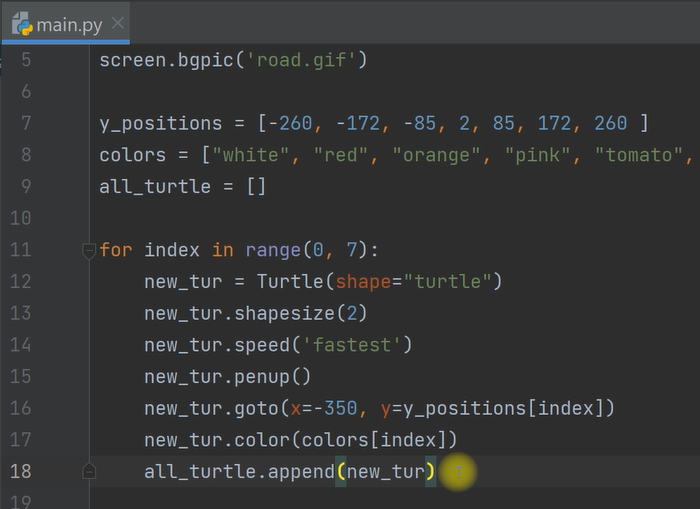
So, we can take a global variable called all_turtle and set it to an empty list. Now, in the for loop, after creating seven new turtle instances, we can append our new born turtle to this global all_turtle list. This way we can access them in other code blocks.
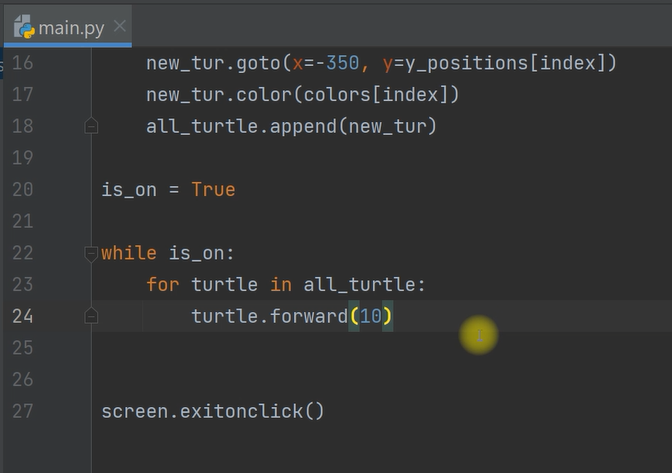
Now we have all our turtles. So, while our is_on variable in true, we can say all_turtle.forward(10). Also, here we need to use a for loop again to get each turtle from this all_turle global variable and then move them forward by 10 pixels.
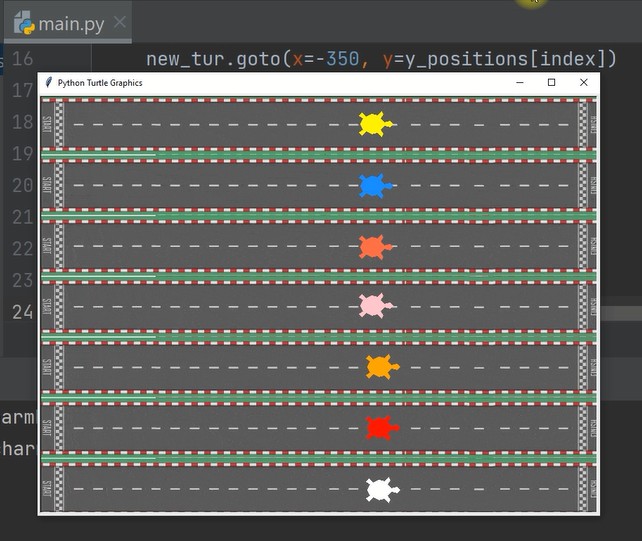
Let's see the result up until now:
How to set random moving speed
So, we solved our turtle moving problem. But they're running infinitely – there is no ending point. Also all turtles are moving at the same speed. Think about this problem, and try to solve it on your own.
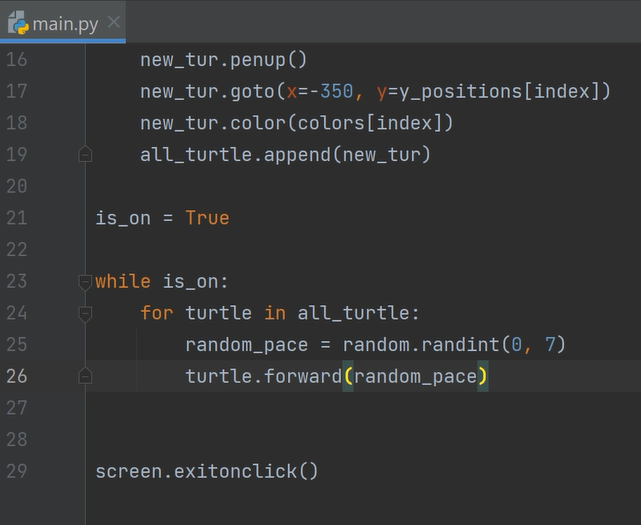
So let's take a new variable random_pace and set it to random.randint(0, 7). It will return value between zero to seven randomly. You have to import random at the top. Finally pass this random_pace variable to the forward() method like forward(random_pace).
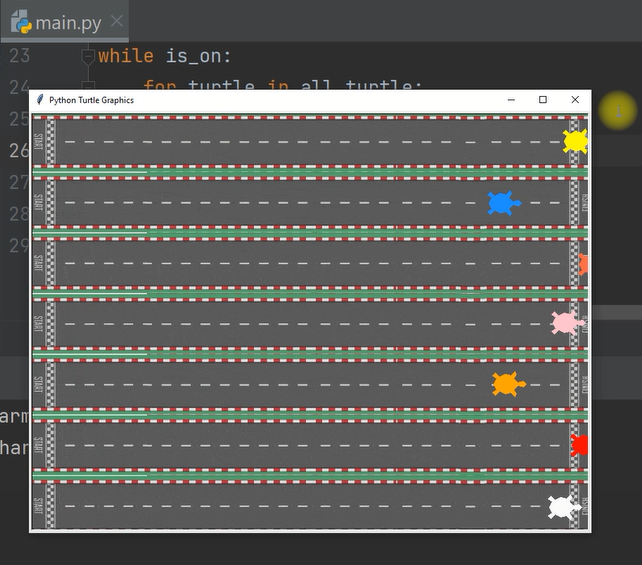
Here is the result:
🏁 How to Set the Finish Line
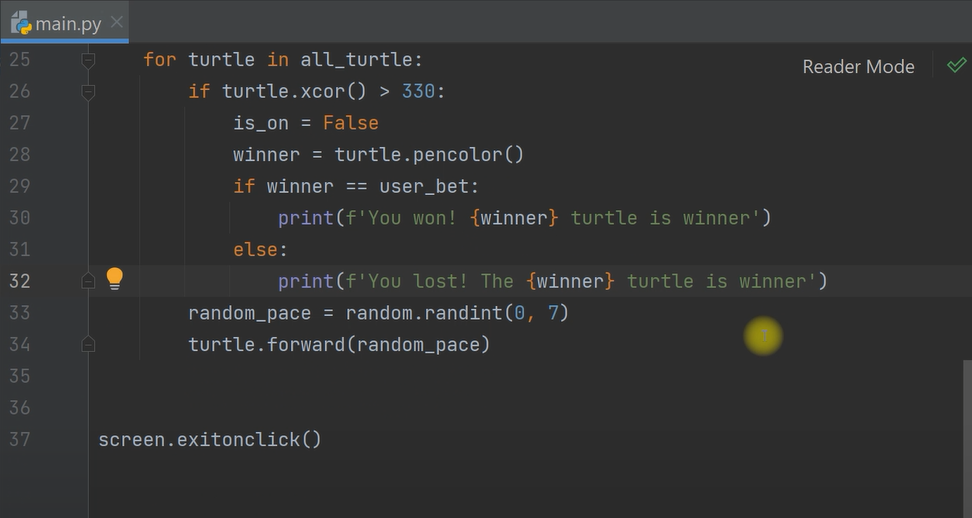
Now, we need to define our finish line in this canvas. To solve this problem, we check if turtle.xcor() > 330, set is_on = False, else we need to continue executing our program.
👥 How to Prompt the User to Enter Their Bet
We are done with the UI. Now, we need to define some logic to let the user enter their bet and compare their bet with our programmed result.
To let the user enter their bet, we can write screen.textinput and with a placeholder 'Enter your bet'. We'll also prompt the user "which turtle color" and store it in a global variable user_bet.
Then we take a variable winner. We check if winner == user_bet which will come from the user's input color. We print You Won, Otherwise, You lost with the turtle winner's color. That's why we have to use an f-string to pass the variable in the print method.
🎐 How to Show the Results on the Screen
Now, I want you to show this print text in the canvas with their responsive turtle color after touching the finish line. How can you implement this? You will see my solution next.
S0, here in the top. We take two global variables ALIGN = "right" and FONT = ("Courier", 28, "bold"). We will write to align the text on the right, and also make the font family courier and font size 28, bold.
Now, we'll use them when we want to show the user the racing results. So when the winner turtle color is equal to the user_bet color, we have to show the text in the canvas instead of printing it in the terminal.
To do this, we write turtle.write() and past the print statement along with font=FONT and align=ALIGN. Else, we need to show the text "You lost" with the same variable FONT and ALIGN. See, this is the benefit of using global variables.
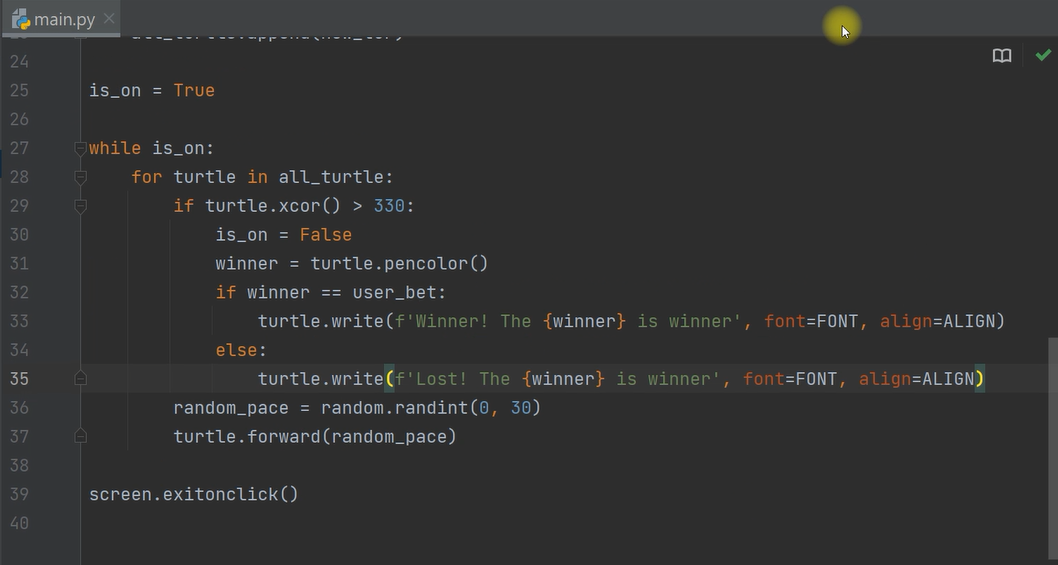
Finally, let's run this code one more time. Let's say that the red turtle will be the winner. But, as you can see below – Oops, the yellow turtle is the winner. So, you can see the bold yellow font displayed next to this turtle. This is why we used align = "right" and set the turtle color using the turtle.pencolor() method.
Turtle Racing Game Project
And there you have it - we've built our turtle racing game. If you want to watch this tutorial in video form, here's a full video tutorial for you:
📹 Full Video Tutorial
👏 Conclusion
So, we are at the end of this racing game project. If you liked this article, feel free to subscribe to my YouTube Channel or send me a tweet.
Happy Coding!