
By Olasunkanmi Balogun
State management is essential in today's world of web development. If you do it well, it helps you create apps that are reliable and effective.
Firebase is a Backend-as-a-Service platform that has gained popularity along with the emergence of serverless architecture and cloud technologies. And Cloud Firestore is a scalable, flexible NoSQL database that Firebase provides as part of its services.
Put these two together and you can store and sync data for your apps. This helps with state management.
This article will guide you through how to implement efficient state management for this Frontend Mentor Todo App Challenge in a TypeScript environment, using Firebase Cloud Firestore.
The challenge involves performing the following CRUD (Create, Read, Update, Delete) operations:
- Add new todos to the list
- Mark todos as complete
- Delete todos from the list
- Filter by all/active/complete todos
- Clear all completed todos
This challenge is a great use case for showcasing Cloud Firestore's features because of the procedures mentioned above. You'll have a firm grasp on how to use Firebase Cloud Firestore to create dynamic and scalable applications by the end of the article. When you are ready, let's dive in.
Just a note: in this article, we'll focused solely on implementing CRUD functionality for the challenge. We won't cover any aspects of styling.
Here's what we'll cover:
- How to Setup the Project
- How to Create Your Todo List Markup
- How to Add New Todos to the List
- How to Populate Tasks from the Database to the UI
- How to Mark Todos as Complete
- How to Delete Todos from the List
- How to Filter by All, Active, or Complete Todos
- How to Clear All Completed Todos
- How to Display the Uncompleted Todos Count 10.Conclusion
Prerequisites
- You have a knowledge of TypeScript and JavaScript, especially data types and methods.
- You are familiar with the React library.
- You have basic knowledge of the Context API.
- You are familiar with how to create a Firebase project and Firebase Config.
Prior knowledge of Firebase Firestore is not neccessary, but is a plus.
How to Setup the Project
Set up your React TypeScript Project
You'll start off by creating a new React app with Vite
To create a project using Vite, enter into the folder where you host all your projects – in my instance, it’s a Repos folder in my desktop folder.
With Vite, you can directly specify the project name and the template you want to use with one command. It's as staightforward as this:
npm create vite@latest todolist-app -- --template react-ts
After typing the above command in your terminal, you'll get a prompt that looks like this:

You have your project after providing the appropriate answer 🎉:

Now, go to the project folder that you just created with this command:
cd todolist-app
To install dependencies, run:
npm install
Then start your dev server:
npm run dev
Your dev server should be running on running at port 5173 on your local server, if it's not in use.

Set Up Firebase in Your Project
Now it's time to install Firebase in your development environment with this command:
npm install firebase
You must first create a Firebase project and a Cloud Firestore database in order to use Cloud Firestore to read and write data.
Create a folder named components, and inside the folder create a new file called firebaseConfig.ts. Copy your Firebase config into it and initialize Cloud Firestore as seen here.
If you have any challenges setting this up, feel free to reach out to me.
Set Up the Context API
Inside your components folder, create a new file called Context.tsx. The code below sets up a Context API in React for managing the state that we'll use throughout the project. Don't worry if you don't understand the code at this moment – I'll explain it step by step later in this section.
// Context.tsx

import React, { useContext, useState } from "react";

type ValueProp = {
    userId: string;
    setUserId: React.Dispatch<React.SetStateAction<string>>;
}

type ContextProp = {
    children: React.ReactNode
}

export const AppContext = React.createContext({} as ValueProp); //create the context API

//function body
export default function Context({ children }: ContextProp) {

const [ userId, setUserId ] = useState<string>('');

    return (
        <AppContext.Provider value={{userId, setUserId}}>
            {children}
         </AppContext.Provider>
    )
}

export const useGlobalContext = ():ValueProp => {
    return useContext(AppContext);
}
The ValueProp type specifies the shape of the value that will be stored in the context, which in this case includes the userId which is of type string and setUserId of type React.Dispatch.
The props that will be provided to the Context component are specified by the ContextProp type. The children prop is of type React.ReactNode, which indicates that any valid React component may be passed as a child to the Context component because it is a ReactNode.
Then we create a new Context and assign it to the AppContext variable. {} is an empty object that serves as an initial value for the context.
The type assertion as ValueProp tells TypeScript that this empty object conforms to the ValueProp type. This is necessary because TypeScript cannot infer the type of an empty object, so we need to explicitly tell it that the object we're creating conforms to the type we defined – that is, ValueProp.
The Context function is the provider component that wraps the children components and passes the userId and setUserId values to them via the value prop, provided by the AppContext.Provider component.
The useGlobalContext function is a custom hook that simplifies accessing the userId value from any component in the app. It uses the useContext hook to retrieve the AppContext object and return the userId and setUserId properties from the context value object.
Note that we added the userId variable as a required parameter with the goal of making the to-do list more personalized for each user. It's typically obtained during the authentication process, which we won't cover in this article.
If you're new to Firebase authentication, you may want to check out this tutorial for more information.
Now that we have a good grasp of the code, let's make the Context value accessible throughout our project.
To achieve this, go to the main.tsx component and wrap the Context around the App component as shown below:
import React from 'react'
import ReactDOM from 'react-dom/client'
import App from './App'
import Context from './components/Context'


ReactDOM.createRoot(document.getElementById('root') as HTMLElement).render(
  <React.StrictMode>
    <Context>  // wrap it here
    <App />
    </Context>
  </React.StrictMode>,
)
With your set-up complete, it's time to move on to creating the markup for your to-do list.
How to Create Your Todo List Markup
Clean up the boilerplate code in your App.tsx file and copy the following markup:
import { useState } from "react"

export default function App() {

  const [ title, setTitle ] = useState<string>('')

  return (

     <div style={{
       display: 'flex',
       justifyContent: "center",
       alignContent:"center"
     }}>

    <div style={{
      width:'300px' }}>

      <p>Todo List App</p>

      <form style={{
        marginTop: '5px'}}>
      <input value={task}
      onChange={(e) => setTitle(e.target.value)}/>
      </form>
      <div style={{
        marginTop: '10px'
      }}>
      <div style={{
         display:'flex',
         justifyContent: 'space-between',
         marginTop:'10px'

      }}>
      <label>
         <input type="checkbox"/>
             Finish To-do list tutorial
        </label>
        <button>Delete</button>
      </div>
      </div>
      {/* footer */}

       <footer style={{
         marginTop: '10px'
       }}>
         <div style={{
          display: 'flex',
          justifyContent:'space-between',
          }}>
          <button>All</button>
          <button>Active</button>
          <button>Completed</button>
         </div>

         <div style={{
          display: 'flex',
          justifyContent:'space-between',
          marginTop: '10px'
          }}>
         <p>0 items left</p>
         <button>
          Clear Completed
          </button>
          </div>
      </footer>

    </div>
     </div>
  )
}

export default App
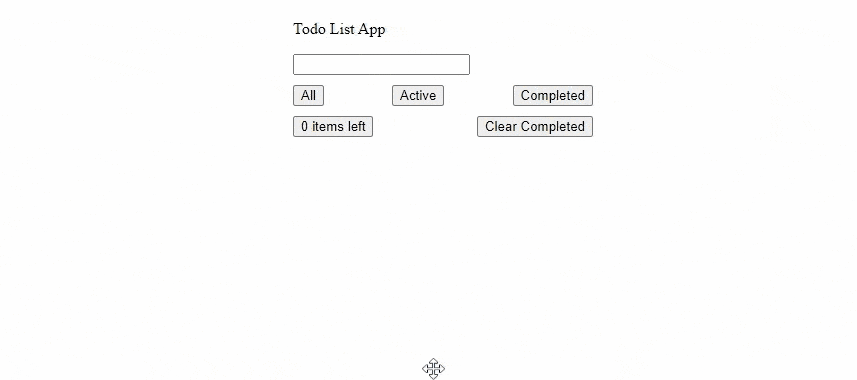
I added some basic styling to the markup to make it look presentable 😁. Your UI should look like this:
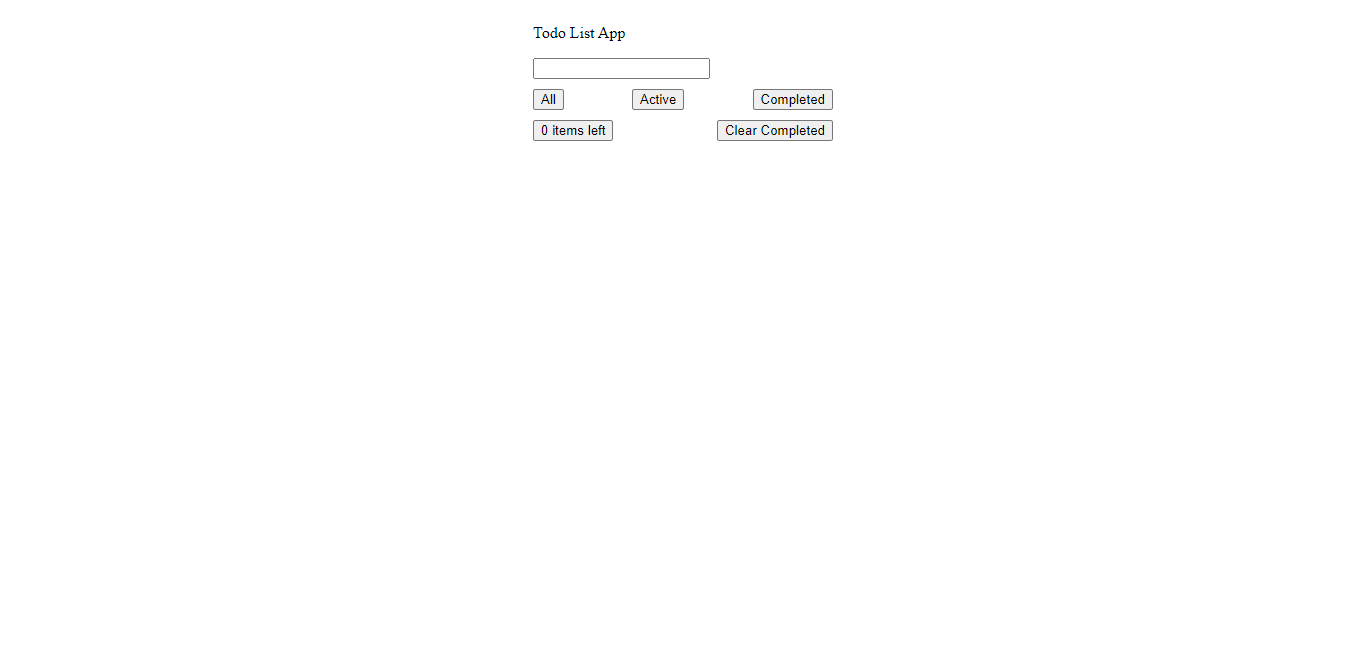
A form element contains an input field which holds the value of the task title and the onChange event handler which updates the title state as a user types. We're using this to add new tasks to the list when a user submits the form.
The div element below it contains a dummy task with a label that includes a checkbox input to indicate if the task is complete or not and a p tag to delete todos. Be aware that a dynamic list of tasks from our Firestore database will subsequently be contained in this div tag.
We use two div tags to implement the footer. The first one has three button elements that have been styled to show the filter options side by side. The second one has p and button elements that show the remaining unfinished tasks and clears completed tasks, respectively.
Now that we have our markup out of the way, let's get our hands dirty! 😀
How to Add New Todos to the List
It's helpful if you're somewhat familiar with the Cloud Firestore Data Model before we begin adding tasks to our list. Let's take a quick look at the Cloud Firestore Data Model to have a better understanding of how data is stored in the database.
Cloud Firestore organizes data into collections and documents. A document is the basic unit of storage in Firestore and is represented by a set of key-value pairs.
In addition to collections and documents, Firestore also allows for subcollections, which are collections nested within a document.
For more information about Firestore's data model, refer to the official documentation.
Now that you have a basic understanding of the data model, let's go on to creating a list of tasks.
First, update your App.tsx file as seen below. If you don't understand the code right away, don't worry – I'll explain everything later:
import { useState } from "react"
import { useGlobalContext } from "./components/Context";
import { collection, addDoc } from "firebase/firestore";
import { db } from "./components/firebaseConfig";

export default function App() {

  const [ title, setTitle ] = useState<string>('')
  const { userId } = useGlobalContext()

    const handleSubmit = async (e: React.FormEvent<HTMLFormElement>) => {
        e.preventDefault();
        if(title !== '') {
            try {
      await addDoc(collection(db, 'users', userId, 'tasks'), {
                     title,
                     completed: false,
                 })
                setTitle('')
                console.log('Task successfully added')
            }
            catch(e) {
                console.log('Unsuccessful')
            }
          }
    }

  return (
     <div style={{
       display: 'flex',
       justifyContent: "center",
       alignContent:"center",
     }}>

    <div style={{
      width:'300px' }}>

      <p>Todo List App</p>

      <form
      onSubmit={handleSubmit}
      style={{
        marginTop: '5px'}}>
      <input
      value={title} onChange={(e) => setTitle(e.target.value)}/>
      </form>
      // rest of the markup
     </div>
     </div>
  )
}
We imported useGlobalContext from the Context.tsx component to get the userId from our store. We also imported the collection and addDoc functions from the firestore package to create a collection in our database and add a document to the collection, respectively.
Then we imported db, which we'll use to initialize the Cloud Firestore, from our firebaseConfig file to help us get a reference to the remote database.
When a user submits a new task, the handleSubmit function is called. This function prevents the default form submission.
If title is not an empty string, the function creates a new document in the tasks collection of the current user in the Firestore database with the title and completed properties. Tthe title property is set to the title state with the object literal shorthand syntax, and the completed property is initially set to false. Then it clears the title input field.
If the operation is unsuccessful, a message is logged to the console. The entire operation is enclosed in a try and catch block, which helps to customize error messages.
Let's move forward and retrieve our data from the database and populate the user interface.
How to Populate Tasks from the Database to the UI
In your App.tsx file, include the code below. I'll explain it after.
import { useState, useEffect } from "react"
import { collection, addDoc, onSnapshot } from "firebase/firestore";

type Task = {
  title: string,
  completed: boolean,
  id:string,
}[];       //define the task type

export default function App() {

  const [ tasks, setTasks ] = useState<Task>([])
  const docRef = collection(db,`users/${userId}/tasks`);

  useEffect(() => {
    if(userId !== '') {
       // onSnapshot so we can get data update real-time
       const unsubscribe = onSnapshot(docRef, (querySnapshot) => {
       const tasks = querySnapshot.docs.map((doc) => {
        const data = doc.data();
// return data compatible with data types specified in the tasks variable i.e title, completed and id
       return {
         title: data.title,
         completed: data.completed,
         id: doc.id,
            }
          });
         setTasks(tasks)
       });
         return () => {
         unsubscribe();
       };
        }
      }, [userId]);

    return (
    //input

    <div style={{
        marginTop: '10px'}}>
        {
          tasks.length > 0 && (
             tasks.map(task => {
             const { id, title, completed } = task;
             return (
               <div id={id} style={{
                  display:'flex',
                  justifyContent: 'space-between',
                  marginTop:'10px'
               }}>
               <label style={{
               }}>
               <input type="checkbox"
                 checked={completed} />
                 {
                  completed ?
                  <s>{title}</s>
                  : <span>{title}</span>
                }
               </label>
               <button>Delete</button>
               </div>
             )}))}
        </div>
  // rest of the code here
    )
We imported the useEffect hook and the onSnapshot method to fetch data from our Firestore database and to subscribe to updates to our collection, respectively.
We've also defined a type called Task which is an array of objects with title, completed and id properties. This will define the shape of the tasks state.
To get data from the database, we have to first get its reference in the database. By reference, I mean the location of the document within the database. This location is referenced in the docRef variable.
In the useEffect hook, we're using the onSnapshot method to subscribe to updates to the docRef collection. Whenever the collection is updated, the querySnapshot object will contain the latest data. We're then mapping over each document in the querySnapshot and returning an object with the title, completed, and id properties. We're setting this array of objects as the new state of tasks using the setTasks function.
The useEffect hook takes a dependency array which contains userId. This ensures that the useEffect hook is only called when the userId changes.
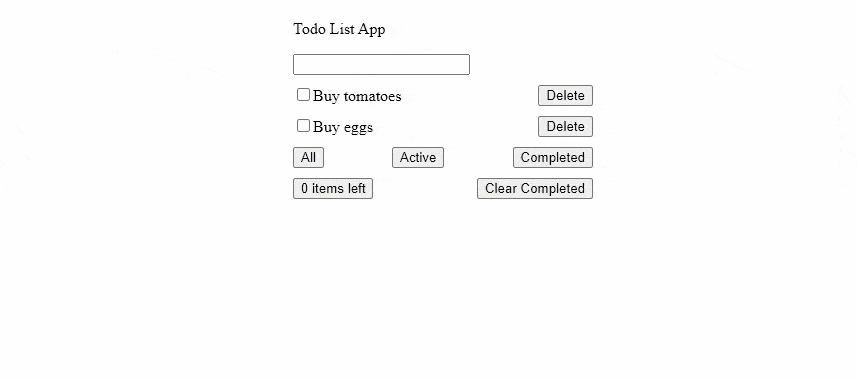
We then map through the tasks array and populate the UI with a list of to-do items:
When a task is completed, the checkbox is checked and the title is crossed out. Let's go ahead and implement this feature.
How to Mark Todos as Complete
When a user checks or unchecks the checkbox, we want to update the completed status of the corresponding task in Firestore. Your App.tsx should include the following code:
import { collection, addDoc, onSnapshot, updateDoc, doc } from "firebase/firestore";

export default function App() {

 const handleComplete = async (id: string, completed: boolean): Promise<void> => {
    await updateDoc(doc(db, `users/${userId}/tasks/${id}`), {
        completed: !completed
    })}

  return (
    <div style={{
        marginTop: '10px'}}>
        {
          tasks.length > 0 && (
             tasks.map(task => {
             const { id, title, completed } = task;
             return (
               <div id={id} style={{
                  display:'flex',
                  justifyContent: 'space-between',
                  marginTop: '10px'
               }}>
               <label style={{
               }}>
               <input type="checkbox"
                 checked={completed}
                 onChange={() => handleComplete(id, completed)}/>   // include an onChange handler
                 {
                  completed ?
                  <s className='completed'>{title}</s>
                  : <span>{title}</span>
                }
               </label>
               <button>Delete</button>
               </div>
             )}))}
        </div>
    )
}
In this code, we defined a function called handleComplete that takes in the id and completed status of a task. This function is async and returns a promise, but since it doesn't explictly return anything, the promise resolves to void. This is why we have Promise<void> as the return type.
Within the function, we used Firebase's updateDoc function to update the completed status of a task in Firestore. We then passed the document reference to updateDoc by calling the doc function with the db object and the path to the task document in Firestore.
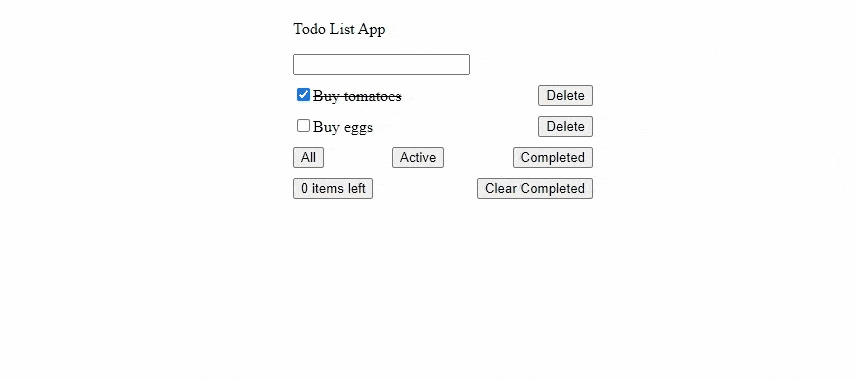
Now when the checkbox is clicked, users can update the state of the task - whether completed or not:
How to Delete Todos from the List
As you'll see below, we will use Firebase's deleteDoc function to remove a task from the database. Update your App.tsx file with the following code snippet:
import { collection, addDoc, onSnapshot, updateDoc, doc,
deleteDoc} from "firebase/firestore";

export default function App() {

const handleDelete = async (id: string): Promise<void> => {
      await deleteDoc(doc(db, `users/${userId}/tasks/${id}`));
   }
  return (
    <div style={{
        marginTop: '10px'}}>
        {
          tasks.length > 0 && (
             tasks.map(task => {
             const { id, title, completed } = task;
             return (
               <div id={id} style={{
                  display:'flex',
                  justifyContent: 'space-between',
                  marginTop: '10px'
               }}>
               <label style={{
               }}>
               <input type="checkbox"
                 checked={completed}
                 onChange={() => handleComplete(id, completed)}/>
                 {
                  completed ?
                  <s className='completed'>{title}</s>
                  : <span>{title}</span>
                }
               </label>
               <button
               onClick={() => handleDelete(id)}>
               Delete</button>
               </div>
             )}))}
        </div>
        //rest of your markup
    )
}
We implemented a function called handleDelete that takes in an id of type string. Within the function, we call the deleteDoc function and pass in a doc object that references the specific task we want to delete.
After that, the button element calls the handleDelete function with the id of the task we want to delete when it is clicked.
This is how this functionality should look like:
Now that you understand this functionality, let's go on to filtering our database data depending on whether a user wants to receive all, active, or complete data.
How to Filter by All, Active, or Complete Todos
To implement the filter functionality, include the following code in your App.tsx:
import { collection, addDoc, onSnapshot, updateDoc, doc, deleteDoc, query, where, getDocs } from "firebase/firestore"; //import query, where, getDocs

export default function App() {

const handleFilter = async (val: boolean): Promise<void> => {
    const q = query(docRef, where("completed", "==", val)) //get collection with respect to if completed is true or not
    const querySnapshot = await getDocs(q)
     const tasks = querySnapshot.docs.map((doc) => {
        const data = doc.data();
        return {  //return data compatible with data types specified in the tasks variable
            title: data.title,
            completed: data.completed,
            id: doc.id,
              }
           });
     setTasks(tasks);
          }

    const handleFetchAll = async (): Promise<void> => {
        const querySnapshot = await getDocs(docRef);
        const tasks = querySnapshot.docs.map((doc) => {
          const data = doc.data();
          return {  //return data compatible with data types specified in the tasks variable
              title: data.title,
              completed: data.completed,
              id: doc.id,
                }
             });
            setTasks(tasks);
          }

  return (

      {/* footer */}


       <footer style={{
        marginTop: '10px'
        }}>
         <div style={{
          display: 'flex',
          justifyContent:'space-between'
          }}>
          <button onClick={handleFetchAll}>All</button>
          <button onClick={() => handleFilter(false) }>Active</button>
          <button onClick={() => handleFilter(true)}>Completed</button>
         </div>

         <div style={{
          display: 'flex',
          justifyContent:'space-between',
          marginTop: '10px'
          }}>
         <p>0 items left</p>
         <button onClick={handleClearCompleted}>
          Clear Completed
          </button>
          </div>
      </footer>

    </div>
     </div>
  )}
Firstly, we import some additional functions from the firestore library: query, where, and getDocs.
We then defined two functions: handleFilter and handleFetchAll, which we use to filter and fetch tasks, respectively, based on their completion status.
The handleFilter function receives a boolean value val which represents the completion status of the task we want to filter.
We create a new query using the query function, passing in docRef (which represents the collection reference) and where to specify the filter criteria. Here, we're looking for tasks where the completed field is equal to the value of val.
We then use getDocs to execute the query and get a querySnapshot object. We map over the docs array in querySnapshot, extracting the data fields we need (title, completed, and id) and returning an object with those properties. After that, we update the tasks state with the filtered results.
In handleFetchAll, we also use getDocs to get all the documents in the docRef collection. We map over the docs array in querySnapshot, extracting the data fields we need (title, completed, and id) and returning an object with those properties. Then, we update the tasks state with the fetched results.
Depending on the functionality, we then pass the functions to the corresponding p tags in the footer element.
See demonstration below:

How to Clear All Completed Todos
Users should be allowed to delete any finished tasks from their Todo list. This functionality is implemented by mapping through the task list and deleting any task whose completed status is set to true with the deleteDoc function. Include the code below to see a real-world illustration:
// imports

export default function App() {

   const handleClearCompleted = async ():Promise<void> => {
     const q = await getDocs(query(docRef, where("completed", "==", true))); //get the document so we can loop through
       q.forEach( async (doc) => { //loop through
          await deleteDoc(doc.ref);
          })
      }
    return (
       //footer

       <footer style={{
        marginTop: '10px'
        }}>
         <div style={{
          display: 'flex',
          justifyContent:'space-between'
          }}>
          <button onClick={handleFetchAll}>All</button>
          <button onClick={() => handleFilter(false) }>Active</button>
          <button onClick={() => handleFilter(true)}>Completed</button>
         </div>

         <div style={{
          display: 'flex',
          justifyContent:'space-between',
          marginTop: '10px'
          }}>
         <p>0 items left</p>
         <button onClick={handleClearCompleted}>
          Clear Completed
          </button>
          </div>
      </footer>
    )
}
We used the getDocs method to fetch all the documents from the database that have a completed field that is equal to true. We do this by passing where as a parameter to the query method. The where specifies that we only want documents where the completed field is equal to true.
We then use the forEach method to loop through all the documents that were returned by the query and delete each of them.
Finally, the handleClearCompleted function is called when the "Clear Completed" button is clicked in the footer.
The clear completed todos functionality now works as seen below:

How to Display the Uncompleted Todos Count
In the final step of our app development, we will add a feature to display the real-time count of uncompleted todos as the user creates or deletes data from the database.
To implement this, we will leverage the useState and useEffect hooks to manage the count's state and fetch data, respectively, whenever the docRef changes.
To accomplish this, we will also use the onSnapshot, query, and where methods from our Firestore library. You can see an illustration below:
 export default function App() {

  const [ completedTasksCount, setCompletedTasksCount ] = useState(0);

   useEffect(() => {
         const unsubscribe = onSnapshot(query(docRef, where('completed', '==', false)), (q) => {
           setCompletedTasksCount(q.docs.length);
         });
         return unsubscribe;
   }, [docRef]);

  return (
    //footer
       <footer style={{
        marginTop: '10px'
        }}>
         <div style={{
          display: 'flex',
          justifyContent:'space-between'
          }}>
          <button onClick={handleFetchAll}>All</button>
          <button onClick={() => handleFilter(false) }>Active</button>
          <button onClick={() => handleFilter(true)}>Completed</button>
         </div>

         <div style={{
          display: 'flex',
          justifyContent:'space-between',
          marginTop: '10px'
          }}>
         <p>{completedTasksCount} items left</p>
         <button onClick={handleClearCompleted}>
          Clear Completed
          </button>
          </div>
      </footer>
  )
 }
Firstly, we initialize the state variable completedTasksCount with a default value of 0.
Then, we use the useEffect hook to set up a snapshot listener that listens for changes in the completed tasks collection.
Whenever there is a change in the collection, the onSnapshot callback function is called, and we update the completedTasksCount state with the length of the docs array returned by the querySnapshot object. This means that the completedTasksCount state will always reflect the current number of completed tasks in the collection.
Finally, we passed the completedTasksCount variable to the p tag in the footer. A demonstration of this functionality can be seen below:
And there you have it! We've finished building our Todo app. Congrats!
Conclusion
In this article, we've explored various functionalities of Cloud Firestore in a React application to create a real-time todo list.
We started by setting up React in a TypeScript environment, Firebase, and the Context API to manage state. We then delved into implementing the CRUD (create, read, update, delete) operations using Firestore and real-time listeners. These allowed us to add new todos, mark them as complete, and delete them from the list.
We also implemented a filter functionality, allowing users to filter their todos by all, active, or completed tasks. Lastly, we explored how to clear all completed todos from the list.
If you want to take a closer look at the code used in this tutorial, you can check out the Github repository here and my official solution to the challenge with styling here.
By now, you should have a good understanding of how to integrate Firebase into a React application and build a comprehensive real-time todo list with it.
With the knowledge you've gained, you can apply these principles to develop more complex applications with Firebase and React, taking advantage of its vast array of services such as cloud storage and cloud functions. Firebase's extensive documentation make it a powerful tool for building complex web applications in no time. Happy coding!