
By Chibuike Okere
Okay, so I assume you have heard of the almighty DOM — that’s why you are here, right? If you are finding it difficult, I can assure you that after reading this article, you will feel comfortable enough with the whole DOM manipulation thing.
But please before I start, permit me to share with you my little story on how I got to know about the DOM (its a funny story).
How I learned about the DOM
A few months into my web development career, I was still learning the good old HTML and CSS. I mistakenly stumbled upon a DOM course on w3schools. The first example they had was one with a light bulb and two buttons.
The onclick of one of the buttons would "switch on" the light bulb and the onclick of the second button would "switch off" the light bulb. I was literally blown away.
How could a button on a website switch on a light bulb? How!?
I even twitted about it. Then I found out that they were just changing the source attribute (src) of the images. I was heart broken, but regardless that little experience made me fall in love with the DOM. It made me want to know more.
And in this article I'm going to walk you through it. I promise that if you stick with me until the end and practice all that I write about, the whole DOM thing won't be an issue for you ever again. So are you ready? Ok Allons-y (let's go!).
To make this easier to understand, I have grouped everything into the following sections below.
- Definition of the DOM and Basic concepts
- How to Select Elements in the DOM
- How to Traverse and Move Around the DOM
- How to Manipulate Elements in the DOM
- General Styling
- Event handling in the DOM
So grab a coffee or anything you like and relax as I walk you through each section.

Definition of the DOM and Basic concepts
What is the DOM?
The DOM stands for Document Object Model. It can simply be understood as a tree of nodes created by the browser. Each of these nodes has its own properties and methods which can be manipulated using JavaScript.
The ability to manipulate the DOM is one of the most unique and useful abilities of JavaScript.
The image below gives a visual representation of what the DOM tree looks like.

Here we have the document object. This is the core/foundation of the DOM. To perform any form of DOM manipulation, you have to access the document object first.
Next we have the html root element which is a child of the document object.
Next on the line are the body and head elements which are siblings to each other and children of the html element.
Under the head element we have the title element which you can agree is the child of the head element and parent to the text node - “my text”.
Directly under the body element we have two elements (a tag and h1 tag) which are siblings to each other and children of the body element.
Finally the href attribute and the text node - “my link” - are children of the a tag. Exactly the same way the text node, “My header”, is a child of the h1 element.
This might seem a little confusing if you are an absolute beginner, but trust me - it always gets better (with practice of course).
How to Select Elements in the DOM
In order to be able to manipulate an element in the DOM, you have to select that particular element. Luckily for us we have 4 major ways of selecting elements.
How to Select DOM Elements with the getElementById Method
The most common way to access an HTML element is to use the id of the element.
In the example below the getElementById() method used id="master" to find the element
<p id="master">i love javascript</p>

 <script>
const masterEl = document.getElementById('master')
console.log(masterEl) //<p id="master">i love javascript</p>
 </script>
The id is case-sensitive. For example, the 'master' and 'Master' are totally different ids.
Once you have selected an element, you can add styles to the element, manipulate its attributes, and traverse to parent and child elements.
How to Select DOM Elements with the getElementsByClassName() Method
This method returns a collection of all elements in the document with the specified class name.
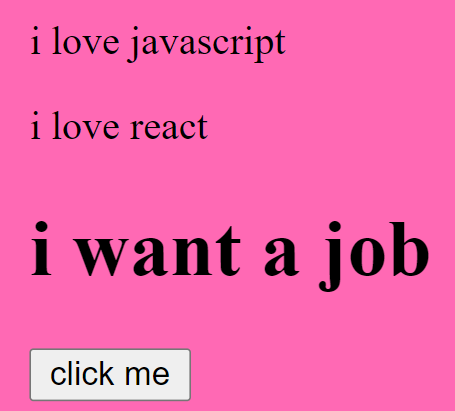
For example, our HTML page below contains three elements with class="master2", and I selected the button with the id of 'btn'.
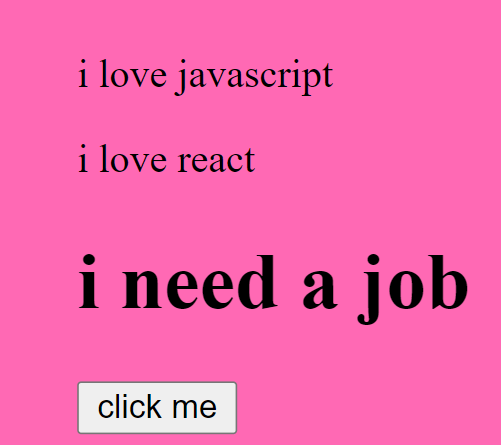
If you click the button it would select all the elements with a class name of "master2" and change the innerHTML of the 3rd element.
        <p class="master2">i love javascript</p>
        <p class="master2">i love react</p>
        <h1 class="master2">i want a job</h1>

        <button id="btn">click me</button>

 <script>

 const btn = document.getElementById('btn')

        btn.addEventListener('click', function master(){
            var master = document.getElementsByClassName("master2");
            master[2].innerHTML = 'i need a job';
        })

</script>
Before the button is clicked, this is what you see:
After the button is clicked, you see:
I know I used
addEventListener()which I have yet to explain, but stick with me. It's definitely part of what I will explain to you below :)
How to Select DOM elements with the getElementsByTagName() Method
This method accepts a tag name and returns all the elements of the specified tag name in the order which they appear in the document.
The following code illustrates the syntax of getElementsByTagName() by getting all the p elements on the page and changing the content of the second element.
 <p>VsCode</p>
 <p>Atom</p>
 <p>Sublime text</p>
        <button id="btn">click me</button>


 <script>

const btn = document.getElementById('btn')

        btn.addEventListener('click', function master(){
            let master = document.getElementsByTagName('p');
            let masterEl = master[1].innerHTML = 'Code editors';
            console.log(masterEl) //Code editors
        })

//<p>Atom</p> changes to <p>Code editors</p>
</script>
How to Select DOM Elements with CSS Selectors
.querySelector()
This returns the first value that matches the selector it’s given. This method can accept all CSS style selectors, allowing it to select by tag, class, or ID.
<div id=master>i am a frontend developer</div>

<script>
const master = document.querySelector("#master")
</script>
This method above takes one argument, which is a CSS selector, and returns the first element that matches the selector.
.querySelectorAll()
This works similar to above which returns a node list collection of all matching elements.
     <p class="master">React</p>
     <p class="master">Vue</p>
     <p class="master">Angular</p>

<script>
const master = document.querySelectorAll(".master")
console.log(master[1])  //<p class="master">Vue</p>
</script>
Summary of How to Select DOM Elements
When you need to select a DOM element, you have four different options to choose from, four different ways of doing a particular thing (selecting an element(s)).
So if you don't remember the first, you use the second. And if by chance you don't remember both you still have options 3 and 4. Is it just me or does JavaScript make our lives easier? :)
My personal recommendation is to stick to option 1 or option 4a (queryselector with an Id). From your early days of learning HTML you likely understood that elements shouldn't have the same id, that is the id is a unique identifier of an element within the document.
With that in mind, selecting an element with its id is a "safe bet" because you wouldn't get to apply same "manipulation" to different elements (unless perhaps that's what you want to achieve - then be my guest, feel free to use other options).
How to Traverse the Document
At this stage you'll hopefully agree with me that everything in an HTML document is a node. Also the text inside HTML elements are text nodes.
With the HTML DOM, you can navigate the node tree and access nodes in the tree using node relationships we talked about earlier (parent, child(ren), sibling(s) etc).
New nodes can be created, and all nodes can be modified or deleted.
A little review
- Every node has exactly one parent, except the top node (which has no parent).
- A node can have a more than one child.
- Siblings (brothers or sisters) are nodes with the same parent.
In this section, we are going to see how to get the parent element, siblings of an element, and children of an element. I will be using the following node properties to achieve these things:
- parentNode
- childrenNodes
- firstElementChild
- lastElementChild
- nextElementSibling
- previousElementSibling
Also I will be using only this HTML page below to show you how we use each of these node properties. And from section 4 above I will be showing you how to manipulate the DOM.
That is the objective of this article - to know how to manipulate the DOM. It doesn't really matter if you know how to select elements and traverse the DOM if you don't know how to manipulate it. It's important to know how to add CSS styling, create and append elements, set innerHTML and handle events.
That's the juice of this article so please stay with me. Let's continue.
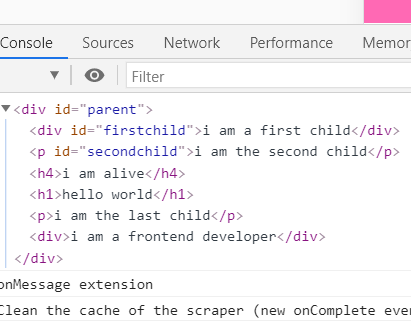
 <div id="parent">
        <div id="firstchild">i am a first child</div>
        <p id="secondchild">i am the second child</p>
        <h4>i am alive</h4>
        <h1>hello world</h1>
        <p>i am the last child</p>
    </div>

    const parent = document.getElementById('parent').lastElementChild
    console.log(parent) //<p>i am the last child</p>

    const parent2 = document.getElementById('parent').children[3]
    console.log(parent2) //<h1>hello world</h1>

    const secondchild = document.getElementById('secondchild')
    console.log(secondchild) //<p id="secondchild">i am the second child</p>

    console.log(secondchild.parentNode) //<div id="parent">...</div>

    console.log(secondchild.nextElementSibling) //<h4>i am alive</h4>

    console.log(secondchild.previousElementSibling) //<div id="firstchild">i am a first child</div>
How to Manipulate Elements in the DOM
In this section we are going to look at:
- How to create elements
- How to set the innerHTML/ text content of an element
- How to append an element
- How to insert one element before another
- How to replace a child element
- How to remove a child element
    <div id="parent">
        <div id="firstchild">i am a first child</div>
        <p id="secondchild">i am the second child</p>
        <h4>i am alive</h4>
        <h1>hello world</h1>
        <p>i am the last child</p>
    </div>
How to Create Elements
The code above shows a parent element with 5 children elements. Let's assume we want to add another div tag with JavaScript. We would definitely have to create a new element with the createElement() method, like this:
 const createEl = document.createElement('div')
 console.log(createEl) //<div></div>
How to Set innerHTML
We have successfully created a div tag, but currently it does not have any text node. We are going to use the .innerHTML() property to add its text node.
const innerhtml = createEl.innerHTML = 'i am a frontend developer'
console.log(createEl) //<div>i am a frontend developer</div>
How to Append an Element
What we have achieved so far is creating an element and inserting its text node. But this created element is not part of the DOM tree yet.
So now, I am going to show you how to append it to that HTML page in this section. Building on the code above:
 const createEl = document.createElement('div')

 const innerhtml = createEl.innerHTML = 'i am a frontend developer'

 const parentEl = document.getElementById('parent')

 parentEl.appendChild(createEl)

 console.log(parentEl)
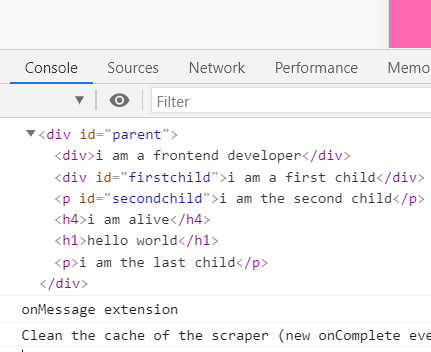
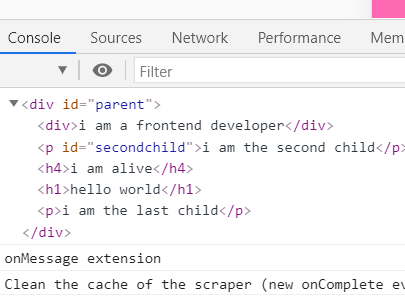
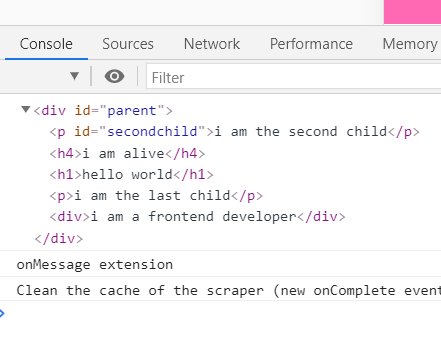
How to Insert One Element Before Another
If you noticed from the console log image above, the appended child div tag was added at the bottom automatically.
What if for some reason you want to append it anywhere of your choice? Maybe before the first element or before the fourth element. I am here to tell you that it is very much possible. In the code below we are going to add it before the current first element.
We are going to be using the insertBefore() JavaScript method which accepts two parameters, the newNode and the existingNode in this order => document.insertBefore(newNode, existingNode).
 const parentEl = document.getElementById('parent')
 const firstchildEl = document.getElementById('firstchild')

 const createEl = document.createElement('div')

 const innerhtml = createEl.innerHTML = 'i am a frontend developer'

 parentEl.insertBefore(createEl, firstchildEl)
   console.log(parentEl)
How to Replace a Child Element
We are going to be using the replaceChild() JavaScript method which accepts two parameters to replace our first element with the newly created one. It works in this order => document.replaceChild(newNode, existingNode).
 const firstchildEl = document.getElementById('firstchild')
 const parentEl = document.getElementById('parent')

 const createEl = document.createElement('div')
 const innerhtml = createEl.innerHTML = 'i am a frontend developer'

 parentEl.replaceChild(createEl, firstchildEl)

   console.log(parentEl)
How to Remove a Child Element
We are going to be using the removeChild() JavaScript method which accepts just one parameter ()that is the element you want to remove, which in this case is our original first element. It works in this order => document.removeChild(element)
const firstchildEl = document.getElementById('firstchild')
 const parentEl = document.getElementById('parent')

 parentEl.removeChild(firstchildEl)

 console.log(parentEl)
How to Add Styling with CSS
From the previous examples, we saw how to create an element and append it to the specified parent element.
Therefore, for an element to have a style we have to add a CSS class to it. In this case we'll do it with JavaScript.
I am not only going to show you how to add a class. I will also show you how to remove a class and how to also toggle between classes.
Don't worry, it's not difficult. I am here to walk you through all of it.
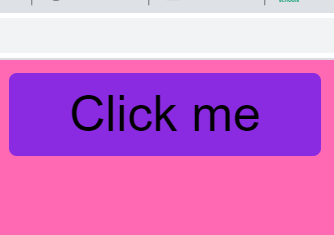
How to Add a CSS Class
Currently we have a normal HTML button with an id of "master" but without any style applied to it. See the image below:

The first thing we are going to do is create the CSS style for the button.
Next, in our JavaScript I will add an event listener to the button so that, when you click it, JavaScript automatically adds the CSS style with a class of "button".
 <style>
        body{
            background-color: hotpink;
            display: flex;
            align-items: center;
        }

        .button{
            background-color: blueviolet;
            width: 200px;
            border: none;
            font-size: 2rem;
            padding: 0.5rem;
            border-radius: 5px;
            cursor: pointer;
        }
    </style>


  <button id="master">Click me</button>


const buttonEl = document.getElementById('master')
buttonEl.addEventListener('click', addFunction)

 function addFunction(){
     buttonEl.classList.add('button')
  }
After the button is clicked, you'll see the below. Beautiful right?
How to Remove a Class
Still using the same example above, we are going to remove the CSS style, this time around with classList.remove() in JavaScript. You probably already guessed what would happen, right?
Exactly, the button will go back to its default state.
const buttonEl = document.getElementById('master')
buttonEl.addEventListener('click', addFunction)

function addFunction(){
    buttonEl.classList.remove('button')
 }
How to Toggle a Class
Let's say you don't want to remove the CSS style completely. You want a way to toggle between the styled and unstyled button.
The classList.toggle() JavaScript method gives you that ability.
The classList.toggle() method is typically used in most social media platforms like Twitter. It allows you to like a post with a button and unlike it with that same button whenever you want.
So JavaScript checks if our button has the CSS class.
If it has the class and you click the button, it REMOVES it. If it doesn't have the class and you click the button, it ADDS it.
const buttonEl = document.getElementById('master')
buttonEl.addEventListener('click', addFunction)


function addFunction(){
    buttonEl.classList.toggle('button')
 }
Event handling
What are HTML events?
HTML events are "things" that happen to HTML elements like the click of a button, input in a text area, and so on. When an event occurs like the ones above, you can write JavaScript code which we call an event handler that will be executed.
These event handlers are JavaScript functions. So when an event occurs on an element, the handler function is executed.
Event listeners
So far we have been making use of event listeners in basically every example above. This should show how important event listeners are in manipulating the DOM.
To add an event listener to an element or any DOM object, we need a method which is addEventListener(). This method is preferred to the old one where we include the event to be handled in the html markup.
With this the JavaScript is separated from the html markup which makes it cleaner and more readable.
I like the idea of separate JS, separate CSS, and so on, so if you are like me you would like this event listener.
An event listener accepts 3 parameters.
- The first one is the type of event, like "click" and so on.
- The second parameter is the function to be executed.
- The third parameter is a boolean value specifying whether to use event bubbling or event capturing. This parameter is optional.
You can add many event handlers to one element.
You can also add many event handlers of the same type to one element, like two "click" events.
Conclusion
Knowing how to manipulate the DOM with JavaScript is very important. It's not something you can decide not to know.
If you understand the examples/illustrations I've given above, you might be able to build little JS projects. I can not over-emphasize the importance of building projects if you want to be a good developer.