

The React team no longer recommends using create-react-app (CRA) as a bundler to create a new React application. The team and community realized that even though CRA was a jump-starter, it lacked the flexibility needed to configure or manage large and complex applications.
Nowadays, the team recommends using production-grade React frameworks like NextJS, Remix, Gatsby, or Expo for native apps. While frameworks are the preferred choice, the React team also recommend using Vite or Parcel for custom build processes.
This is partly because the CRA package has not been updated for about a year. This may cause some problems where packages already updated to more recent versions cannot be used within an existing application. As a result, you may need to update existing applications by replacing the CRA package with the recommended alternatives — Vite or Parcel.
This article walks you through the steps for migrating a production-based application from CRA to Vite. You will learn the "why" of each step, how to retain Jest for tests, and how to update your browserslist since it doesn't work with vite out of the box.
In the conclusion section, you can find a sample pull request that includes all the changes. At the end of each step, you will find a sample commit text which shows the code change required per step.
Step 1: Install Vite and Plugins
Here are the commands to install the packages we need:
yarn add vite @vitejs/plugin-react vite-tsconfig-paths

OR

npm install vite @vitejs/plugin-react vite-tsconfig-paths
Apart from Vite, we are adding two plugins — @vitejs/plugin-react and vite-tsconfig-paths.
The vitejs/plugin-react plugin enables fast refresh in development, uses automatic JSX runtime, and custom Babel plugins or presets. It enriches your React development experience.
The vite-tsconfig-paths plugin resolves imports for TypeScript's path mapping. For example, you can use components/ComponentName instead of ./../components/ComponentName.
Other Vite plugins
Another plugin you could consider is vite-plugin-svgr, which transforms SVG into React components and uses svgr under the hood. I left it out since we do not have such a use case in the application I’m migrating.
You can also checkout other official Vite plugins here.
Step 2: Create a Vite config file
On running vite in the command terminal, Vite tries to find a vite.config.ts file inside the project's root directory. You can read more on Vite's page for how to further configure this file for intellisense, environment based configurations, async configuration, and env variables usage.
At your application’s root, create a file named vite.config.ts with the following content:
import { defineConfig } from 'vite'
import react from '@vitejs/plugin-react'
import viteTsconfigPaths from 'vite-tsconfig-paths'

export default defineConfig({
    // depending on your application, base can also be "/"
    base: '',
    plugins: [react(), viteTsconfigPaths()],
    server: {
        // this ensures that the browser opens upon server start
        open: true,
        // this sets a default port to 3000
        port: 3000,
    },
})
Step 3: Create a Vite Types File Reference
This step is needed to reference a type declarations file which aids type checks and Intellisense. By default, Vite types are for a NodeJS environment. For client side code, Vite provides the type definitions in vite/client.d.ts.
At your application’s root, create a file named vite-env.d.ts with the following content:
/// <reference types="vite/client" />
Step 4: Move the index.html File
Vite has a root directory which your files are served from. Since index.html is the entry point for Vite's server, the file needs to be in the root directory.
From the public directory, move the index.html file to the root of your project.
Step 5: Update the index.html File
Two updates are necessary here:
Remove %PUBLIC_URL%
Vite automatically resolves URLs inside index.html, so there's no need for %PUBLIC_URL% placeholders. You can do a search and replace inside your index.html file for this. Be sure to remove all occurrences.
Before:
<link rel="icon" type="image/svg+xml" href="%PUBLIC_URL%/favicon.svg" />
After:
<link rel="icon" type="image/svg+xml" href="/favicon.svg" />
Add module script to the bottom of the body tag
Vite treats index.html as source code and part of the module graph. It resolves <script type="module" src="..."> that references your JavaScript source code.
At the bottom of the body tag in index.html file, add the script as shown below:
<body>
    {/* others here */}
    <script type="module" src="/src/index.tsx"></script>
</body>
Step 6: Replace CRA with Vite
You can now remove CRA, add Vite scripts to the package.json file, and update tsconfig.json.
Remove CRA
To remove CRA, run the following command. This will remove react-scripts from our installed packages.
yarn remove react-scripts

OR

npm uninstall react-scripts
After running the command above, delete the react-app-env.d.ts file.
Add Vite scripts to the package.json file
With Vite installed, you can use the vite binary in your scripts. This could mean replacing react-scripts in a few places. Your focus should be on the start and build keys. The preview key is an addition which helps to preview production build locally.
Note that start is vite and not vite start.
{
  "scripts": {
    "start": "vite", // start dev server
    "build": "tsc && vite build", // build for production
    "preview": "vite preview" // locally preview production build
  }
},
Update tsconfig.json
Here, your focus should be on the isolatedModules, lib, target, and types. For more options, here is a sample tsconfig file from Vite.
{
    "compilerOptions": {
        "lib": ["dom", "dom.iterable", "esnext"],
        "target": "ESNext",
        "types": ["vite/client"],
        "isolatedModules": true,
    },
 }
Update process.env.REACT_APP_VARIABLE (optional)
This is necessary if your application uses environment variable. Vite uses import.meta.env.REACT_APP_VARIABLE instead of process.env.REACT_APP_VARIABLE. You can find more details on Vite's env variables and modes here.
Before:
process.env.REACT_APP_VARIABLE
After:
import.meta.env.REACT_APP_VARIABLE
Replace REACT_ with VITE_ (optional)
You only need this if you updated process.env above. Replace your REACT_ environment variables to start with VITE_. This is needed because Vite filters out any env variable not starting with VITE_.
Before:
REACT_APP_API_BASE
After:
VITE_APP_API_BASE
Step 7: Run your Application
yarn start

OR

npm start
Congratulations! You have successfully completed the first step in migrating your application from CRA to Vite. You should see a screen that looks like the image below:
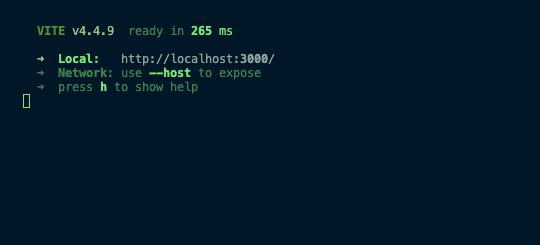
No sample commit. ;)
Possible blockers and their solutions
global is not defined error
If you have this error, define global inside your vite.config.ts file as shown below:
import { defineConfig } from 'vite';
import react from '@vitejs/plugin-react';

export default defineConfig({
  // ...
  define: {
    // here is the main update
    global: 'globalThis',
  },
});
If you use @emotion/react or @emotion/css
You need to inform Vite about this. To do this, install @emotion/babel-plugin.
yarn add @emotion/babel-plugin

OR

npm install @emotion/babel-plugin
Then update your Vite's react plugin in the vite.config.ts as shown below:
import { defineConfig } from 'vite';
import react from '@vitejs/plugin-react';
import viteTsconfigPaths from 'vite-tsconfig-paths';
import svgr from 'vite-plugin-svgr';

export default defineConfig({
  // ...
  plugins: [
    // here is the main update
    react({
      jsxImportSource: '@emotion/react',
      babel: {
        plugins: ['@emotion/babel-plugin'],
      },
    }),
  ],
  // ...
});
Oh no, my unit tests are not working!
At this point, try running your unit tests — yarn test or npm run test. It’s possible that they don’t work. The following steps highlight how you can fix your unit tests.

Your unit tests are not working because CRA uses react-scripts test to run tests, so we want to switch to using jest.
Step 8: Install Jest and TypeScript-related Dependencies
To start with, you need to install jest, ts-jest, and jest-environment-jsdom. jest will be our new binary for running the tests, [ts-jest](https://www.npmjs.com/package/ts-jest) is a transformer with source map support which allows you to run tests in TypeScript projects, and jest-environment-jsdom imitates the browser's behavior during test runs.
yarn add -D jest @types/jest ts-jest jest-environment-jsdom

OR

npm install --save-dev jest @types/jest ts-jest jest-environment-jsdom
Step 9: Update Jest Config
This depends on your current Jest configuration. If it is configured inside package.json, you can update as follows. Here, you focus on preset, testEnvironment, moduleNameMapper, and modulePaths.
preset is set to ts-jest/presets/js-with-ts to allow TypeScript with JavaScript. You can also just set it to ts-jest depending on your application.
moduleNameMapper configures Jest to gracefully handle assets such as stylesheets and images.
  "jest": {
    "preset": "ts-jest/presets/js-with-ts",
    "testEnvironment": "jest-environment-jsdom",
    "moduleNameMapper": {
      "\\.(jpg|jpeg|png|gif|eot|otf|webp|svg|ttf|woff|woff2|mp4|webm|wav|mp3|m4a|aac|oga)$": "<rootDir>/__mocks__/fileMock.js",
      "\\.(css|less)$": "<rootDir>/__mocks__/styleMock.js"
    },
    "modulePaths": [
      // you can update this to match your application setup
      "<rootDir>/src"
    ],
  },
Since we referenced a file in moduleNameMapper above, we need to create the file and it's corresponding files. Step 10 takes care of this. This setup is explained further in Jest's documentation here.
Step 10: Add the __mocks__ Directory to the Root of Your Project
At the root of your project, create a folder named __mocks__.
Inside the created __mocks__ folder, add a file named styleMock.js and add the following content:
module.exports = {}
Inside the created __mocks__ folder, add a file named fileMock.js and add the following content.
module.exports = 'test-file-stub'
Step 11: Update the package.json Scripts
Now that we have jest properly installed, we can replace react-scripts tests with jest. Changes should be as shown below. If you do not have the test:coverage or test:debug keys in your code before, feel free to ignore.
Before:
"scripts": {
    "test": "react-scripts test",
    "test:coverage": "react-scripts test --coverage .",
    "test:debug": "react-scripts test --inspect-brk --runInBand --no-cache"
}
After:
"scripts": {
    "test": "jest",
    // you can add this to keep watch mode on
    "test:watch": "jest --watch",
    "test:coverage": "jest --coverage .",
    "test:debug": "jest --inspect-brk --runInBand --no-cache"
}
Step 12: Run your Tests
yarn test

OR

npm test
If you face a problem related to import.meta, you can resolve this by moving all your environment keys to a single file and mocking this file in your test. You can take a look at this commit to have a better understanding of what I mean.
No sample commit. :)
Ah, it works! But how about the browserslist config?
What is browserslist config?
This is a configuration used to share your target or supported browsers among multiple frontend repositories.
There are various standards depending on the industry. For example, in EdTech, it's possible that all users learning online use similar browsers in terms of brand, version, and screen size. This list of the commonly used browsers can easily become a standard for the EdTech industry.
A sample application of the browserslist config is when you need to be compatible with older browsers. Passing this range to the browserslist config helps your bundler to compile your code using polyfills that are compatible with your target browsers. This way, your page has optimized performance with good user experience.
Mozilla defines a Polyfill as a piece of code (usually JavaScript on the Web) used to provide modern functionality on older browsers that do not natively support it.
Browserslist config is often set in the package.json or .browserslistrc file as shown below.
package.json
{
  "browserslist": [
    "iOS >= 9",
    "Android >= 4.4",
    "last 2 versions",
    "> 0.2%",
    "not dead"
  ]
}
.browserslistrc
iOS >= 9
Android >= 4.4
last 2 versions
> 0.2%
not dead
You can also read more about Browserslist here.
Why is browserslist a Problem with Vite?
Vite uses ESBuild under the hood which expects a different format to the usual browserslist format.
ESBuild expected format: ['es2015', 'safari11', 'ios11']
Browserslist format: ['defaults', 'Safari >= 11', 'ios_saf >= 11']
As a result of this discrepancy, Vite ignores your browserslist configuration which is currently in the package.json or .brwserslistrc file.
To fix this, you can use a package called browserslist-to-esbuild which does this conversion under the hood and pass the config to build.target inside the vite.config.ts file. Steps 13 and 14 take care of this.
Step 13: Install browserslist-to-esbuild
yarn add browserslist-to-esbuild

OR

npm install browserslist-to-esbuild
Step 14: Confiure the browserslist in Vite Config
In the vite.config.ts file, update as shown below.
import { defineConfig } from 'vite'
import browserslistToEsbuild from 'browserslist-to-esbuild'

export default defineConfig({
  ..
  build: {
    // --> ["chrome79", "edge92", "firefox91", "safari13.1"]
    target: browserslistToEsbuild(),
  },
  ..
})
And then, you can pass your configs as shown below,
export default defineConfig({
  ..
  build: {
    // you can also pass your usual browserslist config here
    target: browserslistToEsbuild([
        '>0.2%',
        'not dead',
        'not op_mini all'
    ]),
  },
  ..
})
Conclusion
Voilà! You're done and your application is fully migrated.
Missing any step? Here is a sample pull request that highlights all the changes involved.
You have learned the "why" and "how" of replacing create-react-app with Vite. I hope you are as proud of yourself as I was of myself for what I have learned in the process of the migration.
Alrighty, that it! Happy coding!