
Actuator endpoints help us monitor our services. By using actuators, we can gain a lot of information about what’s going on.
SpringBoot has a number of in-built actuators, and it also allows us to create our own Actuator Endpoint.
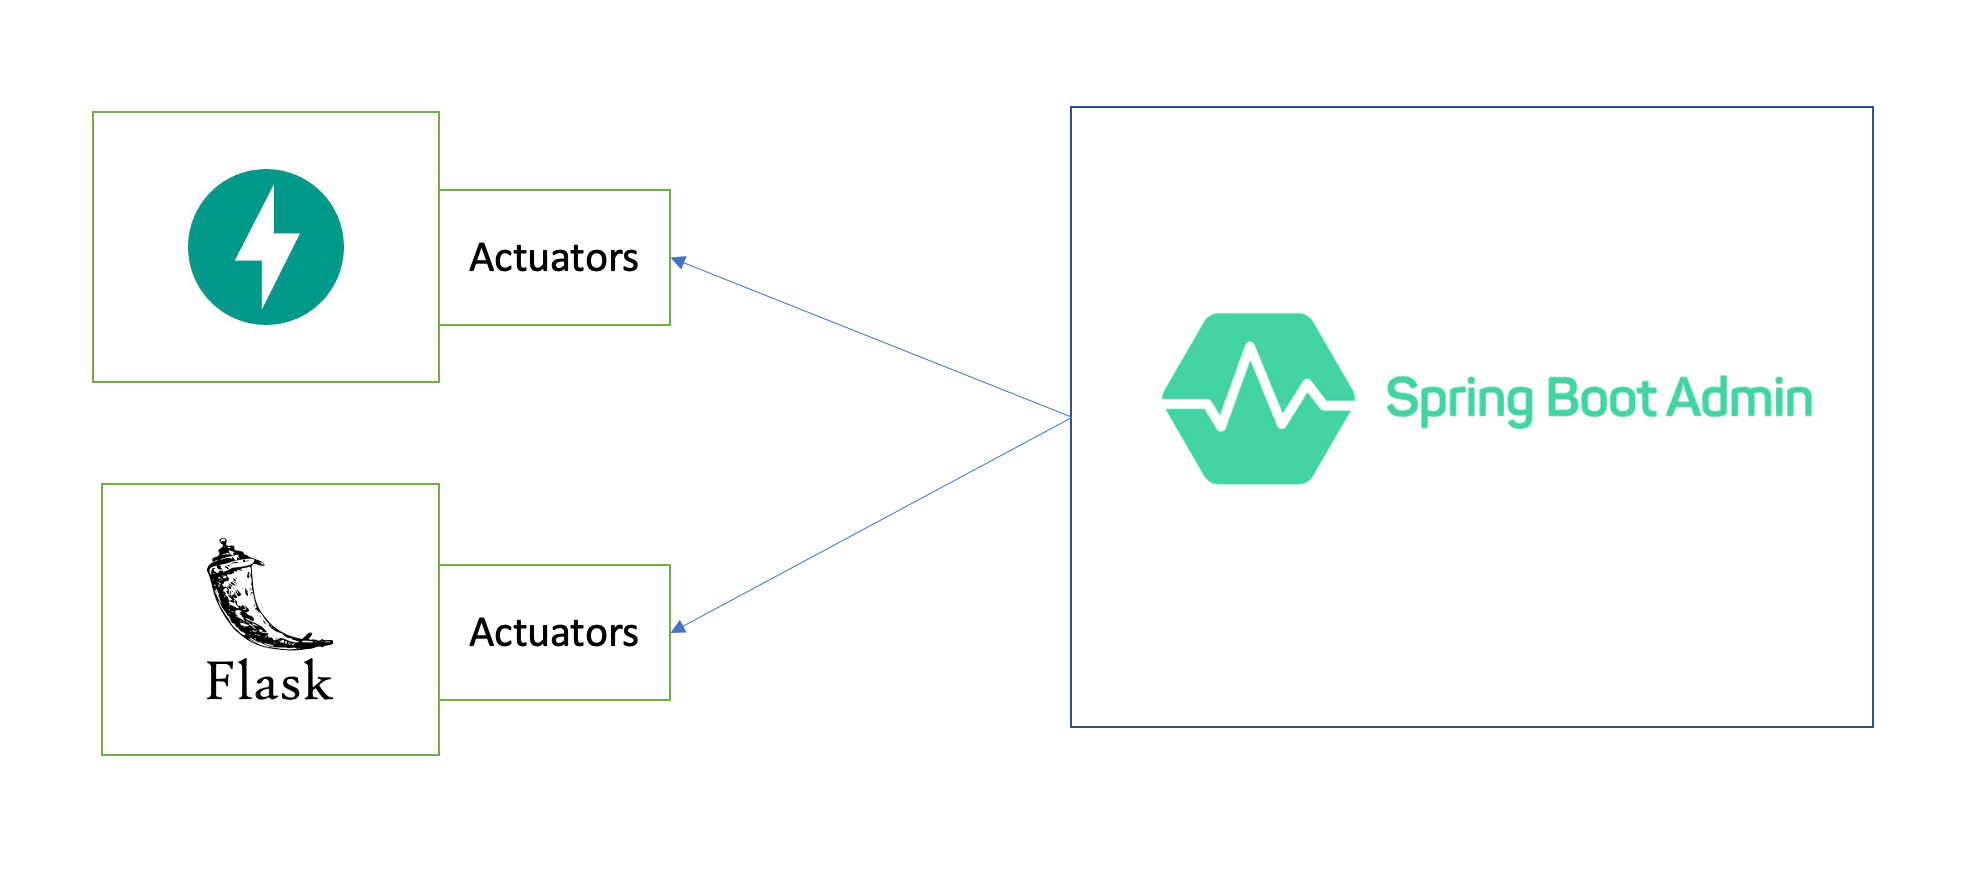
For frameworks written in Python like Flask or FastAPI, we can incorporate actuators by integrating a library called Pyctuator.
In this article I am going to explain how to monitor applications written in FastAPI using the Pyctuator library. I'll also show you how to manage the actuator endpoints using the SpringBootAdmin server.
What are Actuators?
We use actuators for monitoring and managing application usage in production. This usage information gets exposed to us via REST endpoints.
For example, we can access the application logs in production, environment details, and HTTP traces. And if something has gone wrong within the application, we can even access the applications “threaddump” for debugging purposes.
Here are some examples of few important actuator endpoints:

Actuators
What is Pyctuator?
Actuators become popular because of SpringBoot, but you can implement them in frameworks like FastAPI or Flask by integrating a module called Pyctuator.
Pyctuator is a Python Module, which is a partial implementation of SpringBoot Actuators. Pyctuator is managed by SolarEdge.
Some of the actuators supported by Pyctuators are:
/health: This endpoint in Pyctuator has built-in monitoring for Redis and MySQL
/env
/metrics
/logfile
/threaddump
/httptrace
/loggers
What is SpringBootAdmin?
Imagine a service having all these actuators for checking metrics, httptrace, threaddump and so on. It would be pretty tedious to invoke each one of them individually to check what’s going on within the service. And if we have many services and each one of them has its own actuator endpoints, this makes monitoring even more difficult.
That’s where you can use SpringBootAdmin to manage and monitor applications.
In a nutshell, SpringBootAdmin provides a nice dashboard for all the actuator endpoints in one place.

Admin Dashboard
Use-Case for Pyctuator
The use-case is straightforward: we are going to develop a RESTful service using FastAPI framework and configure the actuators in the service using the Pyctuator module.
The service has 3 endpoints as shown in the API-Docs (Swagger) below

API-Docs
GET /users: Return all the users that exists in the system.
POST /users: Create user
GET /users/{id}: Return a user with a given id
You can find the code here.
In the User-Service we are going to enable the actuators using Pyctuator and monitor them using SpringBootAdmin dashboard. We are also going to explore how we can enhance the /health actuator for monitoring Redis.
For configuring the Actuators, first we need to install “pyctuator”. You can do that using the command “pip install pyctuator”.
After installation, simply instantiating the Pyctuator object is the entry point for seeing in-built actuators within a web-framework.

Pyctuator Constructor
Before instantiating Pyctuator, if you access the /pyctuator endpoint you will get the “Not Found” message:

Without Pyctuator Configuration
After instantiation, on accessing the /pyctuator endpoint you will see all the actuators enabled by default. This is because we have defined "pyactuator_endpoint_url" within Pyctuator.

After Pyctuator Configuration
I strongly recommend going through the Pyctuator object as it explains what the mandatory and optional arguments are that we need to provide.

Understanding Constructor parameters
The mandatory parameters are:
app – instance of FastAPI or Flask
the application name – displayed in the info section in SpringBootAdmin
“pyctuator_endpoint_url” – what we have seen which returns all the actuator endpoints
“registration_url” – you will understand this one shortly.
How to Enhance the /health Endpoint
You can enhance the /health endpoint in Pyctuator to monitor Redis or MySQL databases. Say you are using Redis in your application – then we need to use RedisHealthProvider and pass the redis instance to it.

Redis Health
How to Start the SpringBootAdmin Server
To run the SpringBootAdmin server on local, we have two options: first, we can do it by creating SpringBootAdmin manually by going to start.spring.io and adding libraries.
Spring Web & Spring Boot Admin (Server):

Creating SpringBootAdmin
The second option is to run a Docker image:
docker run --rm --name spring-boot-admin -p 8080:8080 michayaak/spring-boot-admin:2.2.3-1
Once the admin server is up, we need to provide the “registration_url” to the Pyctuator Constructor as discussed earlier.

URL registration in SpringBootAdmin
The Admin Server is running on localhost:8080 and this should register our application to SpringBootAdmin. We can access all the actuator endpoints in one place:

Dashboard

All Configured Actuator Endpoints
I executed the /users endpoint few times and now HTTP Traces on the Admin side showcases all the Request-Response exchange details.

HTTP Traces
Wrapping Up
Actuators are extremely helpful in monitoring and debugging applications in production. By accessing endpoints we can get details on thread dumps, heap dumps, HTTP Traces and so on.
Pyctuator simplifies having actuators in Python APIs to a great extent. By simply importing the library and defining an object, all the actuators are ready for us within our application.