
By Satyam Tripathi
Amazon is the most popular e-commerce website for web scrapers, with billions of product pages being scraped every month.
It is also home to a vast database of product reviews, which can be very useful for market research and competitor monitoring.
You can extract relevant data from the Amazon website and save it in a spreadsheet or JSON format. And you can even automate the process to update the data regularly.
Scraping Amazon product reviews is not always straightforward, especially when a login is required. In this guide, you'll learn how to scrape Amazon product reviews behind a login. You’ll learn the process of logging in, parsing review data, and exporting reviews to CSV.
Important Disclaimer: This tutorial is for educational purposes only. Scraping data from behind logins on websites may violate their terms and conditions (T&Cs). It's crucial to always check the T&Cs of any website before scraping data.
Without further ado, let's get started.
Prerequisites and Project Setup
We’ll use the Node.js Puppeteer library to scrape Amazon reviews. Make sure Node.js is installed on your system. If it is not, go to the official Node.js website and install it.
After Node.js is installed, install Puppeteer. Puppeteer is a Node.js library that provides a high-level, user-friendly API for automating tasks and interacting with dynamic web pages.
Now, let's install and configure Puppeteer.
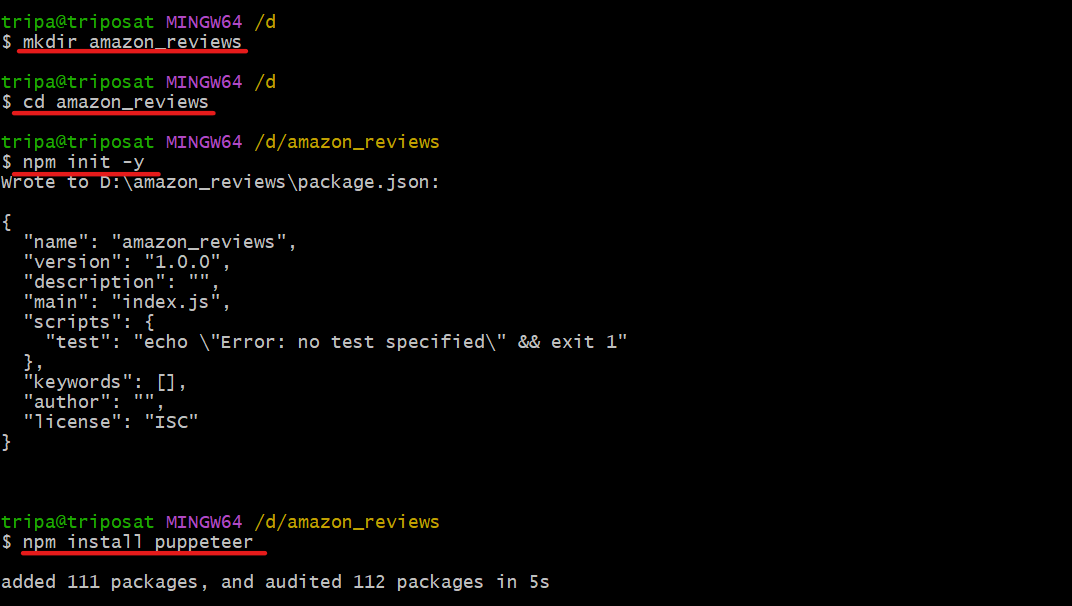
Open a terminal and create a new folder with any name. (In my case, it is _amazonreviews).
mkdir amazon_reviews
Change your current directory to the folder created above.
cd amazon_reviews
Cool, you're now in the correct directory. Execute the following command to initialize the package.json file:
npm init -y
Finally, install Puppeteer using the following command:
npm install puppeteer
This is what the process looks like:
Now, open the folder in any code editor, and create a new JavaScript file (index.js). Make sure that the hierarchy looks like this:
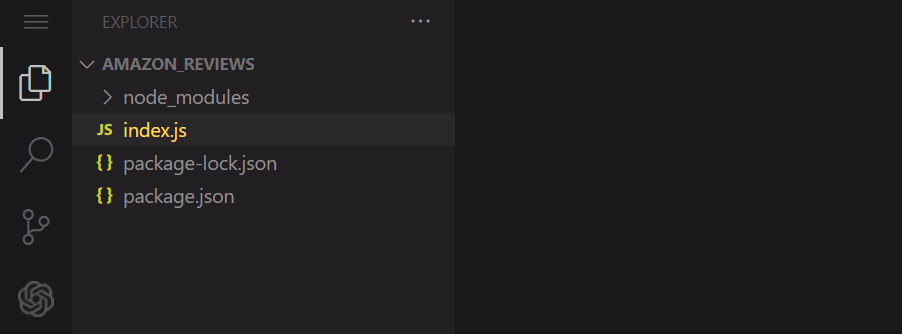 _Hierarchy showing
 node_modules, index.js, package-lock.json, and package.json_
All set up successfully. We’re now ready to code the scraper.
Note: Ensure that you have an account on Amazon so you can progress through the rest of this tutorial.
Step 1: Get Access to the Public Page
You're going to scrape the reviews of the product shown below. You’ll extract the author's name, review title, and date.
Here's the product URL: https://www.amazon.com/ENHANCE-Headphone-Customizable-Lighting-Flexible/dp/B07DR59JLP/
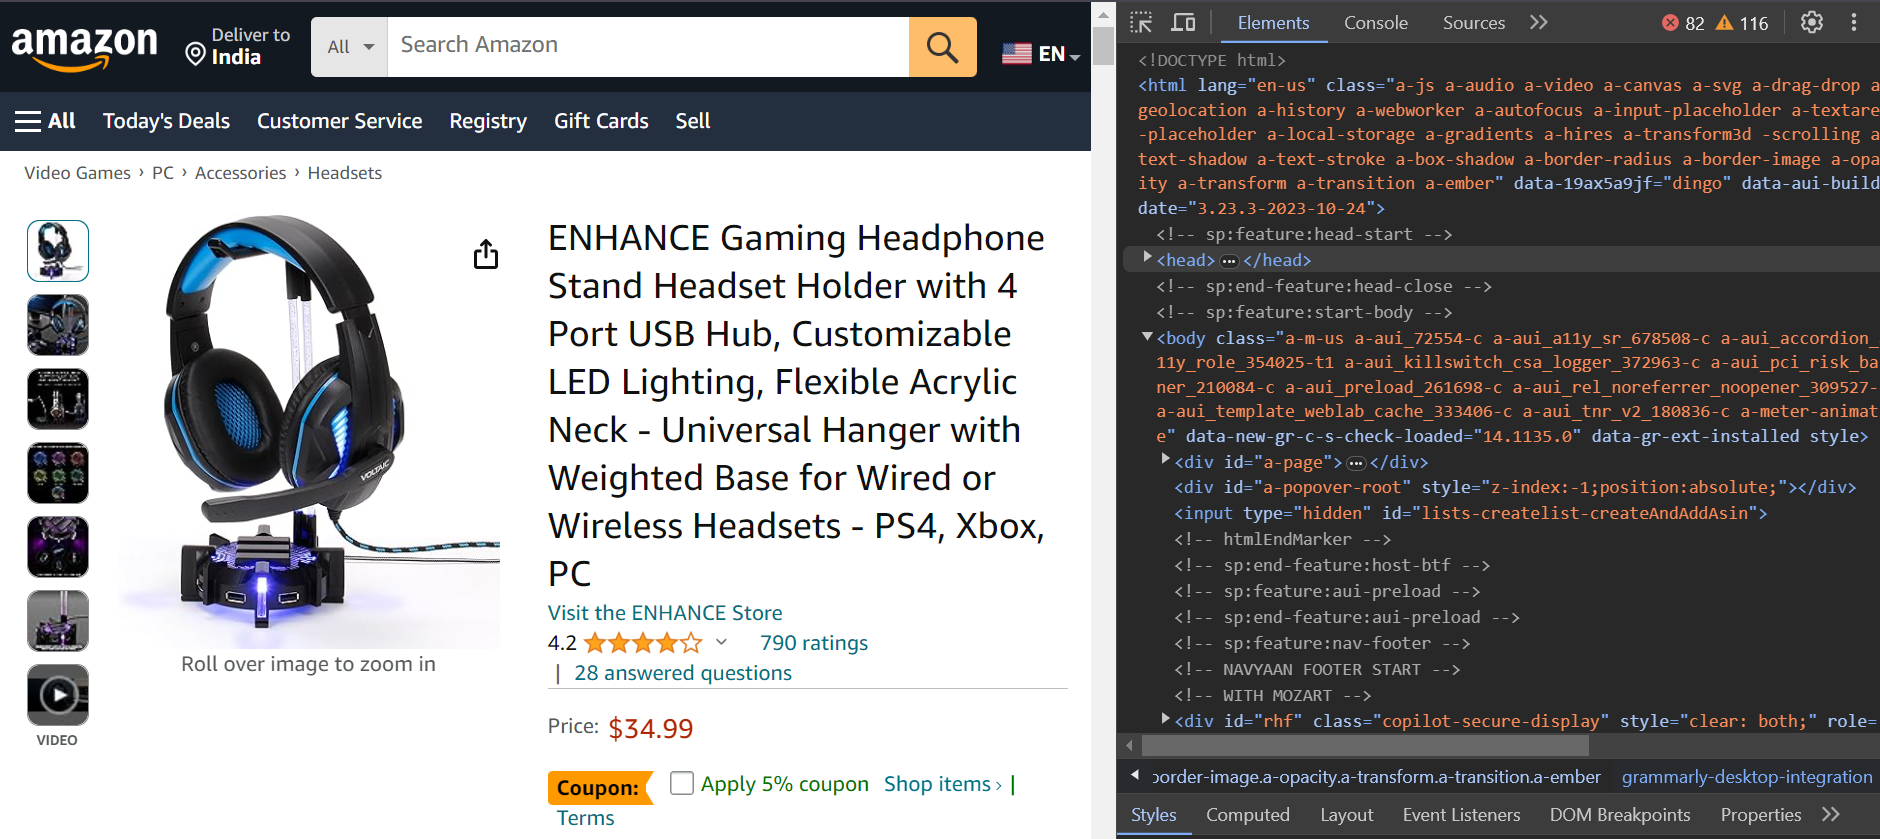 The product we're using in the example - headphones
First, you’ll log in to Amazon, and then redirect to the product URL to scrape the reviews.
Step 2: Scrape Behind the Login
Amazon's multi-stage login process requires users to enter their username or email, click a Continue button to enter their password, and then finally submit it. Both the username and password fields are typically on different pages.
To enter the email ID, use the selector input[name=email].
 HTML of the sign-in field
Now, click on the Continue button using the selector input[id=continue].
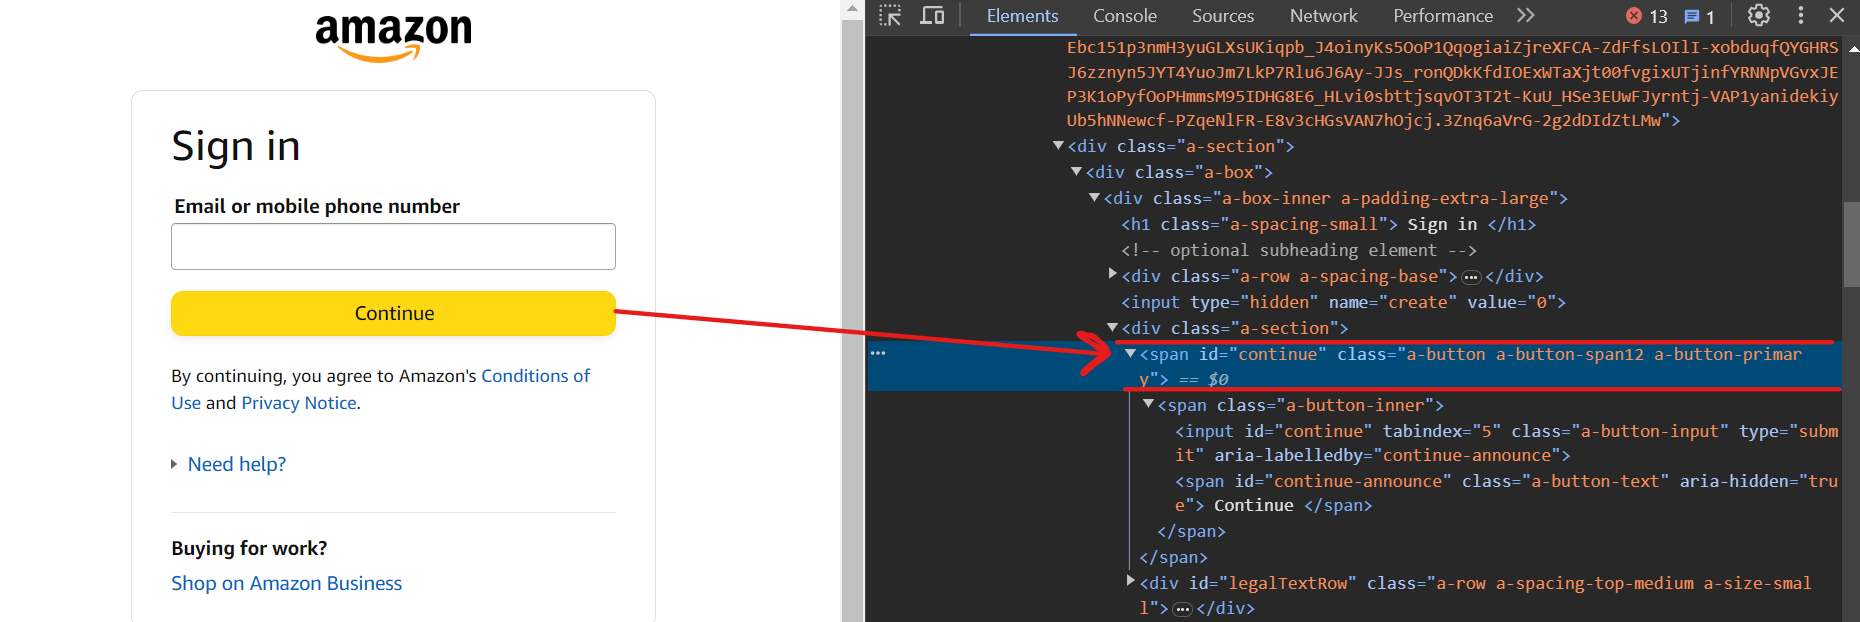 HTML of the continue button
Now you should be on the next page. To enter the password, use the selector input[name=password].
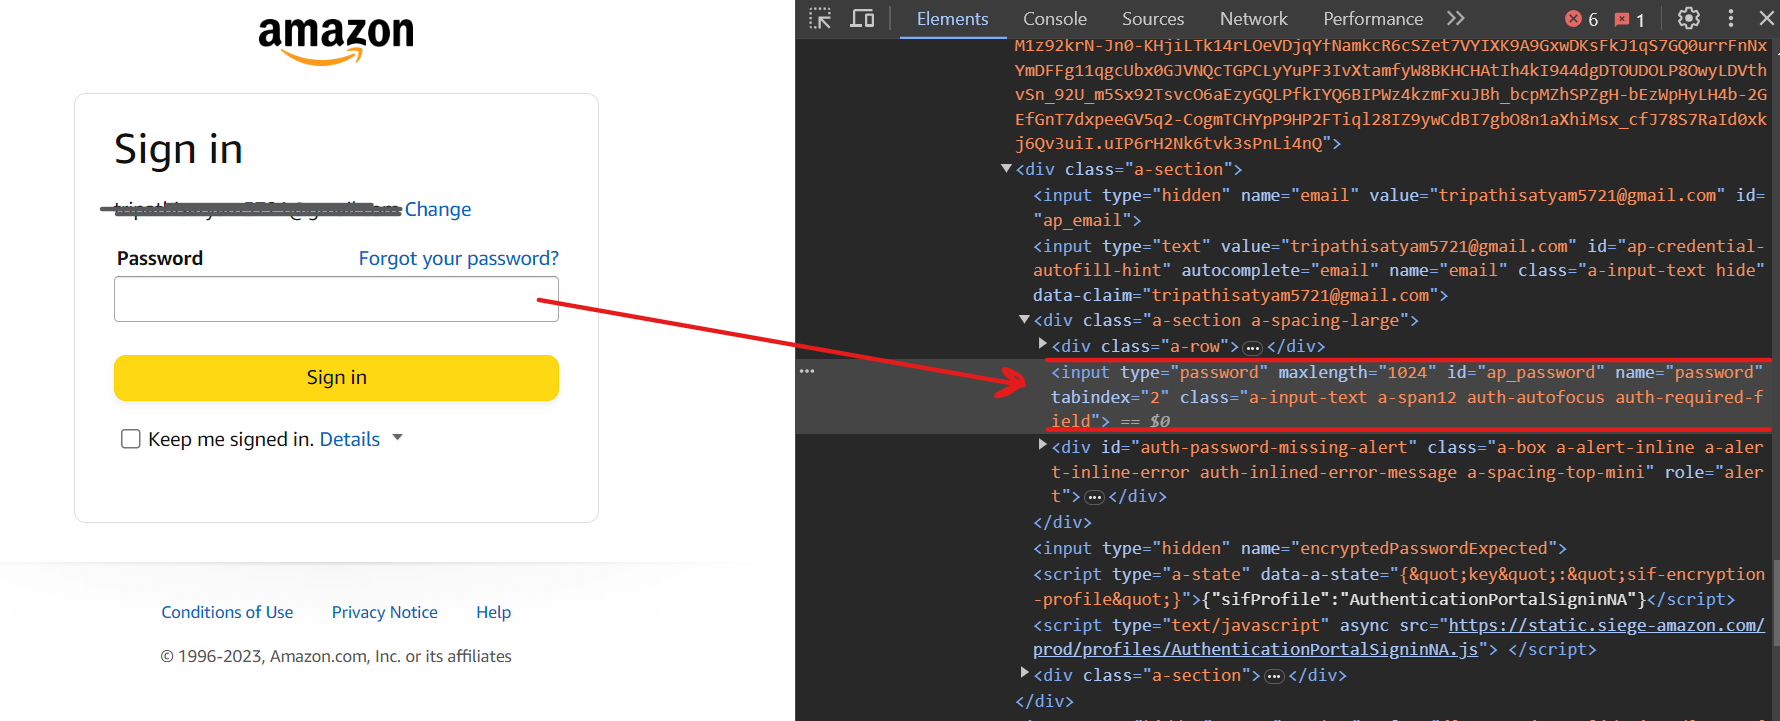 HTML of the password field
Finally, click on the Sign In button using the selector input[id=signInSubmit].
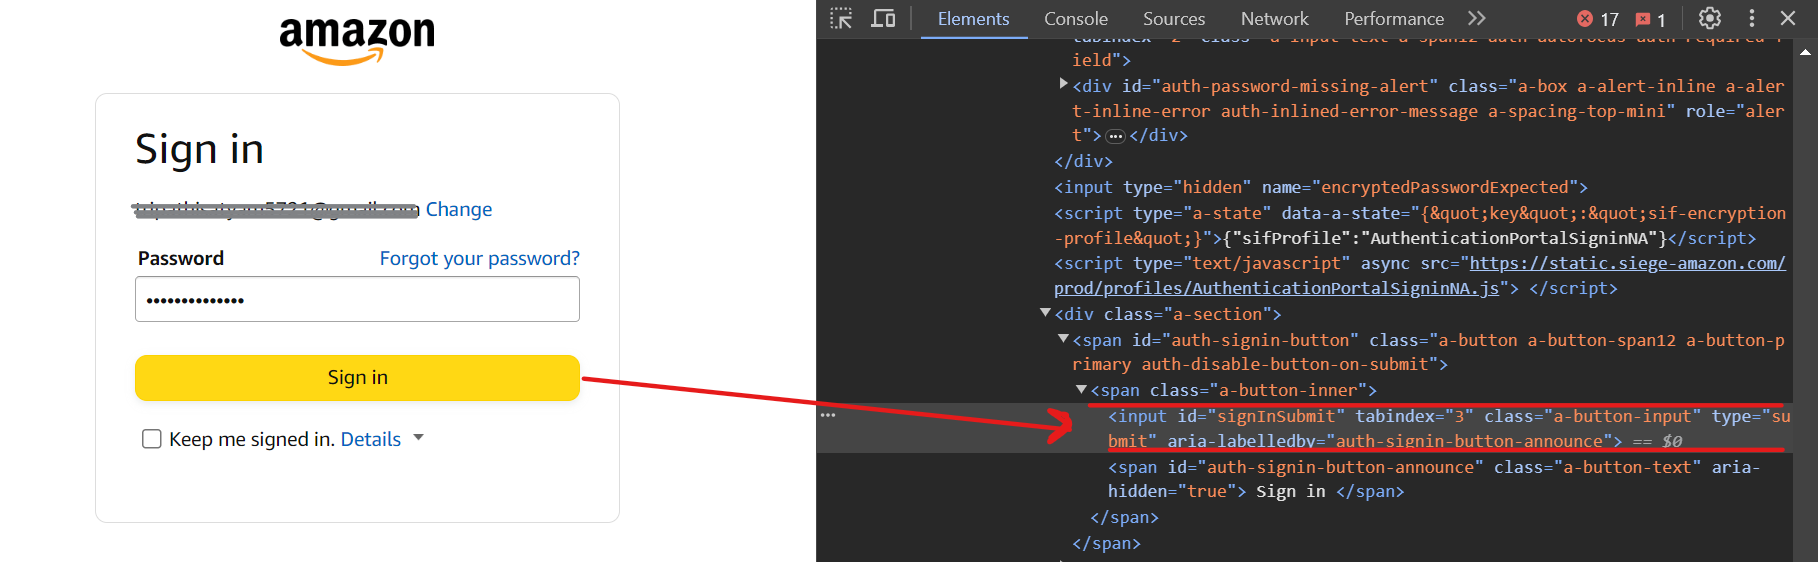 HTML of the sign-in button
Here’s the code for the login process:
const selectors = {
  emailid: 'input[name=email]',
  password: 'input[name=password]',
  continue: 'input[id=continue]',
  singin: 'input[id=signInSubmit]',
};


    await page.goto(signinURL);
    await page.waitForSelector(selectors.emailid);
    await page.type(selectors.emailid, "satyam@gmail.com", { delay: 100 });
    await page.click(selectors.continue);
    await page.waitForSelector(selectors.password);
    await page.type(selectors.password, "mypassword", { delay: 100 });
    await page.click(selectors.singin);
    await page.waitForNavigation();
We're following the same steps as discussed above. First, go to the sign-in URL, enter the email ID, and click on the Continue button. Then enter the password, click on the Sign In button, and wait for a moment for the sign-in process to complete.
After the sign-in process is completed, you’ll be redirected to the product page to scrape the reviews.
 Product page
Step 3: Parse the Review Data
You've successfully logged in and are now on the product page that you want to scrape. Let's now parse the review data.
On the page, you'll find various reviews. These reviews are contained within a parent div with the ID cm-cr-dp-review-list, which holds all the reviews on the current page. If you want to access more reviews, you'll need to navigate to the next page using the pagination process.
This parent div has multiple child divs, and each child div holds one review. To extract the reviews, you can use the selector #cm-cr-dp-review-list div.review.
const selectors = {
  allReviews: '#cm-cr-dp-review-list div.review',
  authorName: 'div[data-hook="genome-widget"] span.a-profile-name',
  reviewTitle: '[data-hook=review-title]>span:not([class])',
  reviewDate: 'span[data-hook=review-date]',
};
This selector shows that you first go to the element with the ID cm-cr-dp-review-list, then search for all div elements with the data-hook review.
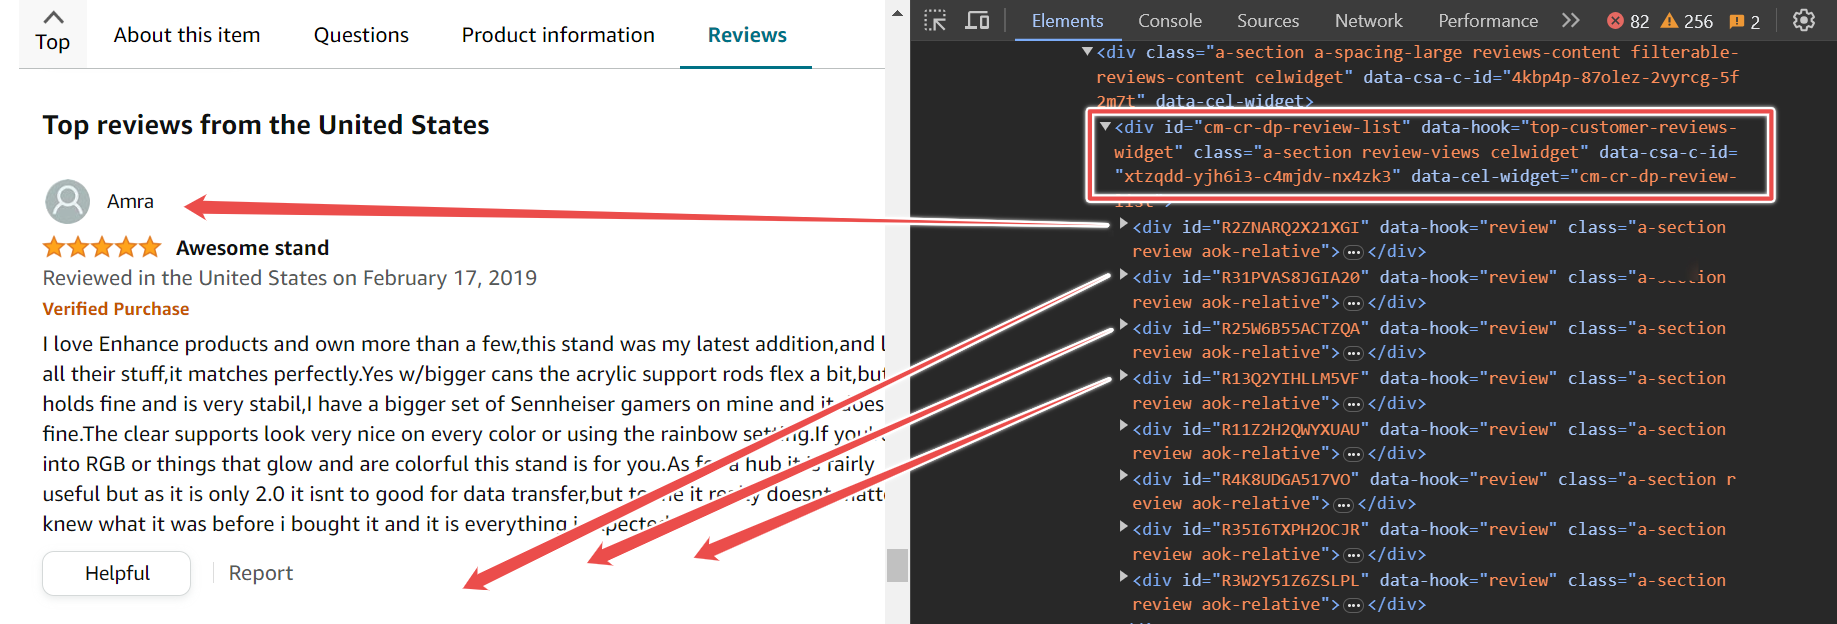 Review data with Author name, Review Title, Description, etc.
The following code snippet shows that you should first go to the product URL, wait for the selector to load, and then scrape all the reviews and store them in the reviewElements variable.
await page.goto(productURL);
await page.waitForSelector(selectors.allReviews);
const reviewElements = await page.$$(selectors.allReviews);
Now, let's extract the author's name, review title, and date.
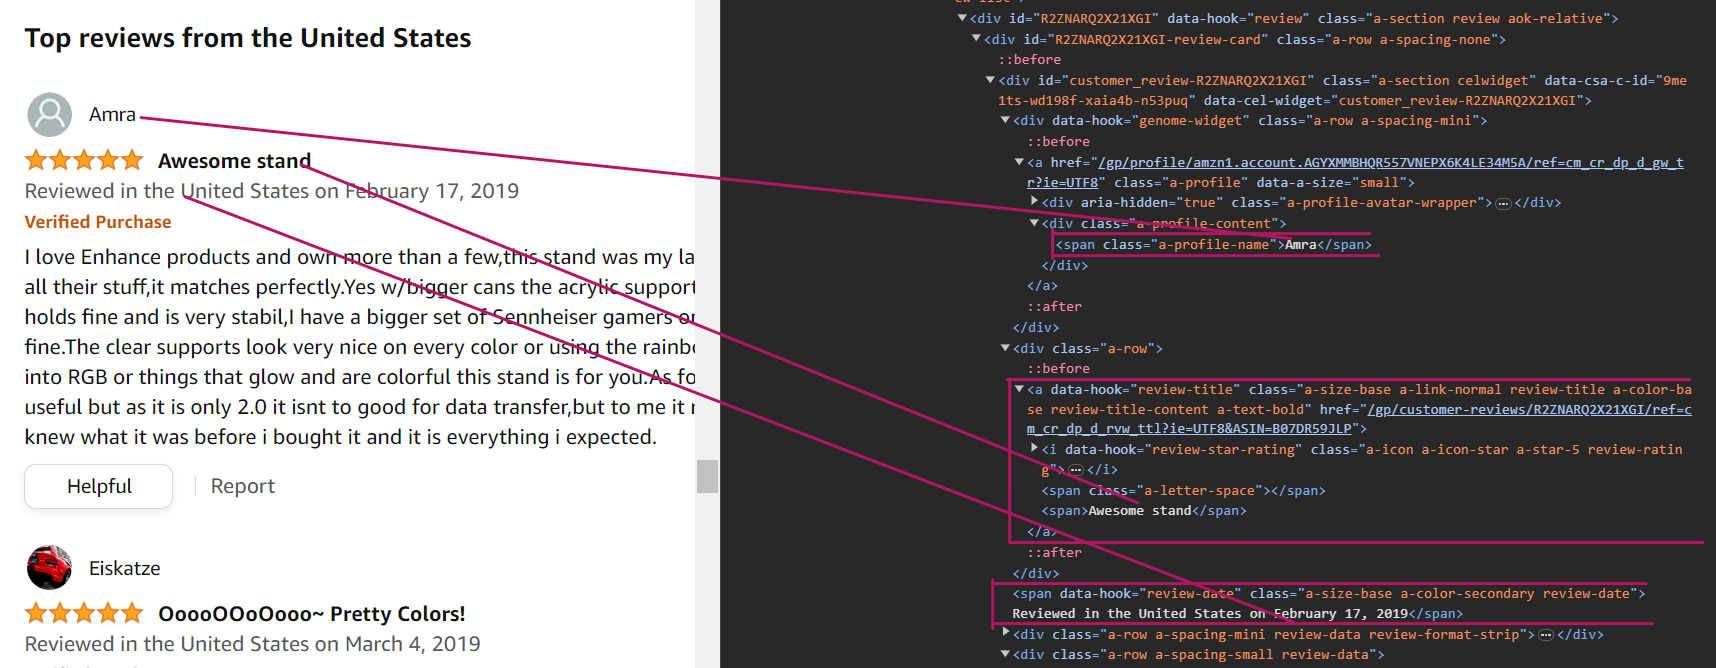 Targetting Author name, Review Title, and Date
To parse the author name, you can use the selector div[data-hook="genome-widget"] span.a-profile-name. This selector tells us to first search for the div element with the data-hook attribute set to genome-widget, because the names are inside this div element. Then, search for the span element with the class name a-profile-name. This is the element that contains the author's name.
const author = await reviewElement.$eval(selectors.authorName, (element) => element.textContent);
To parse the review title, you can use the CSS selector [data-hook="review-title"] > span:not([class]). This selector tells us to search for the span element that is a direct child of the [data-hook="review-title"] element and that does not have a class attribute.
const title = await reviewElement.$eval(selectors.reviewTitle, (element) => element.textContent);
To parse the date, you can use the CSS selector span[data-hook="review-date"]. This selector tells us to search for the span element that has the data-hook attribute set to review-date. This is the element that contains the review date.
const rawReviewDate = await reviewElement.$eval(selectors.reviewDate, (element) => element.textContent);
Note that you’ll get the entire text, including the location, instead of just the full date. Therefore, you must use a regular expression pattern to extract the date from the text.
After that, combine all of the data into the reviewData and then push it to the final list reviewsData.
const datePattern = /(\w+\s\d{1,2},\s\d{4})/;
      const match = rawReviewDate.match(datePattern);
      const reviewDate = match ? match[0].replace(',', '') : "Date not found";

      const reviewData = {
        author,
        title,
        reviewDate,
      };

      reviewsData.push(reviewData);
    }
The above process will run until it has parsed all of the reviews on the current page. Here’s the code snippet to parse the data:
for (const reviewElement of reviewElements) {
      const author = await reviewElement.$eval(selectors.authorName, (element) => element.textContent);
      const title = await reviewElement.$eval(selectors.reviewTitle, (element) => element.textContent);
      const rawReviewDate = await reviewElement.$eval(selectors.reviewDate, (element) => element.textContent);

      const datePattern = /(\w+\s\d{1,2},\s\d{4})/;
      const match = rawReviewDate.match(datePattern);
      const reviewDate = match ? match[0].replace(',', '') : "Date not found";

      const reviewData = {
        author,
        title,
        reviewDate,
      };

      reviewsData.push(reviewData);
    }
Great! You’ve successfully parsed the relevant data, which is now in JSON format, as shown below:
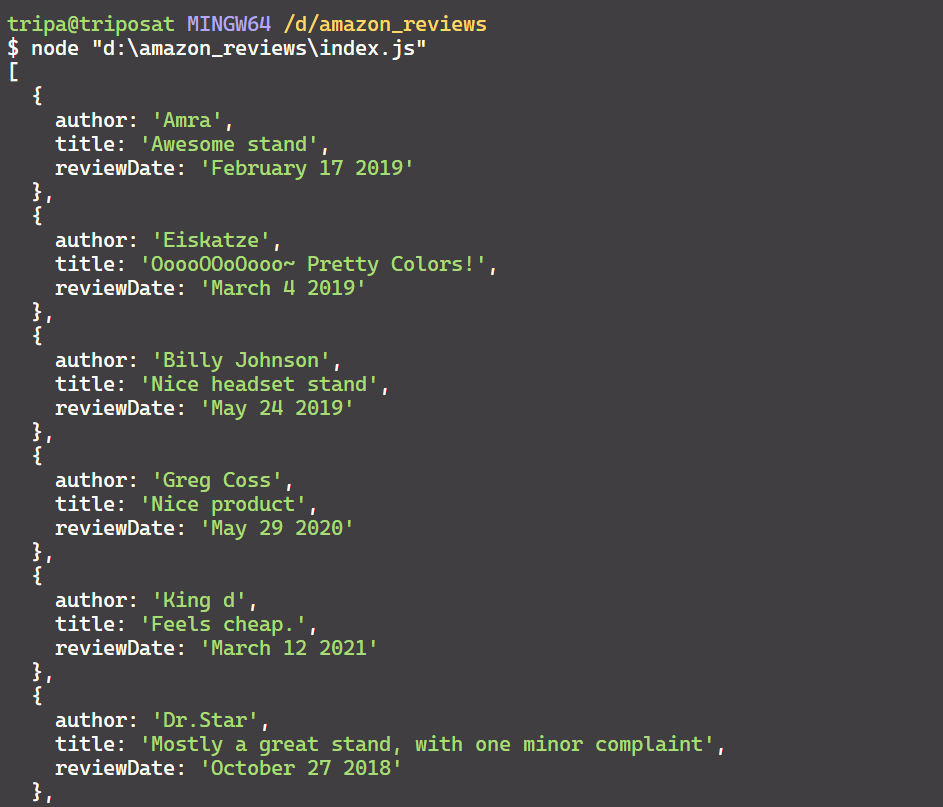 Scraped the data in JSON format
Step 4: Export Reviews to a CSV
You've parsed the reviews in JSON format, which is a bit human-readable. You can convert this data to CSV format to make it more readable and easier for other purposes.
There are many ways to convert JSON data to CSV, but we'll use a simple and effective approach. Here is a simple code snippet to convert JSON to CSV:
let csvContent = "Author,Title,Date\n
for (const review of reviewsData) {
      const { author, title, reviewDate } = review;
      csvContent += `${author},"${title}",${reviewDate}\n`;
    }

const csvFileName = "amazon_reviews.csv";
await fs.writeFileSync(csvFileName, csvContent, "utf8");
Here’s the output of the CSV file.
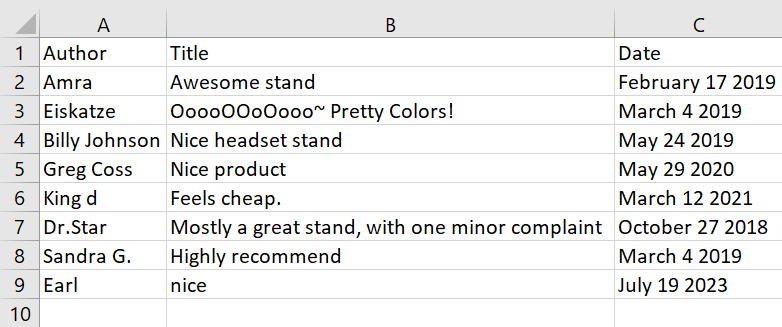 Converted JSON data into CSV format
And there you have it!
You can find the full Code uploaded on GitHub here.
Conclusion
In this guide, you learned how to scrape Amazon product reviews behind a login using Puppeteer. You learned how to log in, parse relevant data, and save it to a CSV file.
To practice more, you can extract all the reviews of all the pages using pagination.