

Using just a few keystrokes, it's easy to capture part or all of your screen on a Mac.
Screenshots are useful in many cases, like when you're writing a blog post and you want to use images that will drive home the points you are making.
This guide will show you how to do just that using a couple of simple and fast keyboard shortcuts.
At the end, I'll share a handy feature that will give you more options when you want to capture something on your computer screen.
Let's get started!
How to take a screenshot on a Mac
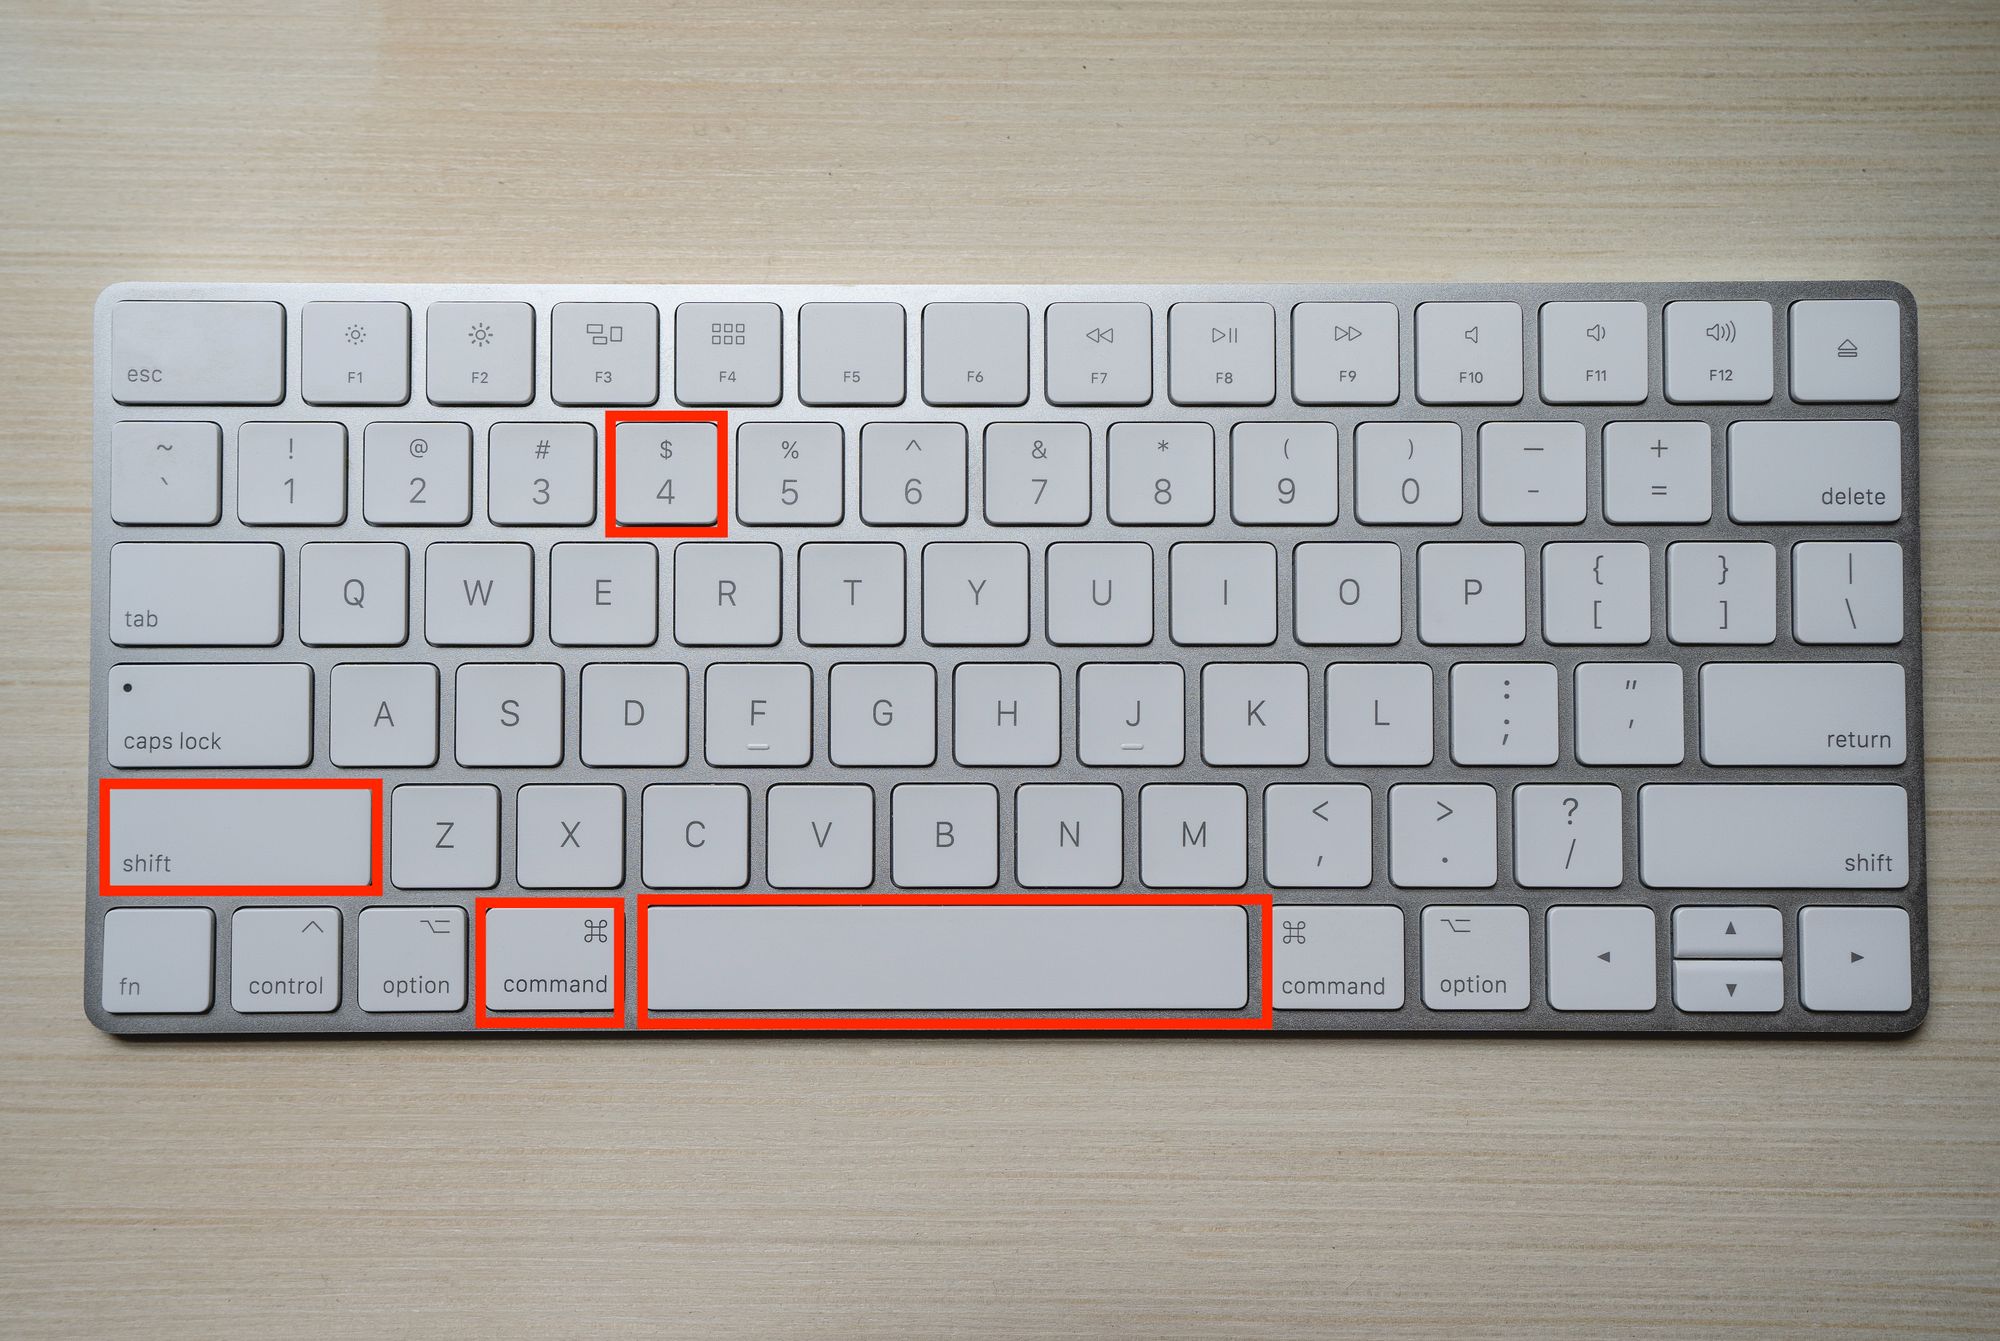
To take a screenshot on your Mac, press and hold down at the same time the following keys: Command Shift 3
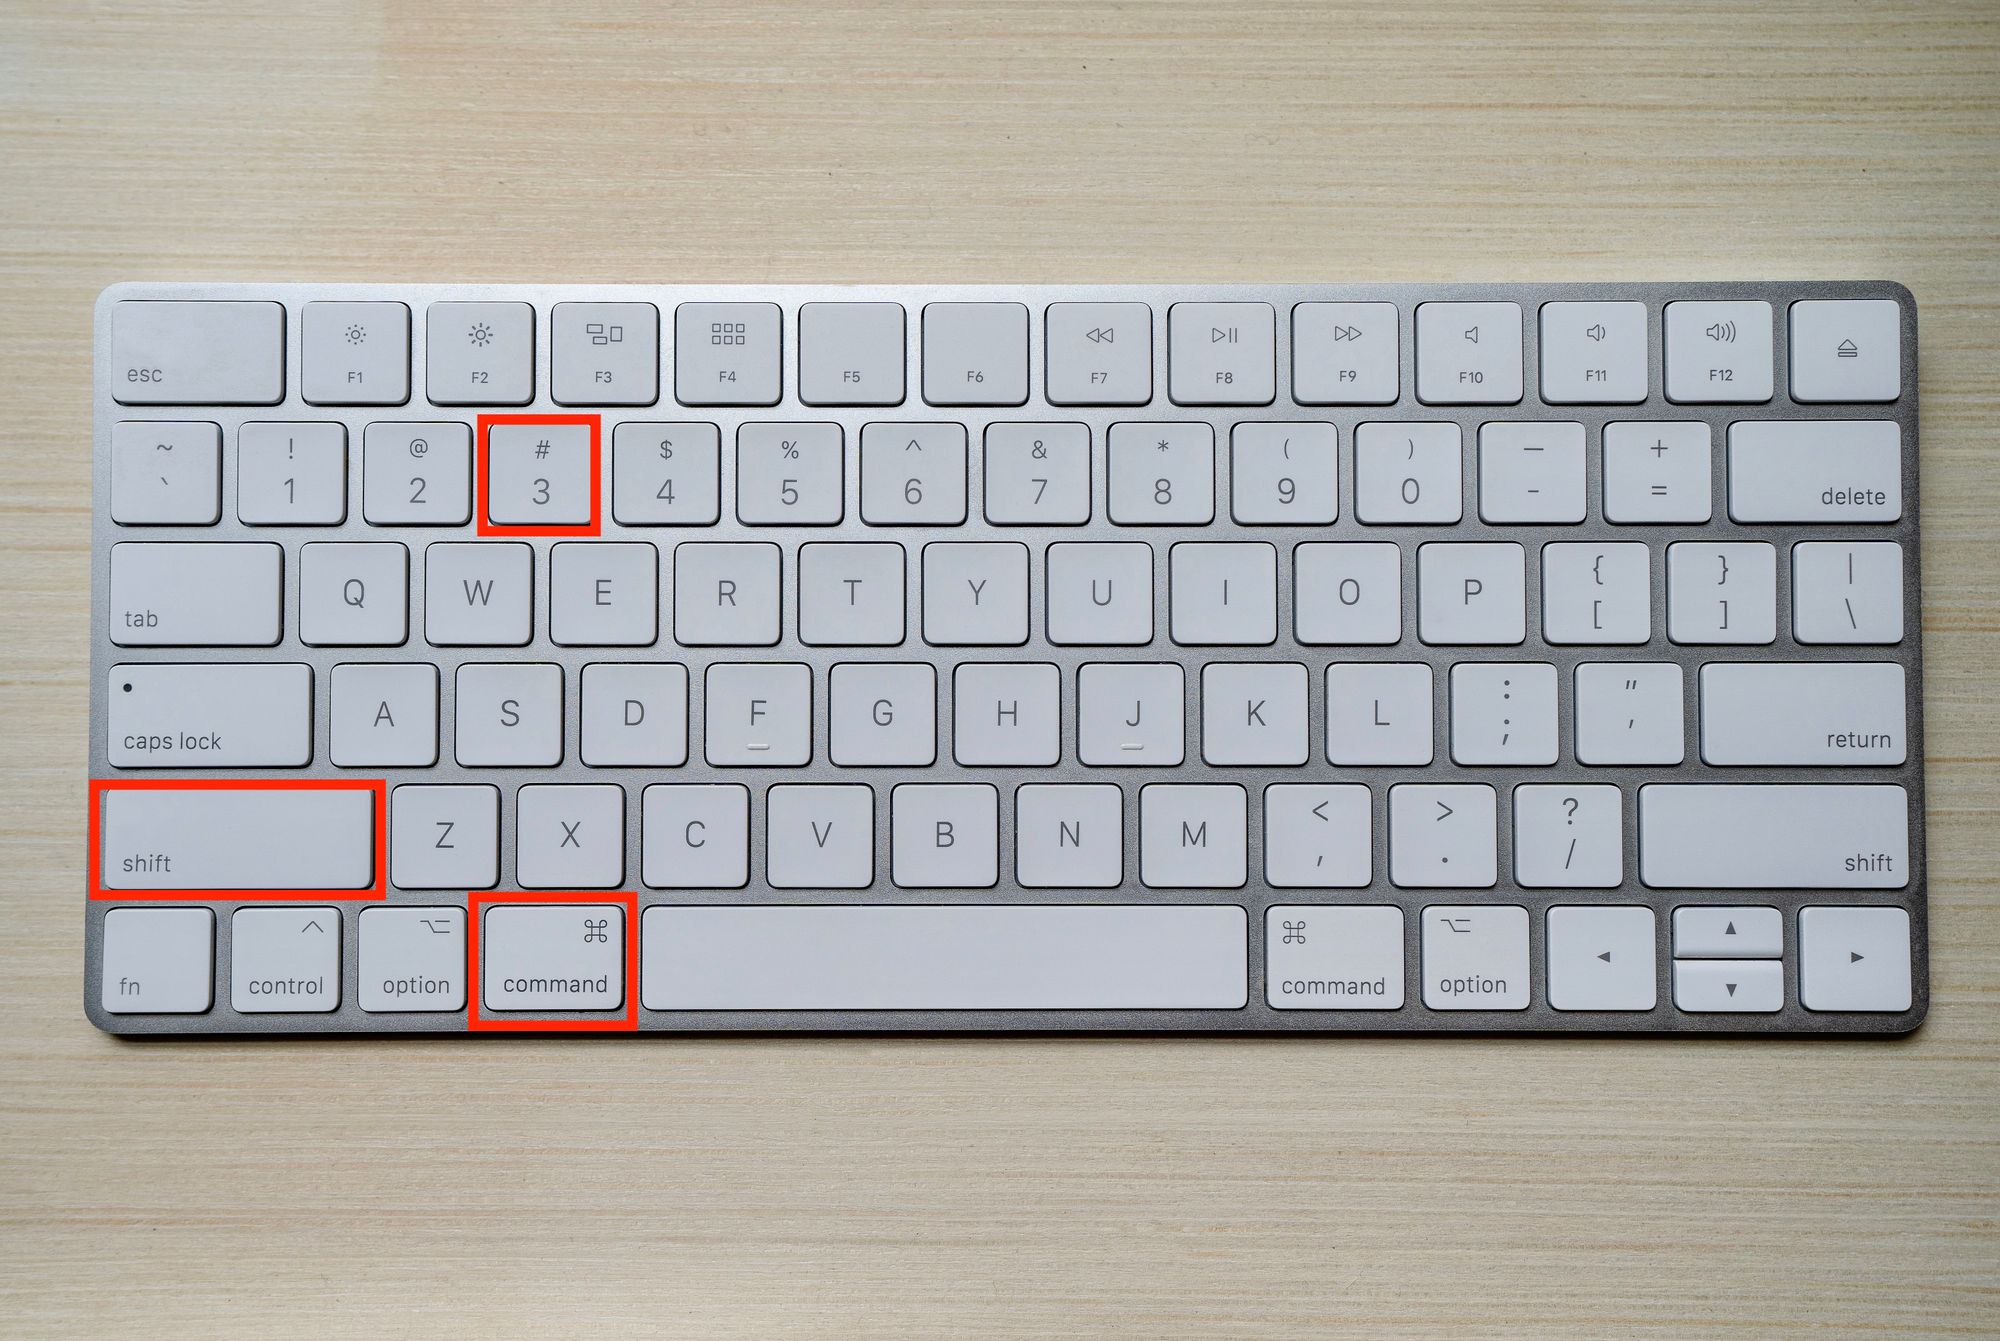
This will take a photo of your entire screen.
You'll see a thumbnail pop up at the bottom right corner of your screen. This is the case for every type of screenshot you can take on a Mac – you'll always be able to see a preview of it.
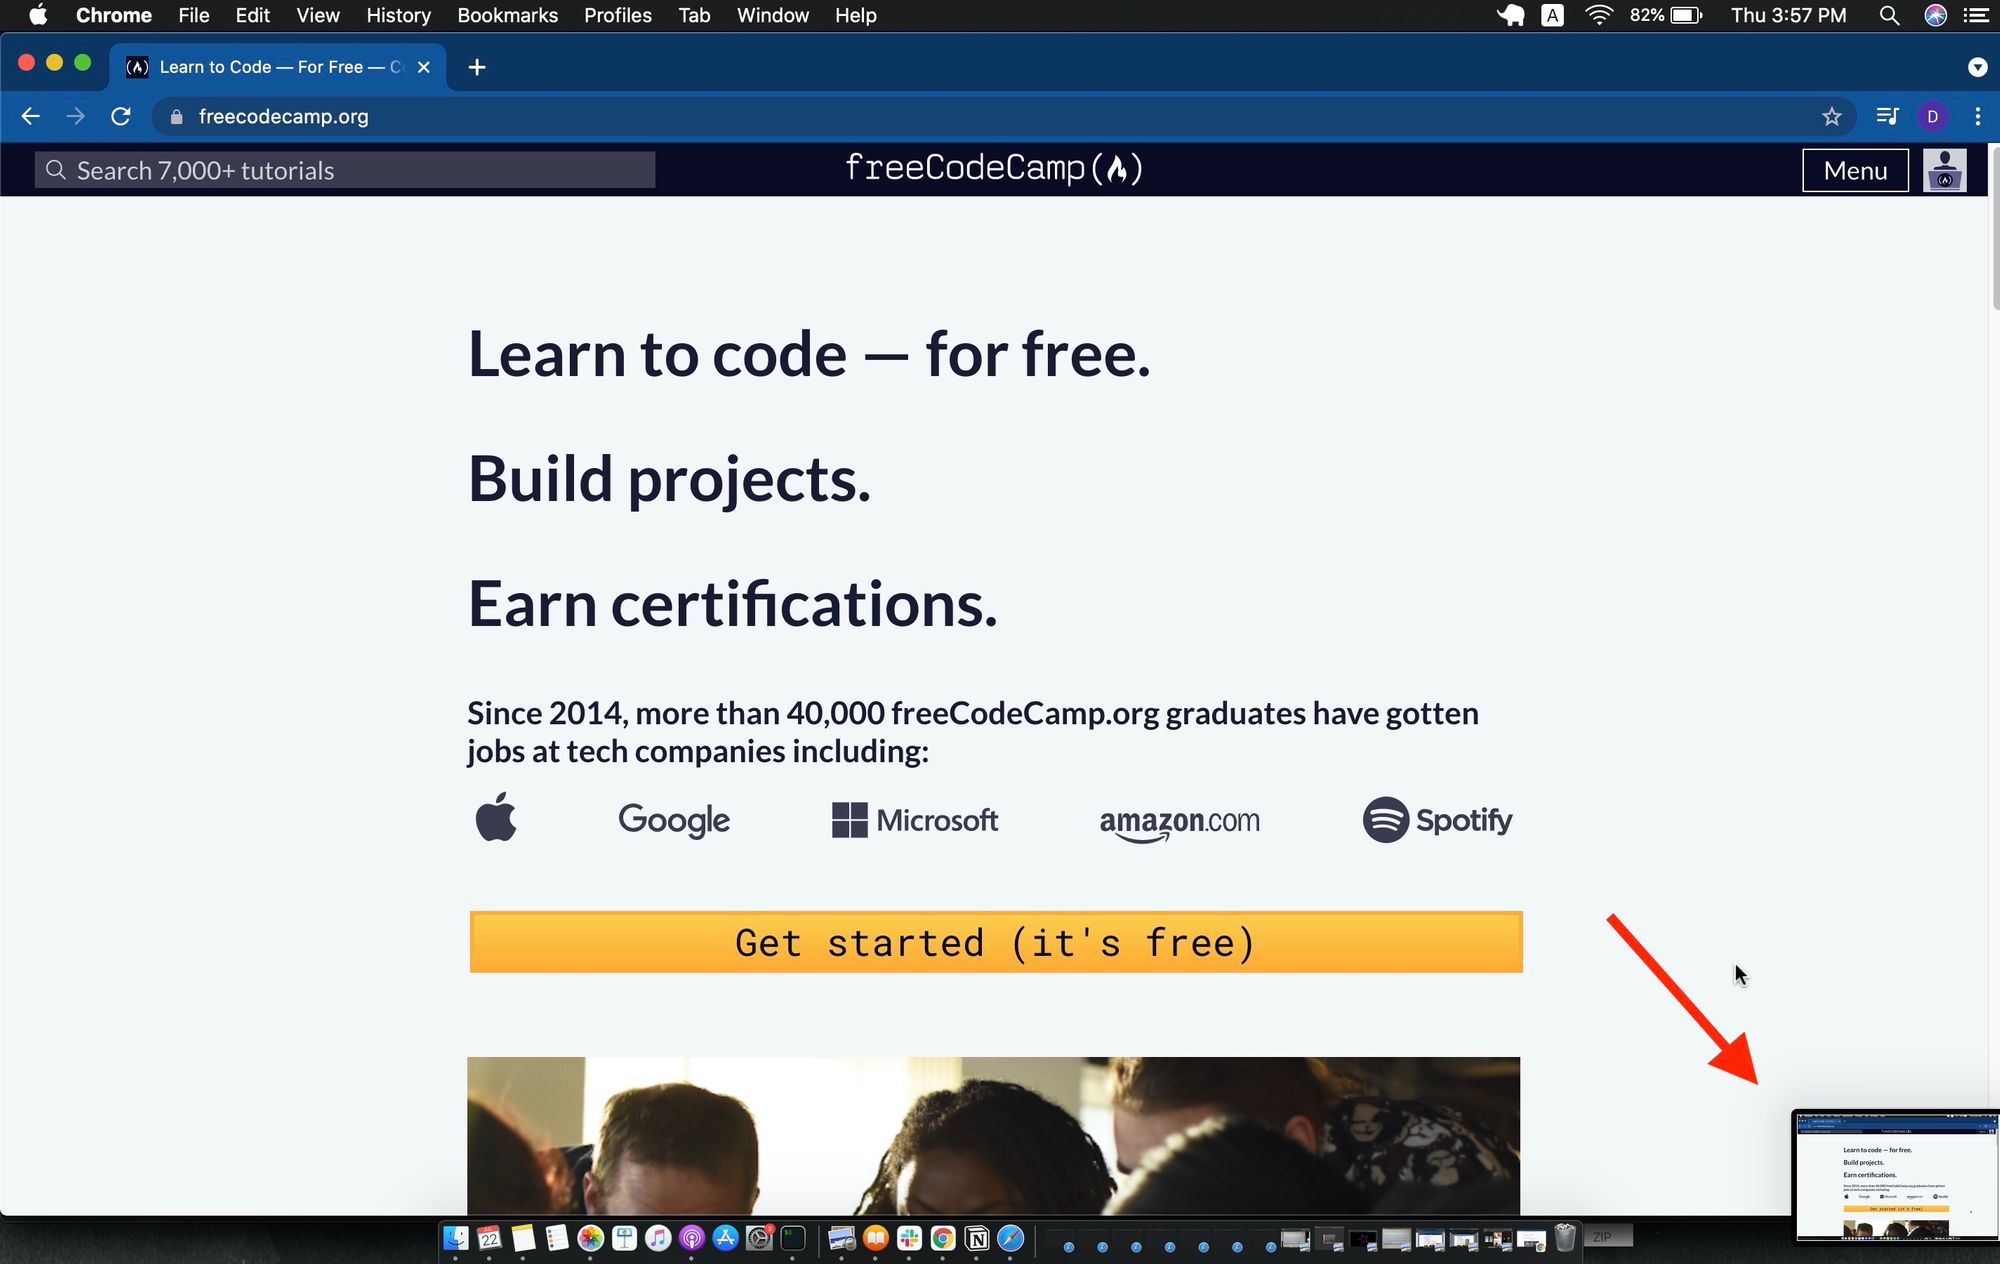
You can click on that to edit your screenshot.
By default all your screenshots get saved automatically to your Desktop folder, with the name 'Screenshot <date> at <time>.jpeg".
How to take a screenshot of part of your screen on Mac
If you want to take a photo of a specific part of your screen, hold and press down at the same time the following keys: Command Shift 4.
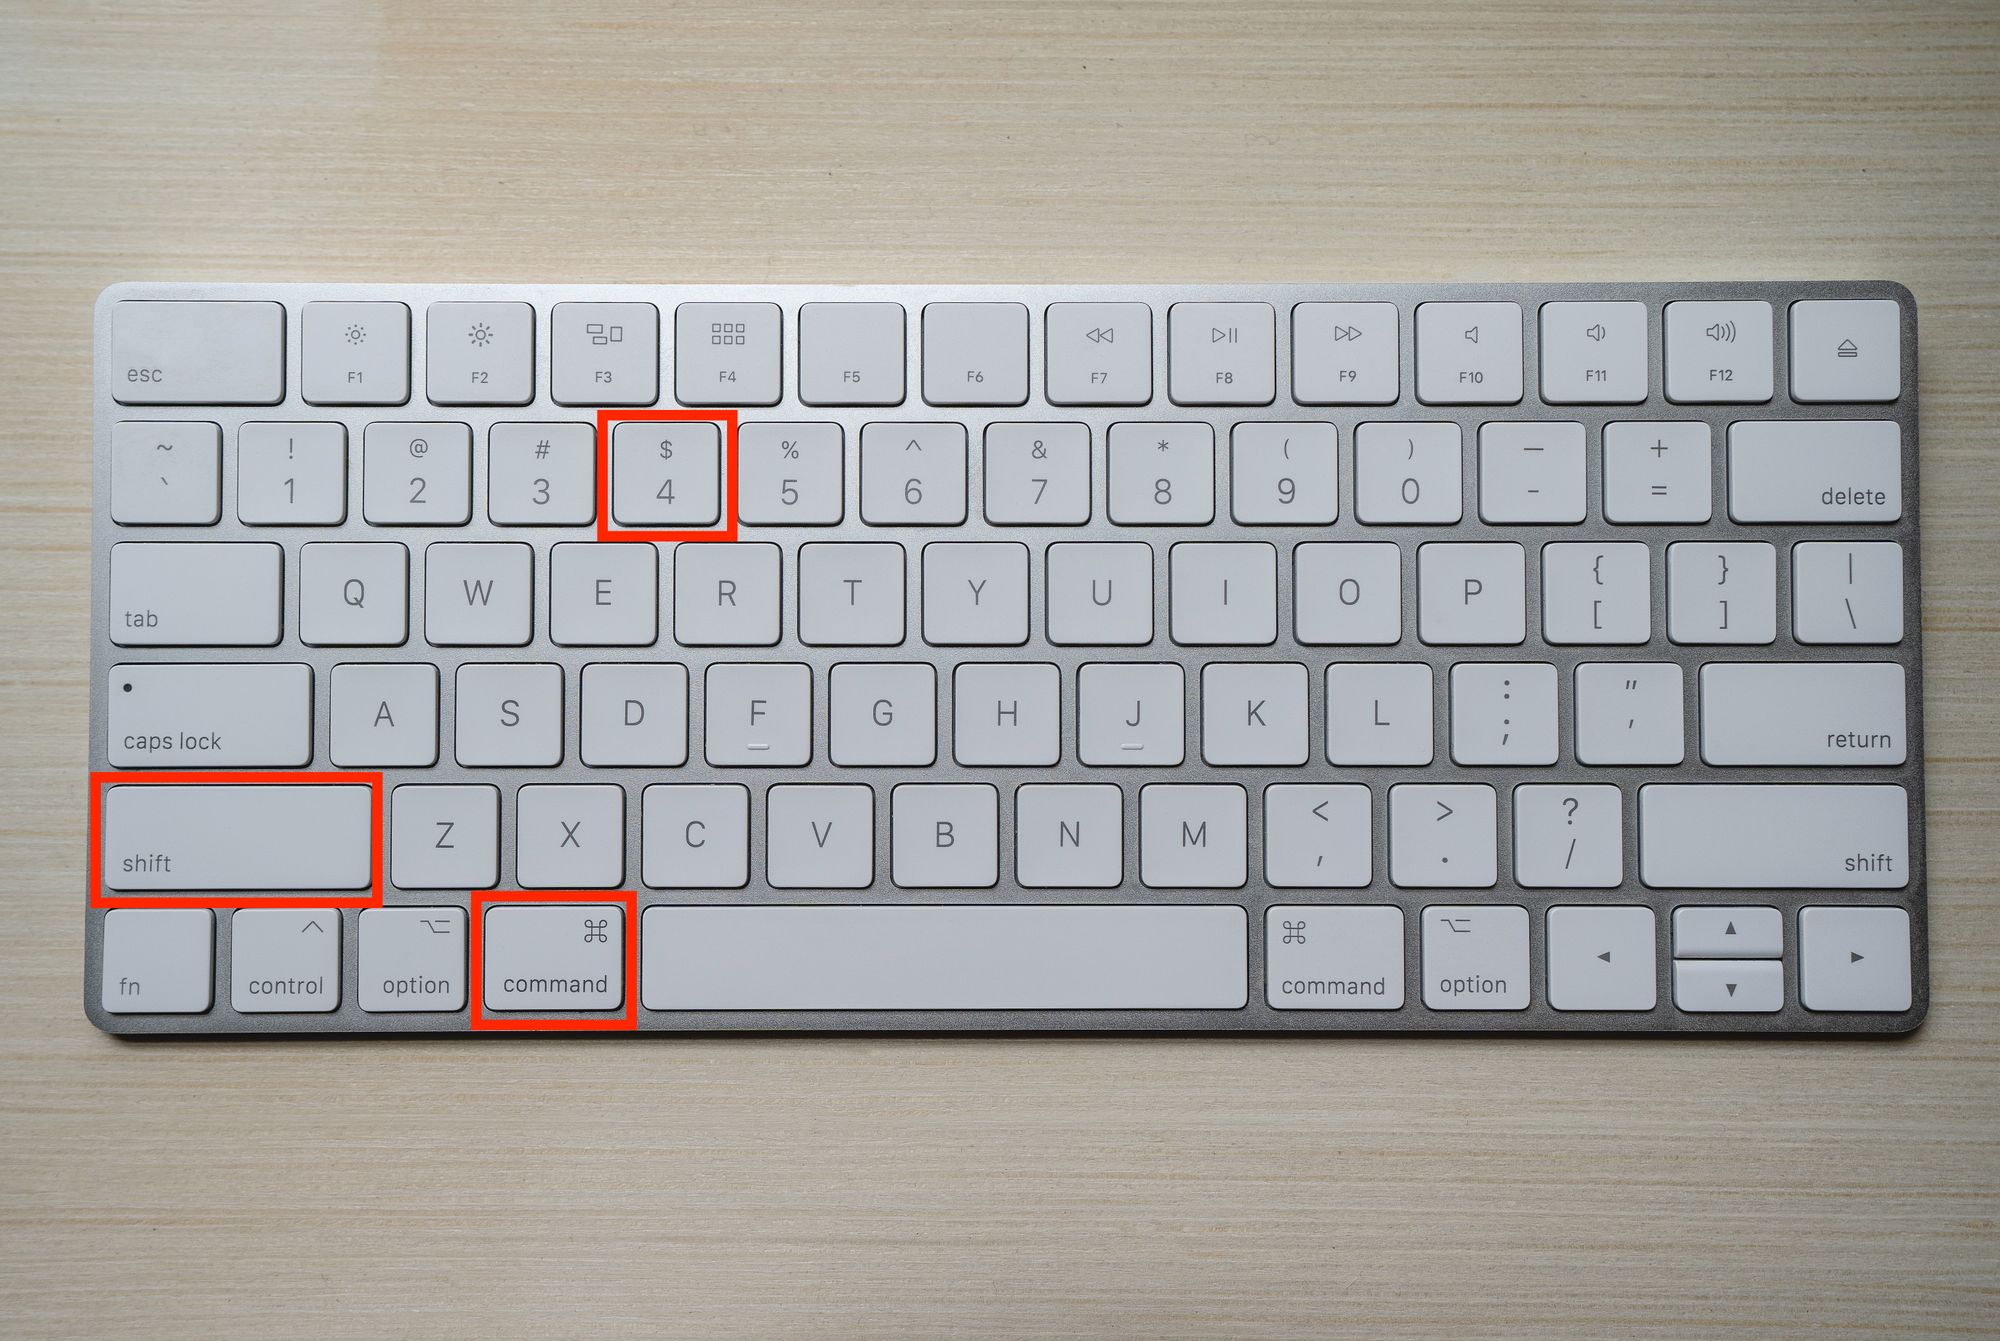
This will make your pointer turn into what's called a crosshair cursor.
Next, press on your trackpad or mouse. This will then allow you to click on and move the cursor to where you want the start and end of your screenshot to be.
Drag and move the grey box that appears in the specific area you want to target – you can make this as wide or as narrow as you wish.
Release the trackpad/mouse and the photo of the area of your choosing will be captured and saved. If you change your mind, press esc before releasing.
How to take a screenshot of a specific window on Mac
You can take a screenshot of a window, whether it's only a menu or the whole window screen.
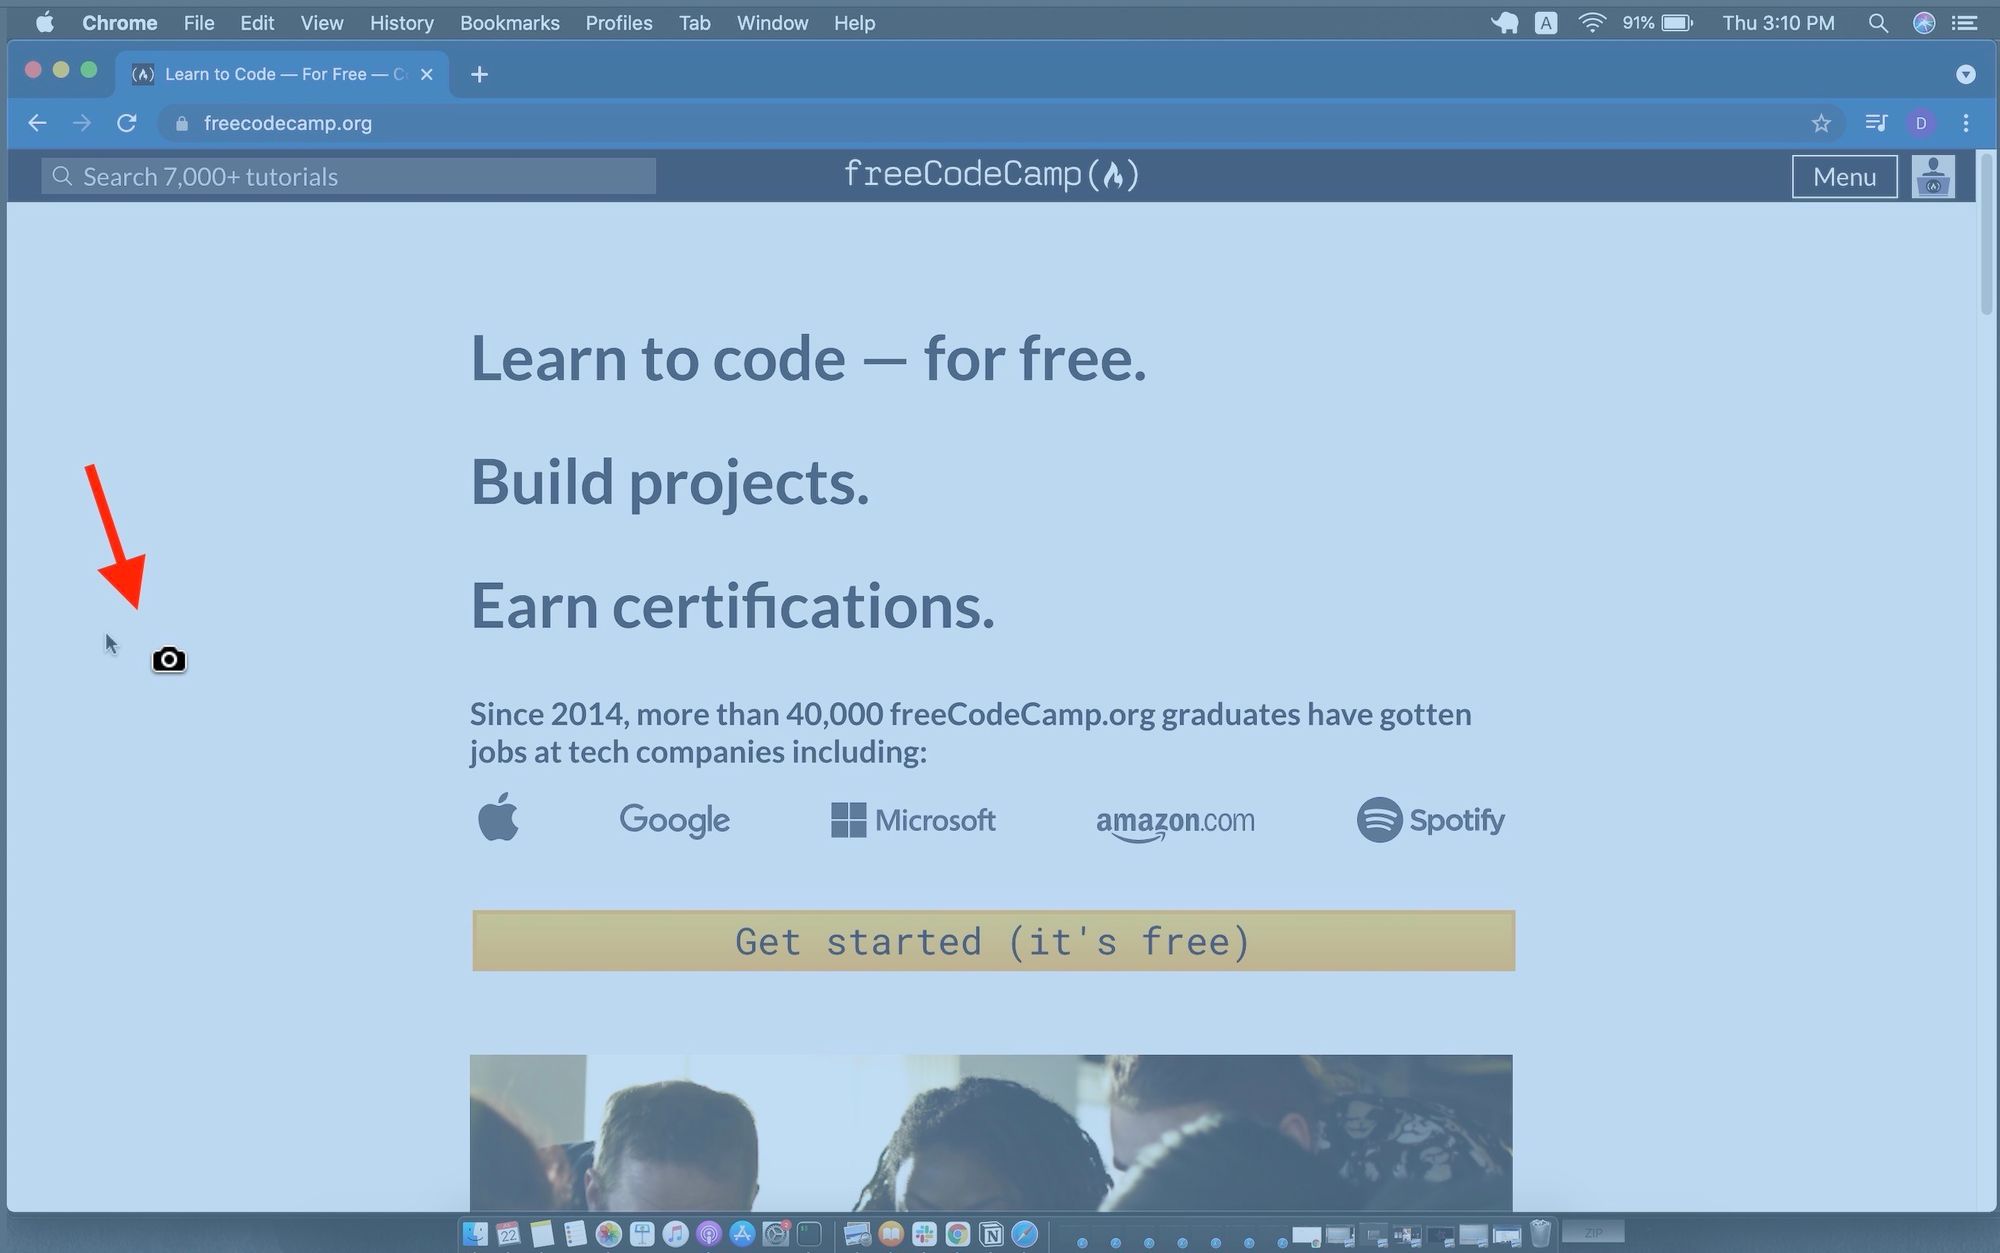
Press and hold at the same time the following keys: Command Shift 4 Space
It's like the previous command, but the Scace bar is the final key that you press after and while holding down the other three keys.
This time, the pointer changes into a camera icon.
You can move your trackpad/mouse to select an area. If you only want the top menu you can select that, or the doc at the bottom, or the whole browser/desktop window.
You'll see that the area you're pointing to is getting highlighted.
Click on your trackpad/mouse to capture what you want.
If you change your mind, press esc before releasing your trackpad/mouse. Otherwise your screenshot will be taken and saved.
Mac Screenshot toolbar
Using just your keyboard for screenshots is great, but Mac has an added feature.
While using this feature, you're able to record your screen instead of just having the option of taking a static photo.
Or you can change the screenshot settings – like for example setting a timer before the screenshot is captured and saving your screenshot location.
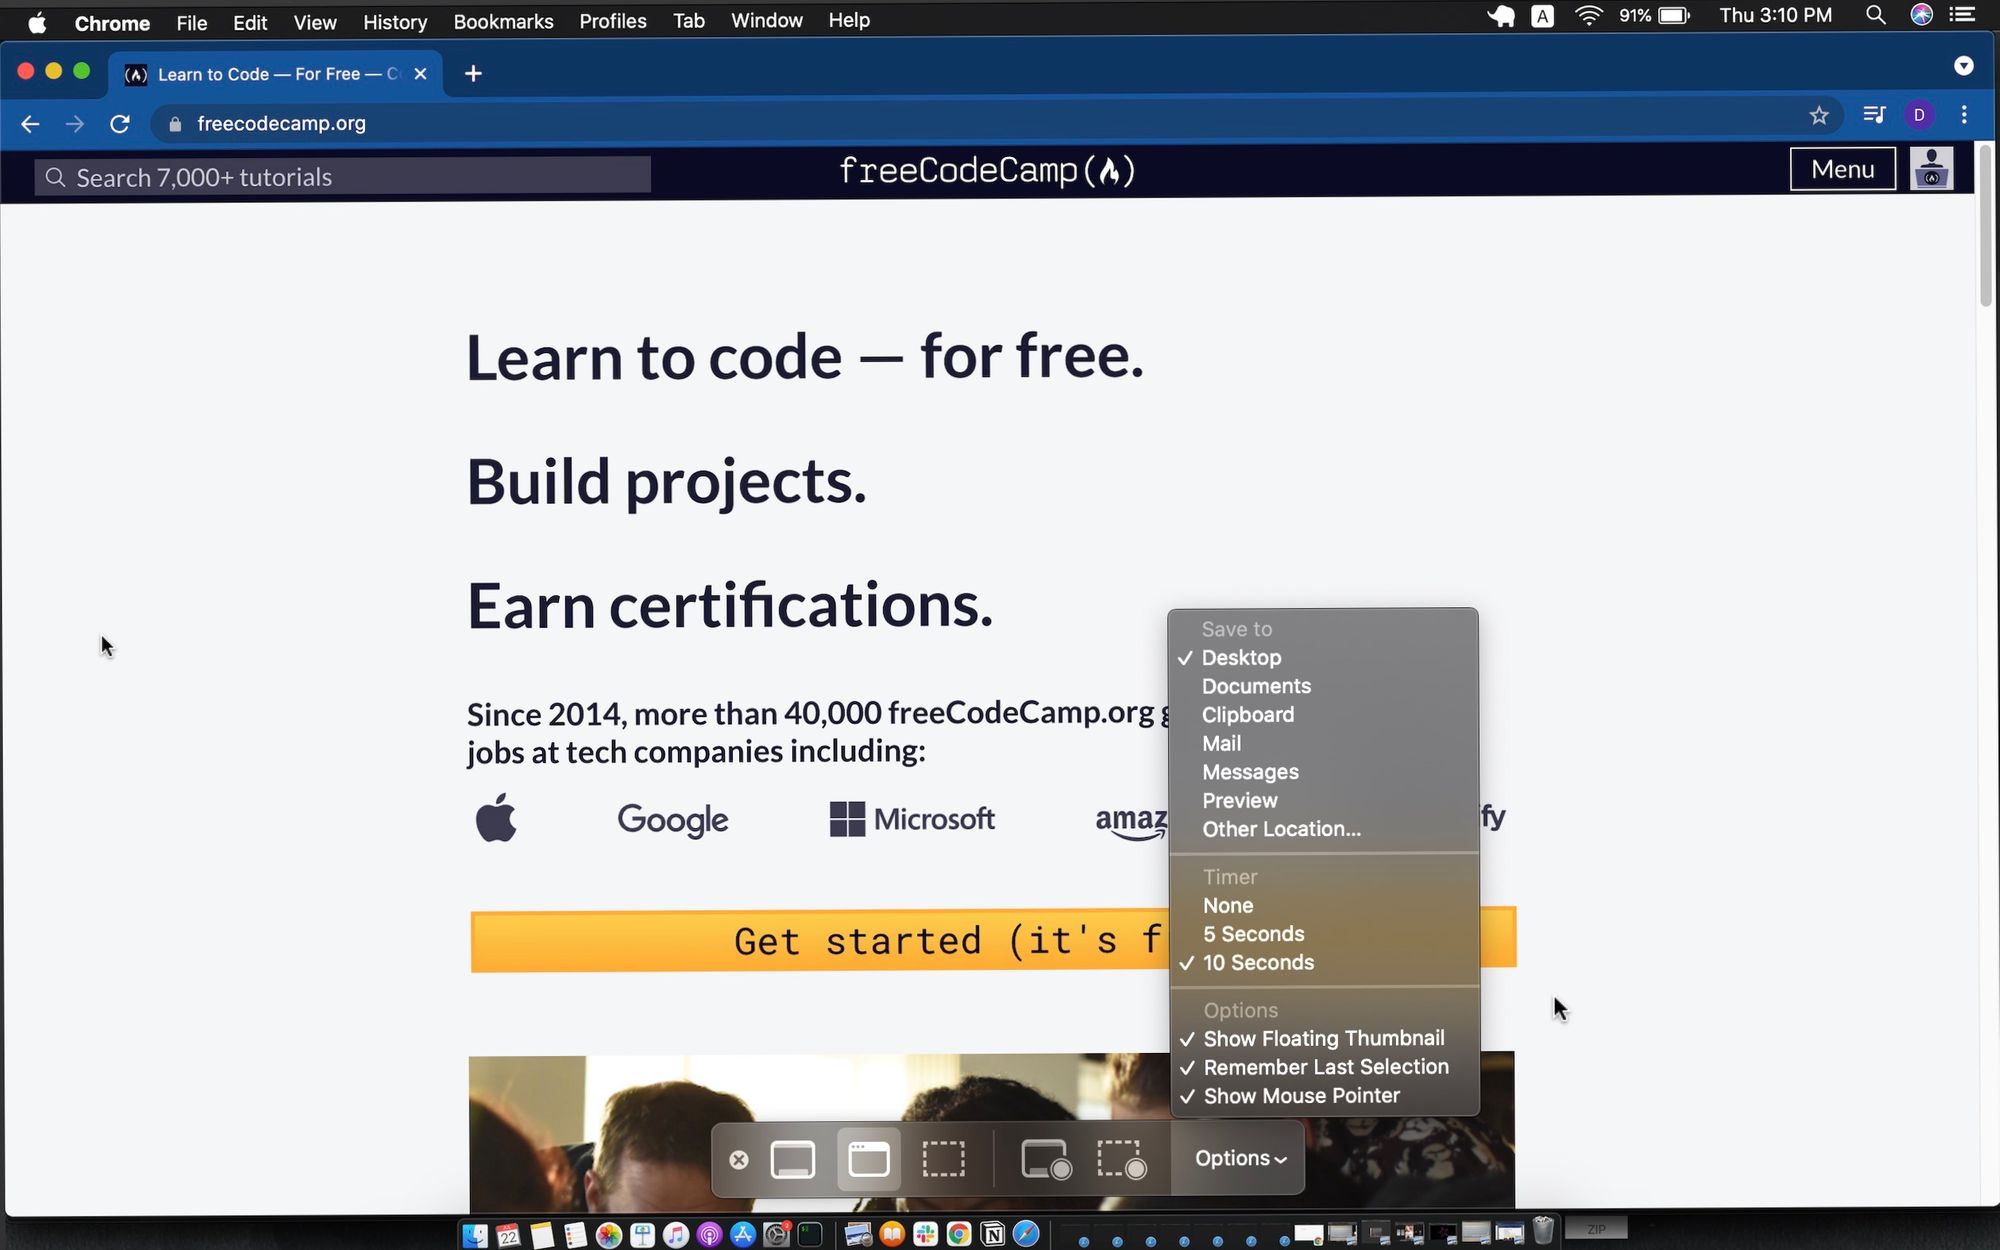
This time, press the keys Command Shift 5.

You'll see this pop up at the bottom of your screen by default:

In the first portion, you have the option to capture the entire screen, a single window, or a scepific portion of your screen.
To do so, select the option you want and press "Capture".
The rectangles with the circle at their bottom right side are options to record the whole screen or just a section of the screen, respectively.
Hit the record button and when you are done, press the "Stop recording" button that appears during your recording at the top menu on your screen.
You also have ways to customize, with the "Options" menu:
Conclusion
And there you have it. These are some simple ways to take screenshots using your Mac, along with an option to record your screen at the end.