
The Django admin site provides developers with a simple yet effective way to manage their models and build sustainable projects. It allows you to create, view, update, and remove records from your applications.
In this article, you will learn how to register your models with your admin site, create your superuser account, log in and use your site, and customize your admin site.
As a developer, if you are thinking about building a Django project or are in the process of building a project, the Django admin site creation is the next step after your Django model creation.
How to Register Your Models
Register your models in your admin.py file. By registering your models you enable Django to generate forms based on the information in the model. It also serves as a form of documentation for your project and allows you to manage data securely.
Below is how to register your models:
from django.contrib import admin
from .models import Author, Genre, Book, BookInstance, Language

admin.site.register(Book)
admin.site.register(Author)
admin.site.register(Genre)
admin.site.register(BookInstance)
admin.site.register(Language)
The first line imports django.contrib.admin. It enables the Django admin for your project and allows you to access it at a specific URL (/admin/) in your web browser.
The second line of the code imports your models, while the last four lines of code, call on the admin.site.register to register each of them.
Your models can be more or less, depending on how complex your project is.
How to Create a Superuser
A superuser account allows you to log into the admin site, create records, and manage objects.
The following command will create a superuser account with full access to the admin site and all needed permissions:
# For macOS/Linux
python3 manage.py createsuperuser

# For Windows
py manage.py createsuperuser
You will receive a prompt to enter a username, email, and password. Once this command completes, you will have have a superuser account, and you can restart your development server and test your login details using the following command:
# For macOS/Linux
python3 manage.py runserver

# For Windows
py manage.py runserver
When running these commands, ensure you are in the same directory as manage.py.
How to Log in and Use Your Site
To log into your site, open your /admin URL( or http://127.0.0.1:8000/admin) in your browser. You will see a page that looks like this:
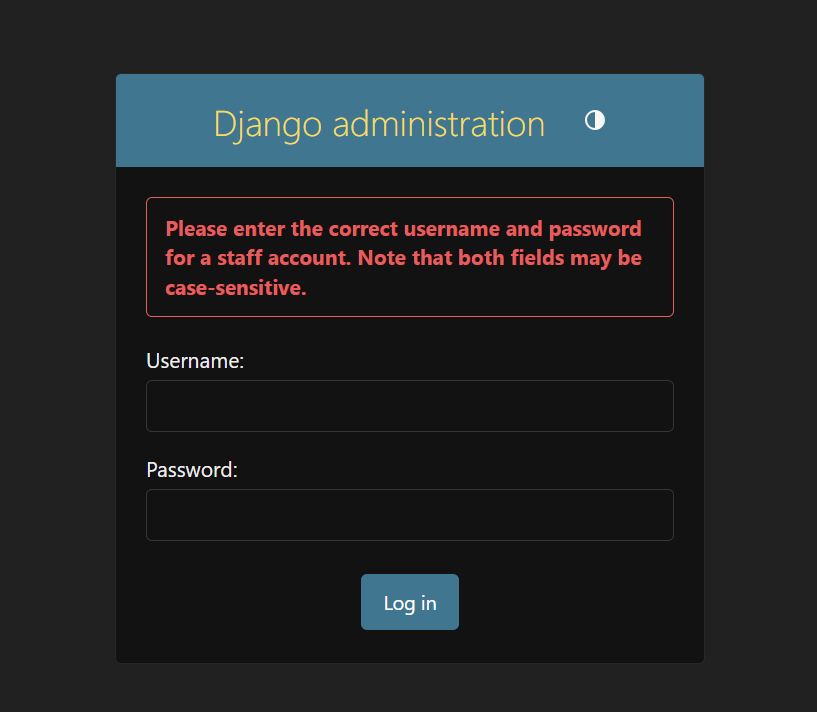 The Django admin login page.
Enter your superuser account details, click login, and you will see a new page that looks like this:
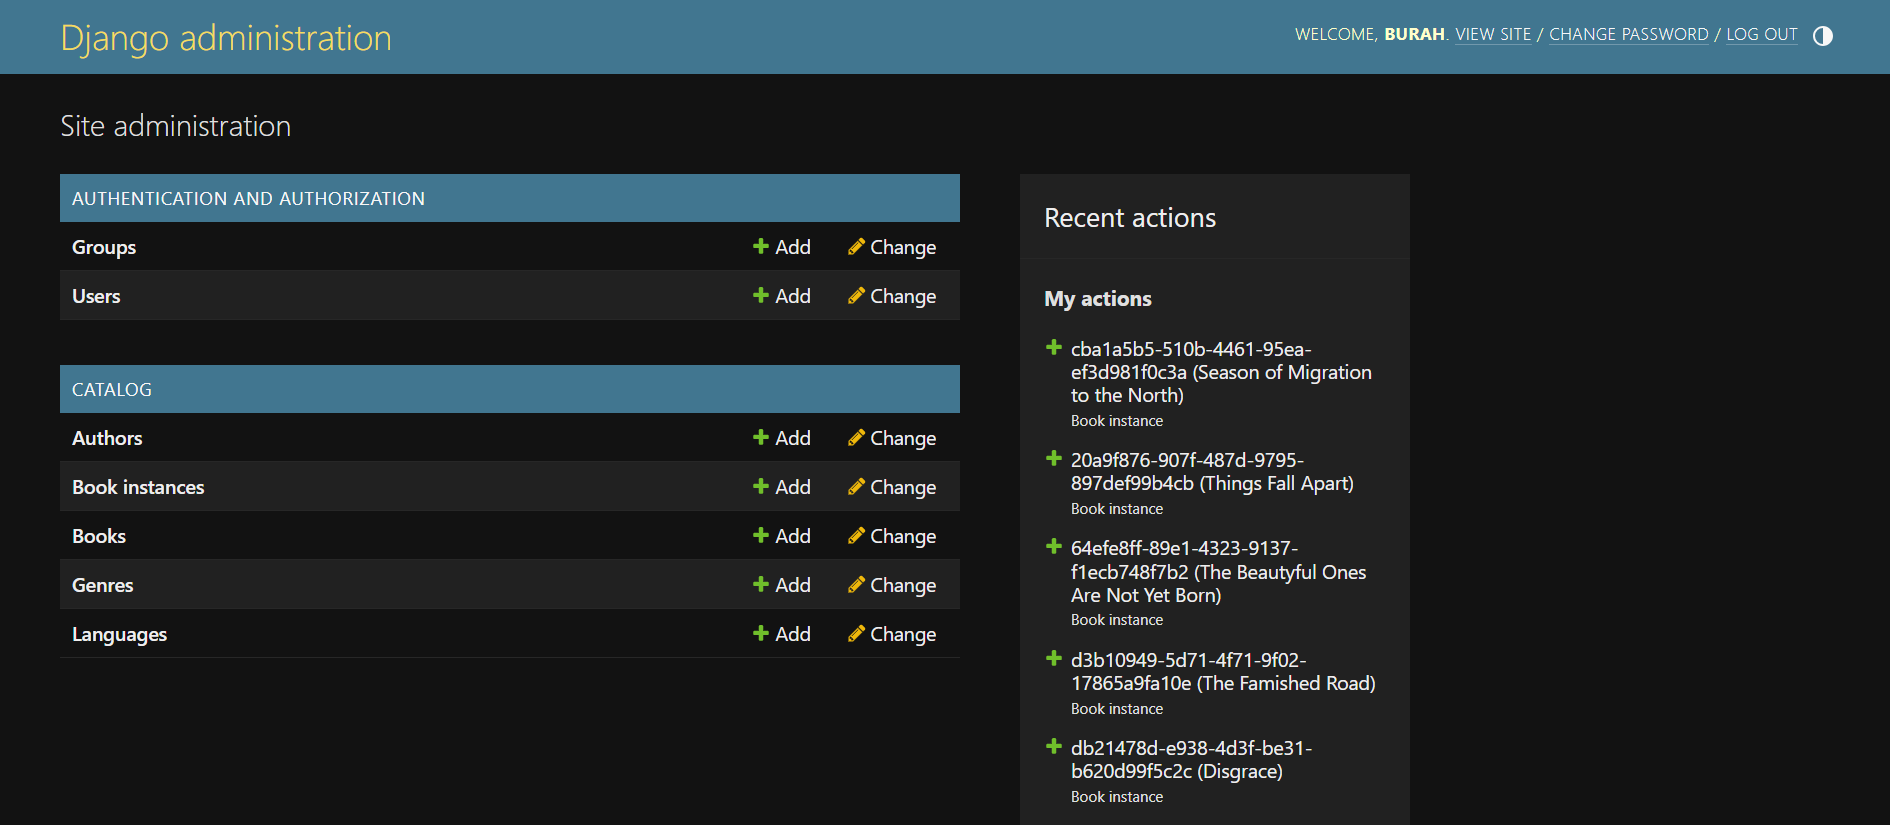 The Django admin home page.
The new page above is the Django admin site that displays all registered models.
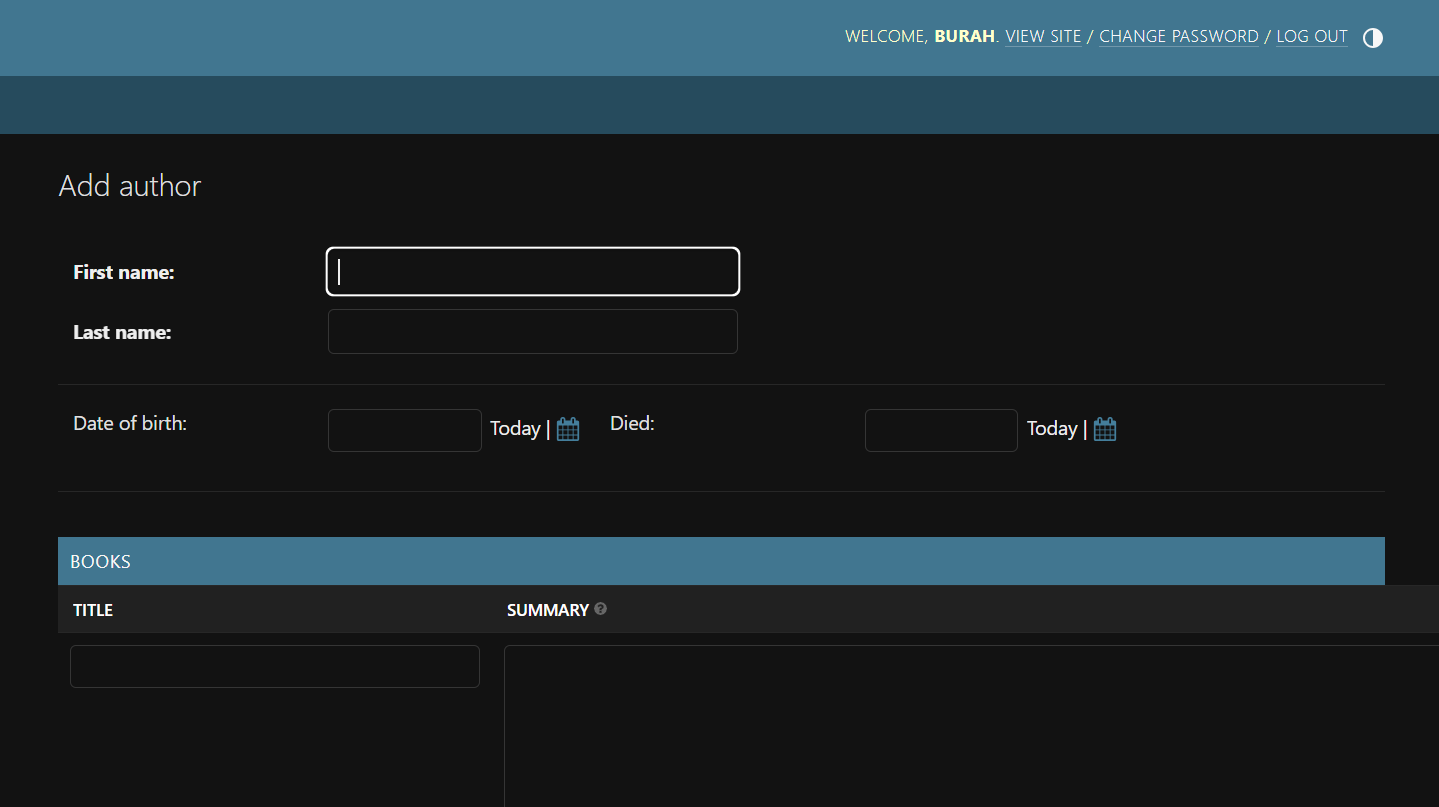
Click the add link next to each model to start creating your records.
After adding a record to a model, click on SAVE, Save and add another, or Save and continue editing to save your record. Your screen should look like the one below:
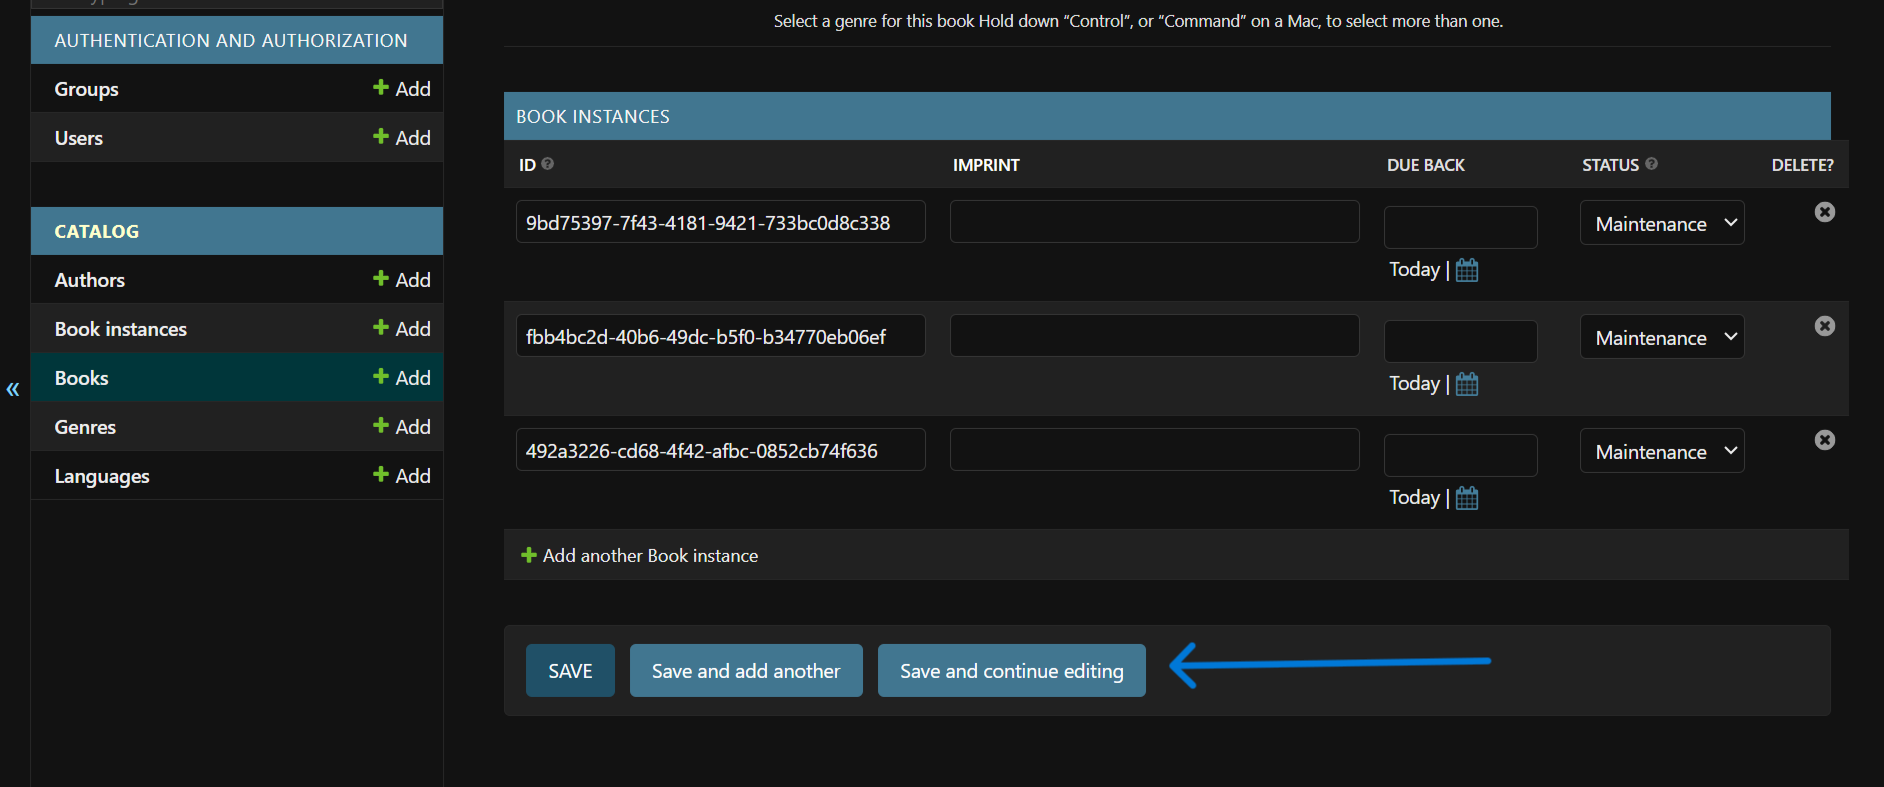 The 3 save options on the Django admin site.
The screenshots above only show examples of what the Django admin site looks like. According to your project's needs, your models and fields may look different from the examples in this article.
How to Customize your Admin Site
Django does a great job creating your admin site with the information from the models you register. It also allows you to customize your admin interface to suit your project's needs.
The following sections will show you how to carry out these customizations.
How to Register a ModelAdmin Class
A ModelAdmin class represents a model in your admin interface. By registering this class, you can customize the behavior of a specific model in your admin interface. It also keeps your codebase organized and makes it easier to maintain:
# Comment out your original registeration
# admin.site.register(Author)

# Define the admin class
class AuthorAdmin(admin.ModelAdmin):
    pass

# Register the admin class with the model it represents
admin.site.register(Author, AuthorAdmin)
The code snippet above defines and registers an empty admin class for the Author model.
Always comment out your original registration before registering a ModelAdmin class.
How to Customize your List View
Considering the model above, if you have multiple authors or need to display additional information about your authors, the list_display method allows you to customize your list view.
Below is an example of how to customize your interface using the list_display method:
class AuthorAdmin(admin.ModelAdmin):
    list_display = ('last_name', 'first_name', 'date_of_birth', 'date_of_death',)
The code snippet above shows the AuthorAdmin class and a tuple of the field names you want to display in the list, in the order that you require them.
You must always specify these fields in your Django model (models.py file). Otherwise, they will not be displayed.
The result should be an interface like the one below:
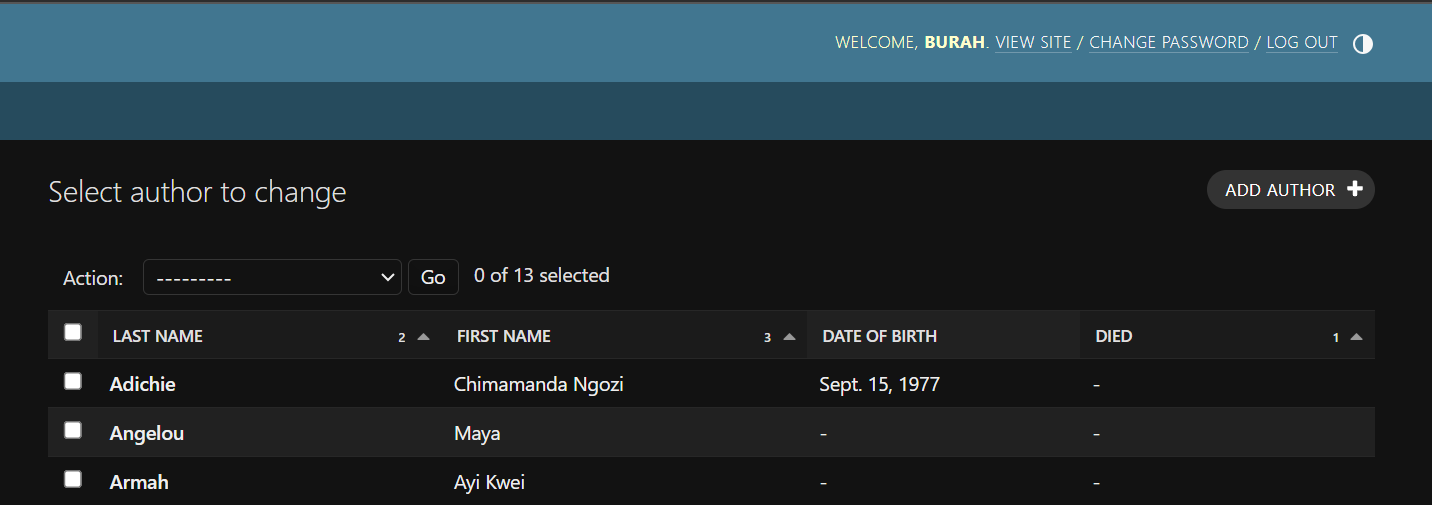 The result of the list view customization.
Using this method, you can customize the list view of any model to suit he needs of your project.
How to Customize the Detail View
Django lays out the detail views vertically by default, in the order they are defined in the model. But you can change this to suit your needs, and decide which fields you want displayed or excluded.
You can do this by adding the field attribute to your admin class. For example:
class AuthorAdmin(admin.ModelAdmin):
    list_display = ('last_name', 'first_name', 'date_of_birth', 'date_of_death')

    fields = ['first_name', 'last_name', ('date_of_birth', 'date_of_death')]
The field attribute in the code snippet above changes the order of your fields. first_name now comes before last_name. Fields display vertically by default, but by grouping them in a tuple (in the dates field) they now display horizontally.
The author detail view should now appear like this:
 The result of the detail view customization.
Also, you can use the exclude attribute to exclude/remove fields from the form.
Conclusion
Setting up your Django admin site is important for managing your models effectively in your Django project. Knowing how to use and customize your Django interface improves the quality and maintainability of your project.
This article describes how to set up your admin site and how you can customize it to suit your project's needs. Happy Coding!