

If you are learning machine learning / deep learning, you may be using the free Google Colab. But you might wonder if the free version is adequate.
If you can afford a good Nvidia Graphics Card (with a decent amount of CUDA cores) then you can easily use your graphics card for this type of intensive work.
A lot of developers use Linux for this. But, I do not like Linux as a desktop operating system (do not get offended, as it is my personal preference. And yes, Linux is the best for server-related stuff).
Also, if you own the latest Nvidia GPU, then you're probably already familiar with the hassle regarding the graphics driver and so on.
For all these reasons, I was thinking about trying something different: utilizing the new Windows 11 operating system to use the CUDA cores from my Graphics Card.
I followed a lot of videos but couldn't implement it after trying many times, unfortunately. There was some gap in the latest version of PyTorch with the Windows 11 kernel in CUDA. Still, after researching a lot, I have found out that WSL2 should work just fine.
After trying for more than a few days, I have successfully managed to set up everything necessary and can use my graphics card's CUDA cores in my Windows machine! An interesting thing is, in this process, you do not need to download or use Microsoft Visual Studio 2022 and download huge 30/35GB files just to install the recommended compilers and so on.
Because of this, I wrote a complete handbook on my GitHub (here's the repo: CUDA-WSL2-Ubuntu, and here's the website: fahimfba.github.io/CUDA-WSL2-Ubuntu).
I am writing the same handbook here as well. So, here we go! 🎉
My Computer Specification
For this guide, I have used my Desktop workstation. If you are also interested in the current specification that I used for this task, here you go:
- Processor: Ryzen 5 3500X 6 Core and 6 Threads
- RAM: 32GB DDR4 3200MHz (16 GB + 8 GB + 8 GB)
- GPU: Zotac Nvidia GeForce RTX 3050 8GB GDDR6
- Motherboard: Gigabyte B450M Aorus Elite
- Storage: Gigabyte 240GB SATA SSD
- Monitor: MSI Optix G24 Gaming Curved 75Hz
I will be using Windows 11 Pro (Version 22H2) and WSL2 (of course!).
Step 1: Make Sure You Have Solid Internet and Electricity
This whole process can take a lot of time. So make sure you're properly connected to the internet and have consistent electricity. For me, it took almost 7 hours in total. You will also need to download some pretty huge packages along the way.
Also, make sure that you have installed the latest Nvidia driver after downloading the official driver from the official website of Nvidia. Make sure that you have installed all the updates of your Windows 11.
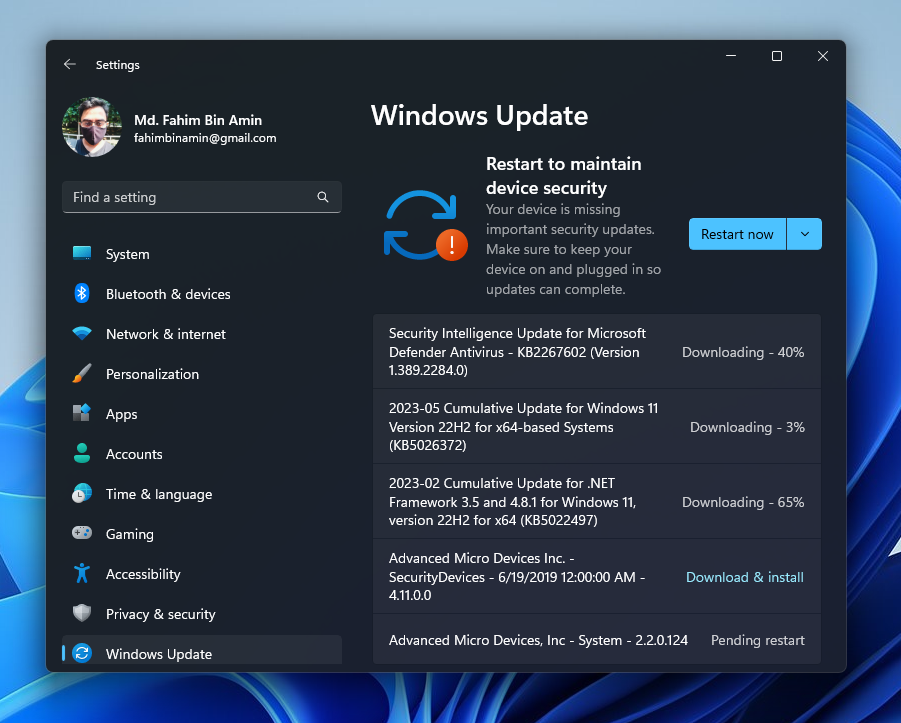 windows update
Step 2: Download Latest PowerShell
I will be using the latest PowerShell. You can download that from the Microsoft store, but I will download it from the official website as the store might create some problems later.
Go to the official website. This normally redirects you to the latest version of PowerShell available at that moment. For me, the latest version is 7.3 (24 May 2023). For you, it might be the updated version. Don't worry about that. Simply download the latest stable version.
- Click on the Download PowerShell button.
 Download Powershell button
- Find the latest PowerShell of
win-x64.msi. Download that.
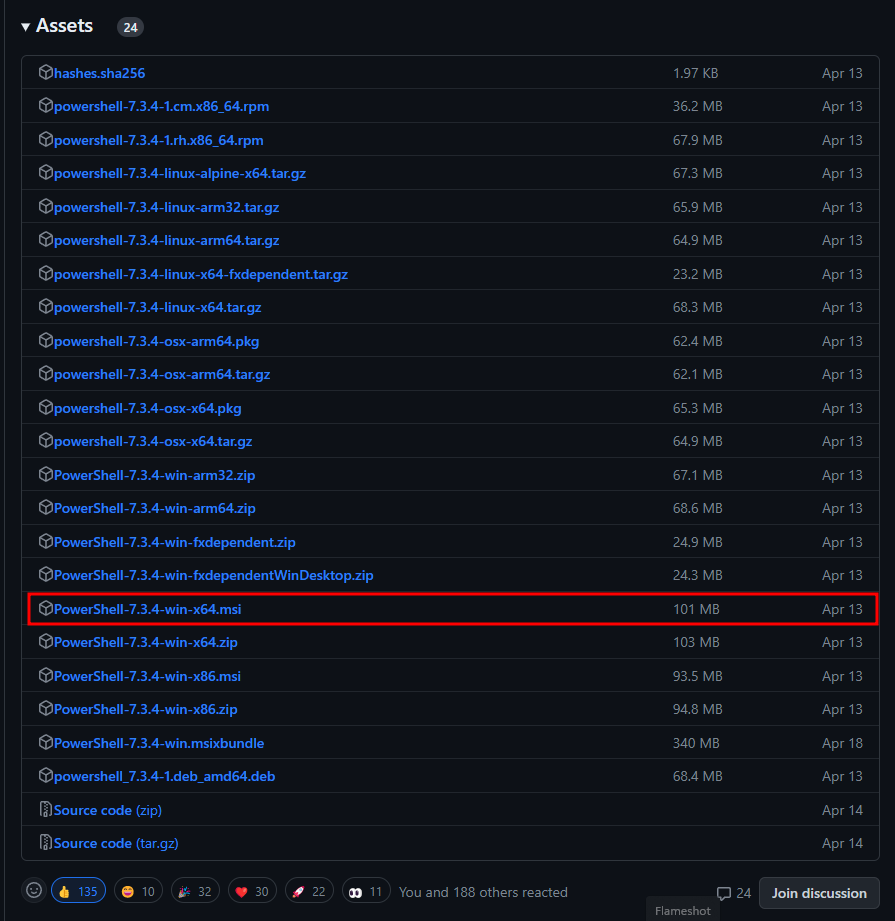 latest PowerShell msi file
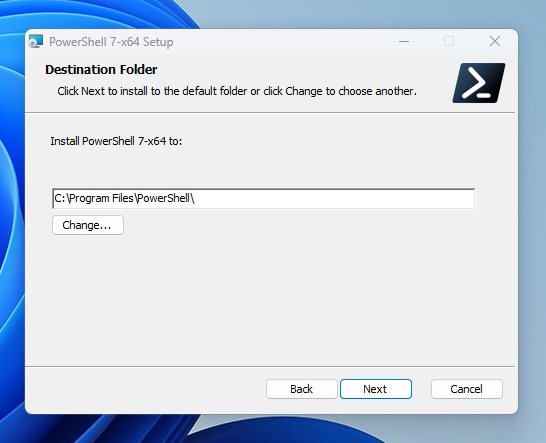
- The installation process is pretty straightforward. But I will be guiding you throughout the entire process. Double click on the downloaded file. Then click
Next.
 msi software
- Keep everything as it is and click
Next.
 Next step
- I still prefer to keep everything as it is and simply click
Next.
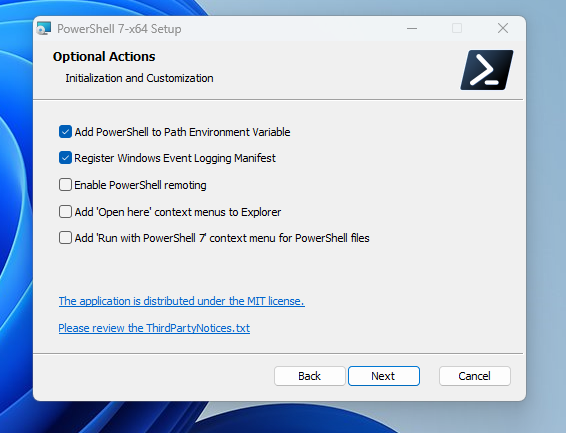 Next step
- I still prefer to keep everything as it is and simply click
Next.
 Next step
- Click
Install.
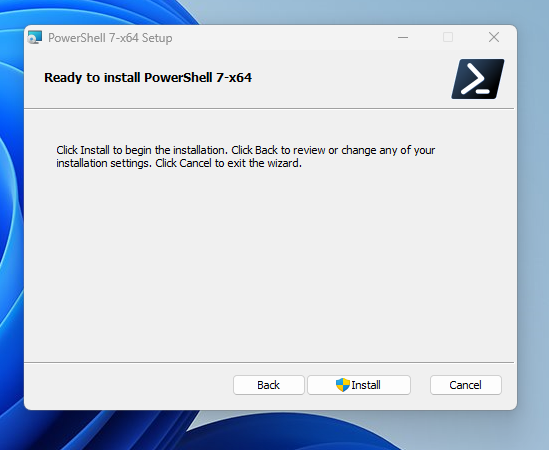 Install
- Now click
Finish.
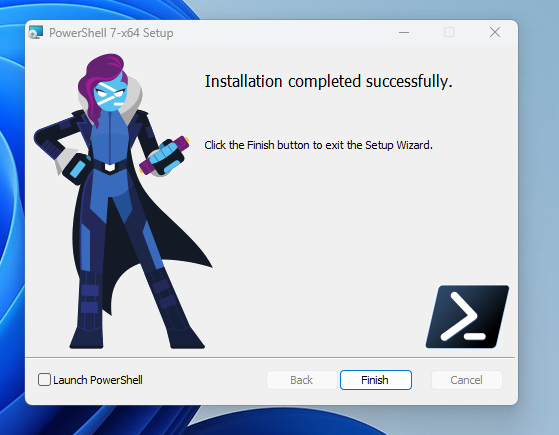 Finish
Step 3: Check Your Windows Terminal
I really like the Windows Terminal, as I can simply switch to any other WSL OSes (Ubuntu, Kali, Git Bash, and so on) whenever I want. But before proceeding further, I have to make sure that my current Windows Terminal is the updated one.
- Open the Microsoft Store and search for
Windows Terminal.
 Windows Terminal on Microsoft Store
Click on
Updateif it needs an update.Make sure that you are on the latest updated Windows Terminal already.
Now open the Windows Terminal, because we have to change some settings first. Click on
Open Settings.
 Windows Terminal Settings Customization
- If you do not see the
Open Settingsprompt, then simply click the drop-down arrow, and click onSettings.
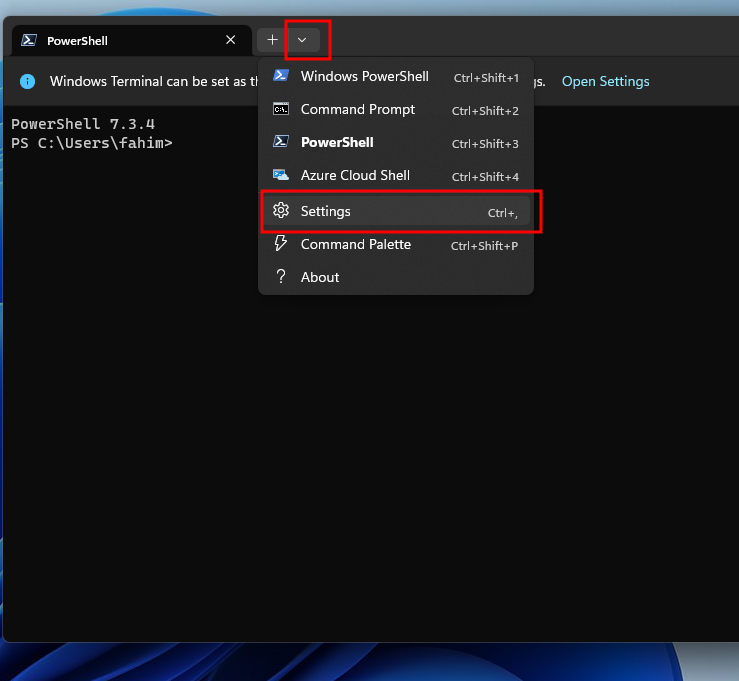 Settings
- From
Startup, make sure that the Default profile is set onPowerShell(the new PowerShell we installed in Step 2). TheDefault terminal applicationshould be set onWindows Terminal.
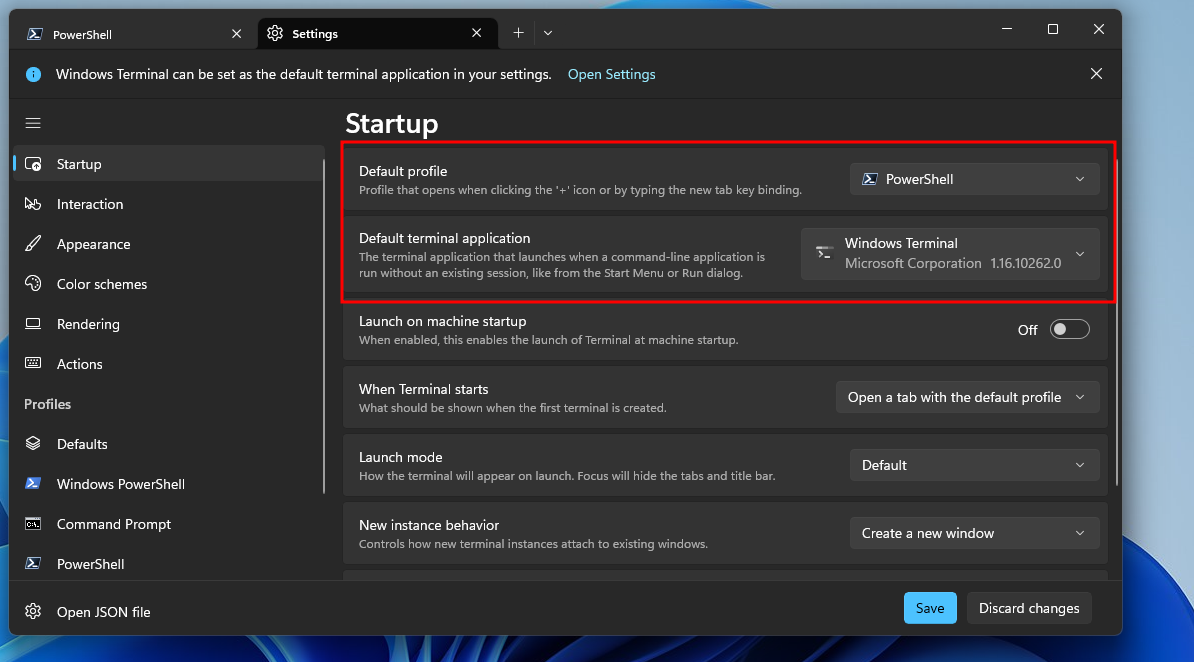 Default startup config
- Then click
Saveand exit the terminal.
 Save
Save
Step 4: Hardware Virtualization
In order to use WSL, we have to make sure that our CPU virtualization is enabled. You can check the status through your task manager. If it is disabled, then make sure to enable the virtualization through BIOS.
You will find a lot of YouTube videos about this, but make sure that you are following the correct one that matches your motherboard brand and model.
 Virtualization
Step 5: Install WSL and Ubuntu LTS
Now we need to install the WSL2 and Ubuntu LTS.
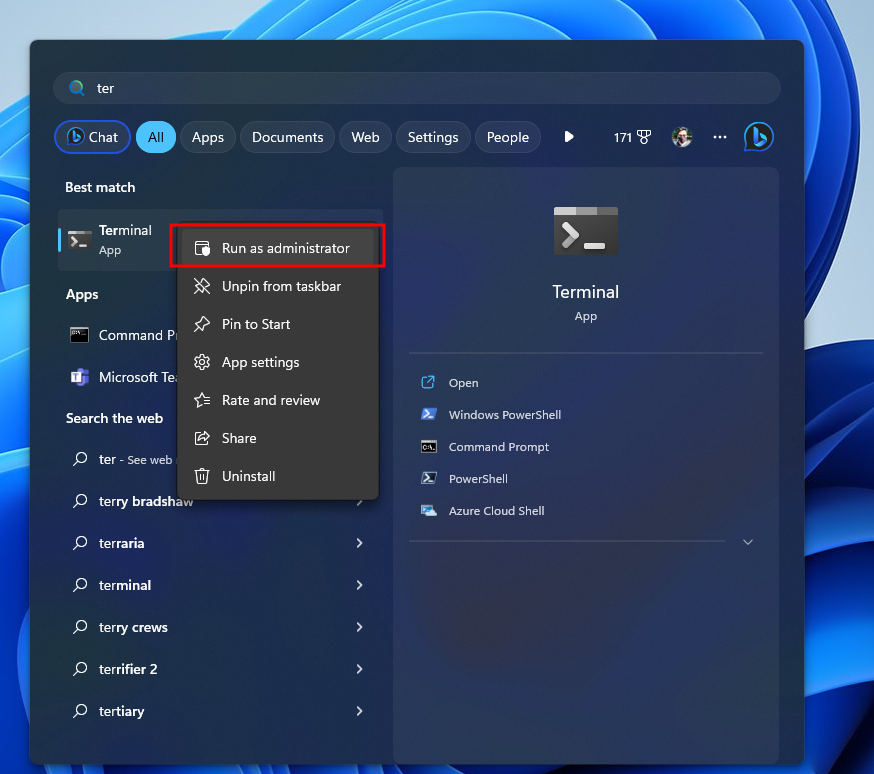
- Open the Windows Terminal as an Administrator.
 Open terminal as an administrator
- For installing WSL, use the command
wsl --install.
 VMP install
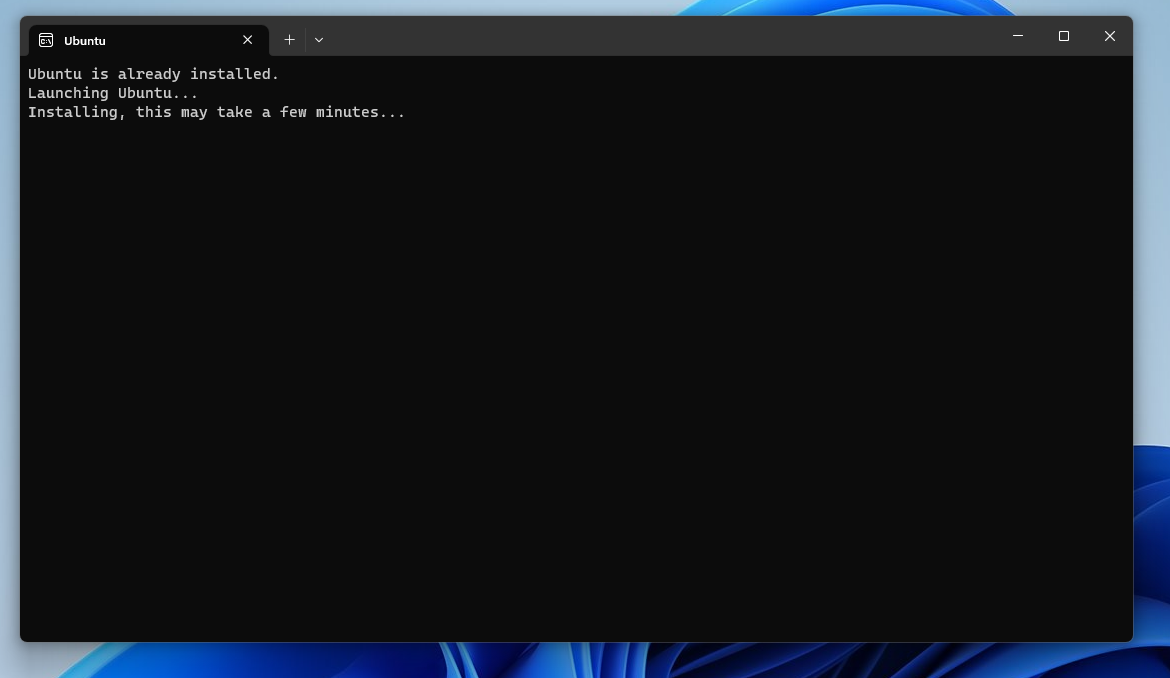
- Then, it would automatically install the latest LTS version of Ubuntu.
 Ubuntu install
- After the tasks get finished, it will prompt you for rebooting your PC. Save other work and simply restart your computer.
 Reboot PC
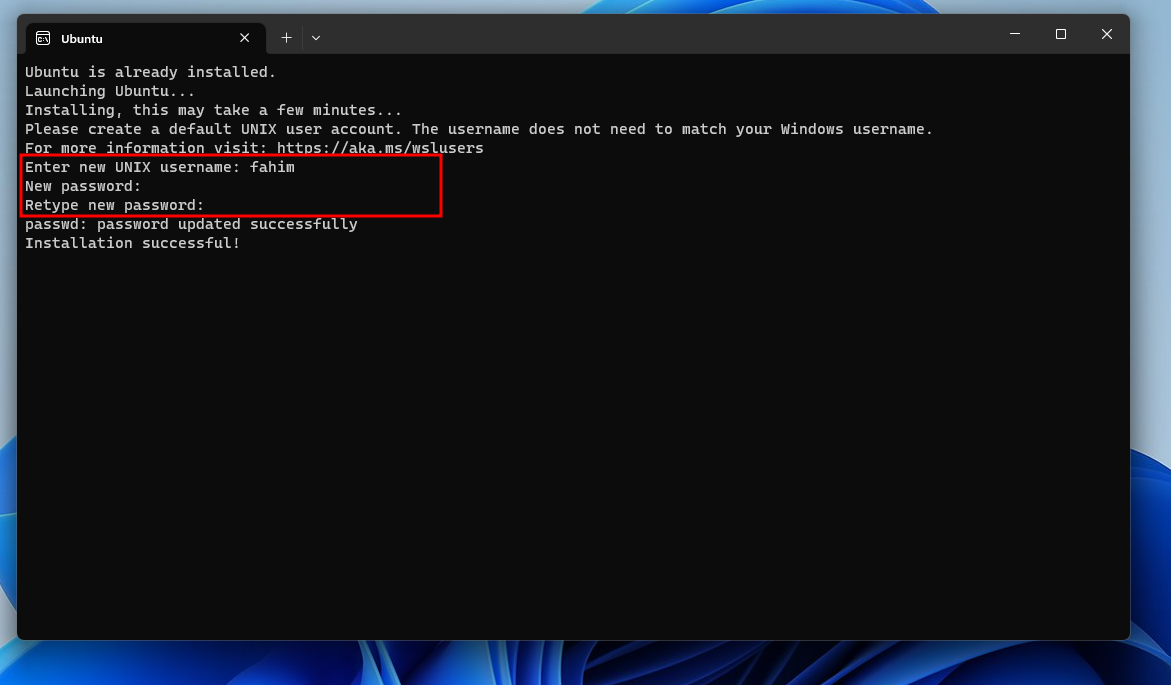
- After restarting the PC, it would automatically open the terminal and ask you for the username and password for your Linux OS.
 After rebooting PC
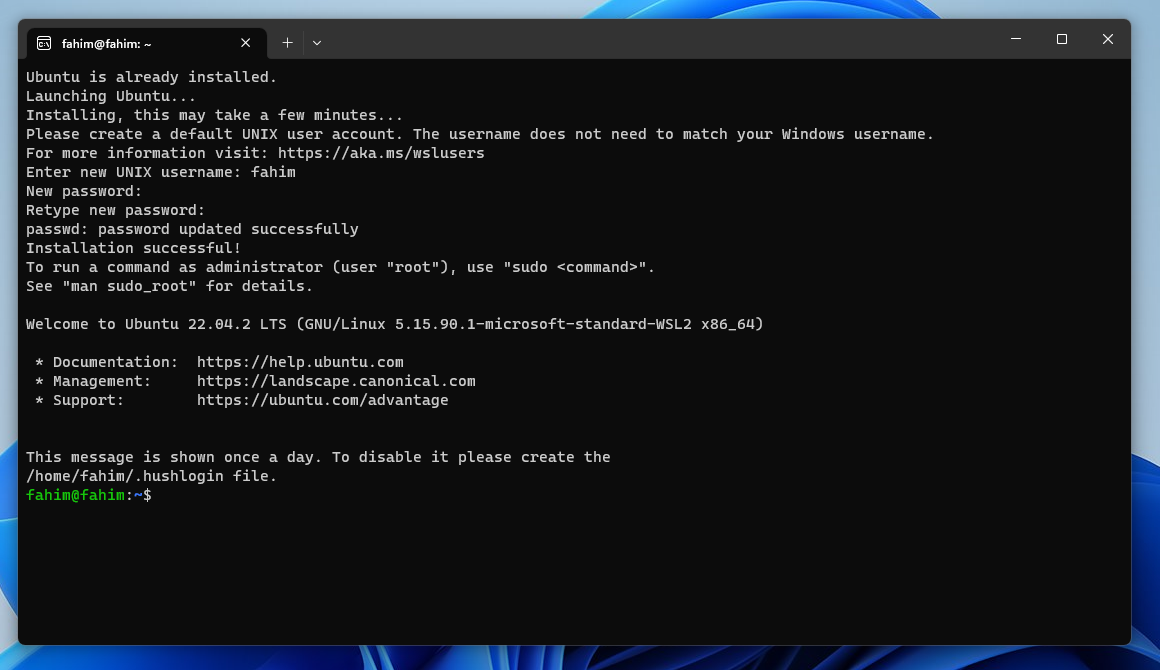
- Give the Username and Password. Make sure to use the same Password on Retype Password!
 username and password
- After a while, it will install the necessary components.
 Complete Ubuntu
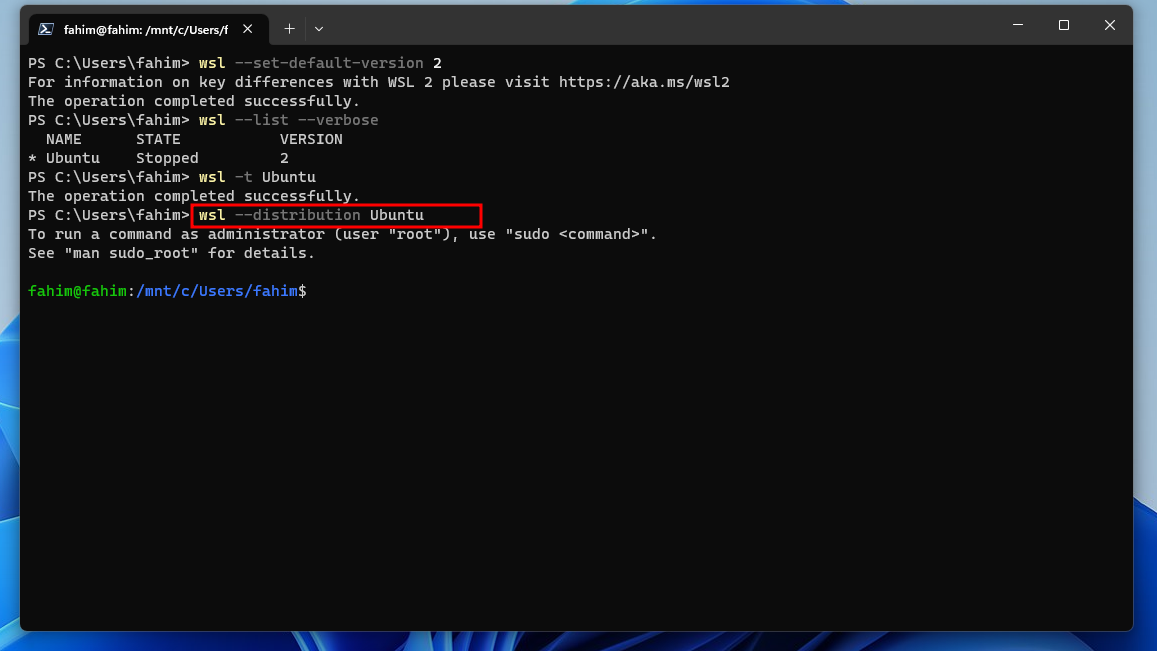
- Now, make sure that WSL2 becomes the default WSL in this terminal. Apply the command,
wsl --set-default-version 2.
 WSL 2 default
- If you want to check the WSL OSes status (how many OSes are available, how many of them are running or stopped), use the command,
wsl --list --verbose.
 OSes status
Here, it is telling me that I have Ubuntu installed on my WSL version 2 and it is currently stopped.
- However, after working on a WSL OS, if you want to shut down the OS, then you can use the command
wsl -t distro_name. For me, it is Ubuntu, so I usedwsl -t Ubuntu.trepresents the termination command here.
 Terminate command
- If you have multiple OSes in WSL, and if you want to run any specific distribution, then use the command
wsl --distribution distribution_name. For example, if I want to run Ubuntu specifically, the command would bewsl --distribution Ubuntu. If you only have one distribution, then you do not necessarily need to worry about this at all.
 run specific distro
- You can simply use
exitto exit a distro from the terminal. It might not necessarily shut down the distribution. You can specifically use the termination command for that. But some regularly used commands are here.
 regularly used command
- After installing a distribution, you would also be able to see and go there by using the drop-down menu from the Windows Terminal.
 the drop-down menu for other distributions
Step 6: Configure Ubuntu LTS
We need to update and install some apps now.
- Open Ubuntu by using any method inside the Windows Terminal. You can obviously use the dedicated Ubuntu App. But I always prefer the Terminal as I can use multiple different distributions and command line applications here altogether.
 start Ubuntu
- Update the system by using the command
sudo apt update.
 update
If you get errors in updating/upgrading saying it can't reach the server then change the nameserver with the command
echo "nameserver 8.8.8.8" | sudo tee /etc/resolv.conf > /dev/null.After updating, upgrade the system using
sudo apt upgrade.
 Upgrade
 Upgrade system
You can clear the terminal by using the clear command.
- CUDA works with C. So we need to install the gcc compiler first. Use the command
sudo apt install gcc --fix-missing.
 gcc
gcc
 gcc installing
 finishing installation
Step 7: Install CUDA
Now it is time to install CUDA from the official website of Nvidia.
Make sure to select the following:
- Operating System: Linux
- Architecture: x86_64
- Distribution: WSL-Ubuntu
- Version: 2.0
- Installer Type: deb(local)
 Nvidia - CUDA
This will provide the necessary commands.
 commands CUDA
Now your task is to apply each command serially in the WSL Ubuntu terminal. Make sure to use the first command twice. It normally resolves the problem of keyring later.
Also, keep in mind that these commands might get changed later. So always follow the official website. For this guideline, I will be using the exact command I used to set up the CUDA in my machine.
wget https://developer.download.nvidia.com/compute/cuda/repos/wsl-ubuntu/x86_64/cuda-wsl-ubuntu.pin
 1st command
I used the same command again after finishing the previous transactions.
wget https://developer.download.nvidia.com/compute/cuda/repos/wsl-ubuntu/x86_64/cuda-wsl-ubuntu.pin
 1st command
sudo mv cuda-wsl-ubuntu.pin /etc/apt/preferences.d/cuda-repository-pin-600
 2nd Command
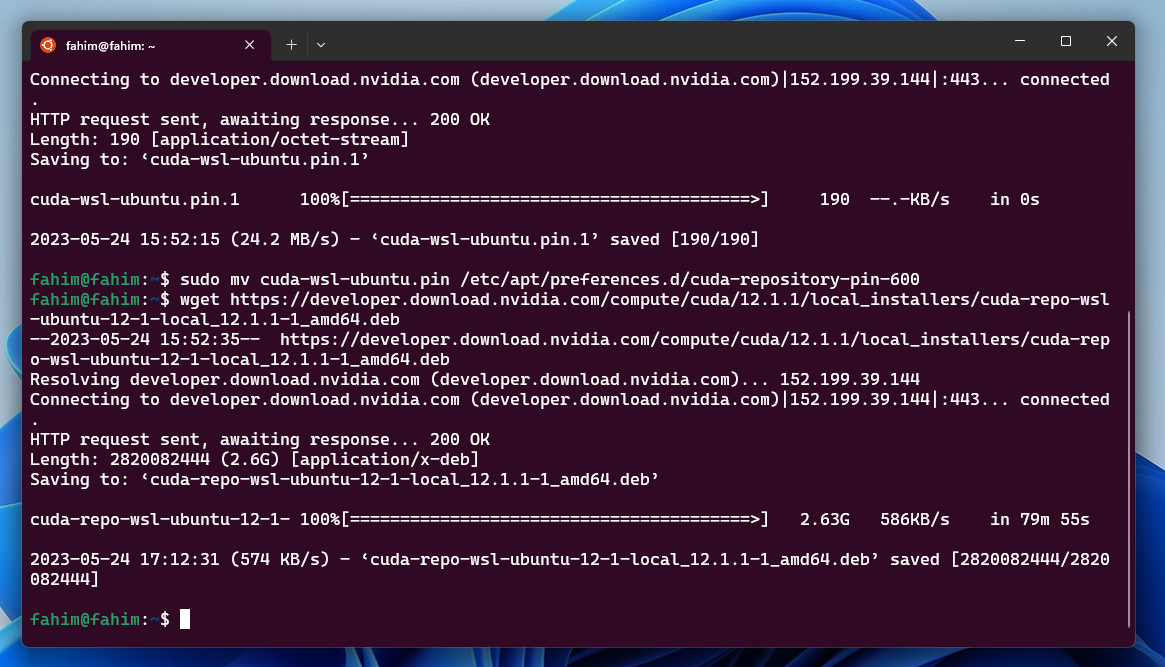
wget https://developer.download.nvidia.com/compute/cuda/12.1.1/local_installers/cuda-repo-wsl-ubuntu-12-1-local_12.1.1-1_amd64.deb
 3rd command
This normally takes a lot of time as it downloads a large file (above 2GB file size).
 large file
sudo dpkg -i cuda-repo-wsl-ubuntu-12-1-local_12.1.1-1_amd64.deb
 4th command
sudo cp /var/cuda-repo-wsl-ubuntu-12-1-local/cuda-*-keyring.gpg /usr/share/keyrings/
 5th command
- Then update the system using
sudo apt-get update.
 update system
 updating
sudo apt-get -y install cuda
 install CUDA
 finish CUDA installation
Step 8: Post Installation
The official CUDA installation guide from Nvidia tells us to add export PATH=/usr/local/cuda-12.1/bin${PATH:+:${PATH}} to the PATH variable.
 path
path
I have changed the CUDA version cuda-12.1 according to my installed CUDA version. Make sure to do the same for your updated CUDA version.
Do the following to do that:
- Open Ubuntu in the Windows Terminal.
- Go to the root directory using
cd ~. Then open thebashrcin nano usingnano .bashrc
 root
root
- Go to the end of the file and copy-paste the path there. For me, the path is
export PATH=/usr/local/cuda-12.1/bin${PATH:+:${PATH}}.
 path
path
Then use Ctrl + X to close. Make sure to use Y to save in the same file.
- To apply the changes, use
source ~/.bashrc. You can check the path usingecho $PATH.
 path check
Step 9: Nvidia CUDA Toolkit
Install the Nvidia Cuda Toolkit using sudo apt install nvidia-cuda-toolkit.
 toolkit 1
 toolkit 2
You can check the Driver and CUDA versions using nvidia-smi.
 smi
smi
Also, make sure to check whether the Nvidia Cuda Compiler Driver has been installed or not by using nvcc -V.
 nvcc
nvcc
Step 9: Confirm that Python is Installed
Now, make sure that you have Python 3 installed in your system. You can check the version using python3 --version. If that says that "python3 is not found" or something like that, then install Python.
Install PIP using sudo apt-get install python3-pip.
 pip install
Step 10: Install PyTorch
For installing PyTorch, go to the official website of PyTorch. Then make sure to select the relevant sections. After that, it will provide you with a command. You have to use the command in your Ubuntu terminal.
For me, the selections were:
- PyTorch Build: Stable (2.0.1) - Make sure to select the latest stable version always
- Your OS: Linux
- Package: Pip
- Language: Python
- Computer Platform: CUDA 11.8 - Make sure to select the latest available CUDA version
After that, I got the command pip3 install torch torchvision torchaudio --index-url https://download.pytorch.org/whl/cu118.
 PyTorch command
I simply used that exact command in my Ubuntu terminal.
 PyTorch command
It also downloads a large file that can take a lot of time if you have a slower internet connection like I do!
 PyTorch download
Step 11: CUDA Availability
You can directly check whether your CUDA has been installed or not by running two lines of Python code in the terminal.
- Run Python in the terminal using
python3. - Import torch using
import torch. - Check the CUDA availability using
torch.cuda.is_available().
If it returns True, then you have successfully finished installing CUDA on your system!
 cuda yes
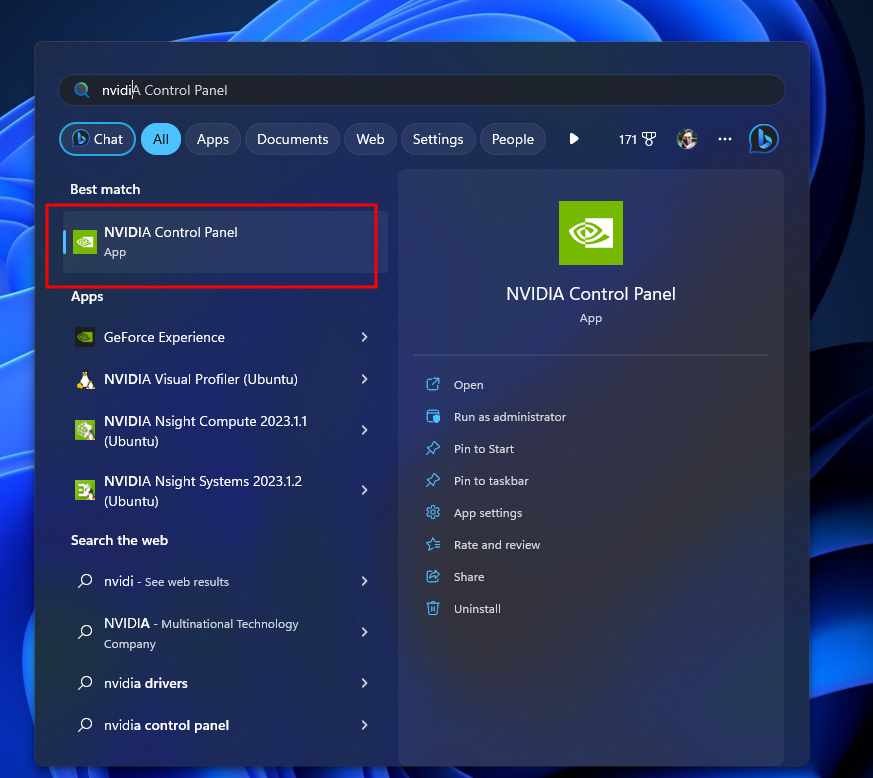
Step 12: Nvidia Developer Settings
You have to enable the Nvidia Developer Settings for using CUDA via WSL. Simply follow this process:
- Open the Nvidia Control Panel.
 Nvidia control panel
- Click "Agree and Continue".
 agree
agree
- In the Nvidia Control Panel, Click Desktop > Enable Developer Settings. If the "Enable Developer Settings" does not have any check mark, then click on that to enable that feature.
 not check mark
 check mark
- The Developer section will be visible. Click on Manage GPU Performance Counters.
 GPU counters
- Check the radio button on "Allow access to the GPU performance counters to all users".
 check
check
- Click "Apply" and "Yes" to approve the changes permanently.
 approve changes
- At the end, it should look like this.
 final
final
- You can again check the CUDA availability like earlier.
 cuda availability
Step 12: Install Jupyter Notebook
I normally prefer the Jupyter Notebook. You can install it in various ways, like pip install notebook.
 notebook 1
 notebook 2
But I prefer the command pip install jupyter notebook.
 jupyter notebook
To open a Jypyter Notebook, you can simply use jupyter notebook in the terminal.
 notebook cli
The notebook will open instantly and you can use the given URL to open that in your web browser:
 open the notebook in the browser
Step 13: Run Some Tests
I ran two codes to check the performance of my CUDA.
- Open a Python3 script in the notebook.
 open script
- I used the following code to check whether it is using my CPU or CUDA from my GPU:
import torch

if torch.cuda.is_available():
    device = torch.device("cuda")
else:
    device = torch.device("cpu")
print("using", device, "device")
 cuda
cuda
- For the performance comparison between my CPU and GPU (CUDA), I used the following code:
import time

matrix_size = 32*512

x = torch.randn(matrix_size, matrix_size)
y = torch.randn(matrix_size, matrix_size)

print("************* CPU SPEED *******************")
start = time.time()
result = torch.matmul(x, y)
print(time.time() - start)
print("verify device:", result.device)

x_gpu = x.to(device)
y_gpu = y.to(device)
torch.cuda.synchronize()

for i in range(3):
    print("************* GPU SPEED *******************")
    start = time.time()
    result_gpu = torch.matmul(x_gpu, y_gpu)
    torch.cuda.synchronize()
    print(time.time() - start)
    print("verify device:", result_gpu.device)
 CPU vs GPU
I also made side by side comparisons between the Google Colab and my computer. You can check them as well.
| Try | Google Colab | My Computer |
| 1 | Google Colab | My PC |
| 2 | Google Colab | My PC |
The result already states that my PC is working better than the Google Colab.
Step 14: Remove the CUDA Deb File
If you think that you do not need the CUDA deb file anymore, then you can remove that using the following command:
rm filename
For me it was this:
rm cuda-repo-wsl-ubuntu-12-1-local_12.1.1-1_amd64.deb
It does not remove the CUDA from your system. It just removes the deb file from your system.
 remove deb
Conclusion
I hope that you have successfully installed CUDA on your Windows 11 system using WSL2. If you have any questions, feel free to reach out to me using Twitter or LinkedIn.
Also, make sure to follow me on GitHub and star (⭐) the repository!
You can also subscribe to my YouTube channel for more helpful video content.
If you are interested then you can also check my website: https://fahimbinamin.com/
Thank you for reading the entire article till now. Have a great day! 😊
Cover image: Photo by Arseny Togulev on Unsplash