By Jared Wolff
This post is originally from www.jaredwolff.com
Privacy.
Performance.
Brilliant looks.
Can you have all three?
(Of course!)
Having a statically generated blog is great. Many folks use services like Disqus and Google Analytics to make them even better. Not surprising if you were one of them! Privacy concerns are are the forefront of everyone’s attention. So, rather than keeping the status quo, it’s time to do something about it!
If you've been looking to protect your site visitor's privacy and improve performance this blog post is for you.
In this article we'll be using DigitalOcean’s Docker droplet. It allows you to host several different applications/services on one (virtual) machine. By the end of it you'll know how to run your own comments server using Commento. Plus i’ll share a few tricks i’ve learned along the way to make it much easier for you.
Leeeets go!
Reverse Proxy
One of the most important aspects of this setup is the reverse proxy. A reverse proxy acts like a router. Requests come in for a certain domain. That request is then routed to the service associated with that domain.
Here’s a diagram from the Nginx Reverse Proxy + Let’s Encrypt Helper documentation. It'll help illustrate the idea.
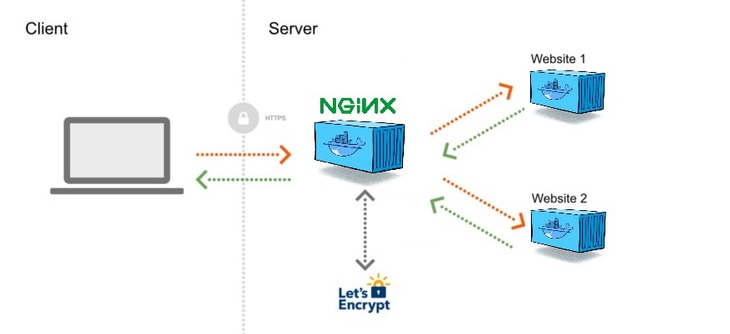
Another benefit is that there’s an extra layer of protection to the outside world. Your websites run in a private network and the only access is through the Nginx reverse proxy. Point your DNS to the server and Nginx handles all the magic.
Here's how to get it setup:
- Go ahead and set up your Digital Ocean Droplet. All the info you need is right here. The $5 version is more than sufficient.
Go here to clone the repository. You can also run this in your terminal. Make sure you SSH into your Digital Ocean droplet first!
git clone git@github.com:evertramos/docker-compose-letsencrypt-nginx-proxy-companion.git
Change directories to the cloned repository.
- Copy
.env.sampleto.envand update the values inside. I had to change theIPvalue to the IP of my Digital Ocean Droplet. I left all the other ones alone. - Run
docker-compose up -dto start everything. (you can run without the-doption to make sure everything starts ok. Or you can attach the log output usingdocker container logs -f <container name
When pointing your sub-domains to this server, make sure you use an A record. Here's an example of mine:
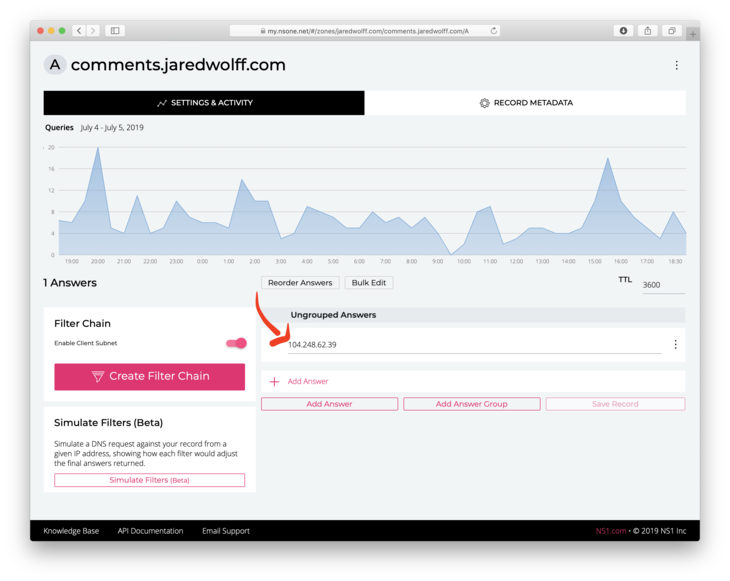
Depending on your DNS provider, you'll have to figure out how to set an A record. That is beyond the purpose of this article though!
Setting Up Commento with Docker Compose
Here is the current docker compose file i'm using for Commento. It includes a few more environment variables for configuring Github, Gitlab and Google. It also includes the environment variables for setting the SMTP settings. These parameters are important. Otherwise you can't receive password reset or moderation emails!
version: '3'
services: commento: image: registry.gitlab.com/commento/commento container_name: commento restart: always environment: COMMENTO_ORIGIN: https://${COMMENTS_URL} COMMENTO_PORT: 8080 COMMENTO_POSTGRES: postgres://postgres:postgres@postgres:5432/commento?sslmode=disable COMMENTO_SMTP_HOST: ${SMTP_HOST} COMMENTO_SMTP_PORT: ${SMTP_PORT} COMMENTO_SMTP_USERNAME: ${SMTP_USERNAME} COMMENTO_SMTP_PASSWORD: ${SMTP_PASSWORD} COMMENTO_SMTP_FROM_ADDRESS: ${SMTP_FROM_ADDRESS} COMMENTO_GITHUB_KEY: ${COMMENTO_GITHUB_KEY} COMMENTO_GITHUB_SECRET: ${COMMENTO_GITHUB_SECRET} COMMENTO_GITLAB_KEY: ${COMMENTO_GITLAB_KEY} COMMENTO_GITLAB_SECRET: ${COMMENTO_GITLAB_SECRET} COMMENTO_GOOGLE_KEY: ${COMMENTO_GOOGLE_KEY} COMMENTO_GOOGLE_SECRET: ${COMMENTO_GOOGLE_SECRET} COMMENTO_TWITTER_KEY: ${COMMENTO_TWITTER_KEY} COMMENTO_TWITTER_SECRET: ${COMMENTO_TWITTER_SECRET} VIRTUAL_HOST: ${COMMENTS_URL} VIRTUAL_PORT: 8080 LETSENCRYPT_HOST: ${COMMENTS_URL} LETSENCRYPT_EMAIL: ${EMAIL} depends_on:
- postgres networks:
- db_network
webproxy
postgres: image: postgres container_name: postgres environment: POSTGRES_DB: commento POSTGRES_USER: postgres POSTGRES_PASSWORD: postgres networks:
- db_network volumes:
postgres_data_volume:/var/lib/postgresql/data
networks: db_network: webproxy: external: true
volumes: postgres_data_volume:
To set the environment variables, put them inside an .env file. Make sure the .env file is in the same directory as docker-compose.yml. When you run docker-compose up it will apply the variables set in the .env file. Nothing gets set if they're left blank.
Set the required COMMENTS_URL and EMAIL or you may run into problems. The best way to set these is by pacing them in the .env file. Here is an example:
COMMENTS_URL=comments.your.url EMAIL=you@your.url
Getting OAuth Key & Secret
Commento works with most popular OAuth providers. Thus visitors can leave comments without making an account.
The instructions are similar for each. I've outlined the steps for all of them below.
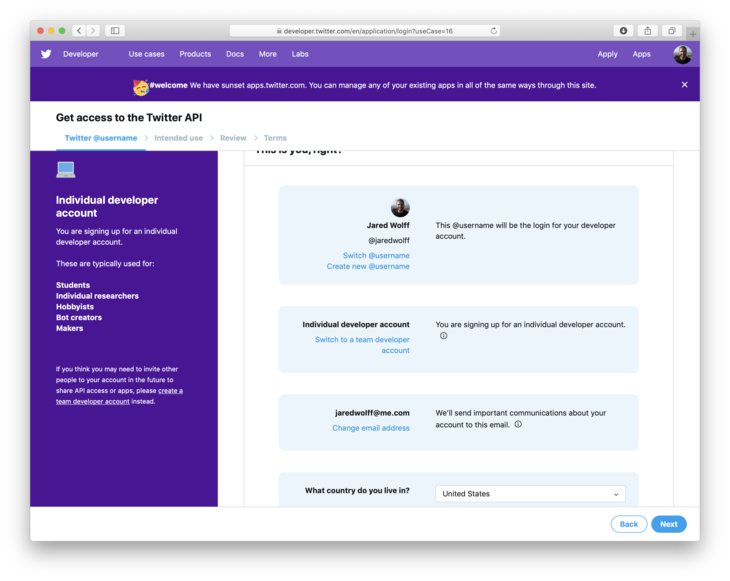
Login to Twitter.com and apply for a developer account: https://developer.twitter.com/en/application/use-case
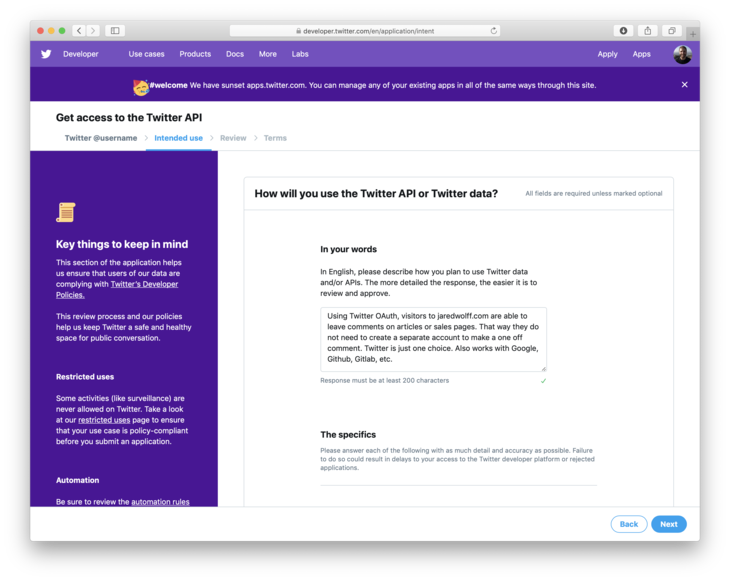
Describe how you'll use the API. You can use what I wrote.
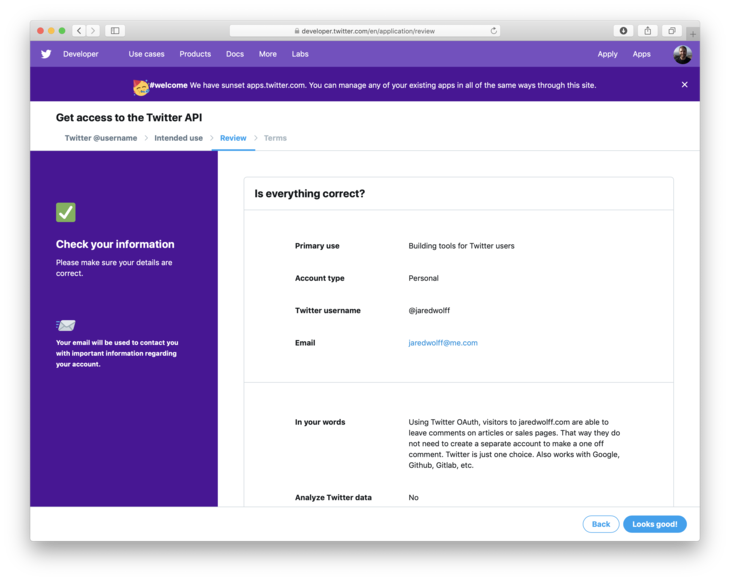
Double check your entry and click Looks Good!
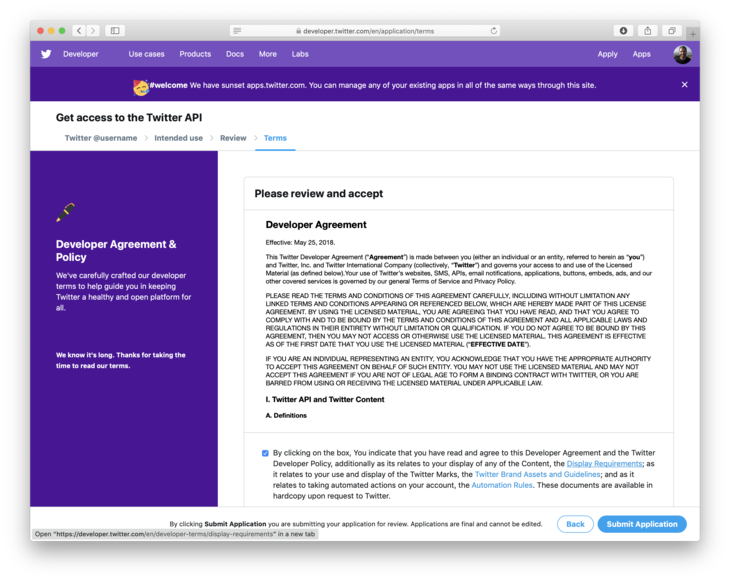
Agree to the terms of service.
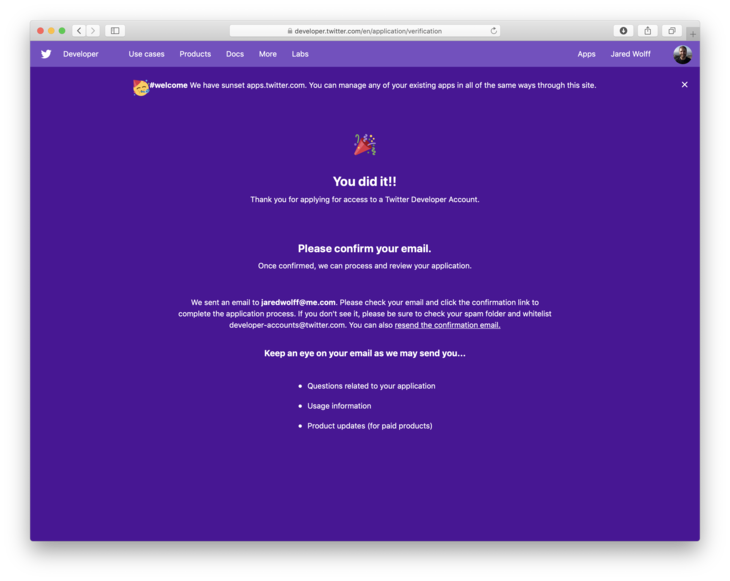
They'll tell you to check your email for a confirmation. Confirm your email and you should be able to create your first app!
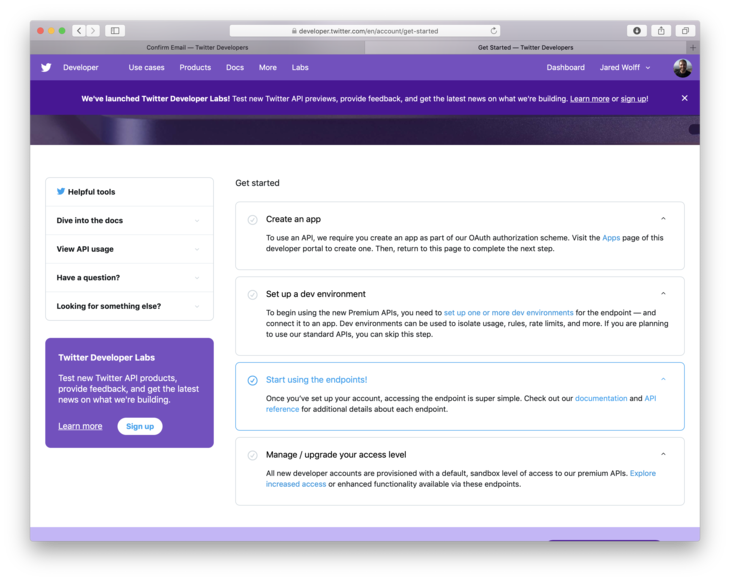
Once approved to to Get started click Create an app.
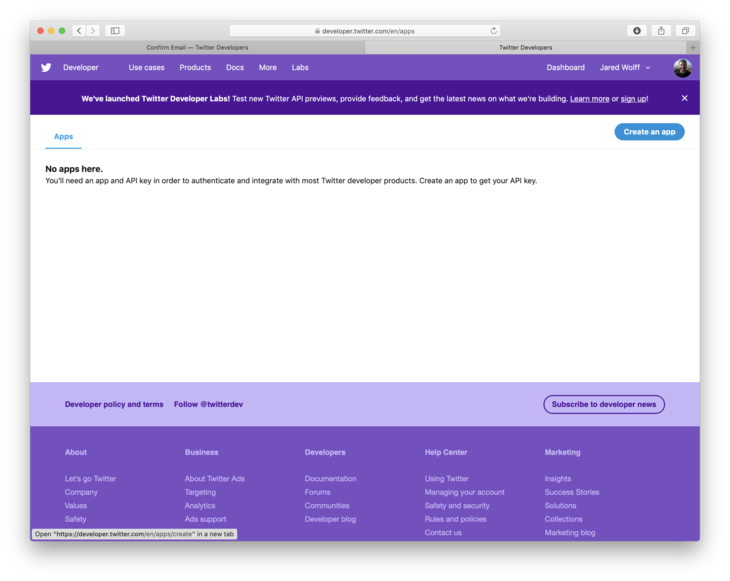
Next screen, again click Create an app
Enter all the appropriate details. For the callback URL, use
https://<your URL>/api/oauth/github/callbackwhere<your URL>is your Commento subdomain.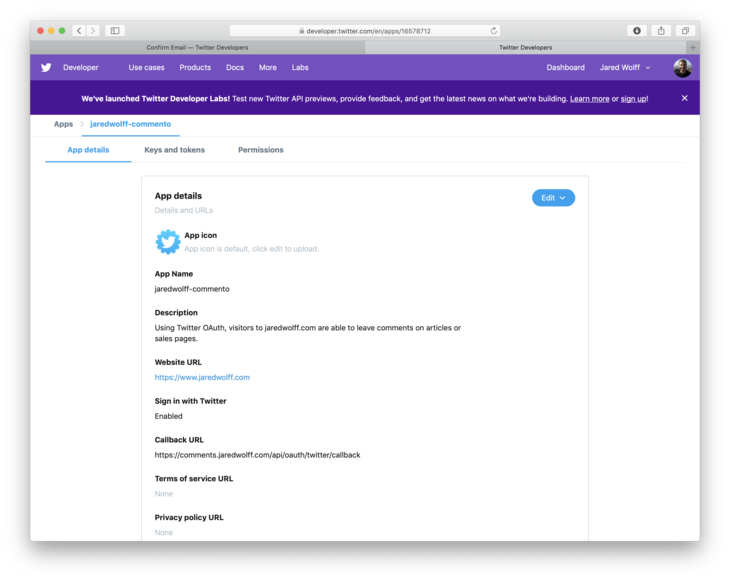
Finally, once you're done filling out the information to go the Keys and Tokens area. Save both the key and token. Enter them into the
.envfile. You can useCOMMENTO_TWITTER_KEYandCOMMENTO_TWITTER_SECRET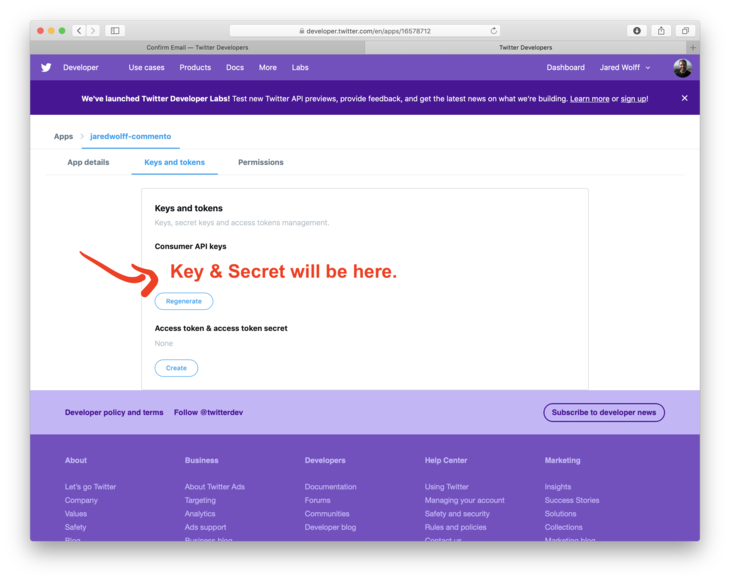
Gitlab
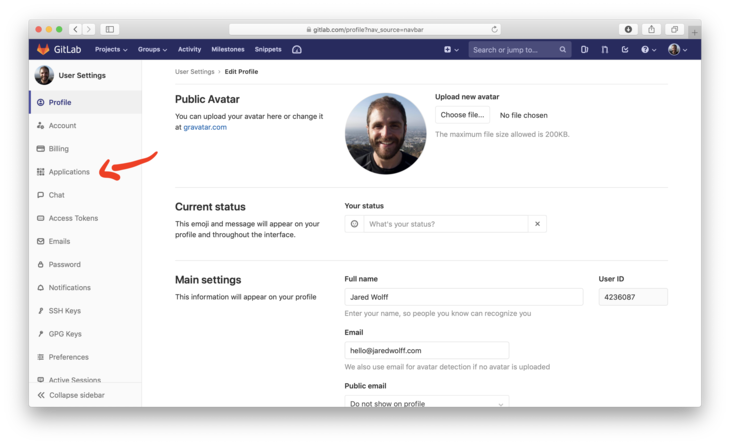
- Login to Gitlab.com and go to to top right and click Settings
Then click on Applications
Enter a name for your app. I put Commento.
- Set the Redirect URI to
https://<your URL>/api/oauth/gitlab/callback Select the read_user scope.
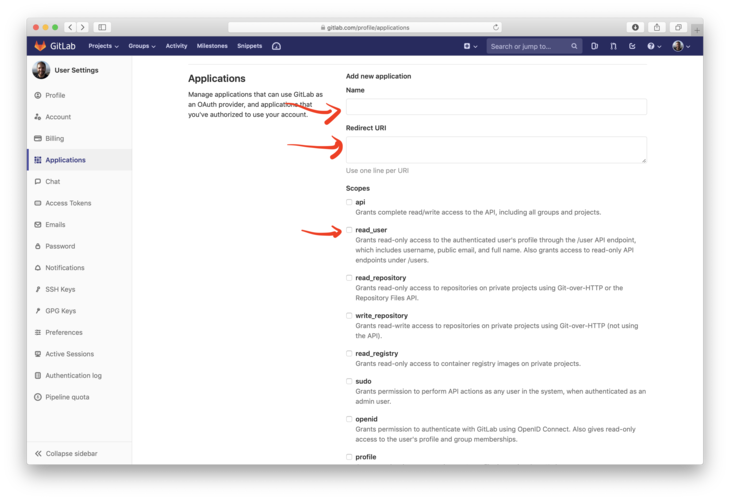
Click the green Save Application button
Copy the Application ID and Secret and place them in your
.envfile usingCOMMENTO_GITLAB_KEYandCOMMENTO_GITLAB_SECRET
Github
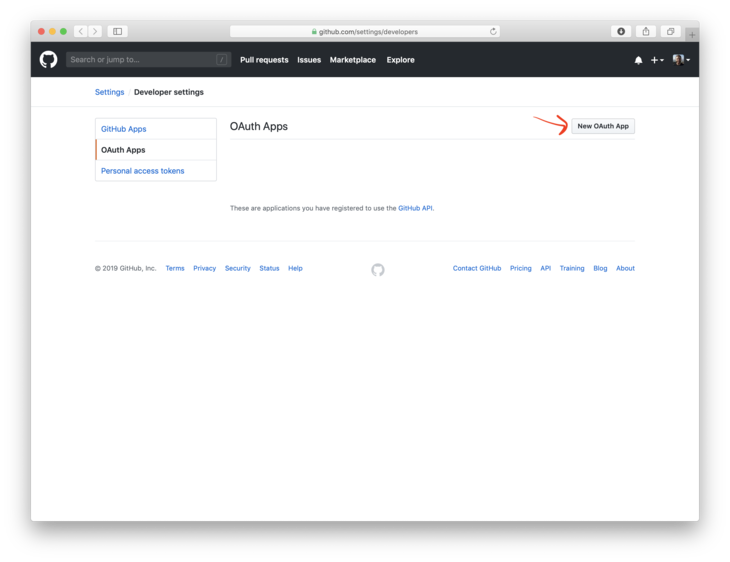
- To get your OAuth key and secret, you'll need to go to this URL: https://github.com/settings/developers
Once there, click on New OAuth App
Enter your details. For the callback URL, use
https://<your URL>/api/oauth/github/callbackwhere<your URL>is your Commento subdomain.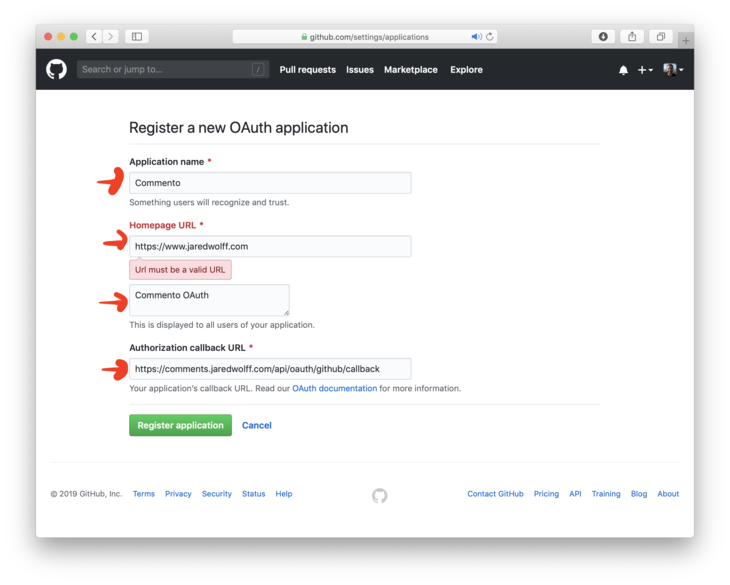
Note: Make sure you include
httpsin your URLs.Grab the Client ID and Client secret and put that into your
.envfile usingCOMMENTO_GITHUB_KEYandCOMMENTO_GITHUB_SECRET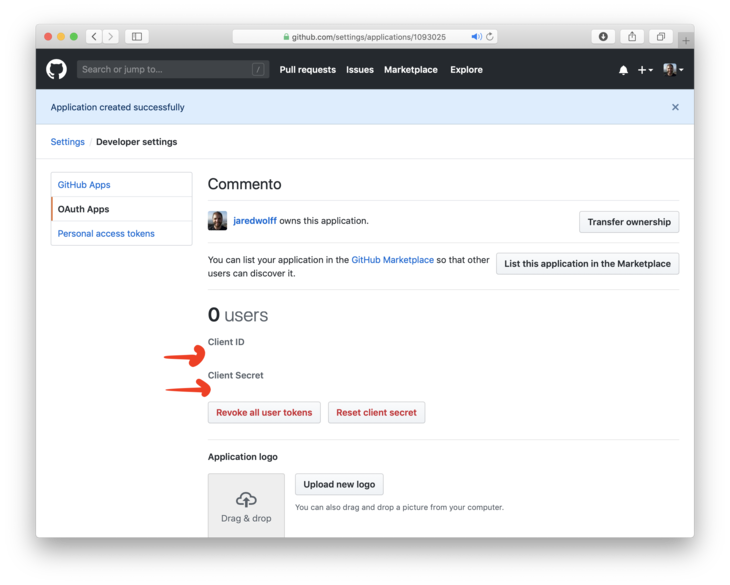
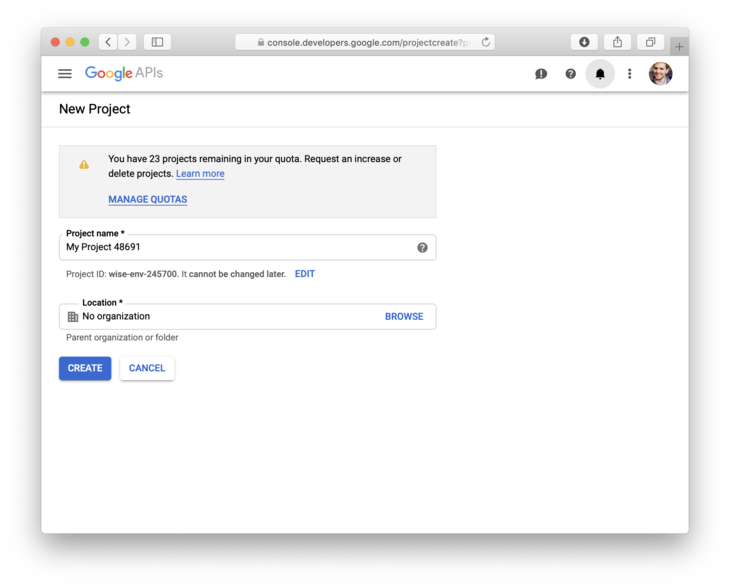
Setting up Google is just about as tedious to set up as Twitter. Despite how scary I just made it out to be, it's completely doable. Here are the steps.
- Go to this URL: Google Developer Console
Create a new project
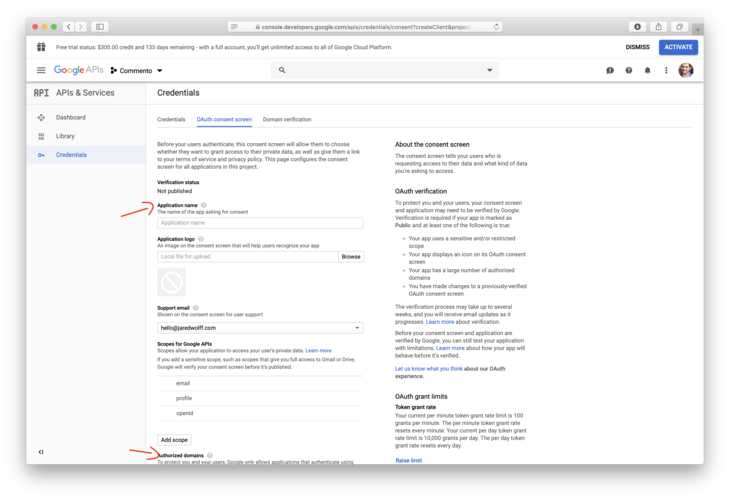
Click the GoogleAPIs logo in the top left corner to go back once you have a project. (Make sure the dropdown next to the GoogleAPIs logo is the same as your new project!)
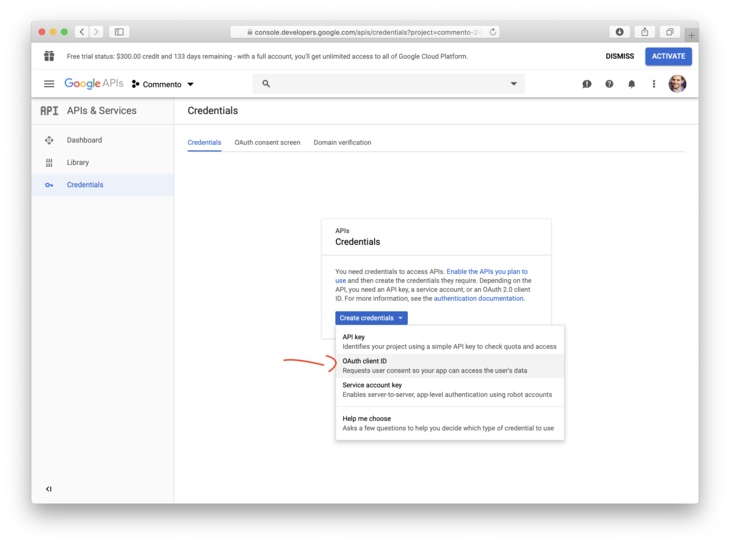
- Then, click Credentials on the left side.
Update the Application Name and Authorized Domains in the OAuth consent screen
Click Create credentials then OAuth client ID
On the Create OAuth client ID enter the subdomain associated with Commento to Authorized Javascript origins. Then, enter the full callback URL. For example
https://comments.jaredwolff.com/api/oauth/google/callback. Make it yours by replacingcomments.jaredwolff.comwith your URL.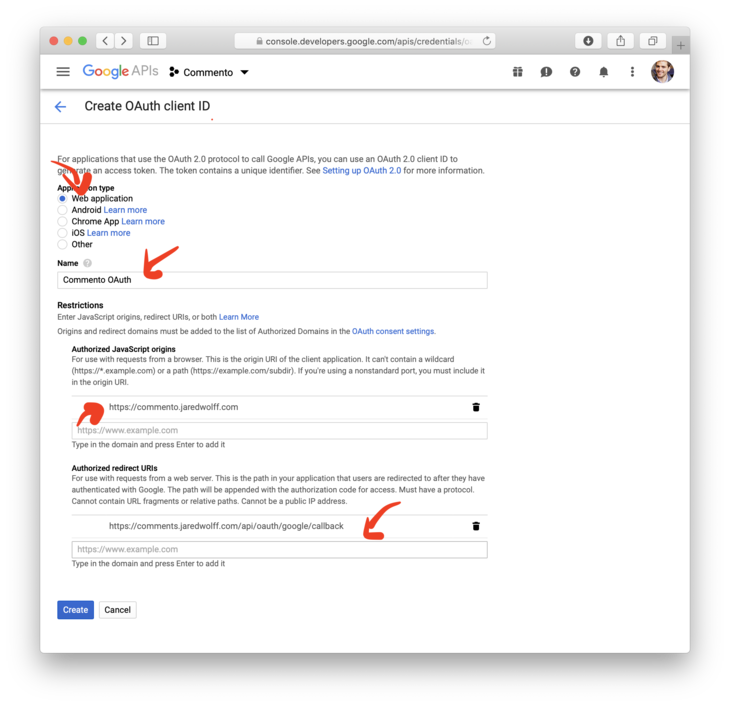
Once entered, click the create button.
Grab the client ID and client secret

Update your
.envfile usingCOMMENTO_GOOGLE_KEYandCOMMENTO_GOOGLE_SECRET
Install your application
You've entered your OAuth Credentials email, domain and SMTP credentials. It's time to wrap this show up!
- Once you're done editing your
.envfile. Rundocker-compose up(For files not nameddocker-compose.yml, use the-fflag. Example:docker-compose -f commento.yml up - Watch the output for errors. If it looks good you may want to kill it (CTRL+C) and run with the
-dflag On first start, Commento will prompt you with a login screen.
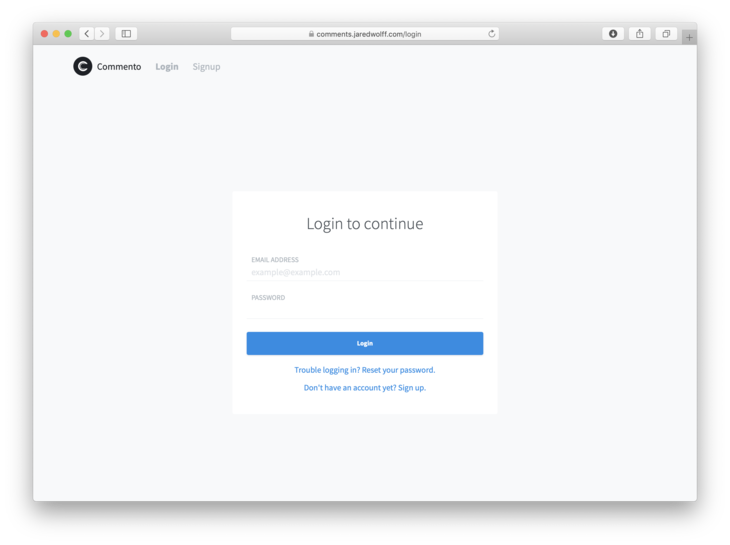
Create a new account by clicking Don't have an account yet? Sign up.
- Enter your information and click Sign Up
Check your email and click the included link:
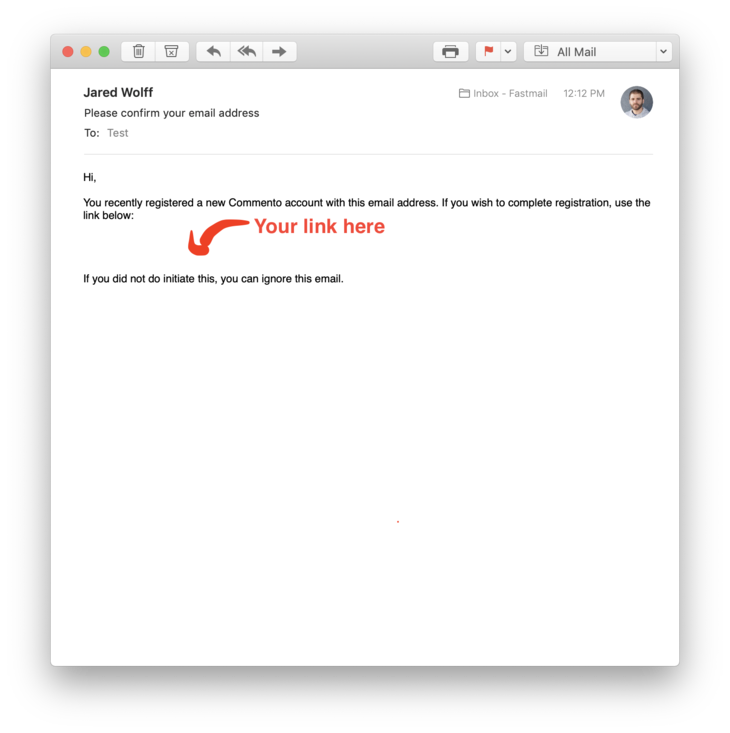
Log in with your freshly made account.
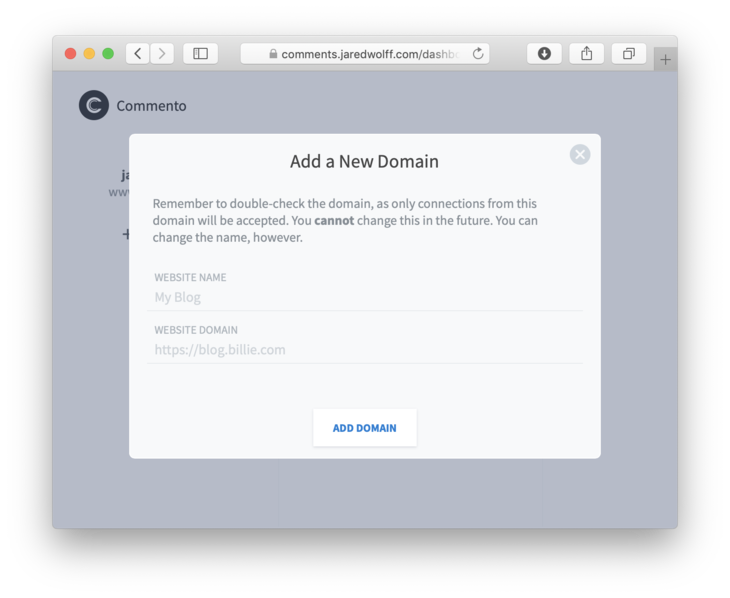
Then, click Add a New Domain.
Once created go to Installation Guide. Copy the snippet and place it where ever you want your comments to live. In my case, I put the snippet in an area just after my
<article>tag.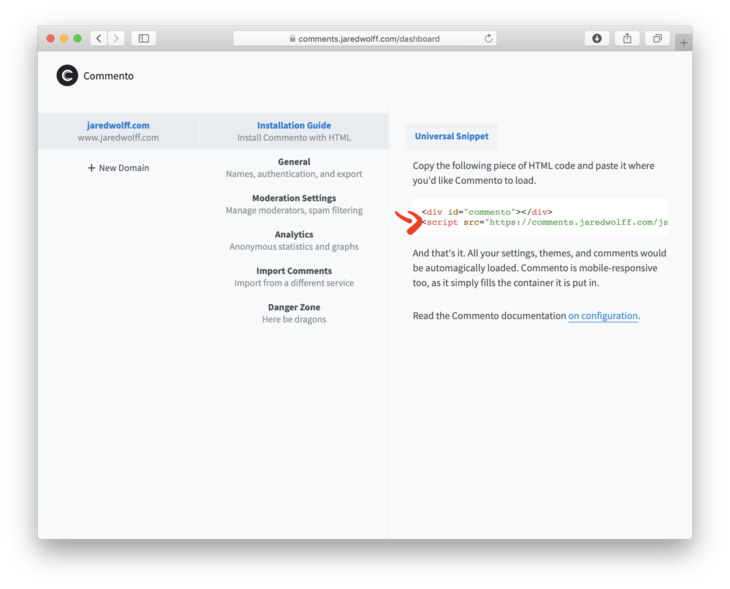
Re-compile your site and check for success!
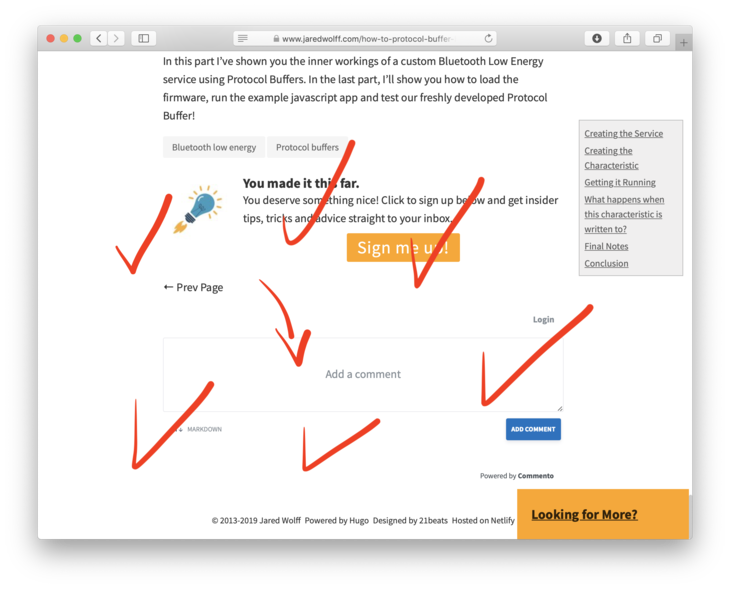
Checkmark! Finally, I recommend you try logging in with each individual OAuth configuration. That way you know it working for your website visitors. ?
Alternatives
I spent a good chunk playing around with some of the alternatives. This is by no means a definitive guide on what will work best for your site. Here are some of the top ones as of this writing:
https://utteranc.es/#configuration
https://github.com/netlify/gotell
https://github.com/eduardoboucas/staticman
https://www.vis4.net/blog/2017/10/hello-schnack/
https://github.com/gka/schnack
There's also a huge thread over at the Hugo blog which has a ton more links and resources as well:
https://discourse.gohugo.io/t/alternative-to-disqus-needed-more-than-ever/5516
Conclusion
Congrats! You are now hosting your own comments server! ?
In this article you've learned how to harness the power of Docker and a Nginx Reverse Proxy. As an added bonus, you know how to set up OAuth credentials! That way future setup will be easy peasy.
By the way, this is only the tip of the iceberg. You can set up the same server for analytics, data collection and more. All the example code including code for other applications can be found here.
Finally, if you're looking pay for Commento head to www.commento.io and sign up for the service. You'll be supporting awesome open source software!
If you have comments and questions let's hear em'. Start the conversation down below. ???