

A fun photo effect is to make a photo look like a cartoon. In this tutorial you will learn how to use Photoshop CC to make a photo look like a cartoon drawing.
Step 1: Open the photo and make sure it has a solid background.
If you need help removing a background from a photo, check out this background eraser tutorial.

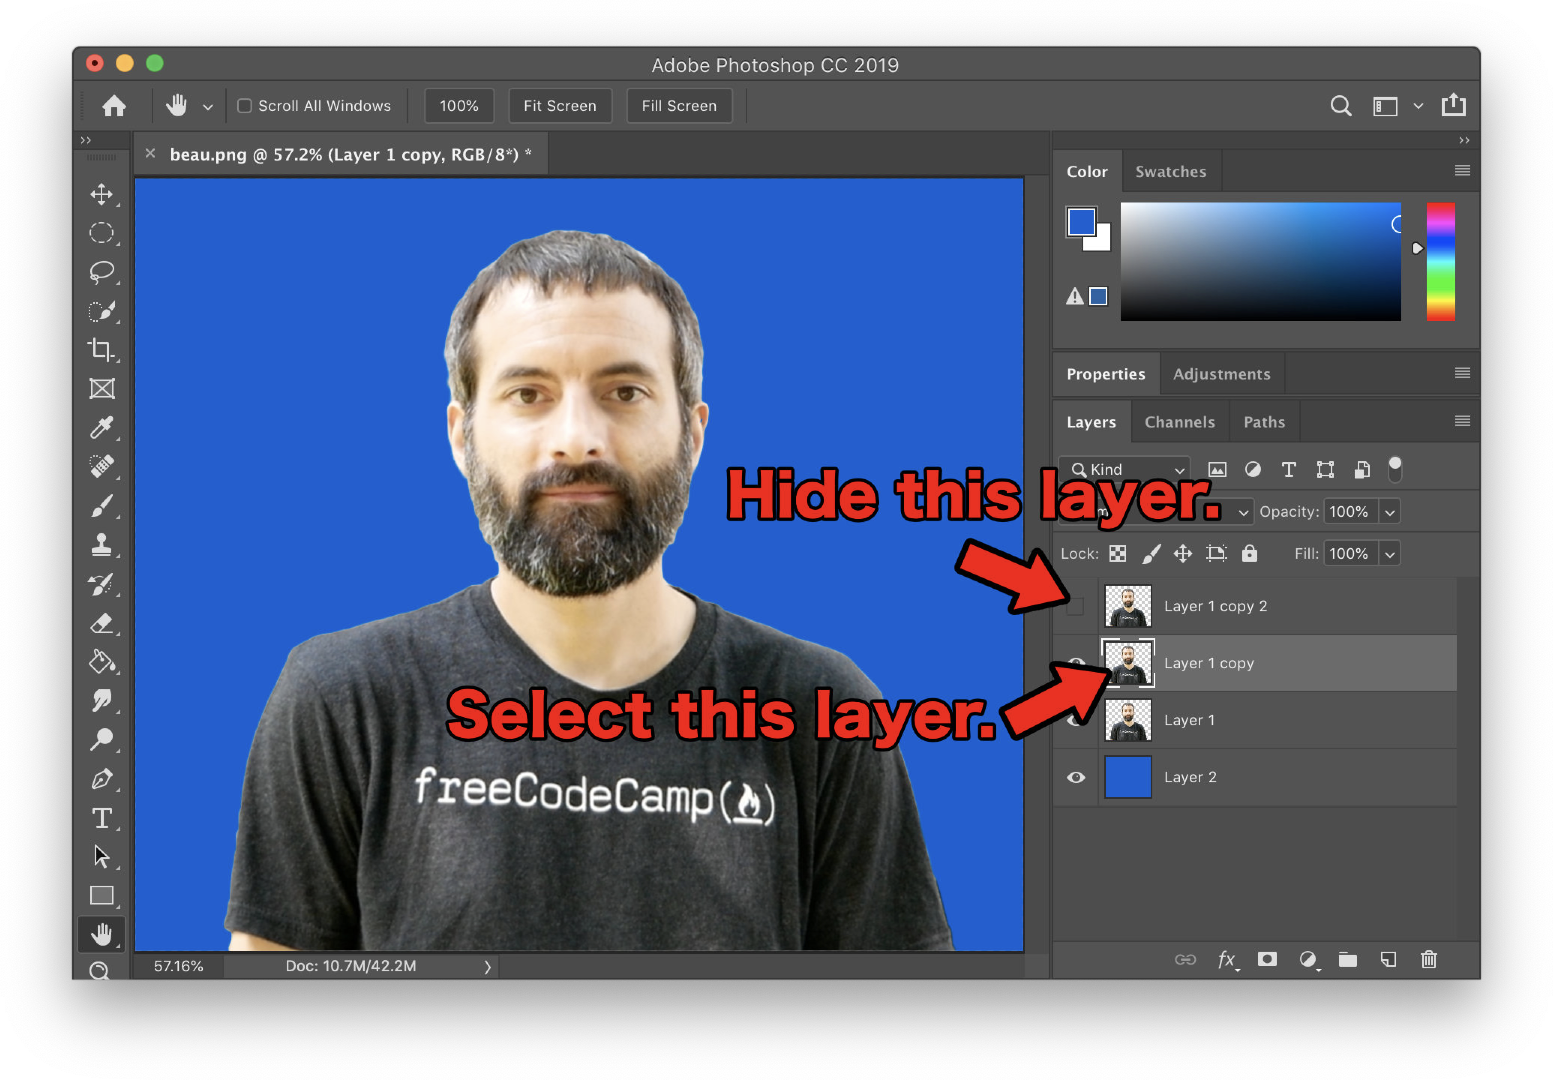
Step 2: Duplicate the layer two times.
To duplicate a layer, right click on the layer and select "Duplicate Layer...". After duplicating the layer two times, hide the top layer and select the second layer.
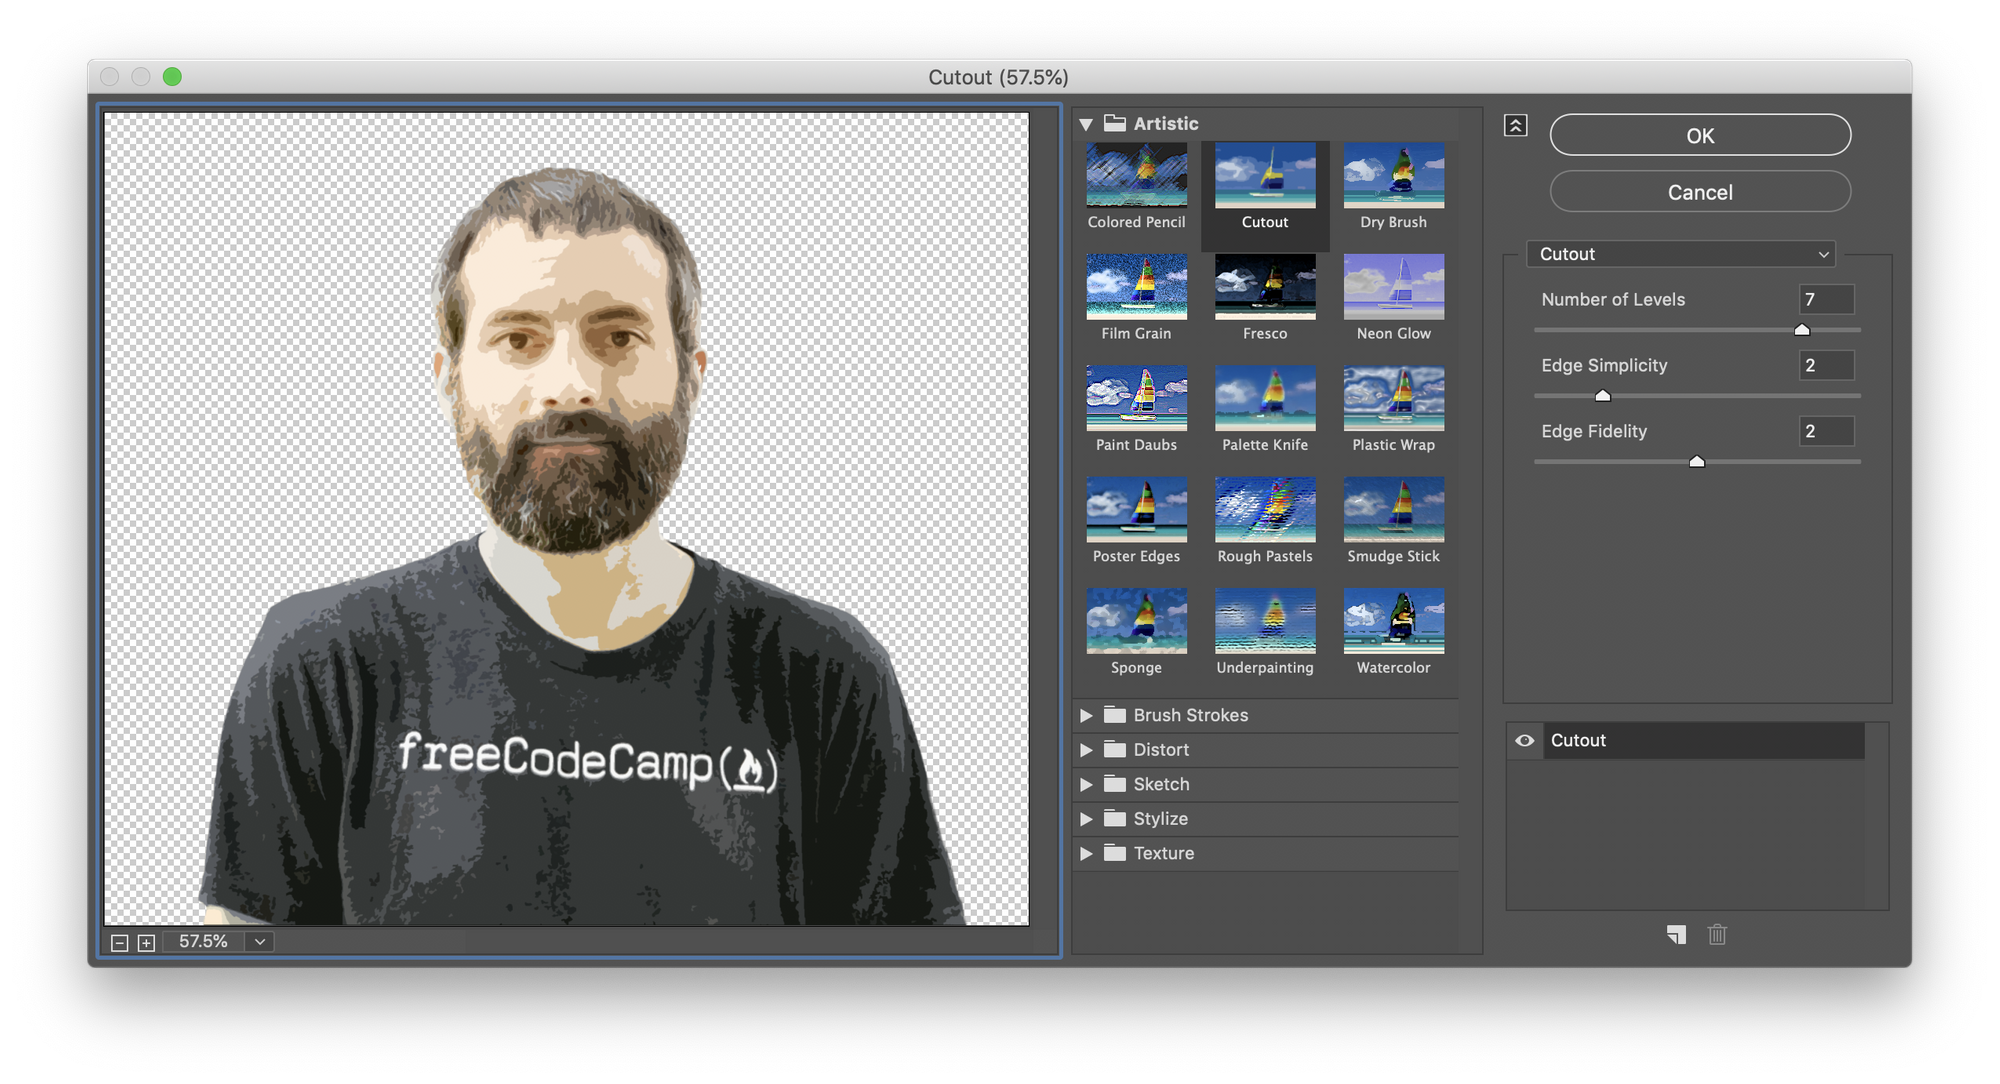
Step 3: Add a Cutout filter to the second layer.
To add a Cutout filter, first choose Filter > Filter Gallery... Then select "Cutout". Set Number of Levels to 7, Edge Simplicity to 2, and Edge Fidelity to 2. You can experiment with other numbers if you like. Click "OK".
Step 4: Add a Poster Edges filter to the top layer.
Unhide and select the top layer. Just like the last step, choose Filter > Filter Gallery... This time select "Poster Edges". Set Edge Thickness to 10, Edge Intensity to 10, and Posterization to 2. Click "OK".

Step 5: Adjust the Threshold on the top layer.
Choose Image > Adjustments > Threshold... Set the Threshold Level to 50. Depending on your image, other values could look better. Select "OK".

Step 6: Add an Oil Paint filter to the top layer.
Choose Filter > Stylize > Oil Paint... Set Stylization to 5.0, Cleanliness to 7.0, Scale to 8.0, and Bristle Detail to 1.0. Select "OK".

Step 7: Adjust the Threshold again on the top layer.
Choose Image > Adjustments > Threshold... Set the Threshold Level to 150 this time. Depending on your image, other values could look better. Select "OK".

Step 8: Change the blending mode of the top layer to "Color Burn".
In the blending mode dropdown menu, select "Color Burn".
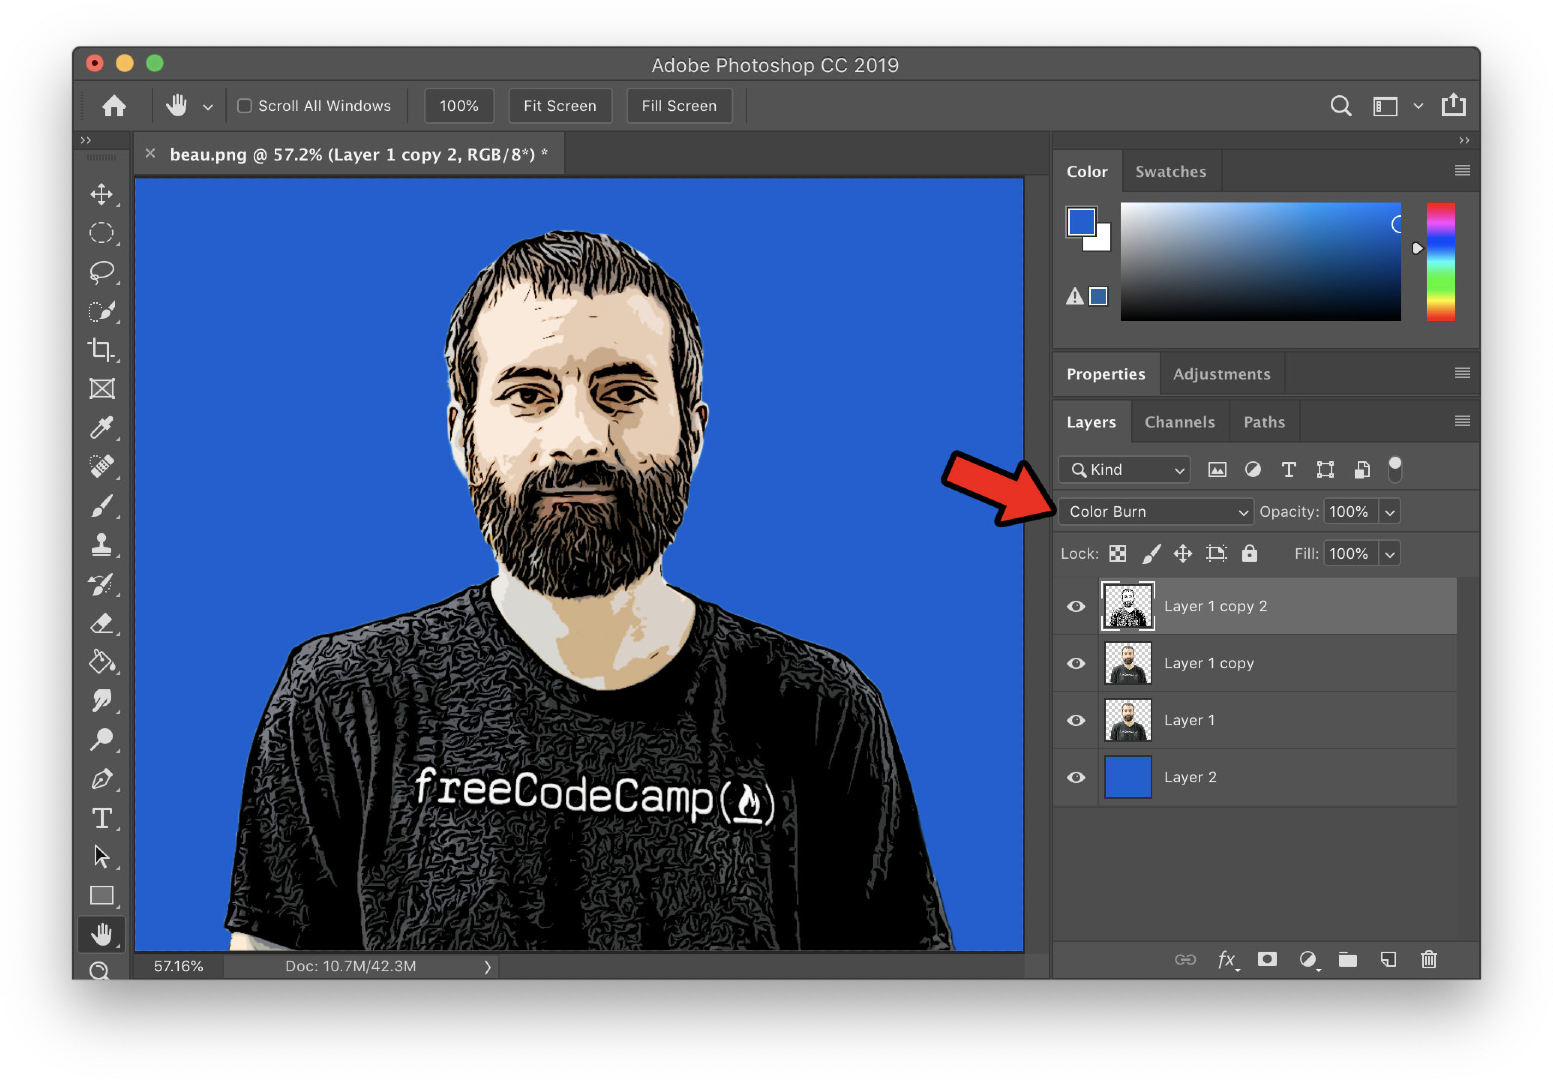
You're done! Your picture now looks like a cartoon.