
If you’re working with a spreadsheet that contains sensitive or private data, then some rows and columns might be hidden. You might also need to hide unimportant information or data you don’t want others to see in your own spreadsheet.
In these cases, you might need to unhide those hidden rows and columns before you start updating the spreadsheet examine the data it contains.
In this article, you will learn how to unhide rows and columns in Excel. You will also learn how to unhide all rows and columns in case they are all hidden.
This tutorial is applicable to Excel 2007 to 2016, but it can also guide you through how to do it in other versions of Excel.
What We'll Cover
- How to Find Hidden Rows and Columns
- How to Unhide a Column in Excel
- How to Unhide a Row in Excel
- How to Unhide all Hidden Rows and Columns in the Home Tab
- How to Unhide all Rows and Columns at Once with VBA Micro
- Conclusion
Before we dive into how to unhide rows and columns in Excel, let’s look at how to find hidden rows and columns.
How to Find Hidden Rows and Columns
You can detect a hidden row or column by looking at the lines that separate each row and each column. If the lines are double or green, then it means there's a hidden row or column.
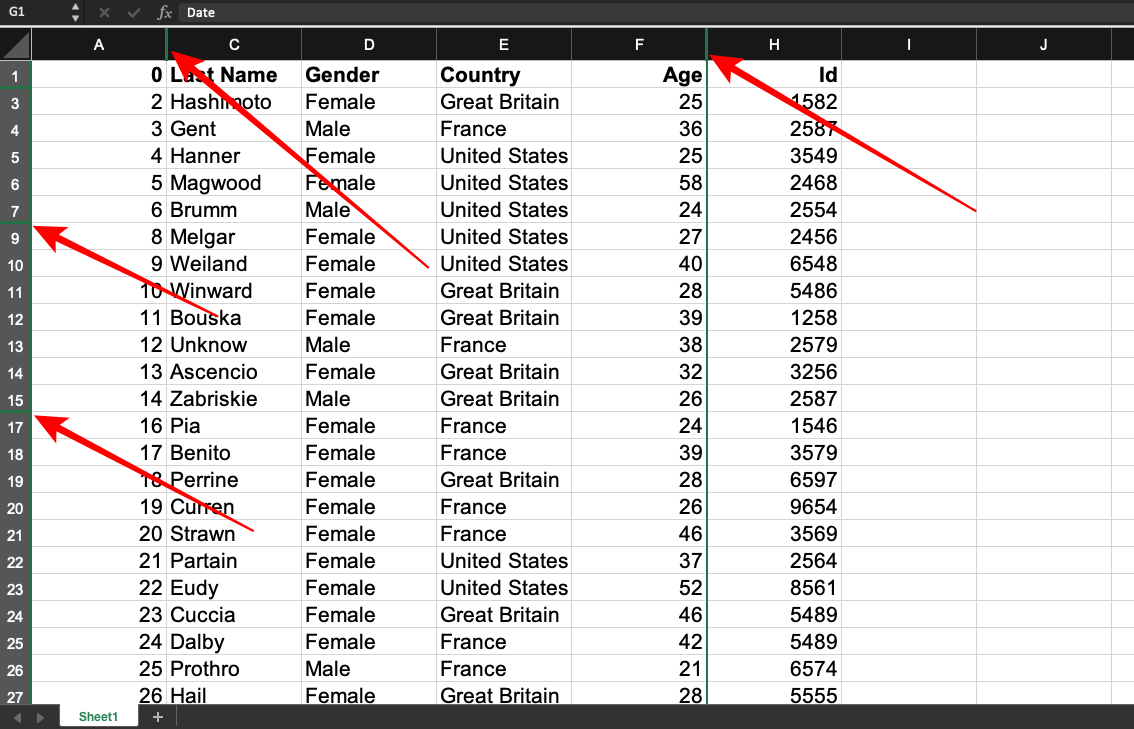
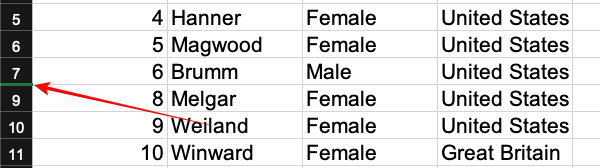
Also, taking a look at the spreadsheet, if there are missing letters for the columns or missing numbers in the rows, then it’s possible there are hidden rows and columns in the spreadsheet.
How to Unhide a Column in Excel
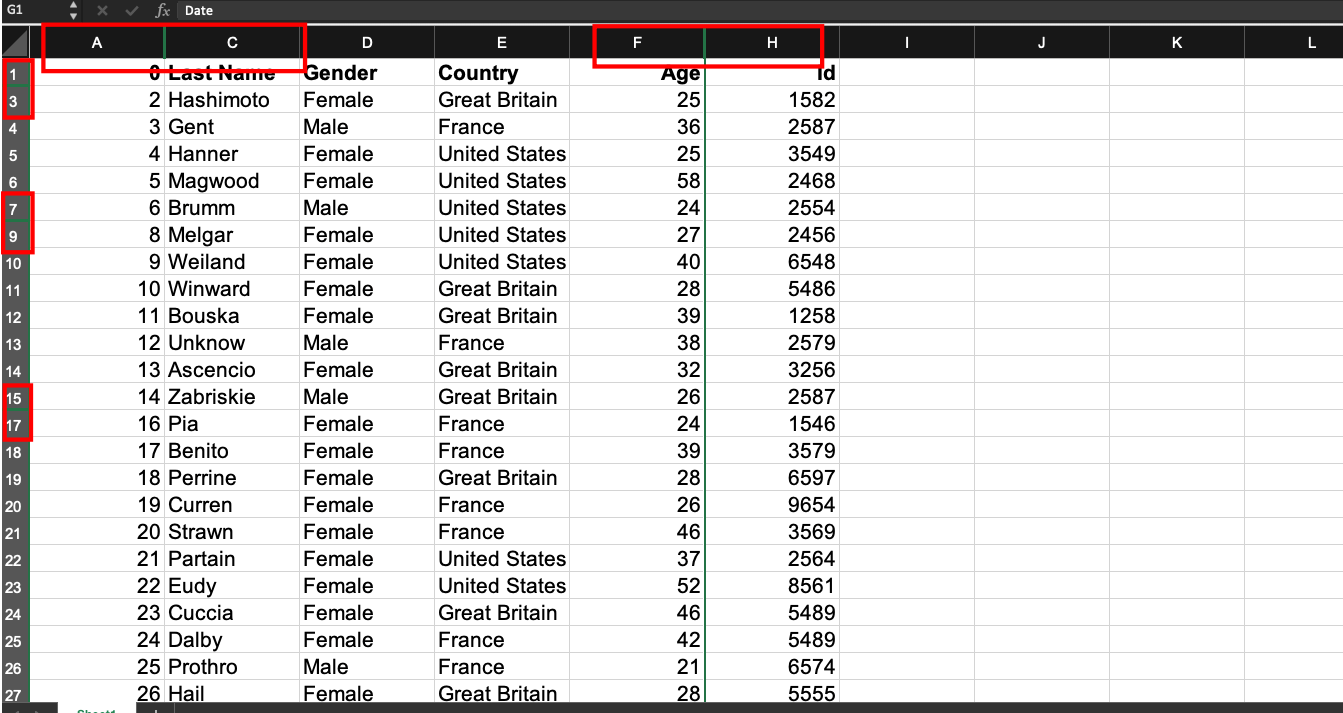
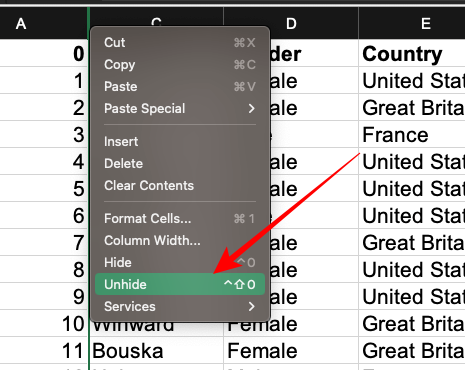
You can unhide a certain column by right-clicking on the double line that indicates the hidden column and selecting “unhide”:

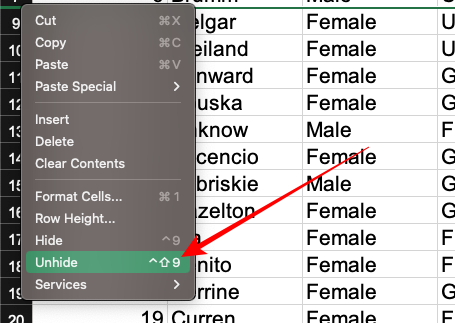
How to Unhide a Row in Excel
If you want to unhide a row, right-click on the double line indicated in green (or if possible, another color based on the user settings), then select “unhide”:
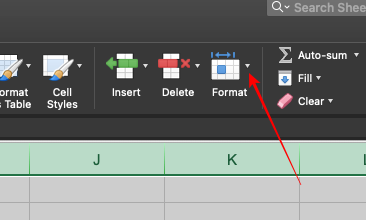
How to Unhide all Hidden Rows and Columns in the Home Tab
To unhide all rows, select all rows and columns by pressing CTRL + A, go to the Home tab, locate cells, and click the arrow on "Format":
Under visibility, hover on “Hide and Unhide”, then select “Unhide Rows”:
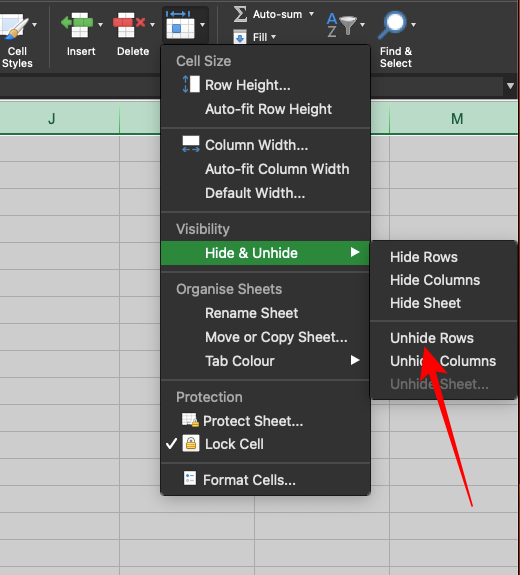
To unhide all hidden columns, you have to follow the same process, but this time around, you have to select “Unhide Columns”.
How to Unhide all Rows and Columns at Once with VBA Macro
If you’re dealing with a large spreadsheet, the processes we just discussed might be tedious for you.
Instead of unhiding for the rows and columns one by one or unhiding rows and unhiding columns, you can run some VBA (Visual Basic for Applications) code to do it.
Here’s how to run VBA code in Excel:
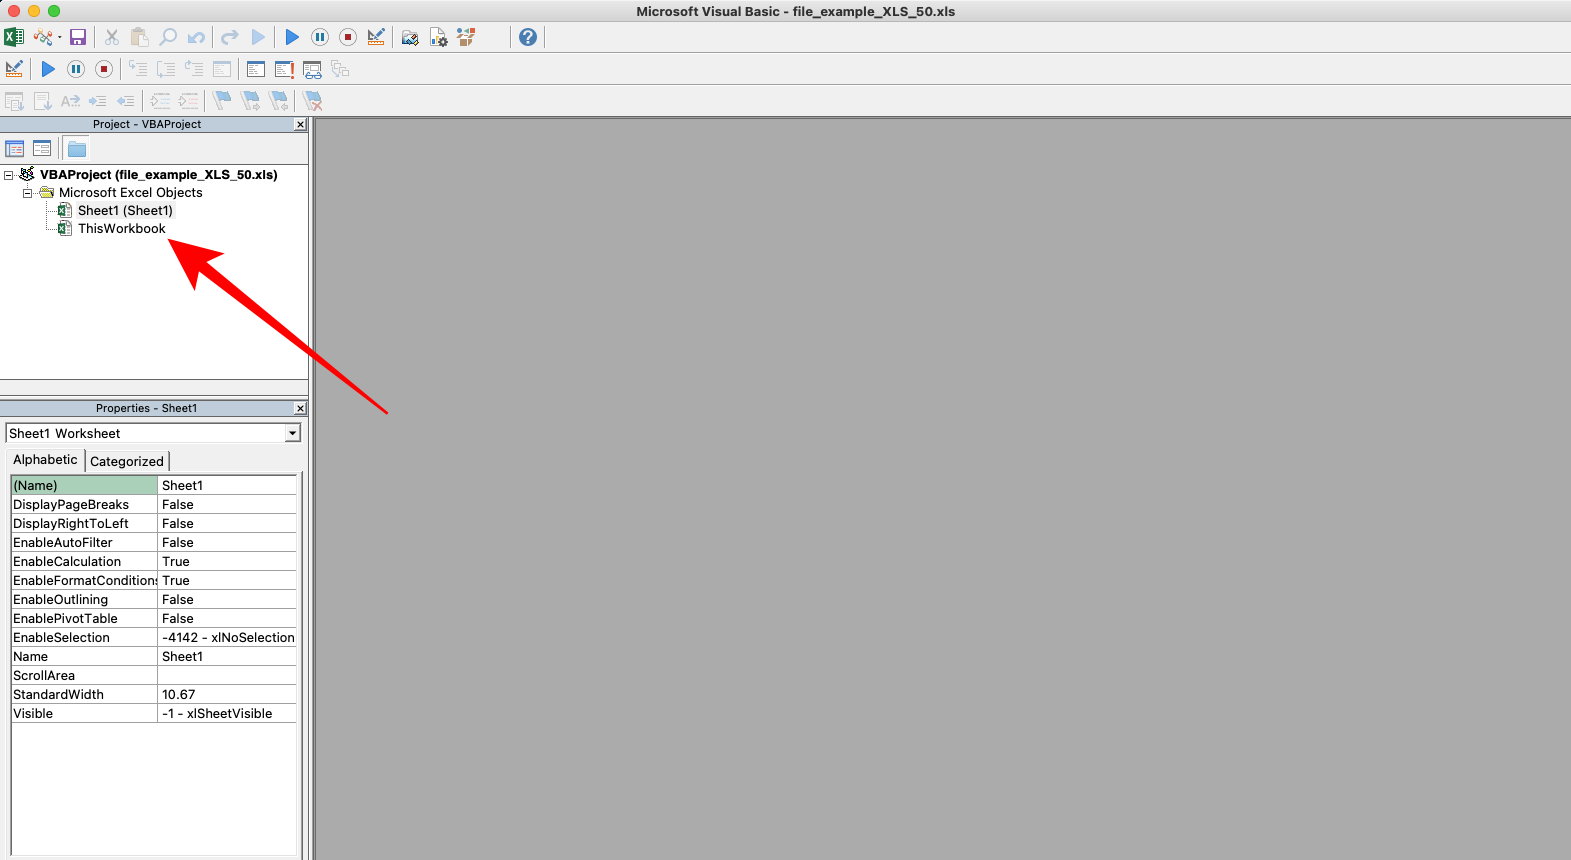
Press ALT + F11 (or Option + F11 on Mac) to open the VBE (Visual Basic Editor):
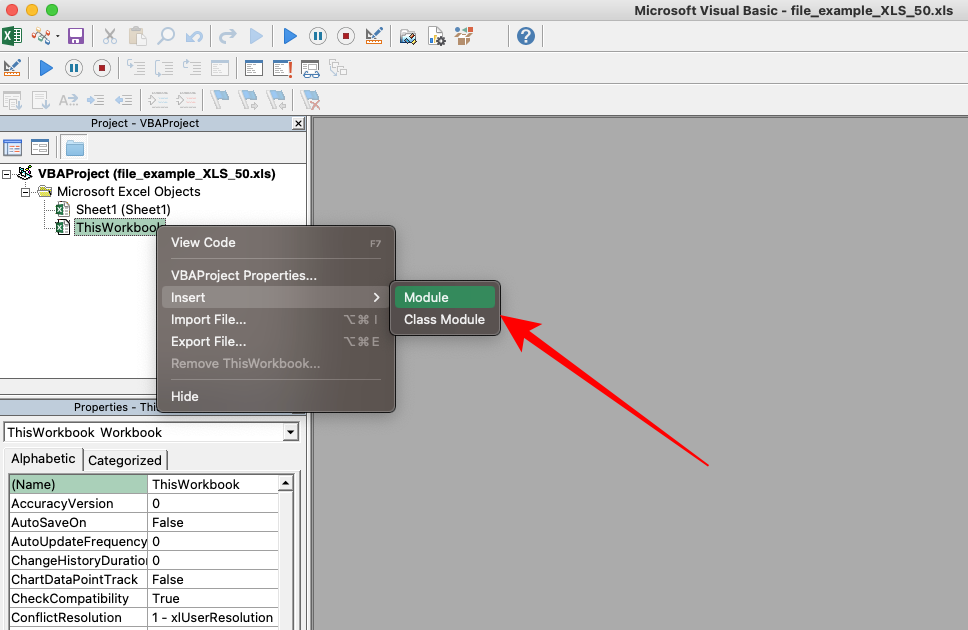
Right-click on your current workbook, hover on “Insert” and select “Module”:
Paste this code into the editor:
Sub UnhideAllRowsAndColumns()
  Cells.EntireColumn.Hidden = False
  Cells.EntireRow.Hidden = False
End Sub
Close the dialogue and go back to your worksheet.
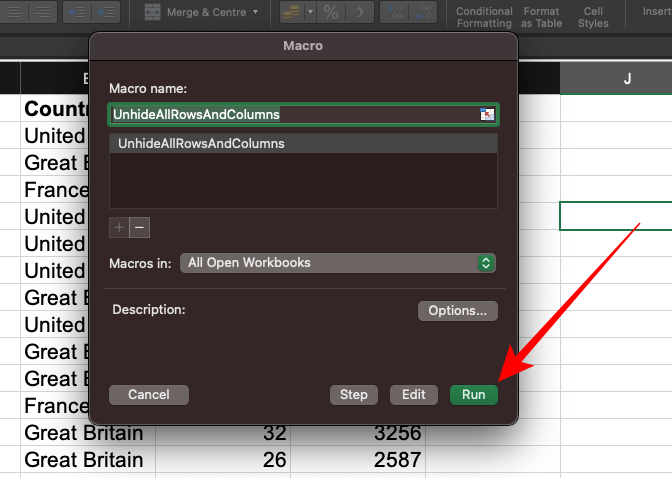
Next, you need to run the VBA Micro. Press ALT + F8 and you’ll see something like this:

Expand it and click “Run”:
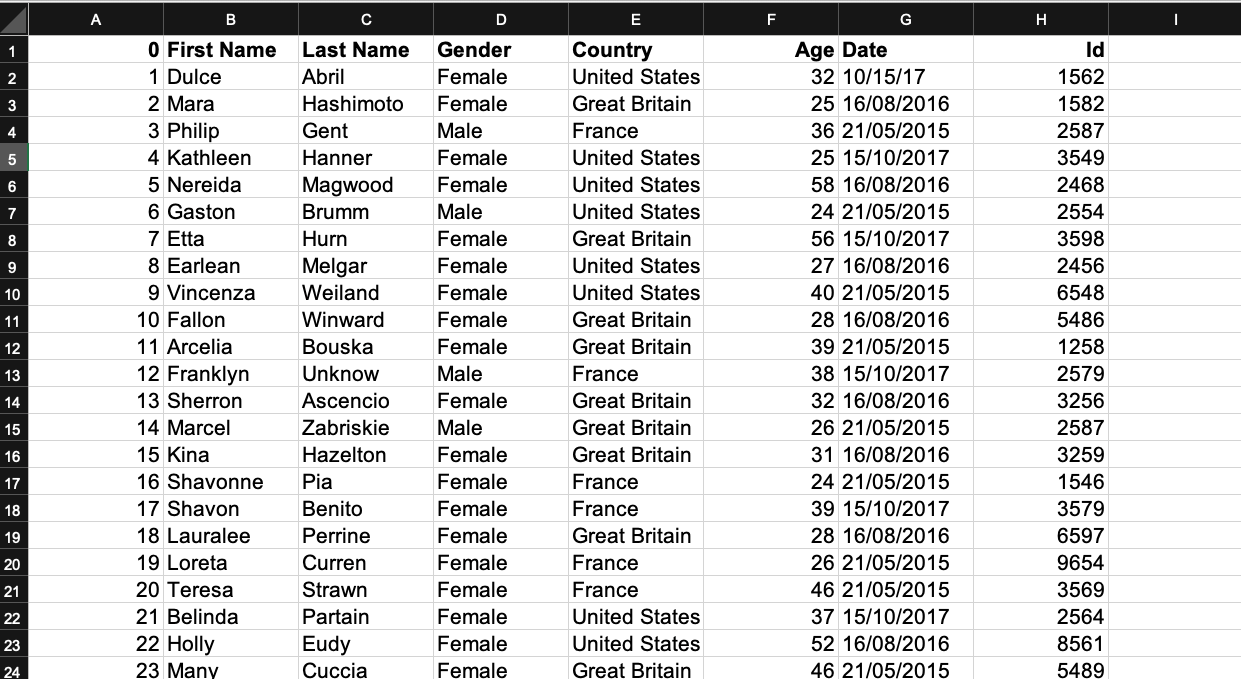
Every row and column should now show up:
Conclusion
This article showed you how to unhide a row or column in Excel.
The examples we looked at showed you how to unhide individual rows and columns, unhide all columns, and unhide all rows.
We also looked at how you can unhide rows and columns altogether with Excel VBE (Visual Basic Editor).
If you find this article helpful, share it with your friends and family.