
Building and managing applications on the cloud can be a daunting task. This is especially true when it comes to handling different environments, scaling, and deploying updates.
But there's a service in AWS that can simplify this. AWS Elastic Beanstalk is here to make your life easier. It provides an easy-to-use platform for deploying, managing, and scaling your applications in the AWS Cloud.
In this tutorial, we'll dive into the basics of Elastic Beanstalk, and then walk you through the process of deploying a NodeJS app connected to an RDS database. Let's get started!
What is Elastic Beanstalk?
AWS Elastic Beanstalk is a fully managed service that helps you deploy, manage, and scale applications on AWS. It takes care of provisioning the required resources, such as EC2 instances, RDS databases, and load balancers.
Elastic Beanstalk also handles application deployment, monitoring, and maintenance tasks so that you can focus on writing code and delivering features.
Elastic Beanstalk uses CloudFormation to provision resources. The good thing is you don't need to write CloudFormation templates. It'll be taken care of by Elastic Beanstalk automatically.
Now that we have a basic understanding of Elastic Beanstalk, let's dive into deploying our NodeJS app with an RDS connection.
How to Prepare the NodeJS Source Code
We cannot deploy our app straight to Elastic Beanstalk (similar to deploying at EC2). We need to follow a few steps before deployment. It took hours for me to figure out this but I'll help you to deploy it in 5 minutes.
In this article, we'll be deploying this Node.js application. But to deploy our code we don't need a repo, instead we need a zip of our source code. You can download the zip file of the above repo here.
Adding the steps here if you want to deploy your own app. But if you want to just deploy the above code, you can move to the next section (How to Create the Elastic Beanstalk App).
How to Deploy Your Own App
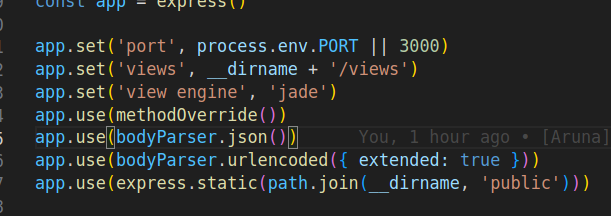
First, ensure your package.json file has the start command and this start command should be configured to run your app. Beanstalk will execute npm start by default and it throws an error if it can't find it.
 package.json file with start command
There's a super important thing about configuring environment variables. AWS follows pre-defined environment variables for RDS connections. Make sure you used the right naming. You can read this article by AWS for additional information.
A quick example for you if you don't understand this point. To configure the hostname for the RDS, you have to use the RDS_HOSTNAME environment variable. You app will not be able to connect if you used some other variable name (for example DB_HOSTNAME).
You can define custom environment variables in the AWS Elastic Beanstalk console as per your needs.
Here's how your DB connection configuration should look:
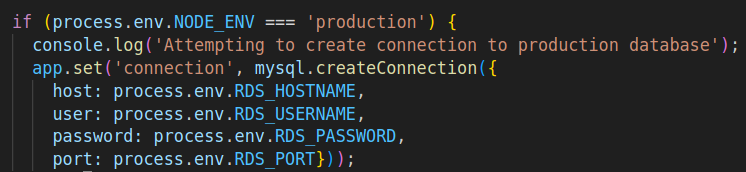 Elastic Beanstalk DB configuration
Elastic Beanstalk (EBS) by default runs on port 8080. So we have to configure our app to run on port 8080. It's always a best practice to add the port number in environment variables and configure it in the EBS console.
 Elastic Beanstalk port
In order for Elastic Beanstalk to read our environment variables, we should add a file called .ebextensions in the project root directory with the following code:
commands:
    setvars:
        command: /opt/elasticbeanstalk/bin/get-config environment | jq -r 'to_entries | .[] | "export \(.key)=\"\(.value)\""' > /etc/profile.d/sh.local
packages:
    yum:
        jq: []
Install the dependencies by executing npm install and zip your code along with node_modules by executing the following command:
zip [filename].zip -r ./
Remember the zipped file should contain all files and subdirectories in the root folder and should not be inside any other folders. This is because Elastic Beanstalk will check for the package.json file in the root folder and it'll throw an error if it can't find it.
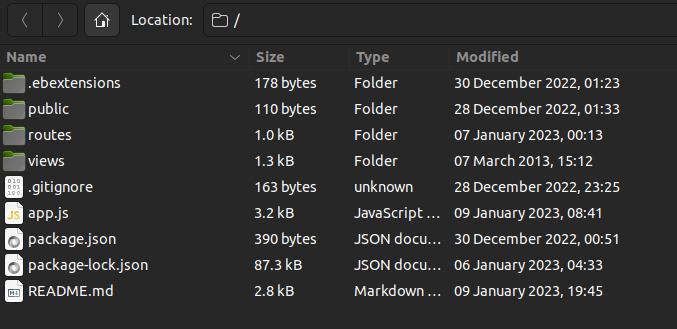 An example of correct Elastic Beanstalk folder structure nodejs
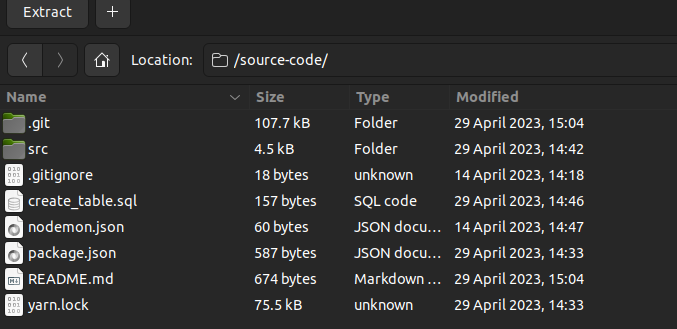 Wrong folder structure (all files are inside the folder called source-code)
Now our app is ready, so let's create the Elastic Beanstalk application.
How to Create the Elastic Beanstalk App
Step 1: Configure Your Environment
First, navigate to the AWS Management Console and select Elastic Beanstalk from the Services menu. Click on "Create Application" button.
Then select the Web server environment and provide a name for your app.
 Getting started with AWS Elastic Beanstalk
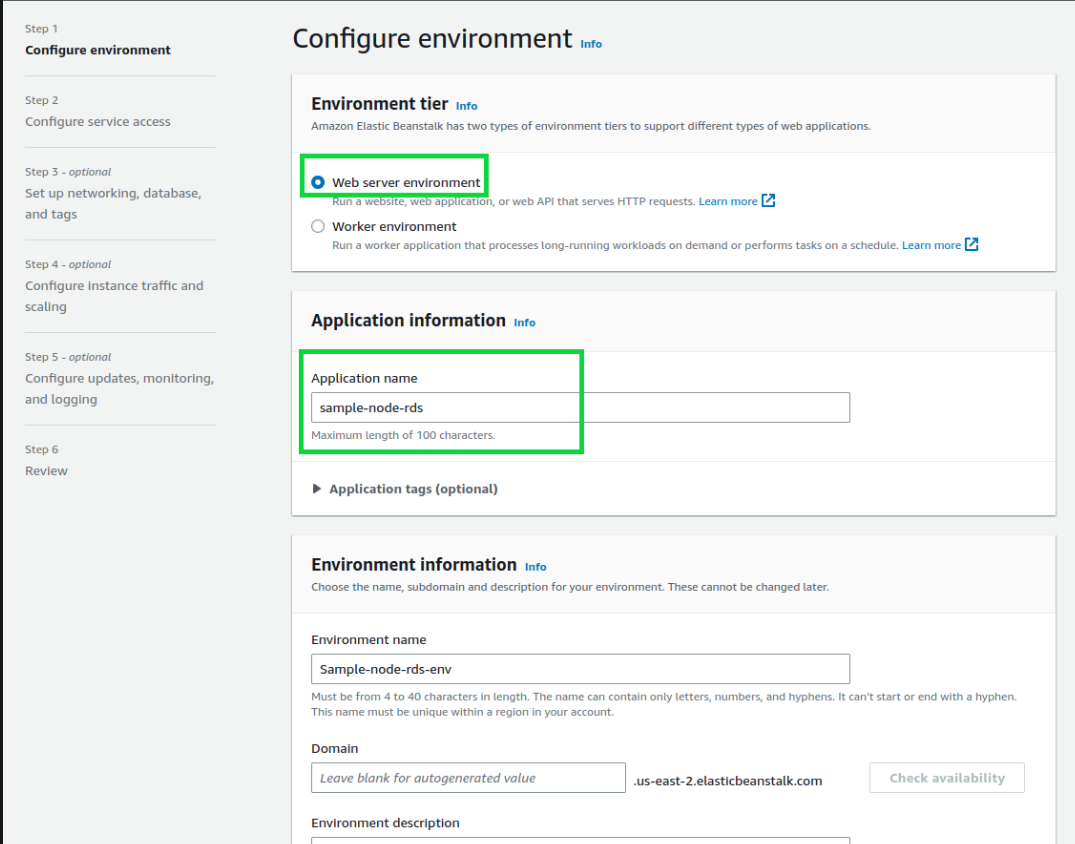 Give your application a name
Choose Managed platform in "Platform type", and Node.js in "Platform", and leave the rest as it is.
Then choose Upload your code in the "Application code" section and upload the zip file.
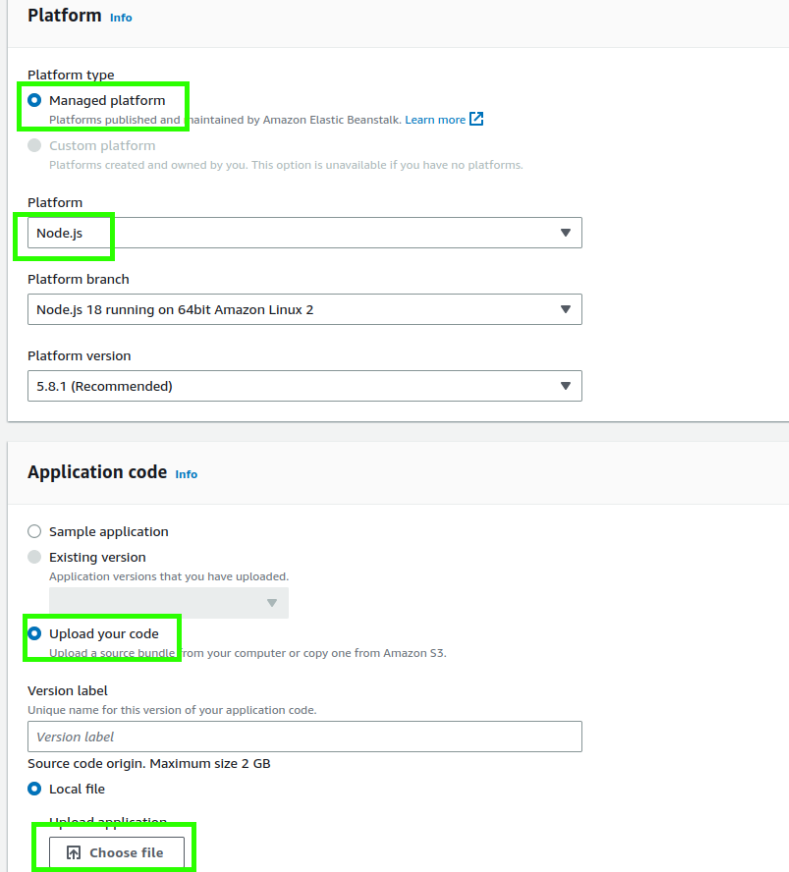 Screenshot showing the above selections
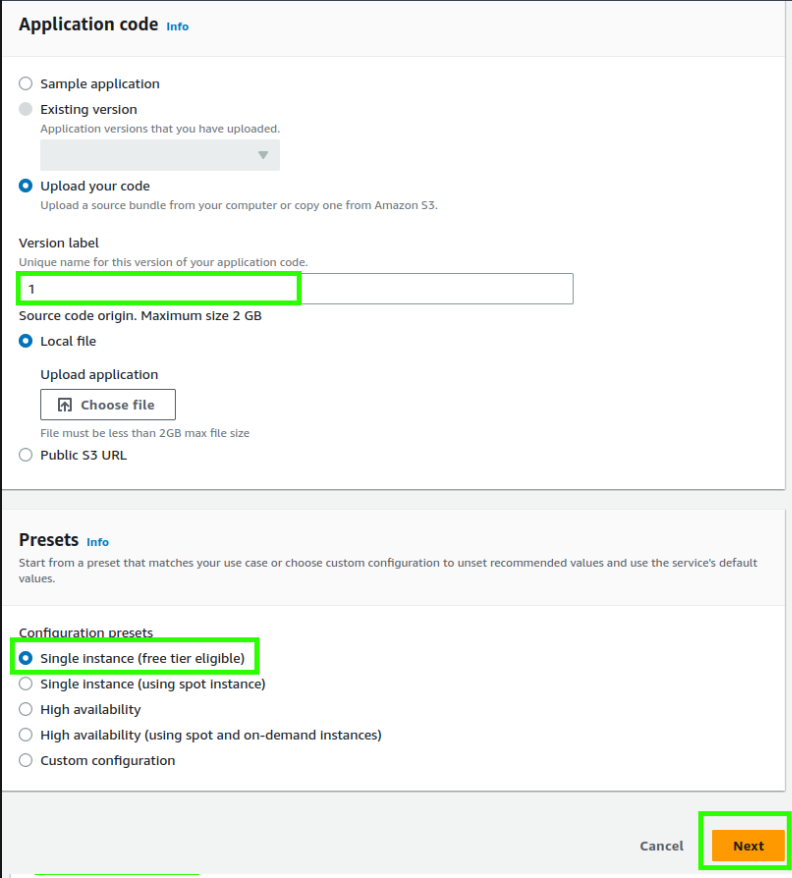
Then set the version label to 1 and choose Single instance in the "Presets" section and click Next.
Note: Prefer High availability for production environment.
 More setup config
Step 2: Configure service access
In this section, we have to configure IAM roles. We need to create two IAM roles, one for Elastic Beanstalk and one for EC2
For the service role, select Create and use new service role. It'll automatically create and provide required permissions
If you want to ssh into your EC2 instance via terminal, create a key-value pair and select it. Ignore this step if you don't want to login into EC2.
Create an IAM role with the following permissions and add the role to "EC2 instance profile" and proceed Next.
- AWSElasticBeanstalkWebTier
- AWSElasticBeanstalkWorkerTier
- AWSElasticBeanstalkMulticontainerDocker
 Configure service access screen
Step 3: Set up networking, database, and tags
Now, turn on the Enable database toggle and choose mysql Engine. Fill out the other fields based on your needs.
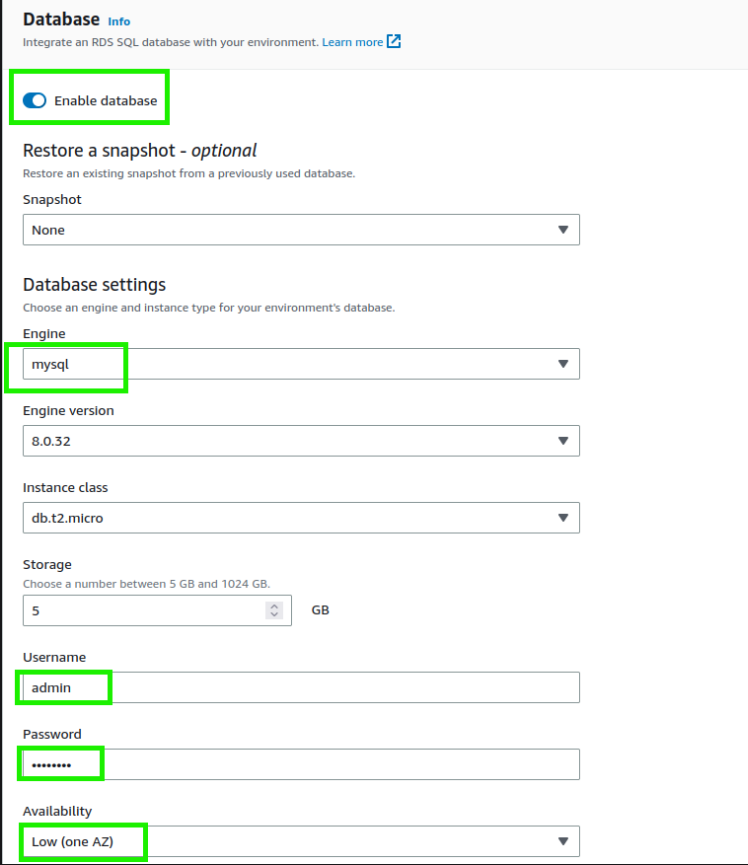 Filling out the other options
Be super careful while selecting the "Database deletion policy". As I'm creating the sample app I selected the Delete option which will delete the database when the Elastic Beanstalk application is deleted.
If you're working on a production database, it's always a best practice to choose the Create Snapshot or Retain option.
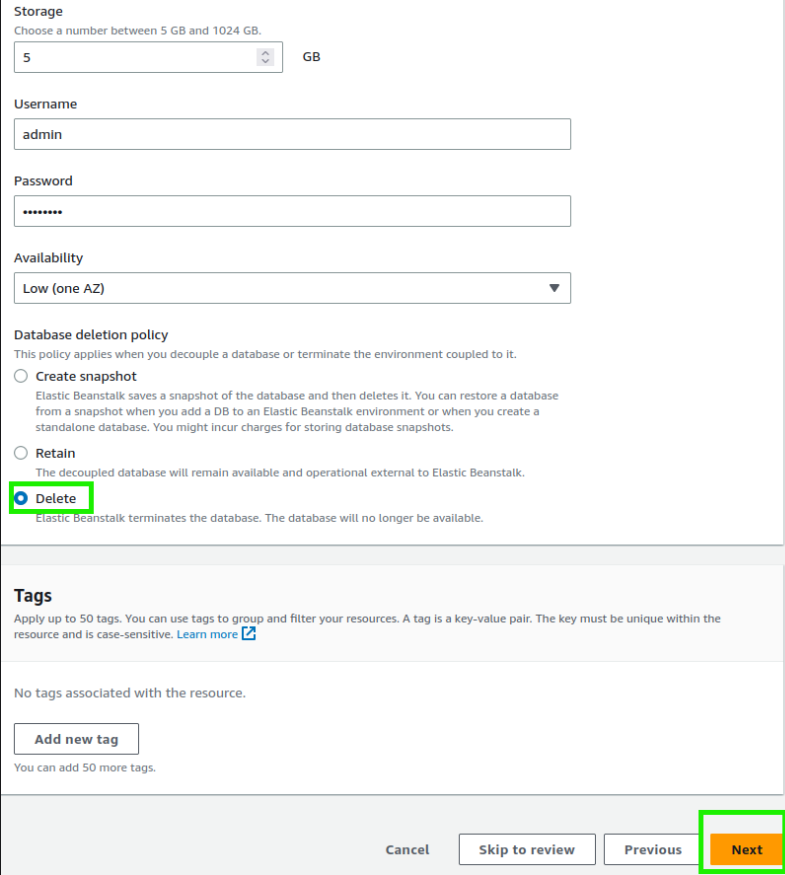 Database deletion policy
Step 4: Configure instance traffic and scaling
You don't need to change anything here unless you particularly need it. If you're building this sample app, leave the fields with default values. By default Elastic Beanstalk will create an Amazon Linux machine.
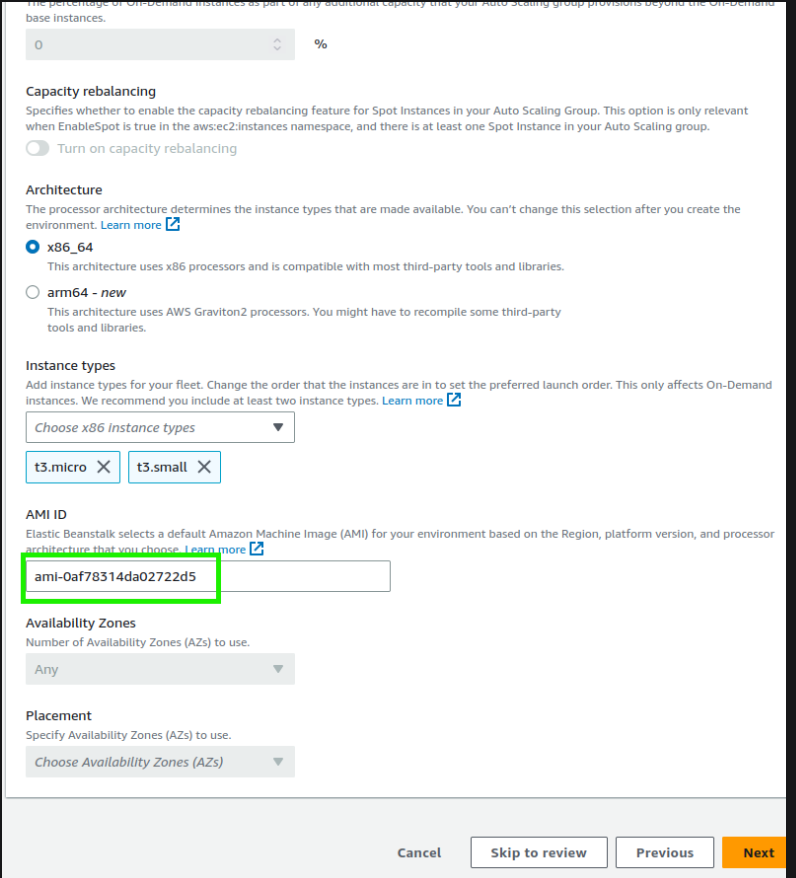 You can leave the default values unless you need someting in particular.
Step 5: Configure updates, monitoring and logging
Choose Basic in "Health reporting" and uncheck Managed updates activation.
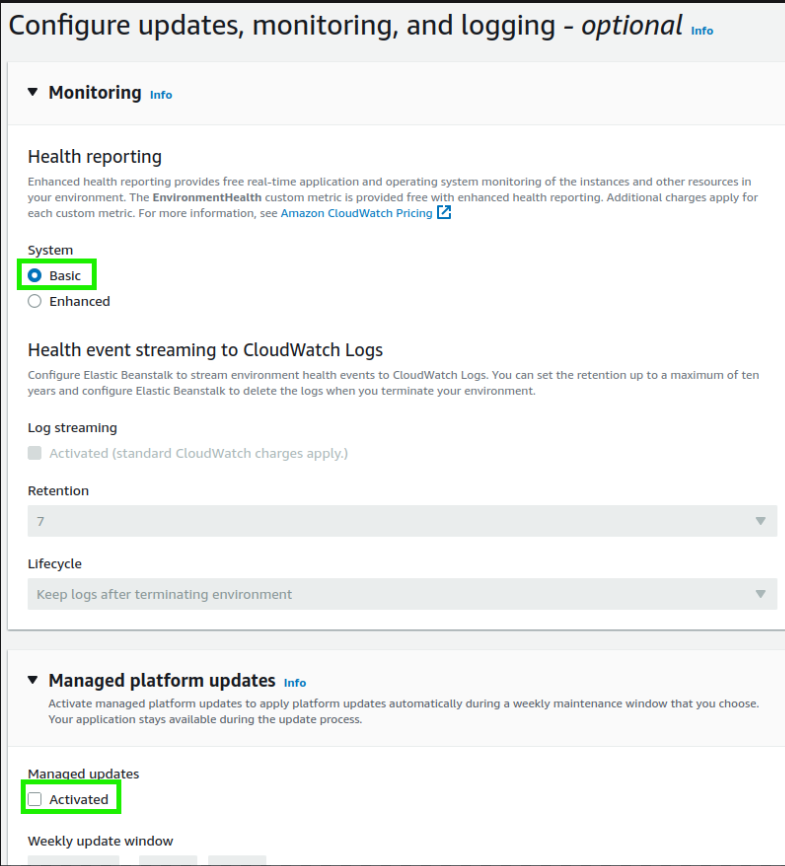 More config
Add your environment variables and click Next.
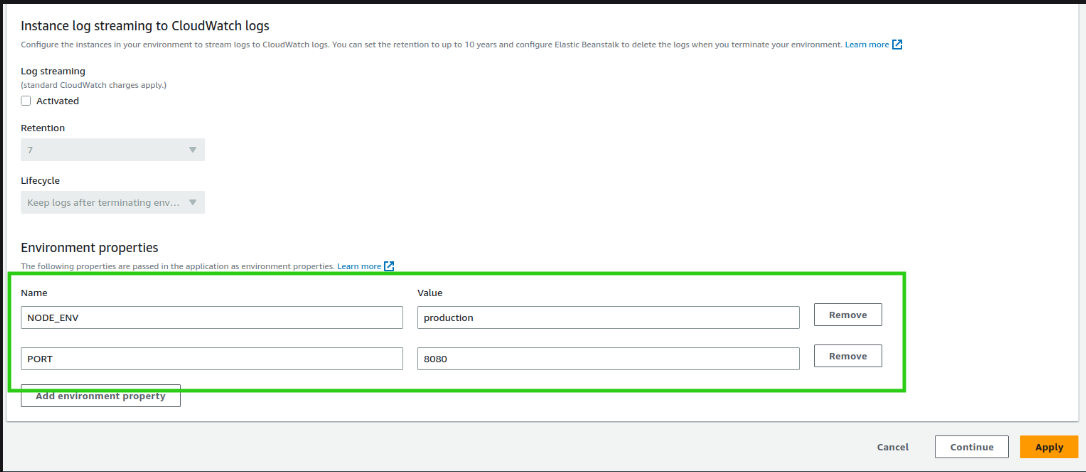 Add environment variables
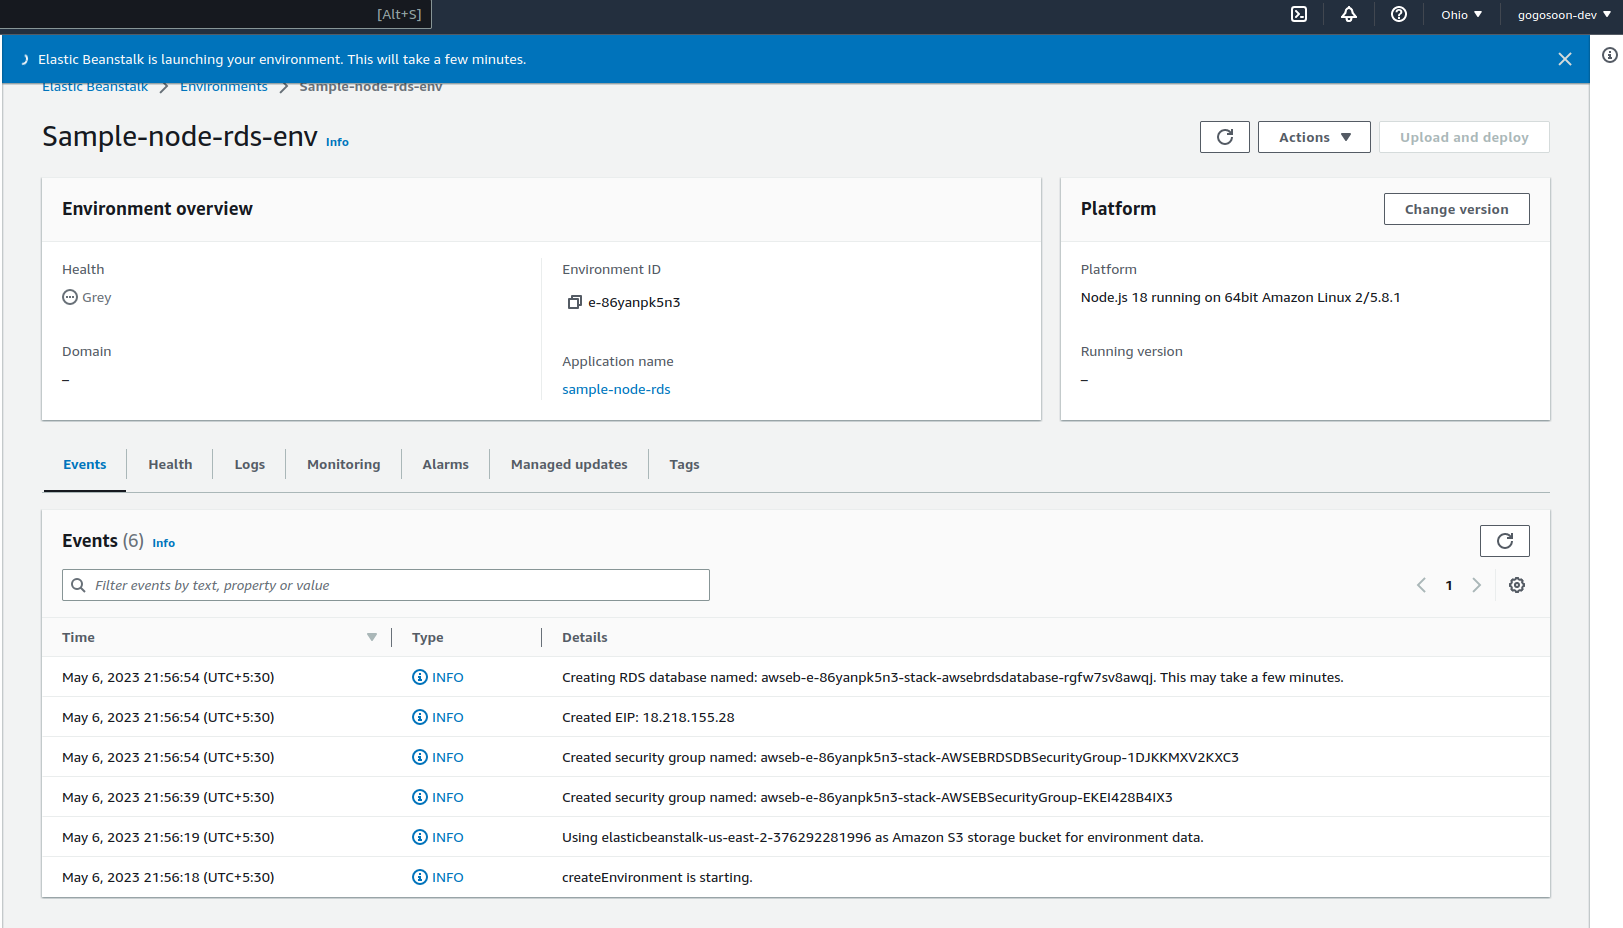
Finally, review all your configurations and proceed with next. It takes time to provision the RDS, so sit back and have your coffee
 Review config and proceed when ready.
By now you may understand why I spent hours on this process the first time 😂. Every time I made a mistake I had to wait for about 10 to 15 minutes to check the result and redo all the above steps if something went wrong. Elastic Beanstalk will definitely test your patience, so be calm and relax.
Once everything is done, you should be able to see that the health becomes green 🎉 and a domain URL will be generated 🥳
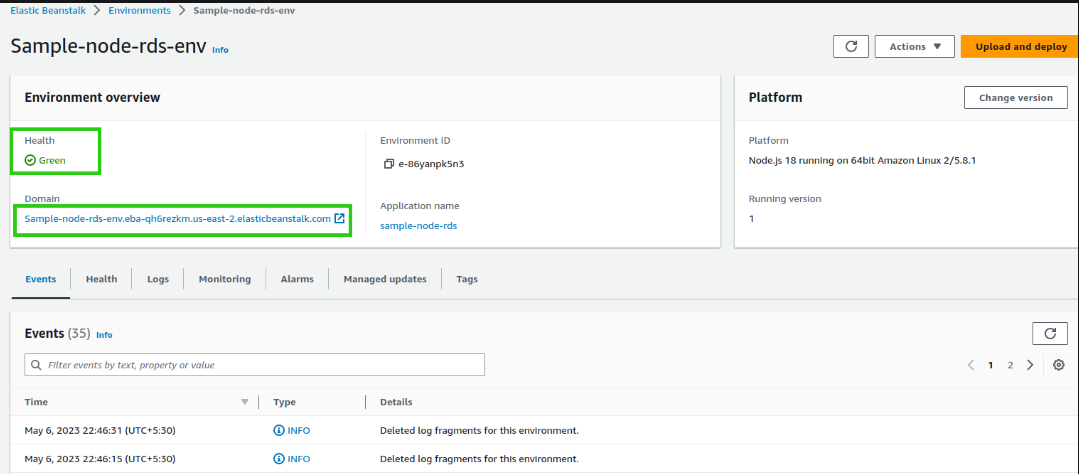 Success!
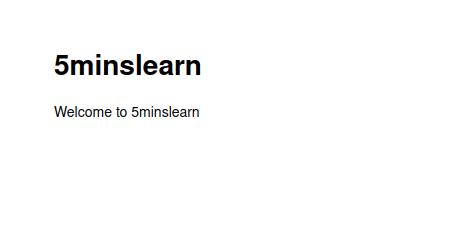
If you used my example repo you'll see the following page on opening the URL.
When you hit domain-url/hikes you can see the below page. Type some data and hit the Record Hike button, the data will be stored in hikes table in RDS MySQL.
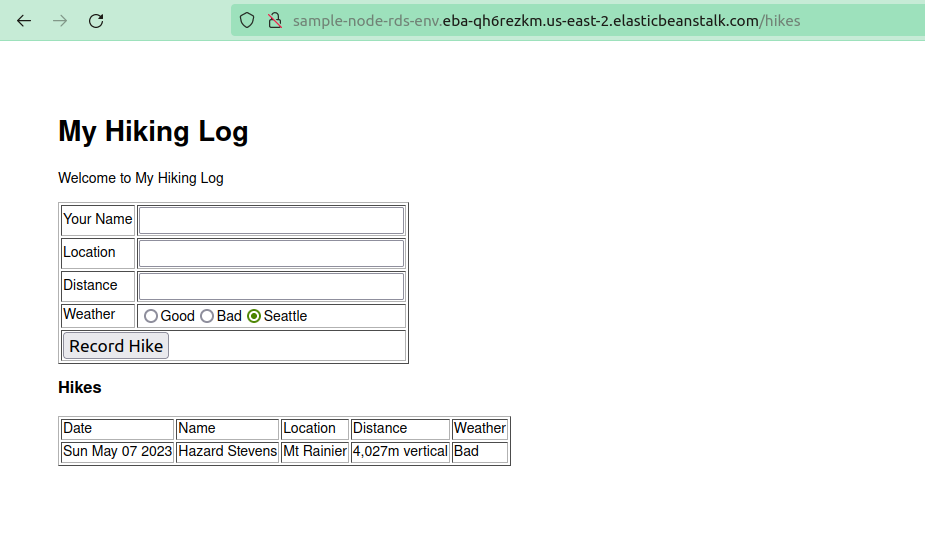 Deployed site
Conclusion
In this article, we've successfully deployed a NodeJS app with an RDS connection using AWS Elastic Beanstalk. This powerful service simplifies the deployment and management process, allowing you to focus on developing and scaling your applications.
If you are stuck at any point feel free to drop your queries to me in my email. I'll be happy to help you.
Hope you enjoyed reading this article!
If you wish to learn more about AWS, subscribe to my newsletter (https://5minslearn.gogosoon.com/) and follow me on social media.