
By Sameeha Rahman
Fritz is a platform that’s intended to make it easy for developers to power their mobile apps with machine learning features. Currently, it has an SDK for both Android and iOS. The SDK contains ready-to-use APIs for the following features:
Today, we’ll explore how to use the Style Transfer API in React Native.
I was only able to develop and test in Android (no Macs here!) and got a working application.
The Style Transfer API styles images or video according to real art masterpieces. There are 11 pre-trained artwork styles, including Van Gogh’s Starry Night and Munch’s Scream, among others.
The app we’ll be developing allows the user to take a picture and convert it into a styled image. It will also allow the user to pick the artwork style they wish to use on the image.
The app will contain a Home page, where the user can pick the art style. It will also include a separate Camera View, where the user captures the image.
Note: The following tutorial is for the Android platform only.
Prerequisites
- React Native CLI: run
npm i -g react-native-clito globally install the CLI
Since there is no default React Native module for Fritz, we’ll need to write our own. Writing a native module means writing real native code to use on one or both platforms.
Step 1 — Creating the RN app and install modules
To create the app, run the following command in the terminal:
react-native init <appname>
Move into the root of the folder to begin configuration.
For navigation, we’ll be using React Navigation and React Native Camera for the Camera View.
To install both dependencies, run the following command in the terminal:
npm i --save react-navigation react-native-camera
Follow the instructions here to configure React Navigation for the app. We’ll need to install react-native-gesture-handler as well, as it’s a dependency of React Navigation.
Follow the instructions here to configure the React Native Camera for the app. We can stop at step 6, as for this example we will not be using text, face, or barcode recognition.
Step 2 — Including Fritz SDK in the app
First, we need to create a Fritz account and a new project.
From the Project overview, click on Add to Android to include the SDK for the Android platform. We’ll need to include an App Name and the Application ID. The Application ID can be found in android/app/build.gradle, inside the tag defaultConfig.
Upon registering the app, we need to add the following lines in android/build.gradle:
allprojects {
    .....
    repositories {
        .....
        maven { url "https://raw.github.com/fritzlabs/fritz-repository/master" } //add this line
    }
}
Afterward, include the dependency in the android/app/build.gradle:
dependencies {
    implementation 'ai.fritz:core:3.0.2'
}
We’ll need to update the AndroidManifest.xml file to give the app permission to use the Internet and register the Fritz service:
<manifest xmlns:android="http://schemas.android.com/apk/res/android">
    .....
    <uses-permission android:name="android.permission.INTERNET" />
    <application>
        .....
        <service
            android:name="ai.fritz.core.FritzCustomModelService"
            android:exported="true"
            android:permission="android.permission.BIND_JOB_SERVICE" />
    </application>
</manifest>
We then need to include the following method within the MainActivity.java:
import ai.fritz.core.Fritz;
import android.os.Bundle; //import these two as well

public class MainActivity extends ReactActivity {
    .....
    @Override
    protected void onCreate(Bundle savedInstanceState) {
        // Initialize Fritz
        Fritz.configure(this, "<api-key>");
    }
}
Step 3 — Create the Native Module
Since the SDK only supports iOS and Android, we’ll need to make the native module. To get a better understanding of this, refer to the docs here:
Native Modules · React Native
_Sometimes an app needs access to a platform API that React Native doesn't have a corresponding module for yet. Maybe…_facebook.github.io
To make an Android Native module, we’ll need to make two new files. They will be within the root package of the Android source folder.
FritzStyleModule: This contains the code that will return the styled imageFritzStylePackage: This registers the module so that it can be used by the JavaScript side of the app.
FritzStyleModule
package com.fritzexample;

import com.facebook.react.bridge.Callback;
import com.facebook.react.bridge.ReactApplicationContext;
import com.facebook.react.bridge.ReactContextBaseJavaModule;
import com.facebook.react.bridge.ReactMethod;

import java.util.*;
import java.io.*;
import android.graphics.*;

import ai.fritz.fritzvisionstylepaintings.PaintingStyles;
import ai.fritz.vision.styletransfer.*;
import ai.fritz.core.FritzOnDeviceModel;
import ai.fritz.vision.*;

public class FritzStyleModule extends ReactContextBaseJavaModule {
    private final ReactApplicationContext reactContext;

    public FritzStyleModule(ReactApplicationContext reactContext) {
        super(reactContext);
        this.reactContext = reactContext;
    }

    @Override
    public String getName() {
        return "FritzStyle";
    }

    @ReactMethod
    public void getNewImage(String image, String filter, Callback errorCallback, Callback successCallback) {

        try {

            // Get the style of painting the user wishes to convert the image into.

            FritzOnDeviceModel styleOnDeviceModel;

            switch (filter) {
            case "STARRY_NIGHT":
                styleOnDeviceModel = PaintingStyles.STARRY_NIGHT;
                break;
            case "BICENTENNIAL_PRINT":
                styleOnDeviceModel = PaintingStyles.BICENTENNIAL_PRINT;
                break;
            case "FEMMES":
                styleOnDeviceModel = PaintingStyles.FEMMES;
                break;
            case "HEAD_OF_CLOWN":
                styleOnDeviceModel = PaintingStyles.HEAD_OF_CLOWN;
                break;
            case "HORSES_ON_SEASHORE":
                styleOnDeviceModel = PaintingStyles.HORSES_ON_SEASHORE;
                break;
            case "KALEIDOSCOPE":
                styleOnDeviceModel = PaintingStyles.KALEIDOSCOPE;
                break;
            case "PINK_BLUE_RHOMBUS":
                styleOnDeviceModel = PaintingStyles.PINK_BLUE_RHOMBUS;
                break;
            case "POPPY_FIELD":
                styleOnDeviceModel = PaintingStyles.POPPY_FIELD;
                break;
            case "RITMO_PLASTICO":
                styleOnDeviceModel = PaintingStyles.RITMO_PLASTICO;
                break;
            case "THE_SCREAM":
                styleOnDeviceModel = PaintingStyles.THE_SCREAM;
                break;
            case "THE_TRAIL":
                styleOnDeviceModel = PaintingStyles.THE_TRAIL;
                break;
            default:
                styleOnDeviceModel = PaintingStyles.THE_TRAIL;
                break;
            }

            // Initialize the style Predictor with the selected artwork style.
            FritzVisionStylePredictor stylePredictor = FritzVision.StyleTransfer.getPredictor(styleOnDeviceModel);

            // Get the Base 64 encoder and decoder.
            Base64.Decoder decoder = Base64.getDecoder();
            Base64.Encoder encoder = Base64.getEncoder();

            // Decode the base 64 image into an array of bytes.
            byte[] decodedString = decoder.decode(image);

            // Convert the byte array into an Bitmap image from the beginning (0) to the end
            // (decodedString.length) of the array.
            Bitmap bitmap = BitmapFactory.decodeByteArray(decodedString, 0, decodedString.length);

            // A standard input class for the style Predictor.
            FritzVisionImage visionImage = FritzVisionImage.fromBitmap(bitmap);

            // Convert the normal image into a styled image according to the selected
            // artwork style.
            FritzVisionStyleResult styleResult = stylePredictor.predict(visionImage);

            // Get a Bitmap image from the styled Result.
            Bitmap styledBitmap = styleResult.getResultBitmap();

            ByteArrayOutputStream baos = new ByteArrayOutputStream();

            // Compress the Bitmap image into a .png image and add it to the output stream
            // baos.
            styledBitmap.compress(Bitmap.CompressFormat.PNG, 0, baos);

            // Convert the output stream into a byte array.
            byte[] b = baos.toByteArray();

            // Encode the byte array into a base 64 image.
            String newImage = encoder.encodeToString(b);

            // Send the styled images' base 64 string through the success callback to the
            // Javascript side.
            successCallback.invoke(newImage);

        } catch (Exception e) {

            errorCallback.invoke(e.getMessage());

        }

    }

}
The React method being used has a success and error callback. The chosen artwork style and a base64 of the original image are sent to the method. The error callback is invoked when an Exception is thrown and returns the error. The success callback returns a base64 encoded string of the converted image. On a high-level, the above code does the following:
- Initializes the style predictor with the user’s choice of artwork.
- Converts the original base64 image into a
Bitmap. - Creates a
FritzVisionImage, which is the input of the style predictor. - Converts the
FritzVisionImageinto a styledFritzVisionStyleResult, which is the converted image. - Gets a
Bitmapout of theFritzVisionStyleResult. - Converts the
Bitmapinto a base64 to be sent back to the JavaScript side of the app.
FritzStylePackage
package com.fritzexample;

import com.facebook.react.ReactPackage;
import com.facebook.react.bridge.NativeModule;
import com.facebook.react.bridge.ReactApplicationContext;
import com.facebook.react.uimanager.ViewManager;

import java.util.ArrayList;
import java.util.Collections;
import java.util.List;

public class FritzStylePackage implements ReactPackage {

    @Override
    public List<NativeModule> createNativeModules(ReactApplicationContext reactContext) {
        List<NativeModule> modules = new ArrayList<>();

        // Append the DataUsage Module to the list of Native module list, that is
        // reffered by the React-Native code
        modules.add(new FritzStyleModule(reactContext));
        return modules;
    }

    @Override
    public List<ViewManager> createViewManagers(ReactApplicationContext reactContext) {
        return Collections.emptyList();
    }
}
This class is used to register the package so it can be called in the JavaScript side of the app.
This class is also initialized in the getPackages() of MainApplication.java:
@Override
protected List<ReactPackage> getPackages() {
    return Arrays.<ReactPackage>asList(
        new MainReactPackage(),
        ......,
        new FritzStylePackage() //Add this line and import it on top
        );
}
Now on to the JavaScript side of the application.
Step 4 — Creating the UI
To do this, we’ll be creating/updating the following pages:
- Home.js — Display the picker of artwork styles and the final result.
- CameraContainer.js — Display the camera view to capture an image.
- FritzModule.js — Export the above-created Native module to the JavaScript side.
- App.js — Root of the app which includes the navigation stack.
Home.js
import React, { Component } from 'react';
import { StyleSheet, Text, View, Button, Image, Picker } from 'react-native';
import { ScrollView } from 'react-native-gesture-handler';

export default class Home extends Component {

    // Hide the header
    static navigationOptions = {
        header: null,
    }

    constructor(props) {
        super(props);

        // initialize the picker with the first value
        this.state = {
            filter: "BICENTENNIAL_PRINT"
        }
    }

    render() {

        // Get the following parameters from navigation props, if they have a value.
        const { navigation } = this.props;
        const oldImage = navigation.getParam('oldImage');
        const newImage = navigation.getParam('newImage');

        return (
            <View style={styles.container}>
                <ScrollView>
                    <View style={styles.innerContainer}>
                        <Text style={styles.welcome}>React Native Fritz Example!</Text>
                        <Text style={{ fontSize: 18 }}>Style Transfer</Text>
                        <Picker style={{ width: "100%" }} selectedValue={this.state.filter} mode="dropdown" onValueChange={(value) => this.setState({ filter: value })}>
                            <Picker.Item value="BICENTENNIAL_PRINT" label="Bicentennial Print" />
                            <Picker.Item value="FEMMES" label="Femmes" />
                            <Picker.Item value="HEAD_OF_CLOWN" label="Head of Clown" />
                            <Picker.Item value="HORSES_ON_SEASHORE" label="Horses on Seashore" />
                            <Picker.Item value="KALEIDOSCOPE" label="Kaleidoscope" />
                            <Picker.Item value="PINK_BLUE_RHOMBUS" label="Pink Blue Rhombus" />
                            <Picker.Item value="POPPY_FIELD" label="Poppy Field" />
                            <Picker.Item value="RITMO_PLASTICO" label="Ritmo Plastico" />
                            <Picker.Item value="STARRY_NIGHT" label="Starry Night" />
                            <Picker.Item value="THE_SCREAM" label="The Scream" />
                            <Picker.Item value="THE_TRAIL" label="The Trail" />
                        </Picker>
                        <Button title="Take Picture" onPress={() => this.props.navigation.navigate('Camera', { filter: this.state.filter })} />
                        {/* Display the images, only if the values are not undefined or empty strings */}
                        {oldImage && <Image style={styles.imageStyle} source={{ uri: 'data:image/png;base64,' + oldImage }} />}
                        {newImage && <Image style={styles.imageStyle} source={{ uri: 'data:image/png;base64,' + newImage }} />}
                    </View>
                </ScrollView>
            </View>
        );
    }
}

const styles = StyleSheet.create({
    container: {
        flex: 1,
        flexDirection: 'column',
        backgroundColor: '#F5FCFF',
    },
    innerContainer: {
        flex: 1,
        flexDirection: 'column',
        justifyContent: "center",
        alignItems: "center",
        padding: 20
    },
    welcome: {
        fontSize: 20,
        textAlign: 'center',
        margin: 10,
    },
    imageStyle: {
        width: 250,
        height: 250,
        marginVertical: 5
    }
});
This page contains:
- Text to display the app description.
- Picker to allow the user to select the artwork style of the converted image.
- Button to redirect the user to the Camera page. It will pass the selected artwork style to the CameraContainer.
- If the navigation prop contains the original and converted image, it will be displayed.
The page currently looks like this;
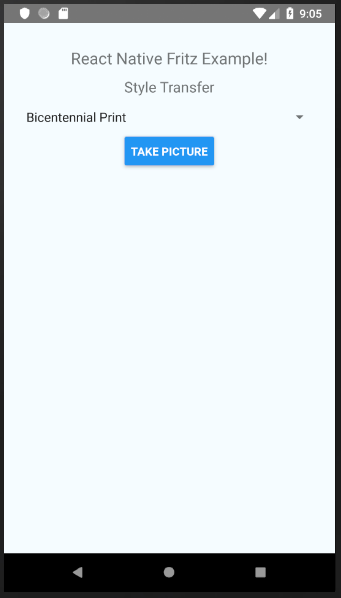 Home page before taking a picture
CameraContainer.js
import React, { Component } from 'react';
import { RNCamera } from 'react-native-camera';
import { View, StyleSheet, Button, Alert, ActivityIndicator } from 'react-native';
import FritzStyle from "./FritzModule";

const styles = StyleSheet.create({
    container: {
        flex: 1,
        flexDirection: 'column',
        backgroundColor: "#000",
        position: 'absolute',
        height: '100%',
        width: '100%'
    },
    preview: {
        flex: 1,
        justifyContent: 'flex-end',
        alignItems: 'center',
    },
    cameraButton: {
        position: "absolute",
        bottom: 0,
        width: "100%",
        backgroundColor: "#000",
        alignItems: "center",
        justifyContent: "center",
        paddingVertical: 10
    },
});

class CameraContainer extends Component {

    // Hide the header
    static navigationOptions = {
        header: null,
    }

    constructor(props) {
        super(props);

        // Initialize below properties
        this.state = {
            oldImage: '',
            newImage: '',
            loading: false
        };
    }

    render() {

        return (
            <View style={styles.container}>
                <RNCamera
                    ref={ref => {
                        this.camera = ref;
                    }}
                    style={styles.preview}
                    type={RNCamera.Constants.Type.back}
                    captureAudio={false}
                >
                    {/* Display the button to take picture only if camera permission is given */}
                    {({ camera, status }) => {
                        if ((status !== 'NOT_AUTHORIZED')) {
                            return (
                                <View style={styles.cameraButton}>
                                    {/* Display spinner if loading, if not display button */}
                                    {this.state.loading ? <ActivityIndicator size="large" color="#FFF" /> : <Button onPress={this.takePicture.bind(this)} title={"Take Pic"} />}
                                </View>
                            );
                        }
                    }}
                </RNCamera>
            </View>

        );
    }

    takePicture = async function () {

        // set loading to true on button click, to show user and action is taking place.
        this.setState({ loading: true });

        // Get the chosen artwork filter picked byt user.
        const { navigation } = this.props;
        const filter = navigation.getParam('filter');

        // If the reference to the camera exists.
        if (this.camera) {

            // Take a base64 image with the following options.
            const options = { quality: 0.75, base64: true, maxWidth: 500, maxHeight: 500, fixOrientation: true };
            const data = await this.camera.takePictureAsync(options);

            // Set the old image as the one captured above.
            this.setState({
                oldImage: data.base64
            },
                () => {

                    // Call the native module method and pass the base64 of the original image and name of selected artwork style.
                    FritzStyle.getNewImage(data.base64, filter,
                        // Error Callback
                        (error) => {
                            // Display an alert to tell user an Arror was encountered.
                            console.log(error);
                            Alert.alert("Alert", "An Error has occured.");
                        },
                        //Success Callback
                        (newData) => {

                            // Set the new image as the one sent from the success callback.
                            this.setState({
                                newImage: newData
                            },
                                () => {

                                    // Navigate to the Home page, while passing the old and converted image.
                                    this.props.navigation.navigate("Home", {
                                        oldImage: this.state.oldImage,
                                        newImage: this.state.newImage
                                    });
                                });
                        });
                }
            );
        }
    }
}

export default CameraContainer;
The CameraContainer page displays a full page CameraView. It includes a button to take the picture at the bottom of the page. Upon clicking it, a spinner will be displayed to convey to the user that an action is taking place.
The image is first captured using the react-native-camera method takePictureAsync(). The original image is then saved into the state of the page. The setState method is asynchronous and thus has a success callback that runs after the state is set.
The getNewImage method from the FritzModule is run within this success callback. The original image and the filter (artwork style) picked from the Home Page is passed to the method. On the error callback, an alert is displayed to the user to convey that an error has occurred. On the success callback, the new styled image is saved into the state. On this second setState methods’ success callback, the user is redirected to the Home page with both the original and styled images.
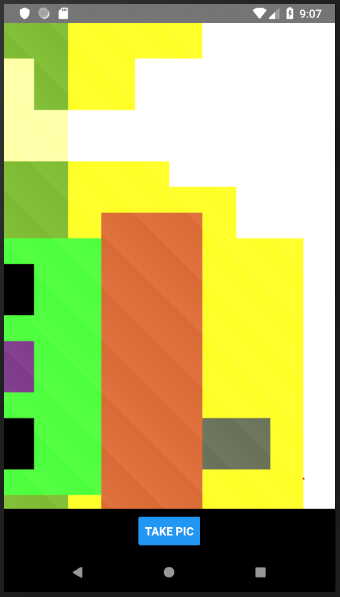 CameraContainer on emulator
FritzModule.js
import { NativeModules } from 'react-native';
export default NativeModules.FritzStyle;
This page exposes the Native module, FritzStyle. This allows the JavaScript side to make calls to the method getNewImage.
App.js
import React, { Component } from 'react';
import Home from './src/Home';
import CameraContainer from './src/CameraContainer';
import { createStackNavigator, createAppContainer } from 'react-navigation';

const AppNavigator = createStackNavigator({
    Home: { screen: Home },
    Camera: { screen: CameraContainer }
});

const AppContainer = createAppContainer(AppNavigator);

export default class App extends Component {
    render() {
        return (
            <AppContainer />
        );
    }
}
First, we create the Stack navigator with the Home Page and Camera View. The key ‘Home’ is used when navigating to the Home Page, and the key ‘Camera’ when navigating to the CameraContainer.
The AppContainer becomes the root component of the App. It’s also the component that manages the app’s state.
Now to see the entire app in function;
To recap, we have;
- Created a React Native app,
- Included the Fritz SDK in it,
- Created a Native Module that makes use of the Style Transfer API, and
- Designed a UI to display the styled image.
Find the code repo, here.
For native iOS or Android implementations of Fritz’s Style Transfer API, check out the following tutorials:
Real-Time Style Transfer for Android — Transform your photos and videos into masterpieces
_Style Transfer allows you to take inspiration from artists like Picasso and Van Gogh and transform ordinary images to…_heartbeat.fritz.aiReal-Time Style Transfer for iOS— Transform your photos and videos into masterpieces
heartbeat.fritz.ai