by Hu Chen
How to use Gatsby to create your blog and work on it from your phone

Recently, I decided to migrate my blog to Gatsby. Gatsby is a blazing fast static site generator based on React.
The Issue
Why do people love to write on platforms like Medium rather than using static site generator?
There are two kinds of people: people who write on platforms like Medium and people who code the blog themselves using static site generators.
There are lots of advantages to writing on public platforms like Medium over static site generators. If you write in public platforms, you can write on a laptop, and edit on your phone. Once you’ve finished writing, you just need to click the “Publish” button. Everything is done, your blog is live, and you can reach your audience right away.
On the other hand, if you write a blog in static site generator, you will need to remember all the scripts, preview the blog on localhost, build the blog for production, commit and push your changes to GitHub, and deploy your site to the public. If anything goes wrong, you might have to repeat some of the steps and wait a few minutes until the blog online is what you want.
You will end up spending much more time doing unimportant things other than the actual writing.
Why should you write on Gatsby instead of public platforms?
I guess this is why people eventually give up writing using a static site generator and write on Medium instead. But there is something Medium or Wordpress cannot provide: the more you write, the more you want to keep your writings in a secure place, in a simple format, just like you might keep your diary books for years.
But imagine that one day you want to migrate everything you wrote from Medium to somewhere else. That is when you hope you have written everything in Markdown and have a site hosting those Markdown files.
But how can I make writing in Gatsby as easy as writing on Medium?
Writing using a static site generator does not need to be difficult. I always believe that the easier it is to write and publish your blog, the more you will write. After trying and researching different setups, I am pretty happy with the result.
In my setup with Travis CI, git push is the new "Publish" button. All you need to do is to commit and push your code. And I will also share how to edit the blog on your phone.
I’ve divided this post into five sections:
- How to create a Gatsby blog
- Setting up Github Pages to host your blog
- Seting up Travis for automatic deployment
- Adding a new blog and publishing it
- Bonus: How to write a blog on your phone
1. How to create a Gatsby blog
There are plenty of tutorials on how to setup a blog using Gatsby that discuss all the powerful features Gatsby provides. This post will not focus on that, but I will still show some basic steps to get your blog up and running.
I assume you are already a JavaScript developer and know some basics of npm, yarn, and continuous integration. For this tutorial, I will be using yarn but feel free to use npm.
First, install gatsby-cli and create a new repo using Gatsby's official blog starter.
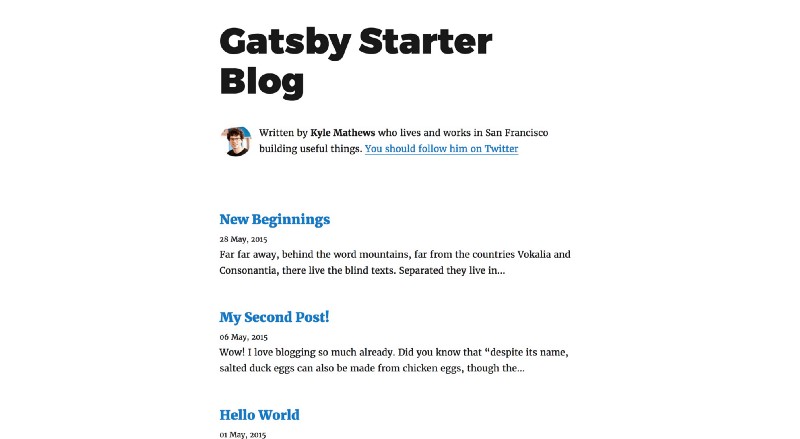
$ yarn global add gatsby-cli$ gatsby new gatsby-blog https://github.com/gatsbyjs/gatsby-starter-blog$ cd gatsby-blog$ gatsby developNow, open localhost:8000 in your browser and you should see the generated blog in your browser.
2. Setup Github Pages to host your blog
Now, let’s host the blog publicly.
There are plenty of options to host your site for free, but I prefer to put both source code and production code in a single place. Since I commit my code to GitHub, I prefer to host my site using GitHub Pages. But feel free to use other services to host your static site.
Note: Later I will need to use Travis CI to automatically deploy the website after each commit, so you might also need to check which platforms they support for deployment.
Now, create a repo named username.github.io. This will be the repo of both the source code for your site and the generated production build.
Because GitHub Page serves content from the master branch, you will need to deploy the content of the public folder generated by the yarn build command to the master branch. We will need to put our source code into another branch. We’ll call it develop.
Let’s create an initial commit and rename the branch to develop.
$ git init$ git add .$ git commit -m “Initial Commit”$ git branch -m developNow, we need to push our code into GitHub. If you have already created the repo named username.github.io, push your code into the repo.
$ git remote add origin git@github.com:username/username.github.io.git$ git push -u origin developMake sure that there is no master branch in your GitHub repo, and that the default branch is set to develop.
3. Setup Travis for automatic deployment
This is an important step. Although we can use yarn deploy to deploy, that is another three steps: generate public folder, deploy to GitHub Page, wait and check online.
But we can get rid of those steps with Travis CI. Travis CI is a hosted, distributed, continuous integration service used to build and test software projects hosted on GitHub.
If your project is public on GitHub, Travis CI is free. Now, create a Travis account by connecting to your GitHub and add your repo in Travis.
Create a .travis.yml file in the project root
language: node_jscache: directories: - ~/.npmnotifications: email: recipients: - chen@huchen.me on_success: always on_failure: alwaysnode_js: - '9'git: depth: 3script: - yarn builddeploy: provider: pages skip-cleanup: true keep-history: true github-token: $GITHUB_TOKEN local-dir: public target-branch: master on: branch: developYou can also view on Gist. Let me explain this config:
- notifications: I asked Travis to send me an email on both success and failed to build. By default, it only sends an email if the status changed (for example, if it was success but changed to failed, or if it was failed, and changed to fixed the build). But I wanted to receive email even if it was success so I could double-check online.
- git:depth:3: I asked Travis to use depth
3when cloning the project, as it will help make the build faster. - script: The script Travis needs to run is
yarn build, which creates static files in thepublicfolder for further deployment. - deploy: I asked Travis to deploy to GitHub Pages after
yarn buildscript success. It uses the$GITHUB_TOKENI set in the Travis repo setting (I will come to this next), pushes contents inpublicfolder into GitHubmasterbranch, and should only trigger deploy on thedevelopbranch. Click here to read more about deploying config.
Create a token for Travis to push to GitHub
You’ll need to generate a personal access token with the public_repo or repo scope (repo is required for private repositories) to allow Travis to push code to the GitHub repo. This is because Travis runs yarn build and needs to push the public folder into the master branch where GitHub Pages is serving.
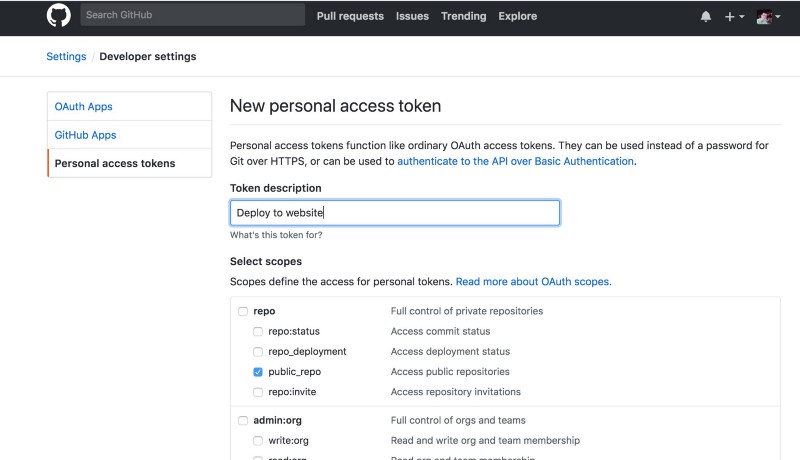
Once a token is created, you will need to copy and paste it into your Travis repo settings.
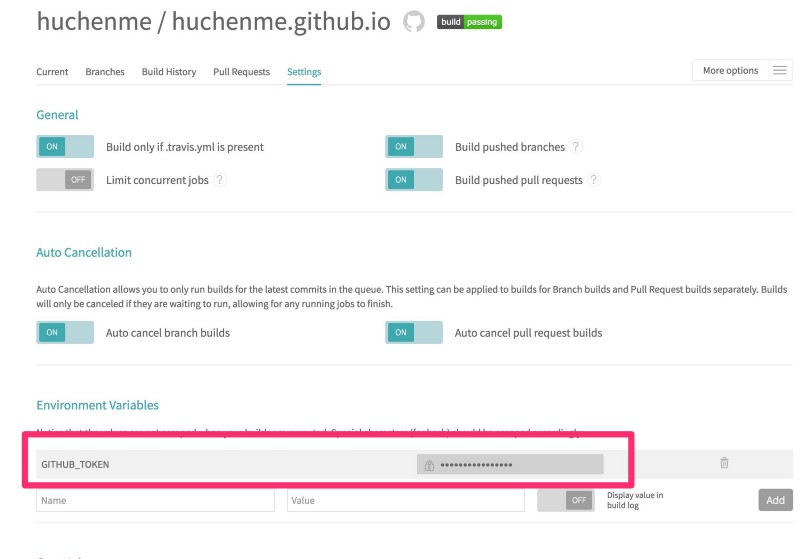
Now, add .travis.yml in git and push changes to GitHub.
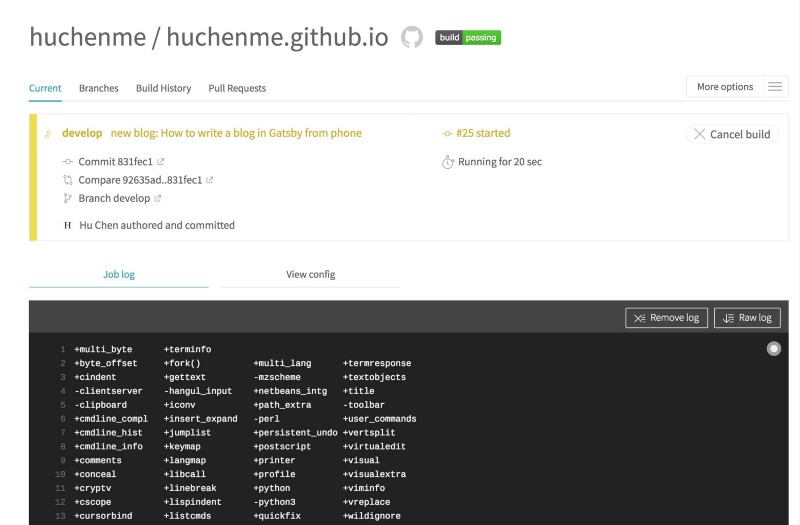
$ git add .travis.yml$ git commit -m “Add Travis config file”$ git push origin developNow, you can check the status on Travis. You should see Travis’ status changed to yellow (running). If everything is ok, it will turn green in a few minutes, and you should receive an email about the successful build. You can visit https://username.github.io to view your blog you just created.
4. Add a new blog and publish
Here comes the fun part. Now I will demonstrate how easy it is to publish a new blog using this process.
Now, let’s add a new blog.
- Create a file
index.mdinsrc/pages/new-blog;. You will need to create a new foldernew-blogas well. - Put some simple content in
index.md.
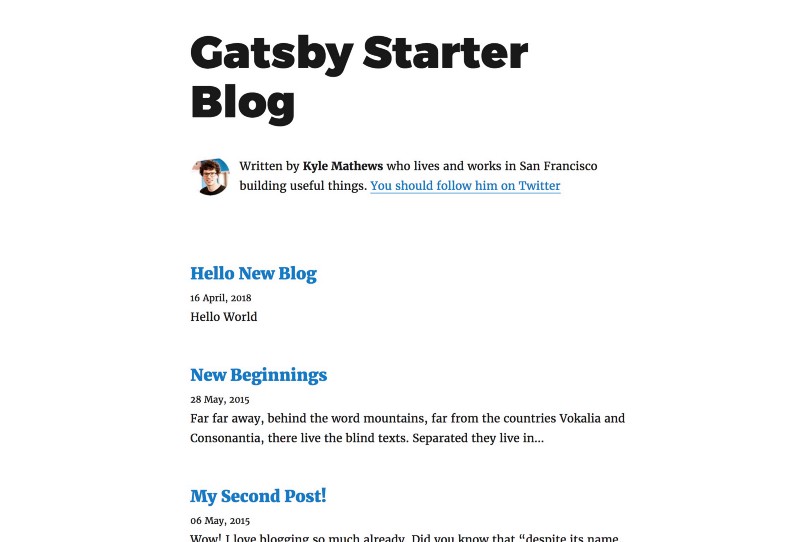
---title: Hello New Blogdate: "2018–04–16T23:46:37.121Z"---Hello World3. Commit this new file and push into GitHub
$ git add .$ git commit -m “Add a new blog”$ git push origin develop4. Wait for Travis to finish and check online. After you receive an email a few minutes later, you can check https://username.github.io again. You should see your new blog in the list.
5. Bonus: how to write the blog from your phone
I want to remove another barrier to writing your blog. I was only able to write my blog when I was with my laptop, but I wondered: could I use my phone to craft ideas and edit?
It turned out to be pretty easy. All you need to do is to add your Desktop and Documents files to iCloud Drive and put your repo either in Desktop or Documents. It may take some time initially, but once everything is uploaded, the updates are instant and I can view my edits in my laptop, my iPhone, and iPad at the same time without any issues.
There are plenty of markdown apps on iPhone. Personally, I find IA Writer is the best: it supports all platforms, it is elegant and focused on writing, and it supports iCloud Drive very well.
Although I can also setup my iPhone to do git commits and pushes, I feel it is not necessary. If the most difficult part of writing a blog is already done, using a laptop to do the final checking and committing the code is not a big issue for me. git push is as simple as clicking the "Publish" button on Medium.
That’s it!
We have come to the end of this tutorial. Thank you for reading this far.
This post is just the tip of the iceberg of Gatsby’s features. I am amazed by its flexibility and powerful features. You should definitely checkout its official tutorial.
