
Emmet is an essential development tool that helps you quickly create repetitive structures like lists, tables, or ordered elements with minimal typing. It is more like a shorthand that translates to multiple lines of HTML or a CSS attribute.
Emmet is built-in in many of the text editors like VS Code. However, you can also download it for your favorite text editor from this link. Emmet is also available inside some online IDEs like CodePen.
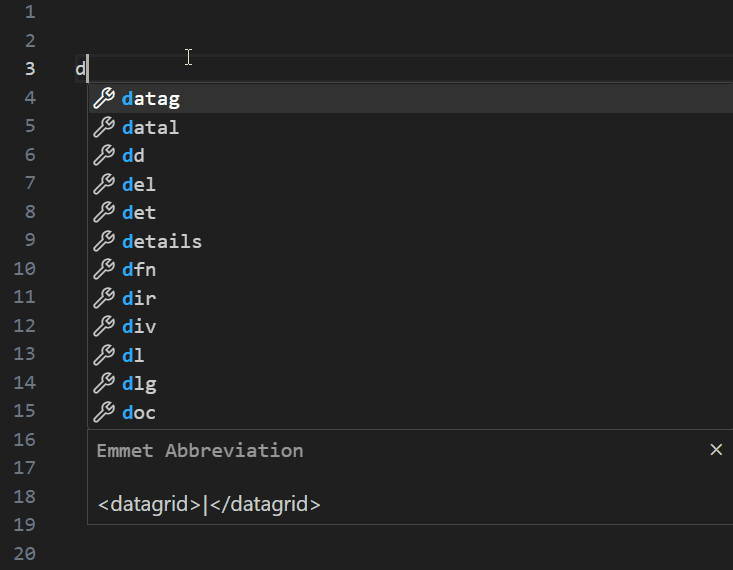
Look closely at the example below. See how easily we generated ten lines of code using only the keywords ol>li{This is a list}*10?
 Emmet doing its magic
We skipped copying and pasting ten lines and then counting to see if there were ten items. Doing this manually also introduces a chance of human error.
In this tutorial, we will learn some Emmet shortcuts that generate HTML and CSS quickly.
Emmet Shortcuts for HTML
How to Create Comments
To comment a single line, press Ctrl + /.
To comment multiple lines, select them and then press Ctrl + /.
Multiplication in Emmet
You can create multiple elements by specifying the count after *.
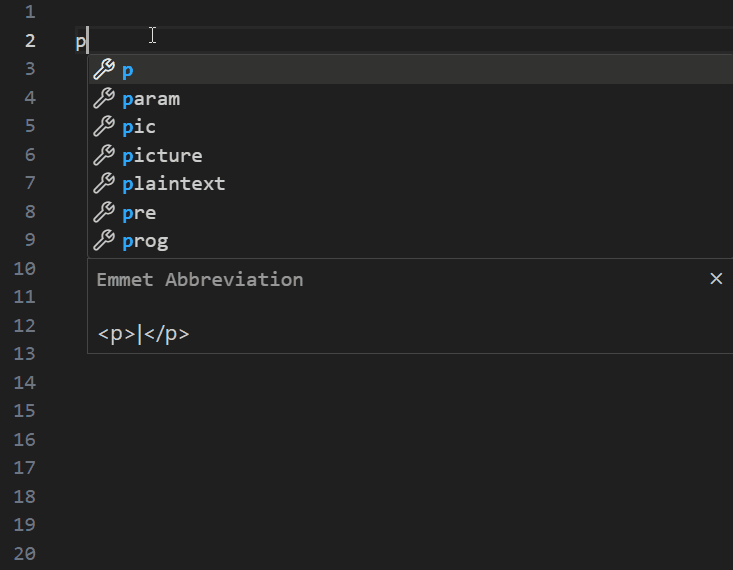
For example, p*10 would generate 10 p elements.
 Create any number of elements using multiplication
How to Create Direct children
You can create direct children using the > symbol.
ol>li would create an li inside the ol element.
 Creating direct children
How to Create Siblings
You can create siblings using the+ symbol.
div+p would create a div element and a p element on the same level.
 Creating siblings
How to Combine selectors
You can combine the sibling and the child selector to create a structure. For example div+p>span would result in a div and a p element on the same level with a span element as a child of p selector:
 Combining selectors
How to code complex structures using brackets ()
Brackets () can be used to separate different parts of the structure.
By using the Emmet shortcut (main>div)+div>ul>li*5, you can create the following complex structure:
<main>
    <div></div>
</main>
<div>
    <ul>
        <li></li>
        <li></li>
        <li></li>
        <li></li>
        <li></li>
    </ul>
</div>
 Creating complex structures
How to use Emmet for setting IDs
If you want to create a p element with the ID of news-section, you can do so using this Emmet: p#news-section.
 Emmet for setting IDs
How to use Emmet for setting Classes
If you want to create a p element with the class of news-espanol, you can do so using this Emmet: p.news-espanol.
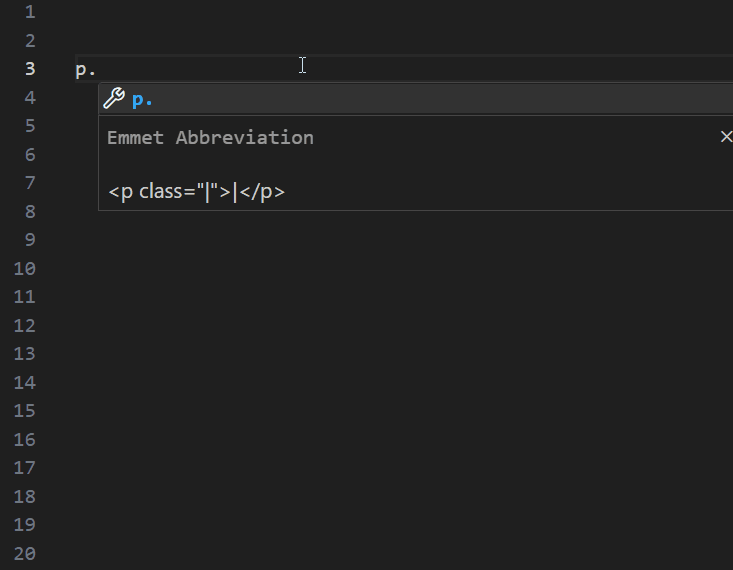 Emmet for setting Classes
How to create Attributes
It is possible to create elements with certain attributes using Emmet.
The Emmet shortcut button[type=submit] would create this button element: <button type="submit"></button>.
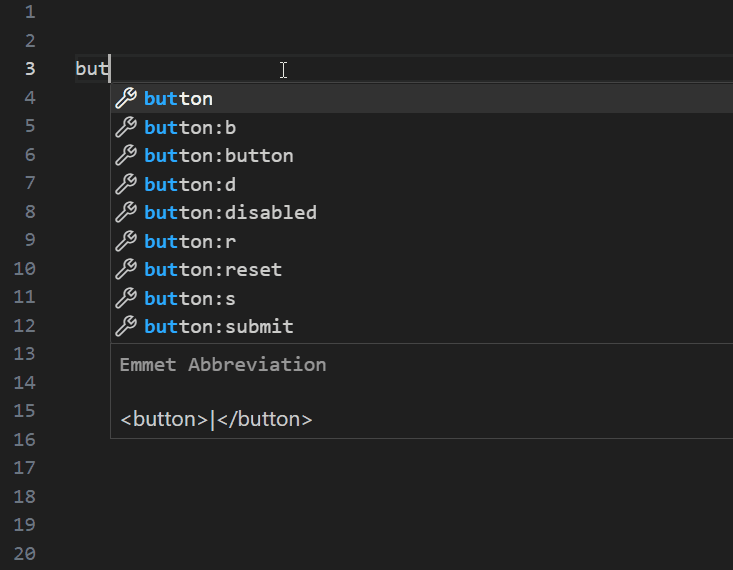 Emmet for setting attributes
How to add Content to Elements
It is fairly easy to provide content for your elements using Emmets.
p{This is a paragraph} would create a p element with content "This is a paragraph".
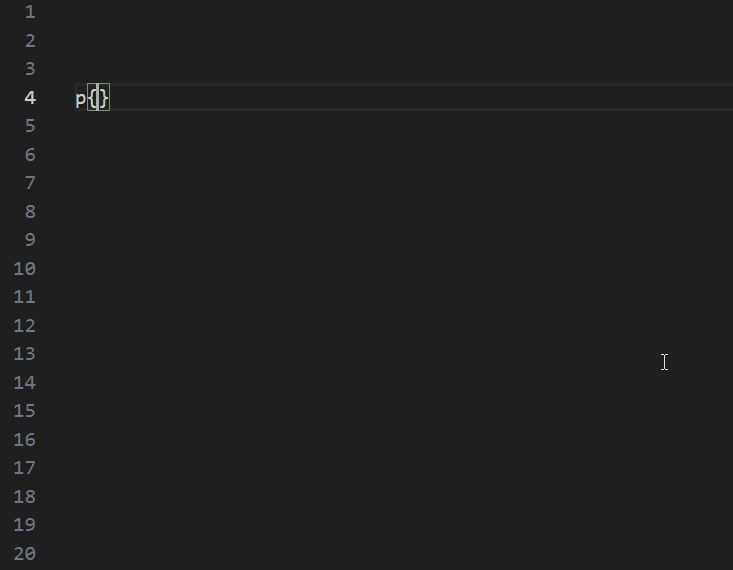 Emmet for setting content
Enumeration
In Emmet, enumeration typically refers to the process of generating multiple HTML elements with sequential numbers or alphabets.
Here is an example of enumeration: ul>li*5{List item number $}.
The $ signifies the point where enumeration starts. The *5 means to repeat this structure five times, with the numbers incrementing for each iteration.
Let's see this in action:
How to generate Lorem Ipsum text
You don't need to Google for "Lorem ipsum" text if you are using Emmet.
Lorem20 would generate a text of 20 characters.
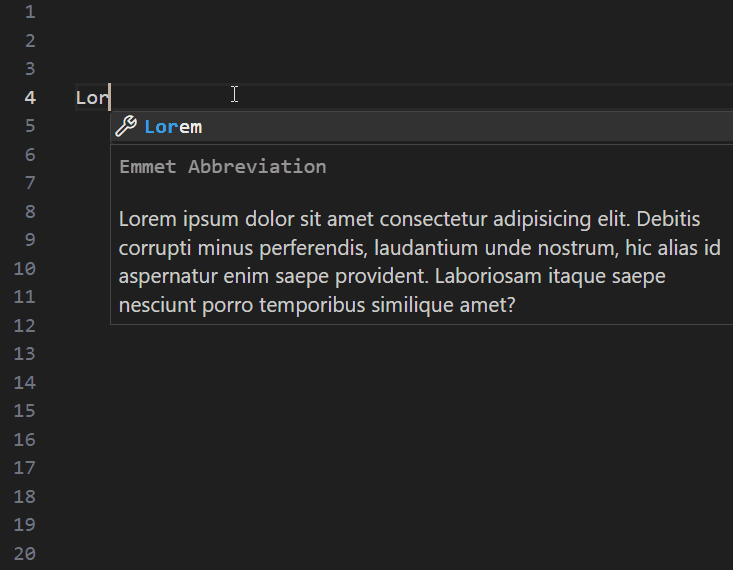 Generate lorem text using Emmet
How to Link CSS
To link a CSS file, type link and press enter.
 Link external CSS
How to Link JavaScript
To link JavaScript, use the Emmet shortcut script:src.
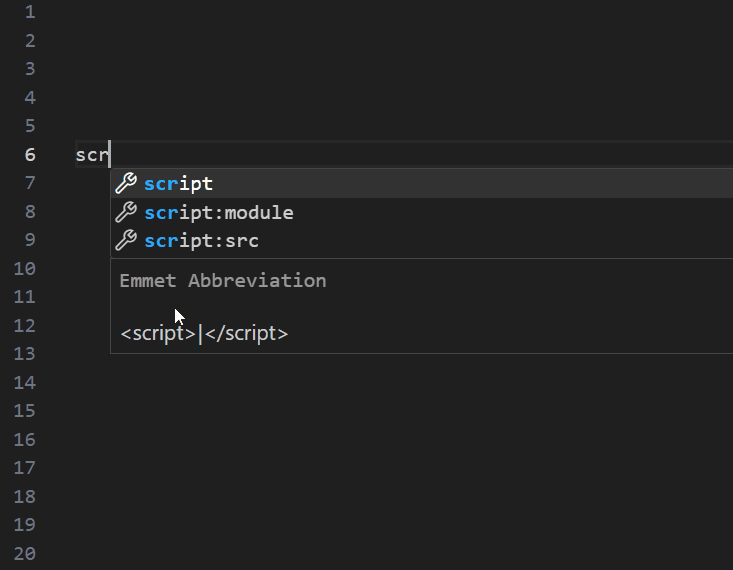 Link JavaScript
Emmet Shortcuts for CSS
Just like HTML, Emmet is also available for CSS.
Here are the Emmet shortcuts for some of the commonly used properties:
m10→margin: 10px;p-10→padding: -10px;m20p→margin: 20%;w100p→width: 100%;bgc#ff→background-color: #fffdb→display: block;dib→display: inline-block;df→display: flex;tac→text-align: center;tar→text-align: right;c→color: #000;o→overflow: hidden;z→z-index: 1;
Wrapping up
If you are into development, I highly recommend learning Emmet.
You will spend less time writing code and get much faster results.
I bet that once you start using it, your development experience will upgrade to a whole new level!
What’s your favorite thing you learned from this tutorial? You can also connect with me on any of these platforms. 📧
See you in the next tutorial, happy coding 😁