
By Mohit Jain
Today we’ll be making a ‘to-do’ website… with some different features.
You can check the live demo of what we will be making here.
For the front end, we will be using React.js. React.js is a component based library which is used to develop interactive user interfaces (UIs).
For the back end and storage, we will be using the browser’s local storage. This lets us save data so that next time we open our site, we can access the data we saved earlier.
Create-React-App
Let’s begin. First, you need to setup Node (a cross-platform JavaScript run-time environment) and React.
You can download and install Node from the node.js website. After that, open terminal and cd to the directory where you want to save the project. Next, run these two commands:
npm install -g create-react-app
create-react-app next-3-days-planner
npm install is a command to install npm packages, and the -g flag helps to install the package globally in our system.
create-react-app will set up a new project directory. It also takes care of all the stuff needed by React like webpack, babel and JSX so that beginners don’t have to mess with setting up their initial project.
I am naming this project next-3-day-planner but you can name it whatever you like.
Open the project directory in your favorite code editor.
The parent component
Now let’s make our parent component. Open the App.js file and remove everything. Add this code snippet:
In first two line we are importing the React class, which helps us make components. We also import ReactDOM which helps render components to the DOM (document object model).
We have also imported the Header component, which will be used to display the header bar of the website.
The Textbox component will contain the input section where the user will type their ‘todo’ item.
Then we import some more child components. These are DisplayToday, DisplayTomorrow, DisplayDayAfterTomorrow. These three components help us display our todo list.
If you are seeing an error, don’t worry. We have not defined these components yet!
Then we define our App component, which is our parent component.
This component has a state which will be used to store data. The ‘Today’ key will be used to store the todo items list that should be completed by today. The same applies for the ‘Tomorrow’ and ‘Day_After_Tomorrow’ keys.
updateEntry(), deleteEntry() are two functions used to add items to the lists, and to remove an item from the lists. We will define them now.
Updating list entries
The updateEntry() function takes two parameters.
term is the new todo item we need to save, and day is the ‘day’ in which we want to add that todo item.
We have an if-else block, which checks the value of day and adds that todo item to that particular array.
The three dots ... before this.state.Today help us concatenate the array with new values.
Deleting entries
Let’s code the delete function:
The deleteEntry() function will be triggered whenever the user clicks the ‘remove item’ button on the page
The deleteEntry() function takes two parameters.
index is the index-location of the element in the array which is to be removed. The second parameter is day, which is the day from which we want to remove the entry.
To implement the logic of deleting an entry from the array, we will use JavaScript’s filter() function.
This function iterates through each element of the array and returns the element if the logic we define corresponds to true.
Then we update the value of state using the setState() method, which re-renders the DOM by default.
Render function
Let’s code the render function of our App component.
Here we have mentioned all our child components _(_which we will be coding later…) and passed some attribute to each tag.
The Header gets an attribute nam which refers to this.state.username. This is the username we defined in the state.
Textbox gets the attribute updateEntry which refers to the this.updateEntry function we defined above.
Dont forget to add this one line at the end of App.js so that we can see our output in the browser screen:
export default App;
Child Components
Create a new directory inside src and name it Components.
Next, create three new files named Display.js , Header.js and Textbox.js inside the Components directory.
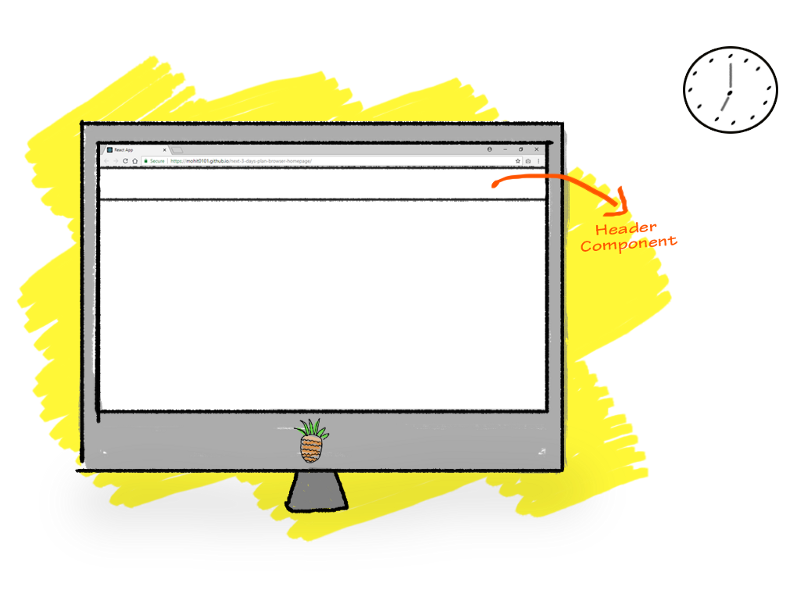
Header Component
Let’s start with the src/Components/Header.js file:
Our header is very simple. It just displays the username we passed in as an attribute. It access that attribute using this.props.nam.
The weird className attributes you see are nothing but HTML class attributes. className is a JSX-specific keyword for HTML classes. These classNames will help us in designing our website with the help of CSS.
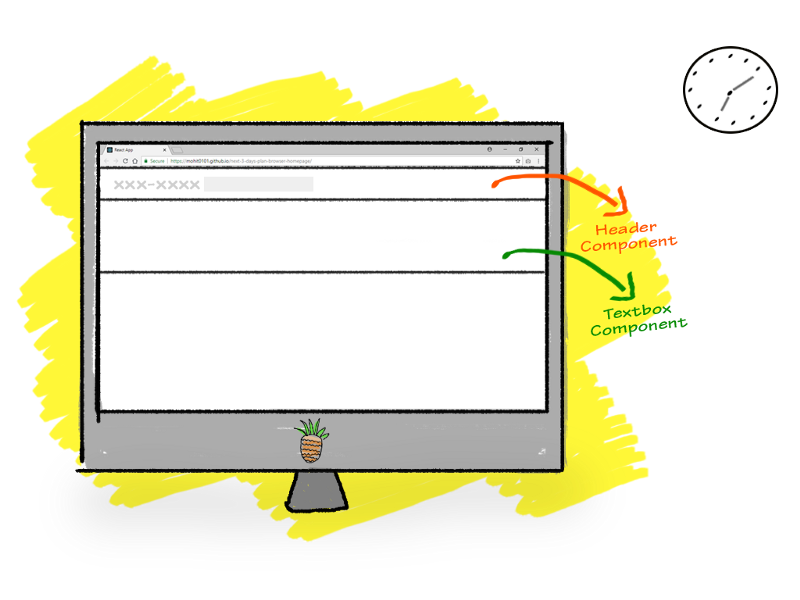
Textbox Component
Now let’s code the Textbox component. This will show the form where users can select a day from the drop-down menu, and add an item to its todo list for that day, using the HTML input field.
Open src/Component/Textbox.js and code the following:
The Textbox component class has a state object. The term will be used to store the entry that user types, and the day is initialized by default to today. But, its value may change if the user selects any other day like Tomorrow or Day After Tomorrow.
The render function renders a simple form which has two fieldsets.
One has an HTML <select> tag so the user can select the day.
This select tag has a onChange event associated with it. This event will be triggered whenever a new option is selected. The handleSelect function will be called and it will update the value of day in the component’s state.
We also have another input tag where user will type their ‘todo Goal’ they want to accomplish. This also has an onChange event which will call the handleChange function. This function will update the value of term in the component’s state.
The wrapping form tag has an onSubmit event which will be triggered when the form is submitted, and it will call the handleSubmit function.
The handleSubmit function calls the updateEntry function and passes the value of term and day. Now the updateEntry function will add the term and day in the parent Component’s state and it will be saved there.
The handleSubmit function also sets the value of term to blank so that the next value can be saved in it.
Note: here we are talking about two states. One is the App component’s state which we will consider our main state. Its data will be saved permanently even after we close the website and server. The other state we refer to is the particular Component’s state. This is used to store data temporarily. For example, here the Textbox Component’s state is a temporary state.
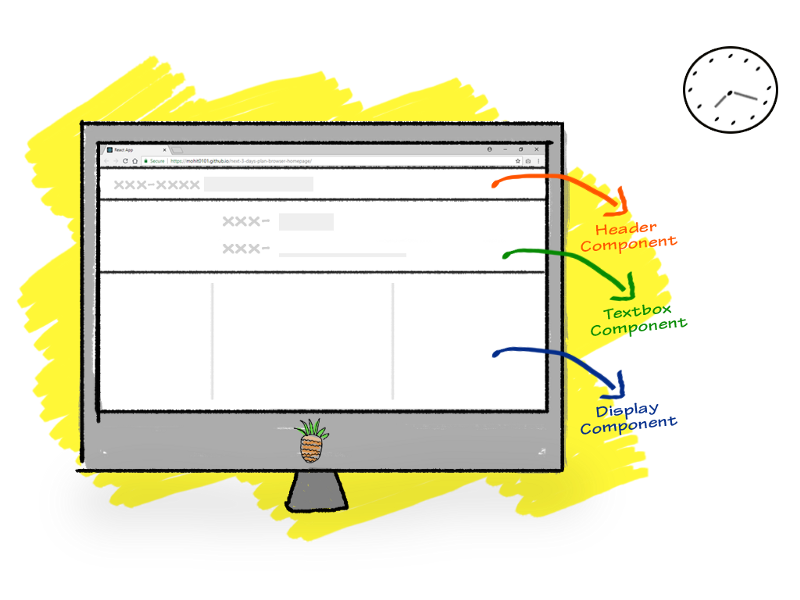
Display Components
Let’s code our display components.
We have divided display logic in three components, which displays the todo list of Today, Tomorrow and Day_After_Tomorrow state objects.
Open src/Components/Display.js and paste the following code:
The Display.js file contains three classes which have identical code.
Let’s consider class DisplayToday for an explanation:
Remember that in the App component class inside the render function, when we call:
/* App.js file */
<DisplayToday items={this.state.Today} deleteItem={this.deleteEntry} />
…we are referring to this DisplayToday class of Display.js file.
We passed in two attributes. item points to the Today array defined in the state of the App.js file, and deleteItem refers to the deleteEntry function we wrote in the App.js file.
The DisplayToday class inside Display.js file renders the DisplayToday component and iterates through the items list we passed in the attribute.
This is the line which does the task of iterating through each item:
this.props.items.map((item, index)=> return ( /* item here */ ))
Here item is each item of an array and index is the index-location of that item in the array.
We also have a <button> tag which has an onClick event listener linked to a local function removeThis.
When the user clicks on the button, the onClick event is triggered and the removeThis function is called. This function receives the index value of the item in the array as a parameter and it calls the deleteEntry function, and passes the array index and array name as parameters.
removeThis(e){ this.props.deleteEntry(e, 'Today'); }
Then the deleteEntry function will remove that particular index location from the array.
You can go above and have a look at the deleteEntry function that we coded in the App.js file.
The working of the DisplayTomorrow class and DisplayDayAfterTomorrow class is the same as the DisplayToday class.
So we are almost done — now let’s add some final touches.
The CSS
For the CSS, I decided to use a CSS framework instead of coding the entire thing.
After a little searching, I found Hack.css. I really liked its monospaced fonts and its classic ‘hacker’ theme.
Setting up the CSS with the project is a very easy task. Just run the following command:
npm install --save hack
Add this line at the top along with other import statements in your App.js file:
import 'hack';
I you want to add some custom CSS styling, create a new file called src/style.css
Write your CSS in this file and import it into App.js at the top along with other import statements.
Storage
Let’s set up the storage.
We will use the browser’s local storage as the main storage of our website.
What we are going to do next is just magic.
Integrating our website with browser storage would not be so easy without React Simple Storage.
Just run the following command in the terminal:
npm install --save react-simple-storage
Open the App.js file and at the top of file add this line:
import SimpleStorage from 'react-simple-storage'
Now in your App Component class, scroll down to the render function and add this line after the first <div> tag:
<SimpleStorage parent={this} />
And voilà! Now our data will be saved in the browser and it will be fetched from the browser when we reopen our website.
The Result!
To check out what we have accomplished, open your terminal and type:
npm start
Now in the browser, navigate to localhost:3000.
I hope you enjoyed this!
A few things as homework for you to add…
- Code validation functions. Right now even a blank entry is also updated, but our app should throw an error that user needs to write something first.
- Showing date and time
- Adding an option to edit the username
If you get stuck anywhere, you can go to my GitHub page where you will find the complete code.
If you want to use this website on daily basis to increase your productivity, you can set this page as your browser homepage (it has some more features added to it).
…until next time buddy, happy coding!