
One of the key factors that differentiates HTML 5 from its predecessors is the introduction of semantic tags.
Semantic tags add real meaning to the webpage and make it easy for humans, and search engines, to differentiate between different parts of the website.
To a certain extent, it affects the SEO of a webpage, too.
So to reap the benefits, you should know the HTML5 tags you can use to enhance your website.
There are some very useful but little-known HTML5 tags that can come in handy, too. They give a semantic meaning to your webpage, bring more accessibility, and make your life easier.
Here is my list of 5 helpful HTML tags that you might wanna try.
The <abbr> Tag
You use this tag when you want to show the full form of an abbreviation you've used in your blog.
For example, if you're writing an article about a smart home product that also has some AI features that you want to discuss. Now, there could be some casual readers that might be unfamiliar with AI. Using this abbr tag coupled with the 'title' attribute will show the readers a tooltip with the content written in the title tag of the abbreviation. When the user hovers over the abbreviation, it can help them learn what "AI" means.
Think of how much hassle it would save you if you ever feel like adding this kind of functionality to your blog. Instead of fiddling with CSS, all you have to do is insert this tag.
How the <abbr> tag works
Considering you're writing a blog and have access to the HTML view. You have to wrap the abbreviated word with <abbr> with a title attribute which will contain the definition or a full form of the abbreviated word. When done right, the tooltip will appear when the user hovers over the abbreviation showing the content the 'title' attribute holds.
<p style="font-family: sans-serif;"> Can <abbr title="Artificial Intelligence">AI</abbr> be taught how to reciprocate human emotions?
</p>

The <details> Tag
You use this tag to create an interactive container box that can expand and shrink when the user clicks while containing all the content. Upon expanding it shows the content within, and closes as it shrinks.
I use this every time I have something like an 'FAQs' or 'Table of Contents' in mind. This gives you the native support of an accordion without a single bit of JS.
I used it recently while working on one of my sites. I built the 'Table of Contents' section using it. (You will be able to see it down below)
How the <details> tag works
First, we declare the <details> tag that wraps the <summary> tag and your usual content that you want the user to see when they need it. It can be anything – a form, a table, a paragraph, or an image.
<details>
    <summary>Table of Contents</summary>
    <ul>
        <li>
            <a href="#web-dev">Web Development</a>
        </li>
        <ul>
            <li><a href="#web-dev-html">HTML</a></li>
            <li><a href="#web-dev-css">CSS</a></li>
        </ul>
       </ul>
 </details>
Now, I mentioned the <summary> tag earlier: this tag is used with the <details> tag and specifies a heading for the content.
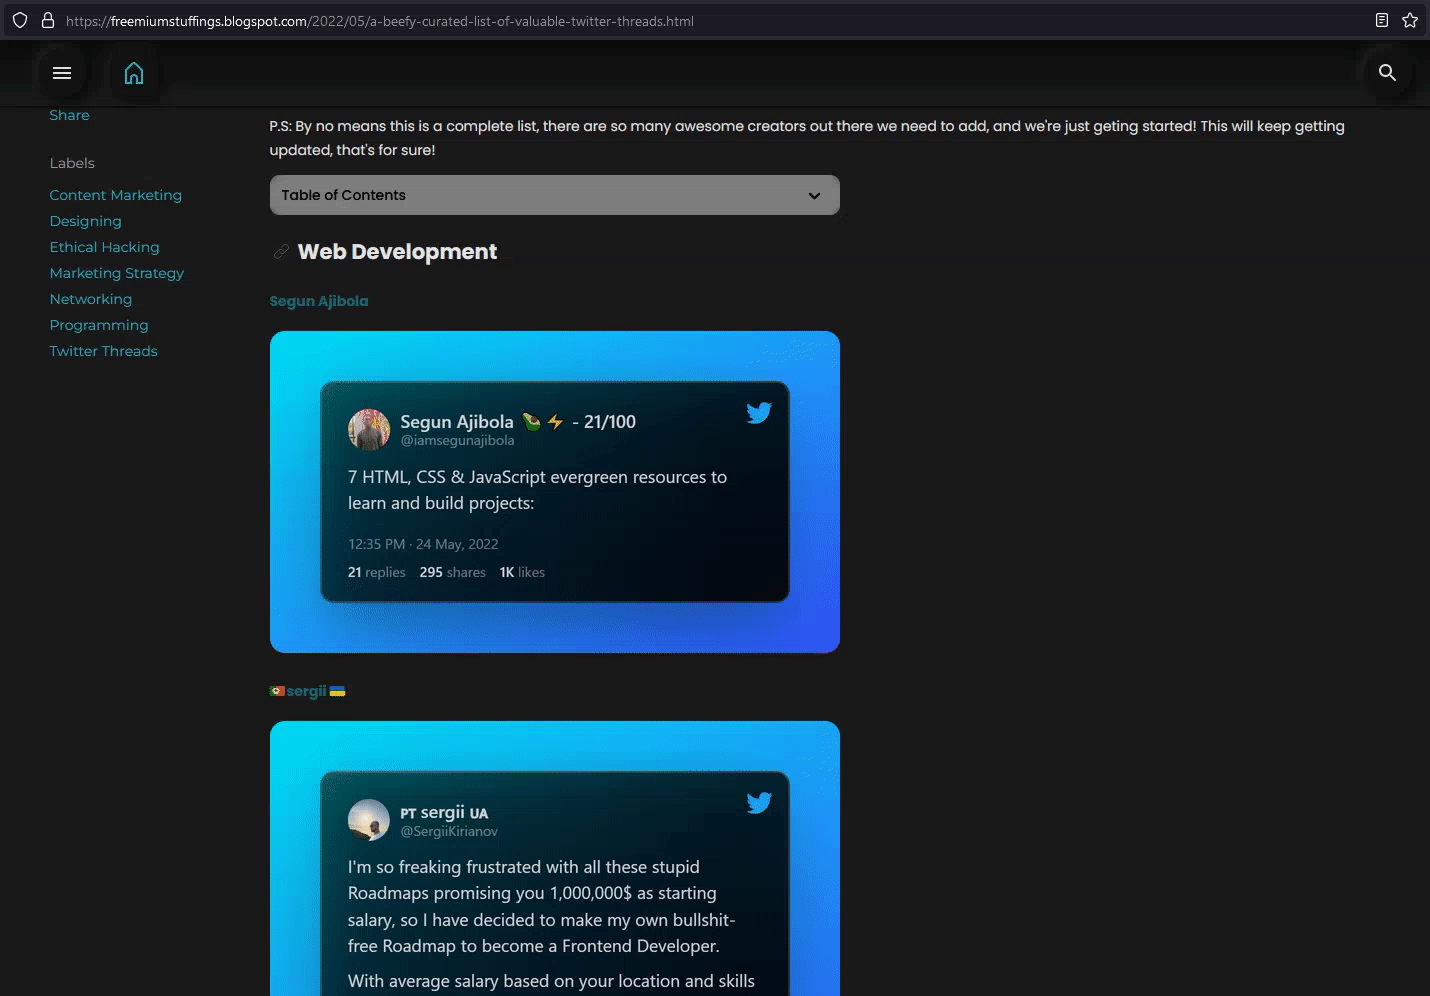
Image Credit: Screen Grab of Freemium Stuff
Tip: Say you're making a FAQ section with this tag, and you want the container to open on page load for, like, 'The most asked question'. You can do that by just giving an 'open' attribute to that particular accordion. Like this:
<details open>
    <summary>How do I get my product registered?</summary>
    <p>You can get your product...</p>
</details>
The <optgroup> Tag
This tag will let you categorize the options of the drop-down list in the forms you build.
When you want something like a drop-down list from which users can choose, use the <select> tag. But, often it can get very long and tedious for users to go through the entire list to find the correct options.
Grouping the options can really help, and your users will appreciate this as they won't have to go through every option. Instead, they can just navigate through to the category they need. This makes for a better user experience.
How the <optgroup> tag works
Right before laying out all the options, declare the <optgroup> tag and wrap all the similar options in it, just like in the example below. You can do it for as many groups as you need.
<label for="cars">Cars</label>
    <select name="Cars" id="cars">
        <optgroup label="SUV">
            <option value="">Porsche Cayenne</option>
            <option value="">Lincoln Nautilus</option>
            <option value="">Mercedes-Benz GLB 2022</option>
            <option value="">BMW X3 2022</option>
            <option value="">Genesis GV80 2022</option>
            <option value="">Mercedes-Benz GLS 2022</option>
        </optgroup>
        <optgroup label="Sports Car">
            <option value="">Ford Mustang</option>
            <option value="">Toyota GR Supra</option>
            <option value="">McLaren 7205</option>
            <option value="">Porsche 911</option>
            <option value="">Audi R8 V10</option>
            <option value="">Chevrolet Corvette Z06</option>
        </optgroup>
    </select>

Image Credit: Author
The <base> Tag
This tag will let you change the base URL for all the relative URLs in that HTML file. You should include in the <head> tag. It lets you have the convenience of the relative URLs while having the flexibility of changing the base URL.
How the <base> tag works
The user just needs to declare this tag inside the head tag, and now all the relative URLs in the document will get the new URL as its base.
<head>
<base href="https://bhaveshrawat.pages.dev/assets/">
</head>
<body>
<figure style="max-width: 480px;">
<img style="width: 100%;" src="netflix-planform.webp">
<figcaption>Netflix Planform made with Grid. </figcaption>
</figure>
<figure style="max-width: 480px;">
<img style="width: 100%;" src="hamburger-menu.gif">
<figcaption><input> tag menu bar</figcaption>
</figure>
</body>

The catch with the <base> tag
There's a catch with using this tag, though. It doesn't play well with in-page anchor tags, like <a href="#home">. These types of links are pretty useful from a navigation point of view. So, unless you're doing JS to make up for the in-page anchor tags, this tag might not be ideal.
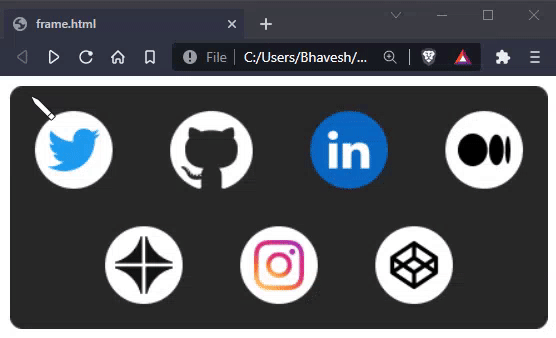
The <map> Tag
If you ever wanted to hook a single image with multiple links and map them according to the image, this tag will let you do exactly that.
This tag lets you specify the areas on an image – it can be a rectangle, circle, or poly (basically any irregular shape) – and map them to different links.
How the <map> tag works
First, we specify an <img> tag with the 'usemap' attribute that holds the same value as the <map> tag's name attribute. It must be the same because that will be responsible for linking the map coordinates to the image.
The <map> tag will be declared after that with the 'name' attribute that holds the same value as the 'usemap' attribute.
The <map> tag also wraps the <area> tags with 'shape', 'coords', 'alt', and 'href' attributes. The shape attribute specifies the shape of the map area, coords defines the coordinates of the map area for mapping purposes, alt is for the alternate text, and href holds the links for the respective areas.
<img src="frame.png" width="430" height="194" usemap="#map" />
    <map name="map">
        <area shape="circle" coords="51,51,31" alt="Twitter" href="https://twitter.com/" />
        <area shape="circle" coords="161,52, 33" alt="Github" href="https://github.com/" />
        <area shape="circle" coords="271,51,31" alt="LinkedIn" href="https://linkedin.com/" />
        <area shape="circle" coords="379,51,31" alt="Medium" href="https://medium.com/" />
        <area shape="circle" coords="187, 143, 31" alt="Contra" href="https://contra.com/" />
        <area shape="circle" coords="215, 143, 31" alt="Instagram" href="https://www.instagram.com/" />
        <area shape="circle" coords="323,143,31" alt="Codepen" href="https://codepen.io" />
    </map>
One more thing...
This isn't a tag, but is rather an attribute that can help you in building a custom context menu for your app. I'm talking about the 'oncontextmenu' attribute.
The context menu is basically a menu bar that appears when the user right-clicks on the browser and is served with options like 'Inspect', 'View page source' to name a few.
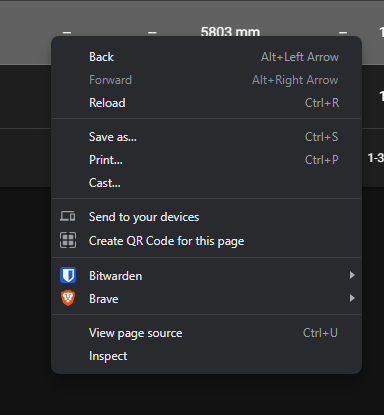
While building a web-app, you might want to serve your user with a custom context menu with a bunch of special options and features, much like Spotify does.

Image Credit: Screen Grab from Spotify
How the oncontextmenu attribute works
The value of this attribute is true by default. This lets you access the context menu that appears when you right-click. But, when given a false value the context menu will not appear.
So, you're disabling the native context menu because your users won't need it. Also, then it won't interfere with your web-app's functionality.
You don't want your custom menu to be overlapped/interfered with by the native context menu, right? So, this exercise could save you from this horrible experience.
<body oncontextmenu="return false"></body>
Note: The attribute is applicable on all HTML elements. This means that if you don't want a user to have context menu functionality on a certain section only, you can do that, too. Just use the attribute on the parent element, like this
<body>
    <section oncontextmenu="return false"></section>
</body>
Signing Off
So, these were the HTML tags I wanted to share with you all! I hope this article was worth your time and you learned something from it.
If any of these tags have piqued your interest, you can learn more about them on MDN.
Have a good day!
If you're learning Git or getting into it, I would like to recommend an e-Book that I wrote when I was learning Git. It is available in PDF and E-PUB format, you can get it for free on Gumroad. Hope you enjoy the e-Book.