
By Ujjwal Saxena
Image Augmentation is a technique for taking an image and using it to generating new ones. It’s useful for doing things like training a self-driving car.
Think of a person driving a car on a sunny day. If it starts raining, they may initially find it difficult to drive in rain. But slowly they get accustomed to it.
An artificial neural network too finds it confusing to drive in a new environment unless it has seen it earlier. Their are various augmentation techniques like flipping, translating, adding noise, or changing color channel.
In this article, I’ll explore the weather part of this. I used the OpenCV library for processing images. I found it pretty easy after a while, and was able to introduce various weather scenarios into an image.
I’ve pushed a fully implemented Jupyter Notebook you can play with on GitHub.
Lets’ have a look.
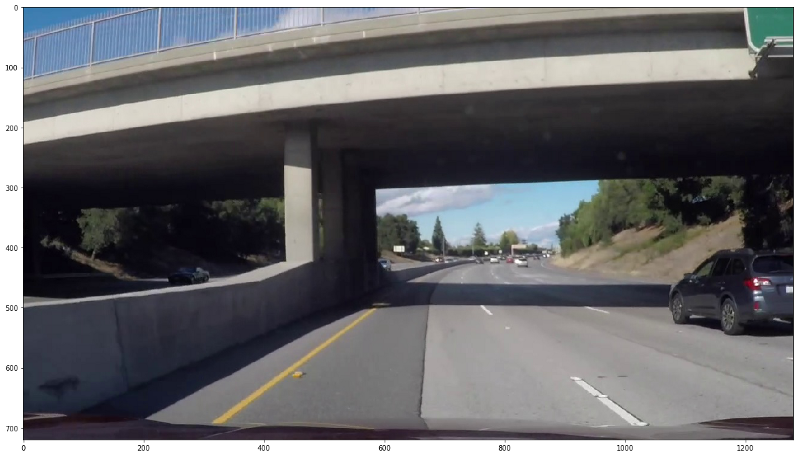
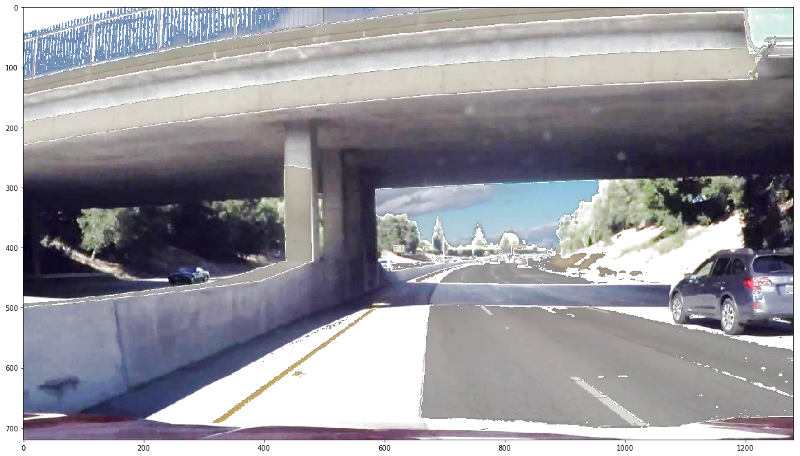
I’ll first show you an original test image and will then augment it.
Sunny and Shady
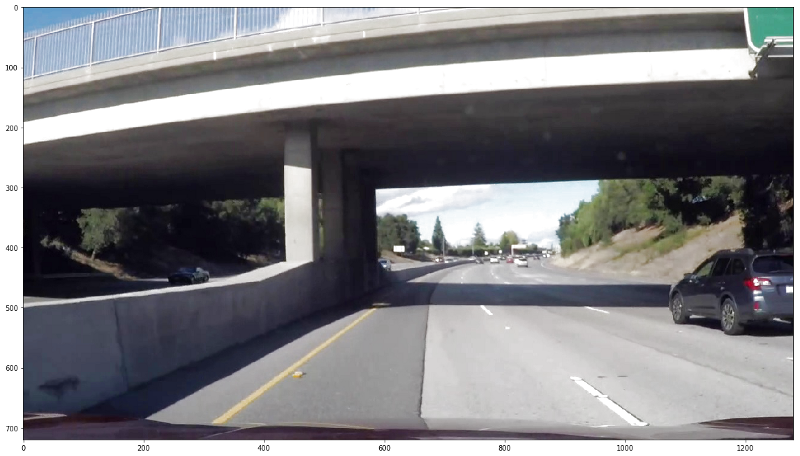
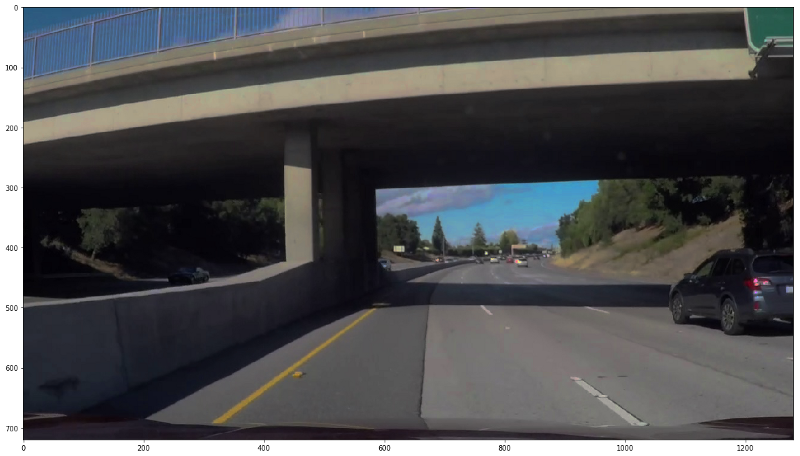
After adding random sunny and shady effect, the image’s brightness changes. This is an easy and quick transformation to perform.
def add_brightness(image): image_HLS = cv2.cvtColor(image,cv2.COLOR_RGB2HLS) ## Conversion to HLS image_HLS = np.array(image_HLS, dtype = np.float64) random_brightness_coefficient = np.random.uniform()+0.5 ## generates value between 0.5 and 1.5 image_HLS[:,:,1] = image_HLS[:,:,1]*random_brightness_coefficient ## scale pixel values up or down for channel 1(Lightness) image_HLS[:,:,1][image_HLS[:,:,1]>255] = 255 ##Sets all values above 255 to 255 image_HLS = np.array(image_HLS, dtype = np.uint8) image_RGB = cv2.cvtColor(image_HLS,cv2.COLOR_HLS2RGB) ## Conversion to RGB return image_RGB
The brightness of an image can be changed by changing the pixel values of “Lightness”- channel 1 of image in HLS color space. Converting the image back to RGB gives the same image with enhanced or suppressed lighting.
Shadows
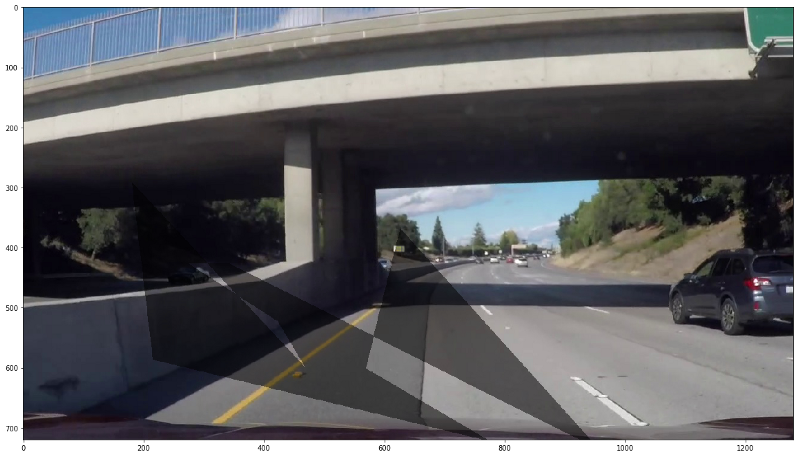
To a car, a shadow is nothing but the dark portions of an image, which can also be bright at times. So a self-driving car should always learn to drive with or without shadows. Randomly changing brightness on the hills or in the woods often boggle a car’s perception if not trained properly. This is even more prevalent on sunny days and differently tall buildings in a city, allowing beams of light to peep through.
Brightness is good for perception but uneven, sudden or too much brightness create perception issues. Let’s generate some fake shadows.
def generate_shadow_coordinates(imshape, no_of_shadows=1): vertices_list=[] for index in range(no_of_shadows): vertex=[] for dimensions in range(np.random.randint(3,15)): ## Dimensionality of the shadow polygon vertex.append(( imshape[1]*np.random.uniform(),imshape[0]//3+imshape[0]*np.random.uniform())) vertices = np.array([vertex], dtype=np.int32) ## single shadow vertices vertices_list.append(vertices) return vertices_list ## List of shadow vertices
def add_shadow(image,no_of_shadows=1): image_HLS = cv2.cvtColor(image,cv2.COLOR_RGB2HLS) ## Conversion to HLS mask = np.zeros_like(image) imshape = image.shape vertices_list= generate_shadow_coordinates(imshape, no_of_shadows) #3 getting list of shadow vertices for vertices in vertices_list: cv2.fillPoly(mask, vertices, 255) ## adding all shadow polygons on empty mask, single 255 denotes only red channel image_HLS[:,:,1][mask[:,:,0]==255] = image_HLS[:,:,1][mask[:,:,0]==255]*0.5 ## if red channel is hot, image's "Lightness" channel's brightness is lowered image_RGB = cv2.cvtColor(image_HLS,cv2.COLOR_HLS2RGB) ## Conversion to RGB return image_RGB
OpenCV’s fillPoly() function is really handy in this case. Let’s create some random vertices and impose the polygon on an empty mask using fillPoly(). Having done this, the only thing left to do is to check the mask for hot pixels and reduce the “Lightness” in the HLS image wherever these hot pixels are found.
Snow
Well this is something new. We often wonder how would our vehicle behave on snowy roads. One way to test that is to get pics of snow clad roads or do something on the images to get a similar effect. This effect is not a complete alternative to snowy roads, but it’s an approach worth trying.
def add_snow(image): image_HLS = cv2.cvtColor(image,cv2.COLOR_RGB2HLS) ## Conversion to HLS image_HLS = np.array(image_HLS, dtype = np.float64) brightness_coefficient = 2.5 snow_point=140 ## increase this for more snow image_HLS[:,:,1][image_HLS[:,:,1]<snow_point] = image_HLS[:,:,1][image_HLS[:,:,1]<snow_point]*brightness_coefficient ## scale pixel values up for channel 1(Lightness) image_HLS[:,:,1][image_HLS[:,:,1]>255] = 255 ##Sets all values above 255 to 255 image_HLS = np.array(image_HLS, dtype = np.uint8) image_RGB = cv2.cvtColor(image_HLS,cv2.COLOR_HLS2RGB) ## Conversion to RGB return image_RGB
Yup! That’s it. This code generally whitens the darkest parts of the image, which are mostly roads, trees, mountains and other landscape features, using the same HLS “Lightness” increase method used in the other approaches above. This technique doesn’t work well for dark images, but you can modify it to do so. Here’s what you get:
You can tweak some parameters in the code for more or less snow than this. I have tested this on other images too, and this technique gives me chills.
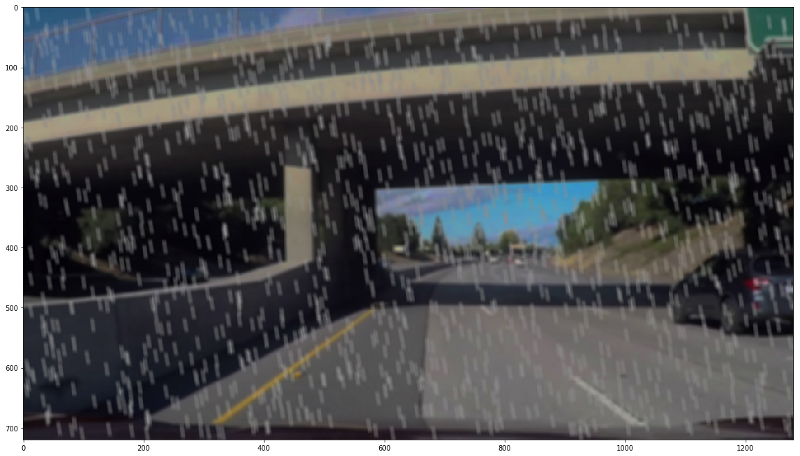
Rain
Yes, you heard that right. Why not rain? When humans experience difficulty driving in rain, why should vehicles be spared from that? In fact, this is one of the situations for which I want my self-driving car to be trained the most. Slippery roads and blurred visions are risky, and cars should know how to handle them.
def generate_random_lines(imshape,slant,drop_length): drops=[] for i in range(1500): ## If You want heavy rain, try increasing this if slant<0: x= np.random.randint(slant,imshape[1]) else: x= np.random.randint(0,imshape[1]-slant) y= np.random.randint(0,imshape[0]-drop_length) drops.append((x,y)) return drops def add_rain(image): imshape = image.shape slant_extreme=10 slant= np.random.randint(-slant_extreme,slant_extreme) drop_length=20 drop_width=2 drop_color=(200,200,200) ## a shade of gray rain_drops= generate_random_lines(imshape,slant,drop_length) for rain_drop in rain_drops: cv2.line(image,(rain_drop[0],rain_drop[1]),(rain_drop[0]+slant,rain_drop[1]+drop_length),drop_color,drop_width) image= cv2.blur(image,(7,7)) ## rainy view are blurry brightness_coefficient = 0.7 ## rainy days are usually shady image_HLS = cv2.cvtColor(image,cv2.COLOR_RGB2HLS) ## Conversion to HLS image_HLS[:,:,1] = image_HLS[:,:,1]*brightness_coefficient ## scale pixel values down for channel 1(Lightness) image_RGB = cv2.cvtColor(image_HLS,cv2.COLOR_HLS2RGB) ## Conversion to RGB return image_RGB
What I did here is that again I generated random points all over the image and then used the OpenCV’s line() function to generate small lines all over the image. I have also used a random slant in the rain drops to have a feel of actual rain. I have also reduced image’s brightness because rainy days are usually shady, and also blurry because of the rain. You can change the dimension of your blur filter and the number of rain drops for desired effect.
Here is the result:
Fog
This is yet another scenario that hampers the vision of a self-driving car a lot. Blurry white fluff in the image makes it very difficult to see beyond a certain stretch and reduces the sharpness in the image.
Fog intensity is an important parameter to train a car for how much throttle it should give. For coding such a function, you can take random patches from all over the image, and increase the image’s lightness within those patches. With a simple blur, this gives a nice hazy effect.
def add_blur(image, x,y,hw): image[y:y+hw, x:x+hw,1] = image[y:y+hw, x:x+hw,1]+1 image[:,:,1][image[:,:,1]>255] = 255 ##Sets all values above 255 to 255 image[y:y+hw, x:x+hw,1] = cv2.blur(image[y:y+hw, x:x+hw,1] ,(10,10)) return image
def generate_random_blur_coordinates(imshape,hw): blur_points=[] midx= imshape[1]//2-hw-100 midy= imshape[0]//2-hw-100 index=1 while(midx>-100 or midy>-100): ## radially generating coordinates for i in range(250*index): x= np.random.randint(midx,imshape[1]-midx-hw) y= np.random.randint(midy,imshape[0]-midy-hw) blur_points.append((x,y)) midx-=250*imshape[1]//sum(imshape) midy-=250*imshape[0]//sum(imshape) index+=1 return blur_points def add_fog(image): image_HLS = cv2.cvtColor(image,cv2.COLOR_RGB2HLS) ## Conversion to HLS mask = np.zeros_like(image) imshape = image.shape hw=100 image_HLS[:,:,1]=image_HLS[:,:,1]*0.8 haze_list= generate_random_blur_coordinates(imshape,hw) for haze_points in haze_list: image_HLS[:,:,1][image_HLS[:,:,1]>255] = 255 ##Sets all values above 255 to 255 image_HLS= add_blur(image_HLS, haze_points[0],haze_points[1], hw) ## adding all shadow polygons on empty mask, single 255 denotes only red channel image_RGB = cv2.cvtColor(image_HLS,cv2.COLOR_HLS2RGB) ## Conversion to RGB return image_RGB
Coding this was the hardest of all the functions above. I have tried a radial approach to generate patches here. Since on a foggy day usually most of the fog is at the far end of the road and as we approach near, vision keeps clearing itself.
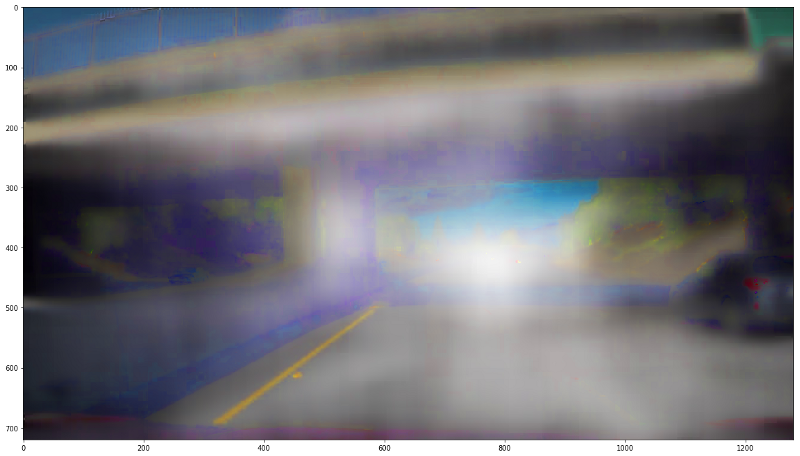
It’s a real difficult task for a machine to detect nearby cars and lanes in such a foggy condition, and is a good way to train and test the robustness of the driving model.
Torrential rain
I thought of making the rain part a little better by combining fog and rain. As there is always some haze during rains and it’s good to train the car for that also. There’s no new function is required for this. We can achieve the effect by sequentially calling both.
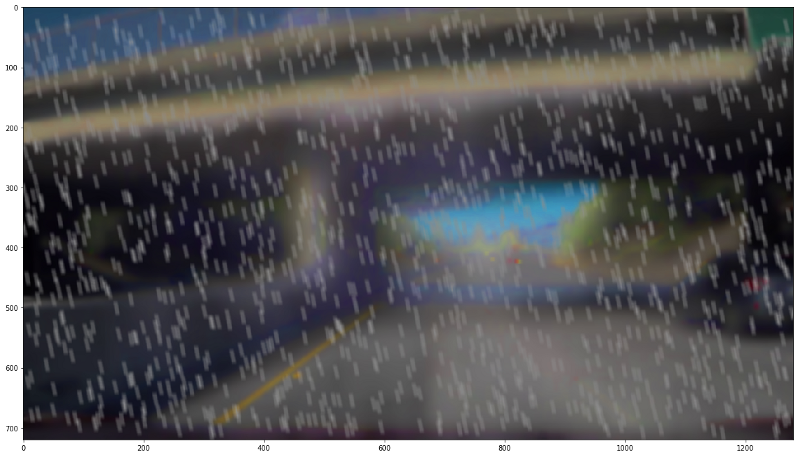
The car on the right is barely visible in this image, and this is a real world scenario. We can hardly make out anything on the road in heavy rain.
I hope this article will help you train the model in various weather conditions. For my complete code, you can visit my GitHub profile. And I’ve written a lot of other articles, which you can read on Medium and on my WordPress site.
Enjoy!