

In Microsoft Word, you can create digital forms, surveys, to-do lists, and printable forms. And you might need to add a checkbox in these forms so your respondents can select certain options.
In this tutorial, I will show you how to insert an interactive checkbox in Microsoft Word for softcopy documents, and a non-interactive checkbox for hardcopy (printed) documents. Then you can start using them in your forms, surveys, and lists.
I will be using the Microsoft Word 2016 desktop app in this guide because it's my personal preference. If you are using a different version, things may not be entirely the same, but you can still follow along.
How to Insert a Checkbox in Softcopy Documents like Digital Forms and Surveys
To insert a checkbox in a softcopy document (like forms and surveys that you want respondents to fill out digitally within the Word document), you'll use the Developer tab in the menu bar.
Unlike other tabs such as File, Home, Insert, Design, and so on, the Developer tab doesn’t appear in the menu bar by default. So I will start this guide by walking you through how to show the Developer tab in the menu bar.
How to Show the Developer Tab
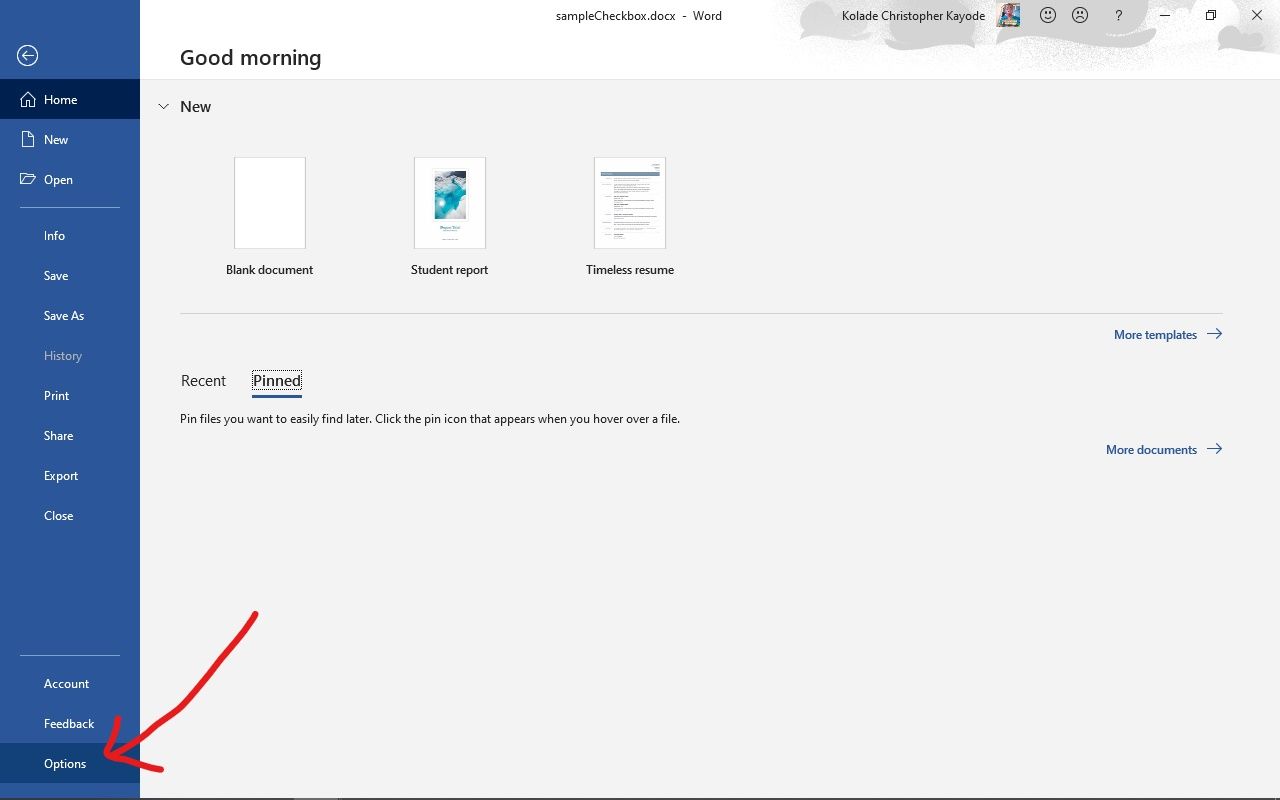
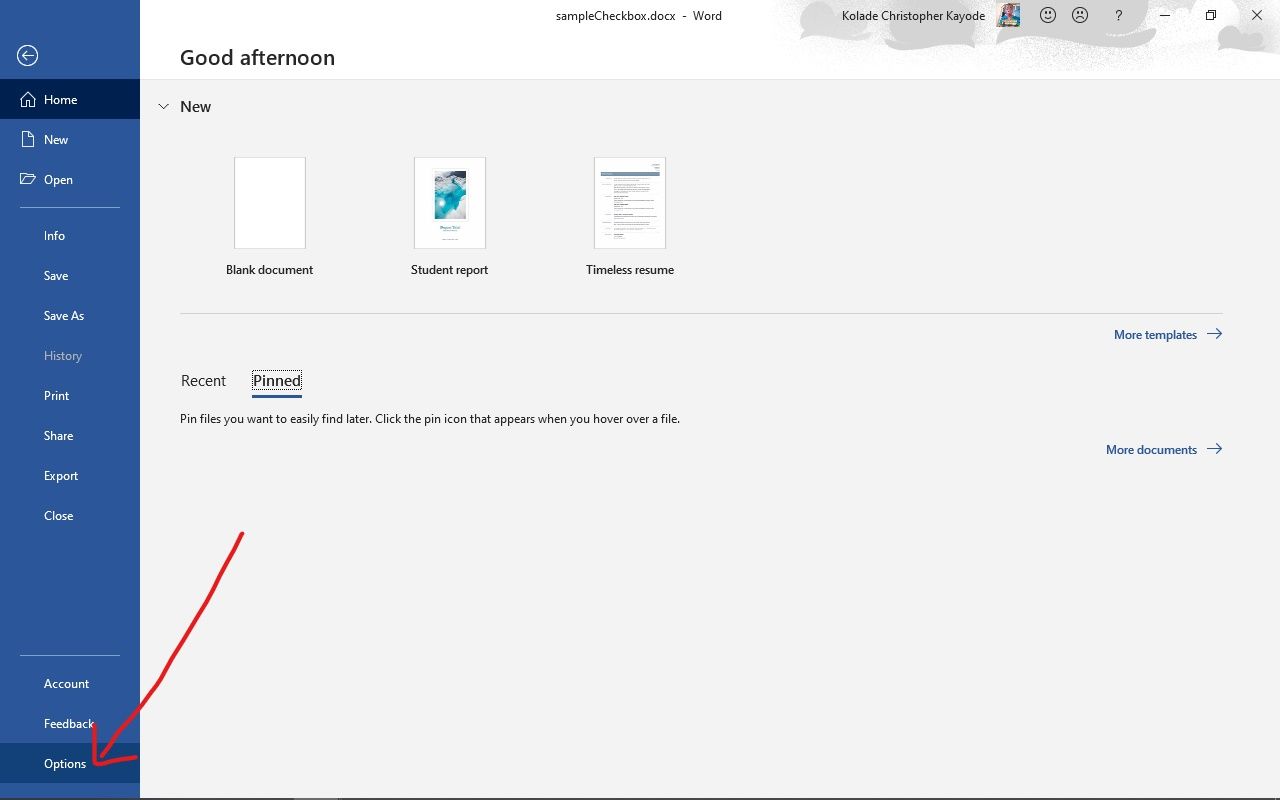
To show the Developer tab in the menu bar, first click on “File”:

Next, click “Options”:
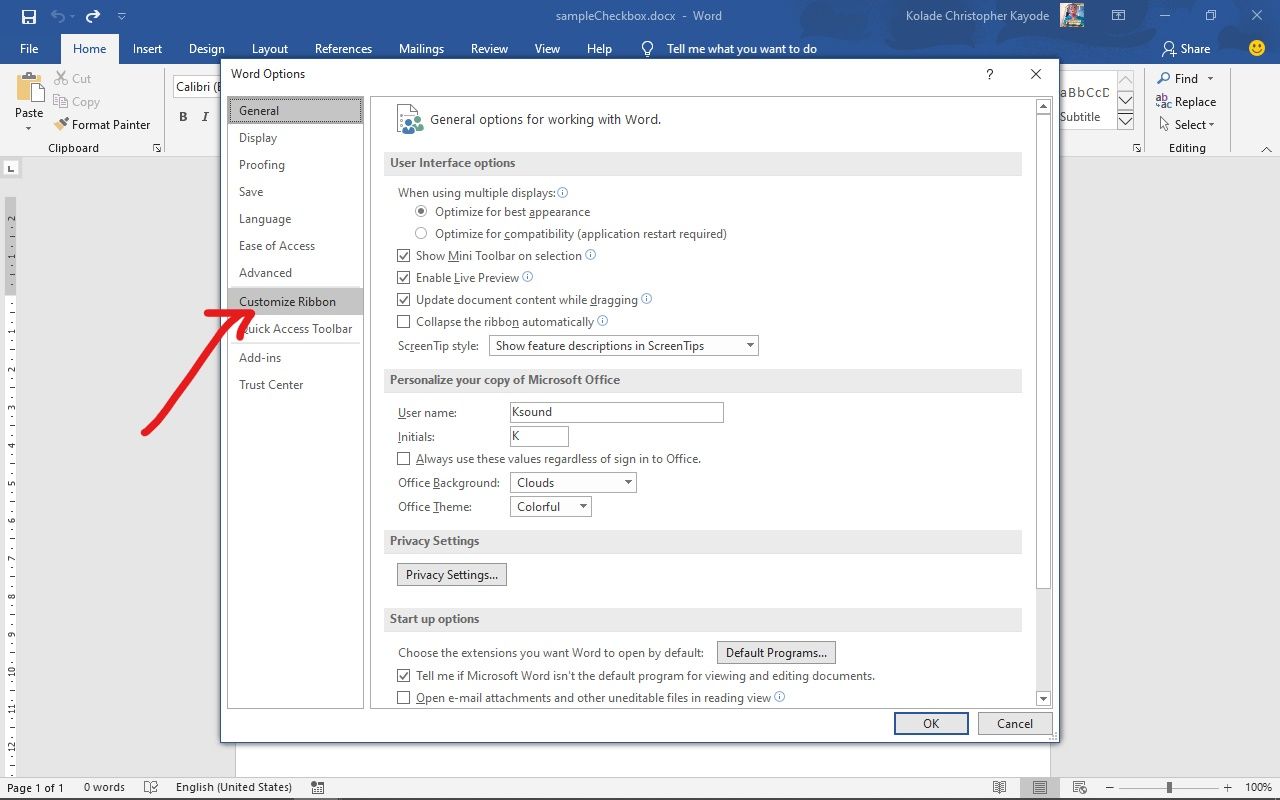
Then select “Customize Ribbon” in the pop up that shows up:
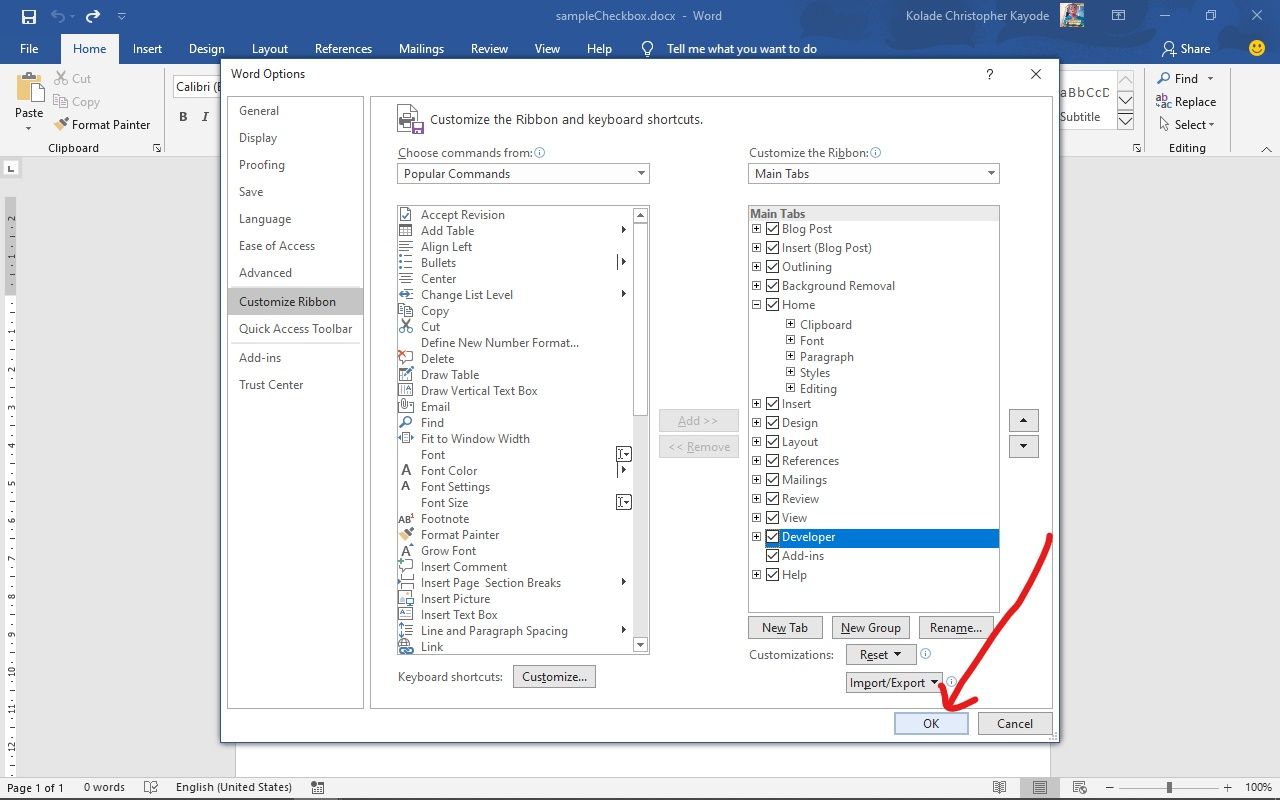
Under “Main Tabs”, check the “Developer” option:

Finally, click “Ok”:
How to Insert the Checkbox in your Word Document
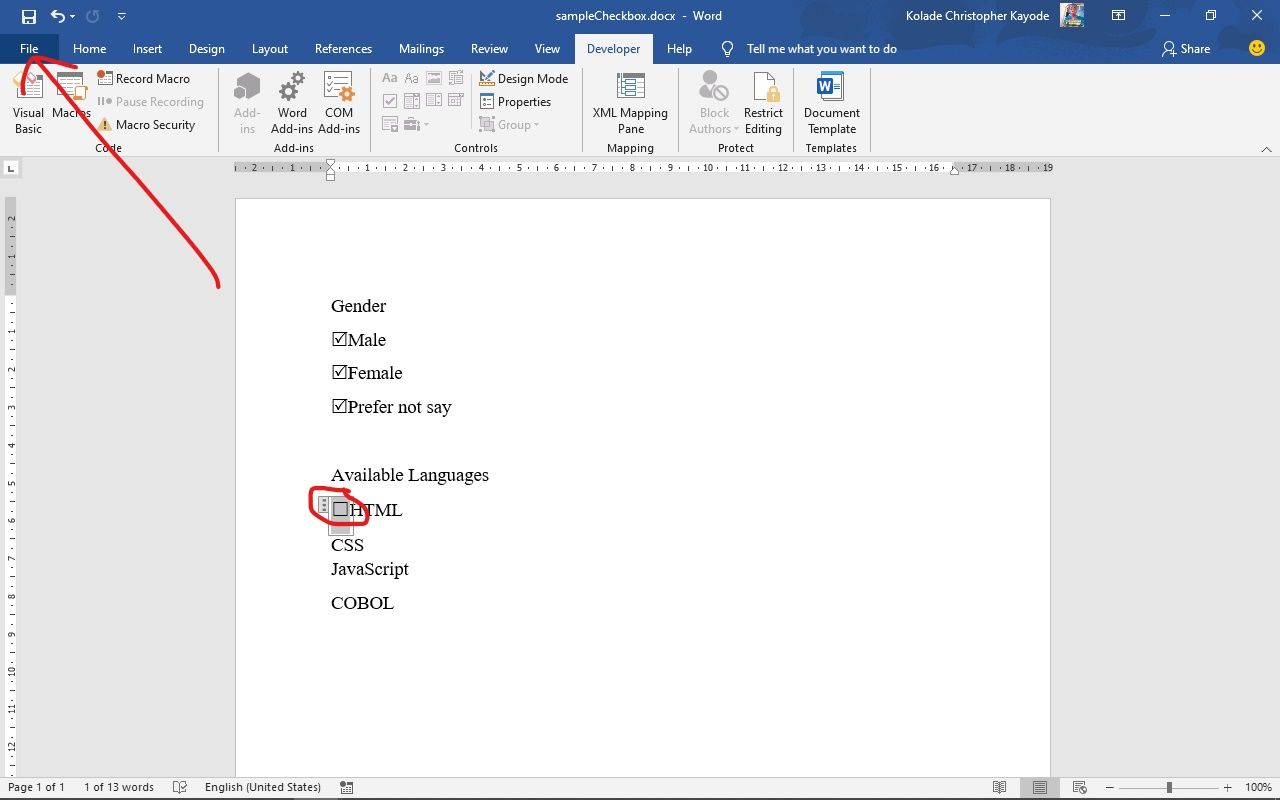
First, place the cursor where you want to insert the checkbox.
Next, click on the Developer tab in the menu bar. You will see options such as Add-ins, XML Mapping Pane, and some others (you will not see their names until you hover on them).
Hover on the one that has a checkmark and select it.
This will insert your checkbox.
How to Change the Icon of the Checked State of the Checkbox
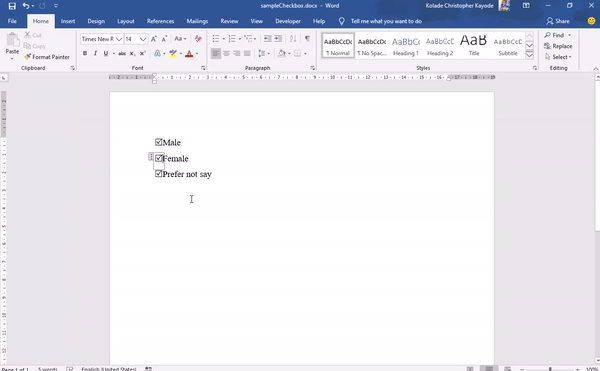
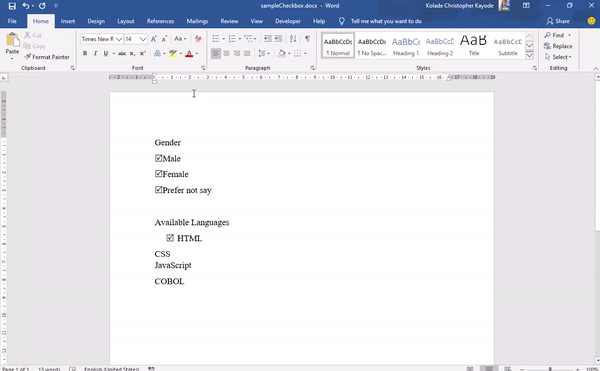
The checkbox becomes interactive immediately after you insert it. The only problem is that an "X" appears by default in the checked state, and you might want a checkmark instead of this.
So now I’m going to show you how to change the X to a checkmark.
Step 1: Select the checkbox, or place the cursor right next to it:

Step 2: Click on the Developer tab and select “Properties”:

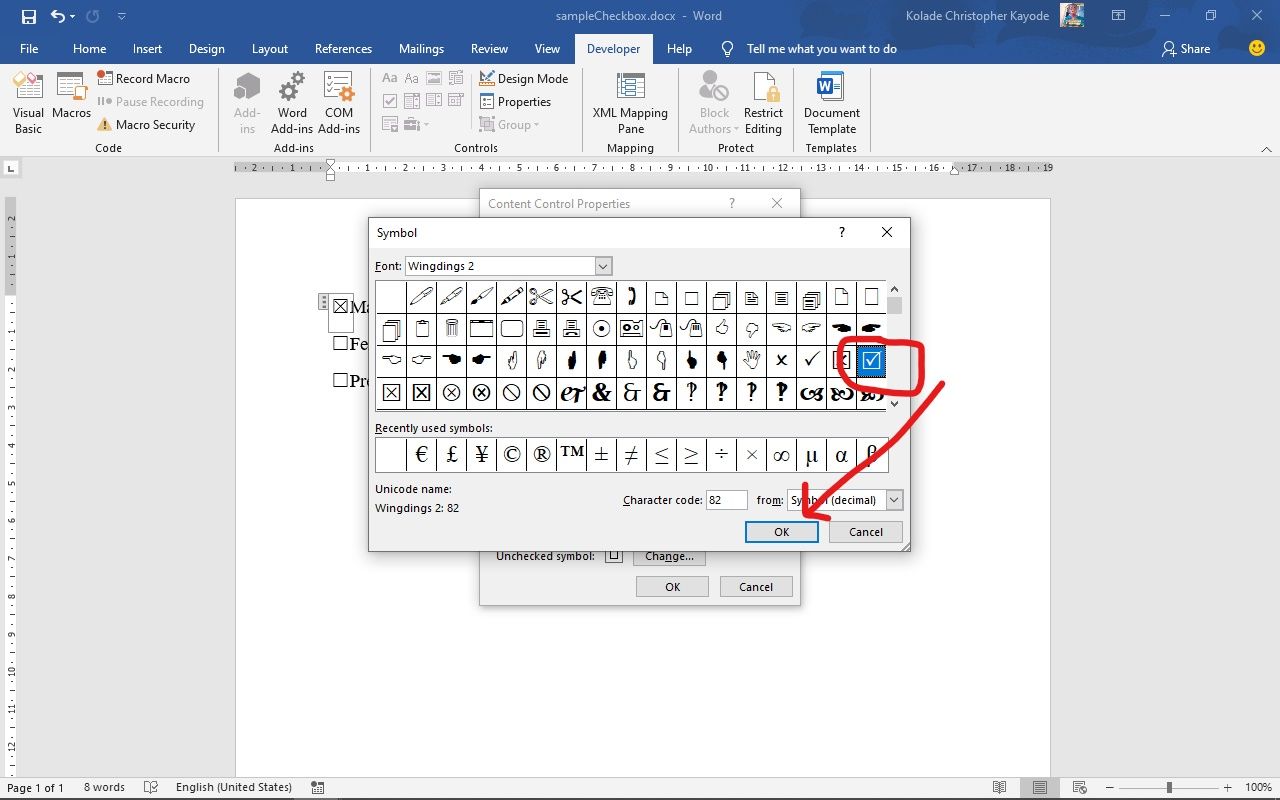
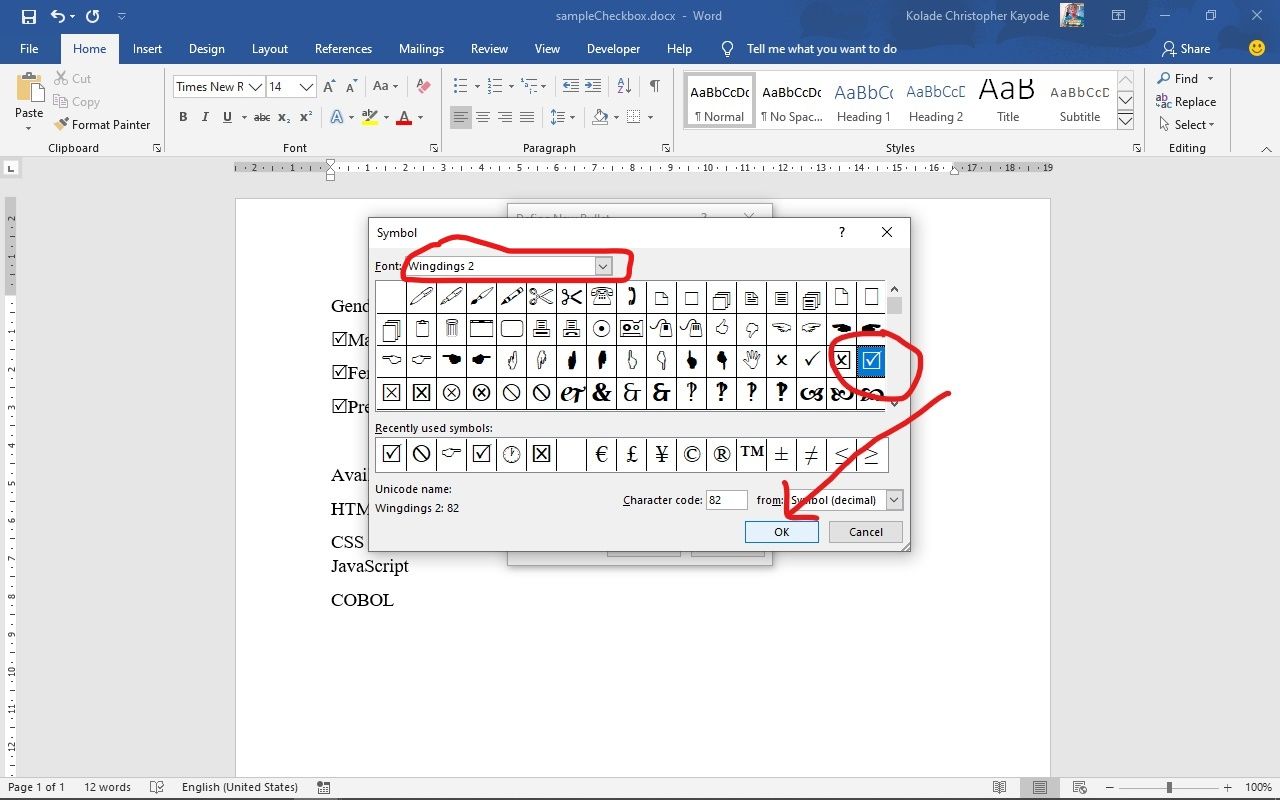
Step 3: You will see the default symbols for checked and unchecked symbols. Right next to the “Checked Symbol”, click “change”.
Step 4: In the popup that shows up, look for “winding2” under font and select it. You will see the common checkmark icons used for the checked state of checkboxes. Just select one of them and click “Ok”, then “Ok” again.
Below is a gif demonstrating how to change the checked icon:

You can follow the same process to change the unchecked state, as I've shown below:

How to Remove the Bounding Box of the Checkmark
Another way you can make the checkbox look better and make it user-friendly is to remove the bounding box that appears when it is checked or unchecked, and when the cursor is placed on it.
Step 1: Place the cursor on the checkbox.
Step 2: Select the Developer tab in the menu bar and click on “Properties”.
Step 3: Right next to “Show as”, click the dropdown and select “None”.
Thee 3 steps above are demonstrated in the animated gif below:
How to Insert a Checkbox in Hardcopy (Printed) Documents
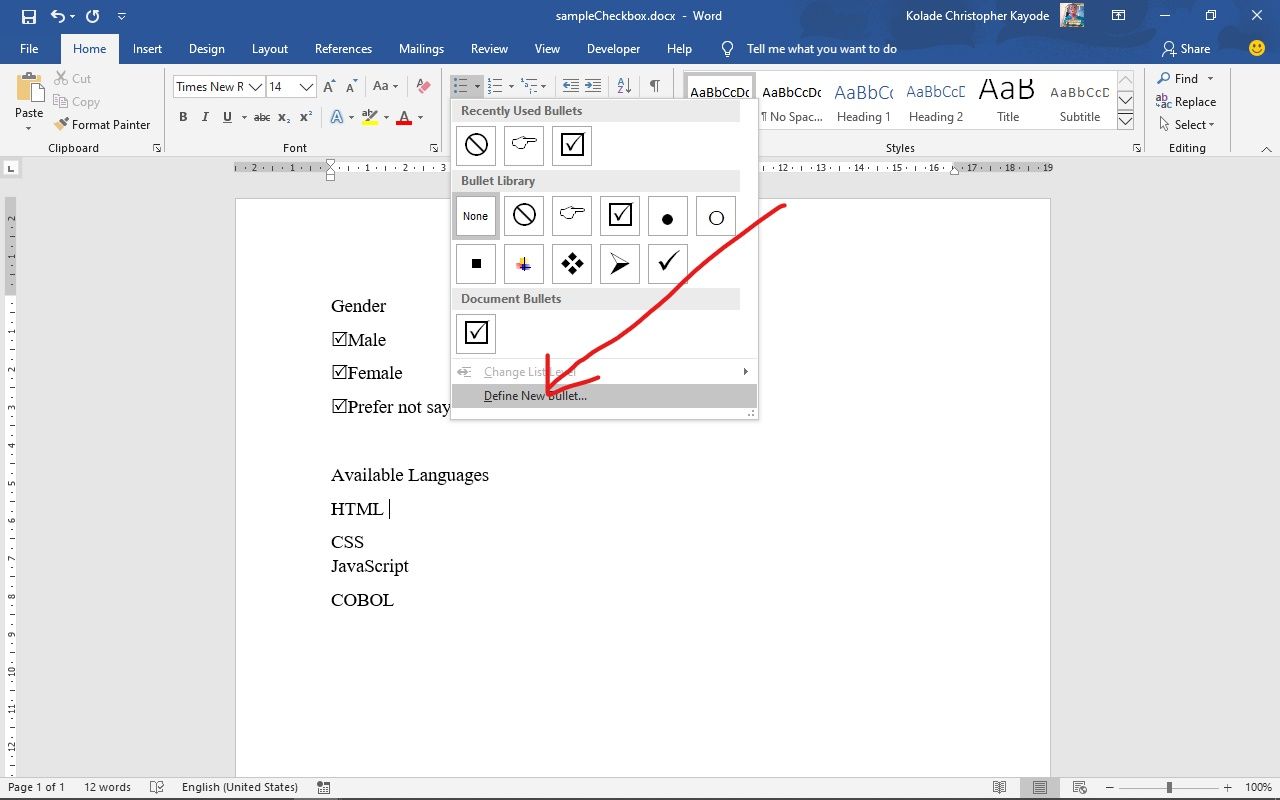
If you are dealing with printed documents, you don’t need to dabble around with the Developer tab to insert a checkbox. Instead, you can define a custom bullet point for the purpose.
Step 1: Make sure you are on the Home tab of the menu bar.
Step 2: Click the Bullets dropdown icon:

Step 3: Click “Define new bullet”:
Step 4: Select "Symbol" in the popup that shows up:
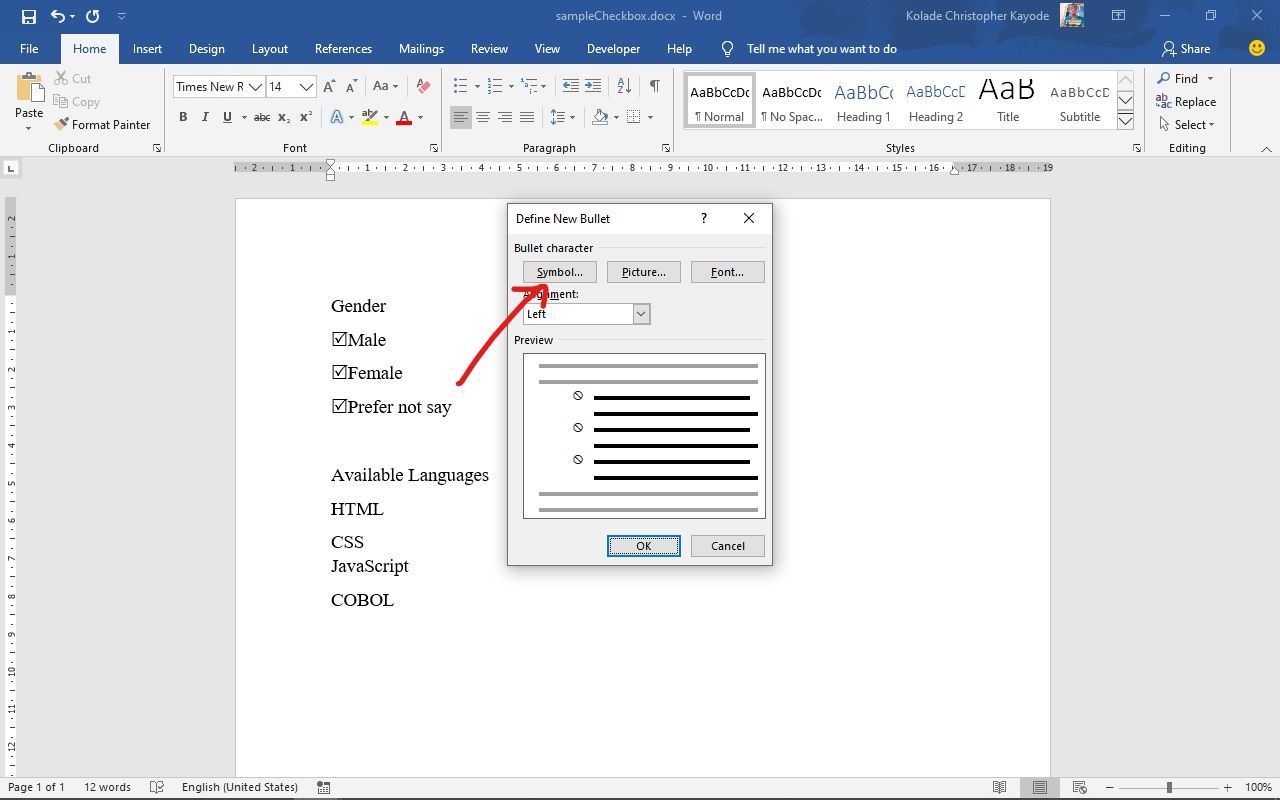
Step 5: Select "Winding2" as the font.
Step 6: Choose the checkmark Icon and click “Ok”, then “Ok” again:
This is how its all done:
How to Create a Shortcut to Add an Interactive Checkbox in Word
If you want to continue inserting more interactive checkboxes, you don’t need to waste time by doing it from the Developer tab all the time. You can create a shortcut with the steps below.
Step 1: Make sure the checkbox is being shown as a bounding box. Refer to the steps under the "Remove the Bounding Box” part of this tutorial to get a refresh on how to do this.
Step 2: Highlight the checkbox and click on the File tab of the menu bar:
Step 3: Click on “Options”:
Step 4: Select “Proofing” in the popup that comes up and click on “Autocorrect Options”:
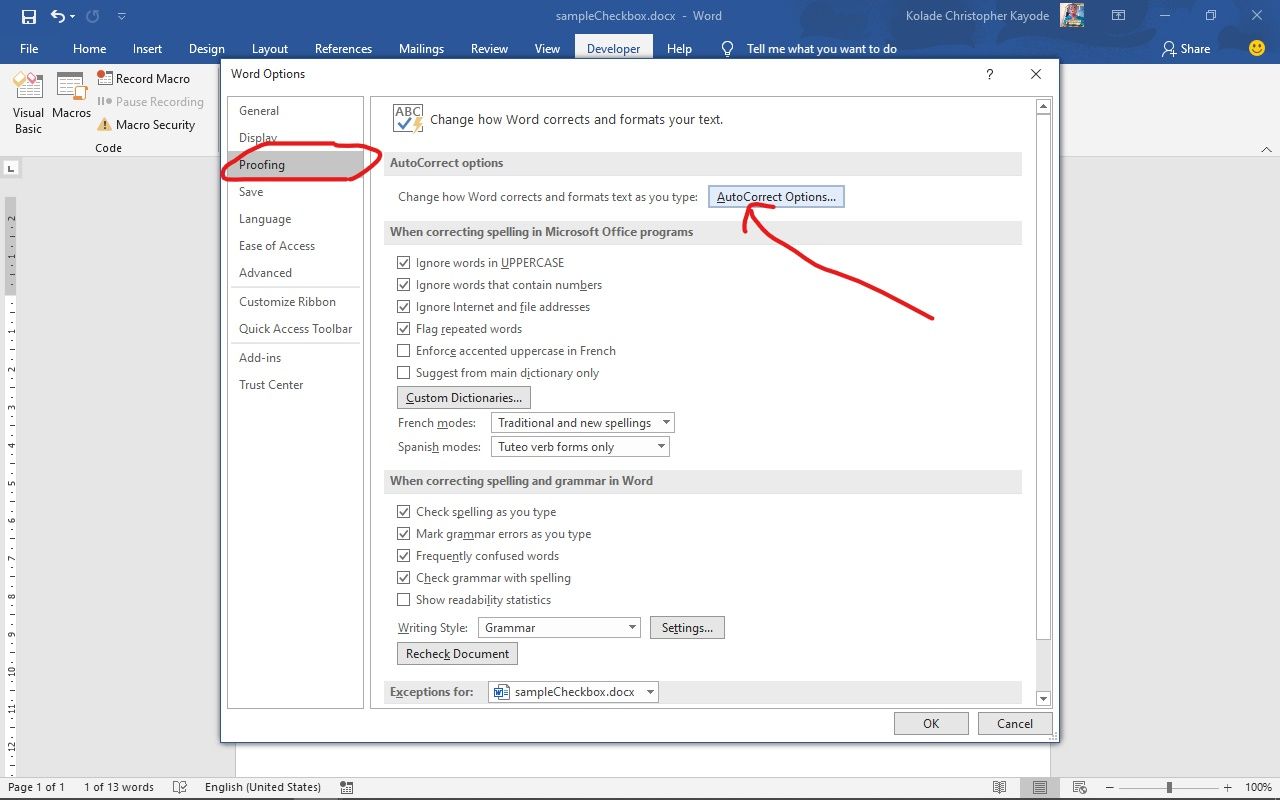
Step 5: You should see several options checked. Make sure “Replace text as you type” is checked too.
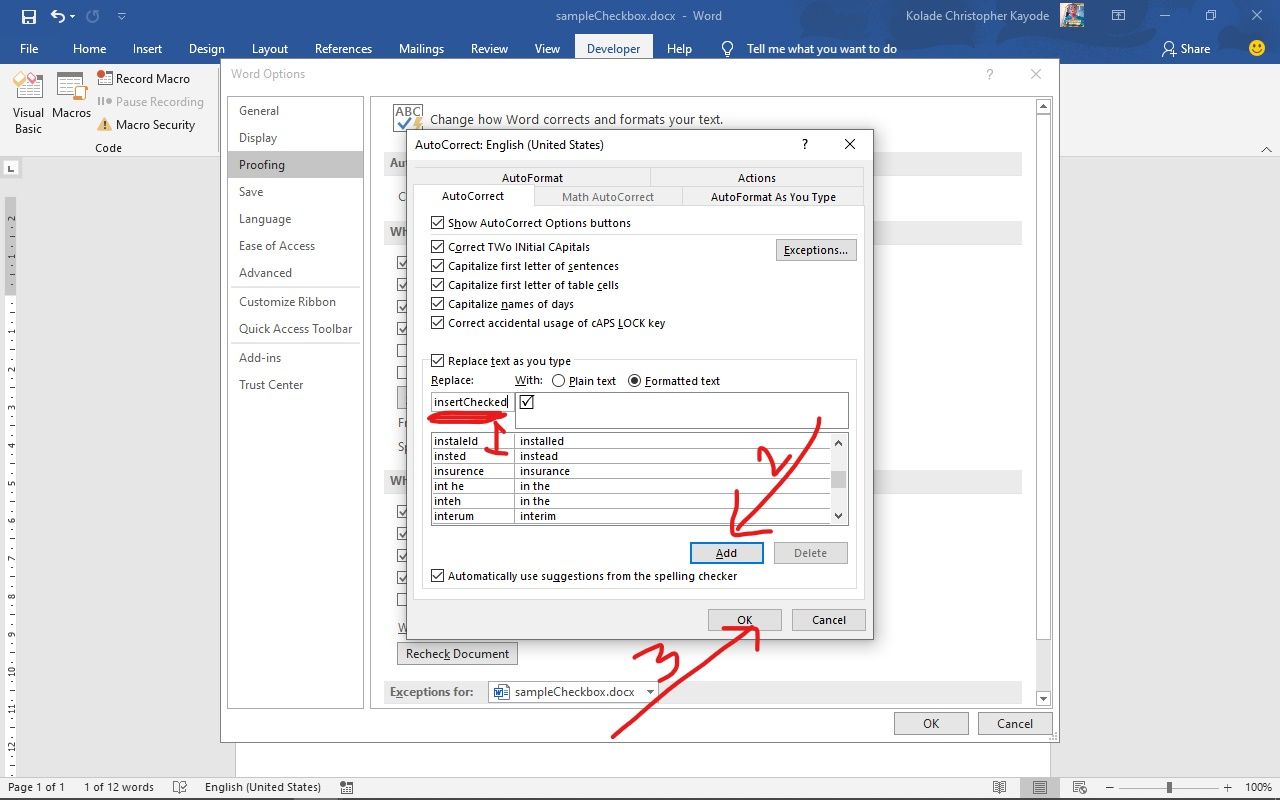
Step 6: In the editor under “Replace”, type in the shortcut you would like to use to insert checkboxes and click “Add”. Click “Ok” and “Ok” again.
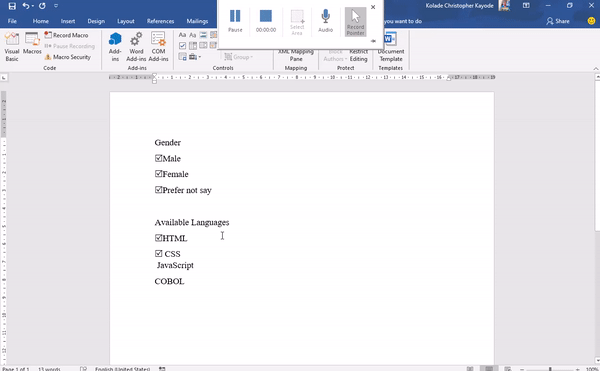
Now, to insert a checkbox, you can simply type the word you entered in step 6 and hit the space bar.
Conclusion
Checkboxes often play a crucial role in data collection using softcopy and printed documents. I hope this tutorial helped you understand how they work.
In this guide, you learned how to insert an interactive checkbox for fillable digital documents such as forms and surveys, and insert a non-interactive checkbox in printed documents.
Thank you for reading, and have a nice time.