By Aviator Ifeanyichukwu
Apache Airflow is a tool that helps you manage and schedule data pipelines. According to the documentation, it lets you "programmatically author, schedule, and monitor workflows."
Airflow is a crucial tool for data engineers and scientists. In this article, I'll show you how to install it on Windows without Docker.
Although it's recommended to run Airflow with Docker, this method works for low-memory machines that are unable to run Docker.
Prerequisites:
This article assumes that you're familiar with using the command line and can set up your development environment as directed.
Requirements:
You need Python 3.8 or higher, Windows 10 or higher, and the Windows Subsystem for Linux (WSL2) to follow this tutorial.
What is Windows Subsystem for Linux (WSL2)?
WSL2 allows you to run Linux commands and programs on a Windows operating system.
It provides a Linux-compatible environment that runs natively on Windows, enabling users to use Linux command-line tools and utilities on a Windows machine.
You can read more here to install WSL2 on your machine.
With Python and WSL2 installed and activated on your machine, launch the terminal by searching for Ubuntu from the start menu.
Step 1: Set Up the Virtual Environment
To work with Airflow on Windows, you need to set up a virtual environment. To do this, you'll need to install the virtualenv package.
Note: Make sure you are at the root of the terminal by typing:
cd ~
pip install virtualenv
Create the virtual environment like this:
virtualenv airflow_env
And then activate the environment:
source airflow_env/bin/activate
Step 2: Set Up the Airflow Directory
Create a folder named airflow. Mine will be located at c/Users/[Username]. You can put yours wherever you prefer.
If you do not know how to navigate the terminal, you can follow the steps in the image below:
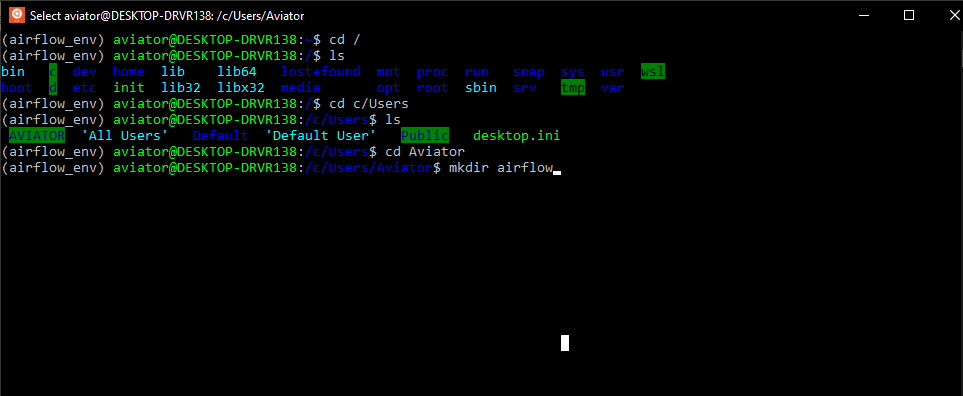 Create an Airflow directory from the terminal
Now that you have created this folder, you have to set it as an environment variable. Open a .bashrc script from the terminal with the command:
nano ~/.bashrc
Then write the following:
AIRFLOW_HOME=/c/Users/[YourUsername]/airflow
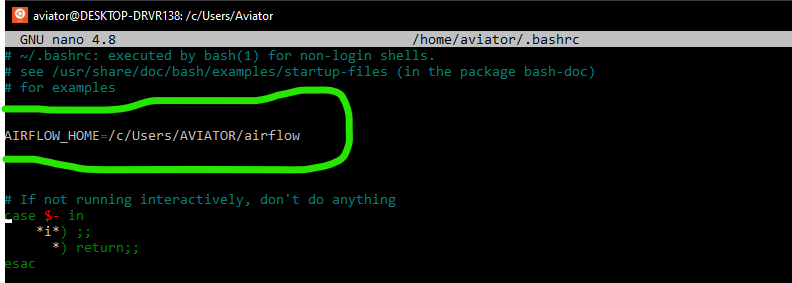 Setup Airflow directory path as an environment variable
Press ctrl s and ctrl x to exit the nano editor.
This part of the Airflow directory will be permanently saved as an environment variable. Anytime you open a new terminal, you can recover the value of the variable by typing:
cd $AIRFLOW_HOME
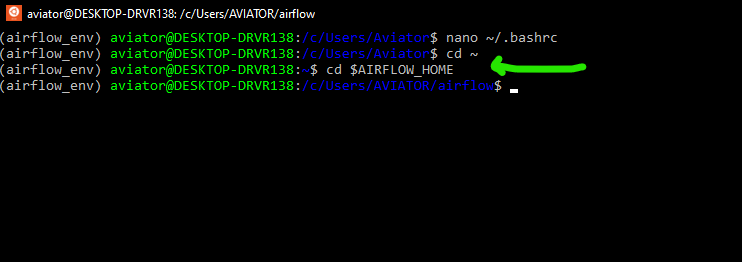 Navigate to Airflow directory using the environment variable
Step 3: Install Apache Airflow
With the virtual environment still active and the current directory pointing to the created Airflow folder, install Apache Airflow:
pip install apache-airflow
Initialize the database:
airflow db init
Create a folder named dags inside the airflow folder. This will be used to store all Airflow scripts.
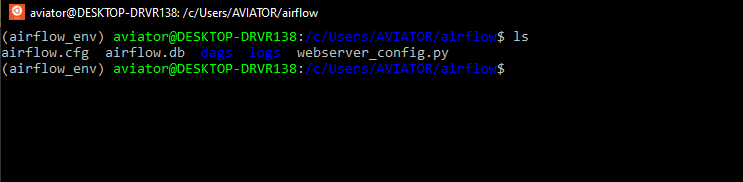 View files and folders generated by Airflow db init
Step 4: Create an Airflow User
When airflow is newly installed, you'll need to create a user. This user will be used to login into the Airflow UI and perform some admin functions.
airflow users create --username admin –password admin –firstname admin –lastname admin –role Admin –email youremail@email.com
Check the created user:
airflow users list
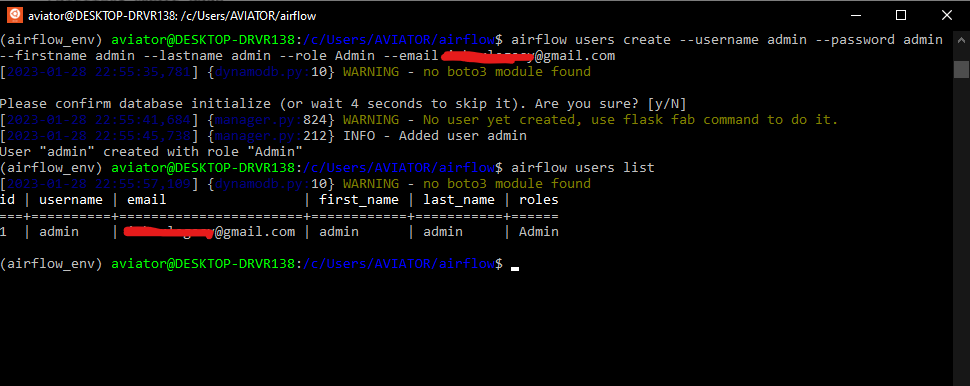 Create an Airflow user and list the created user
Step 5: Run the Webserver
Run the scheduler with this command:
airflow scheduler
Launch another terminal, activate the airflow virtual environment, cd to $AIRFLOW_HOME, and run the webserver:
airflow webserver
If the default port 8080 is in use, change the port by typing:
airflow webserver –port <port number>
Log in to the UI using the username created earlier with "airflow users create".
In the UI, you can view pre-created DAGs that come with Airflow by default.
How to Create the first DAG
A DAG is a Python script for organizing and managing tasks in a workflow.
To create a DAG, navigate into the dags folder created inside the $AIRFLOW_HOME directory. Create a file named "hello_world_dag.py". Use VS Code if it's available.
Enter the code from the image below, and save it:
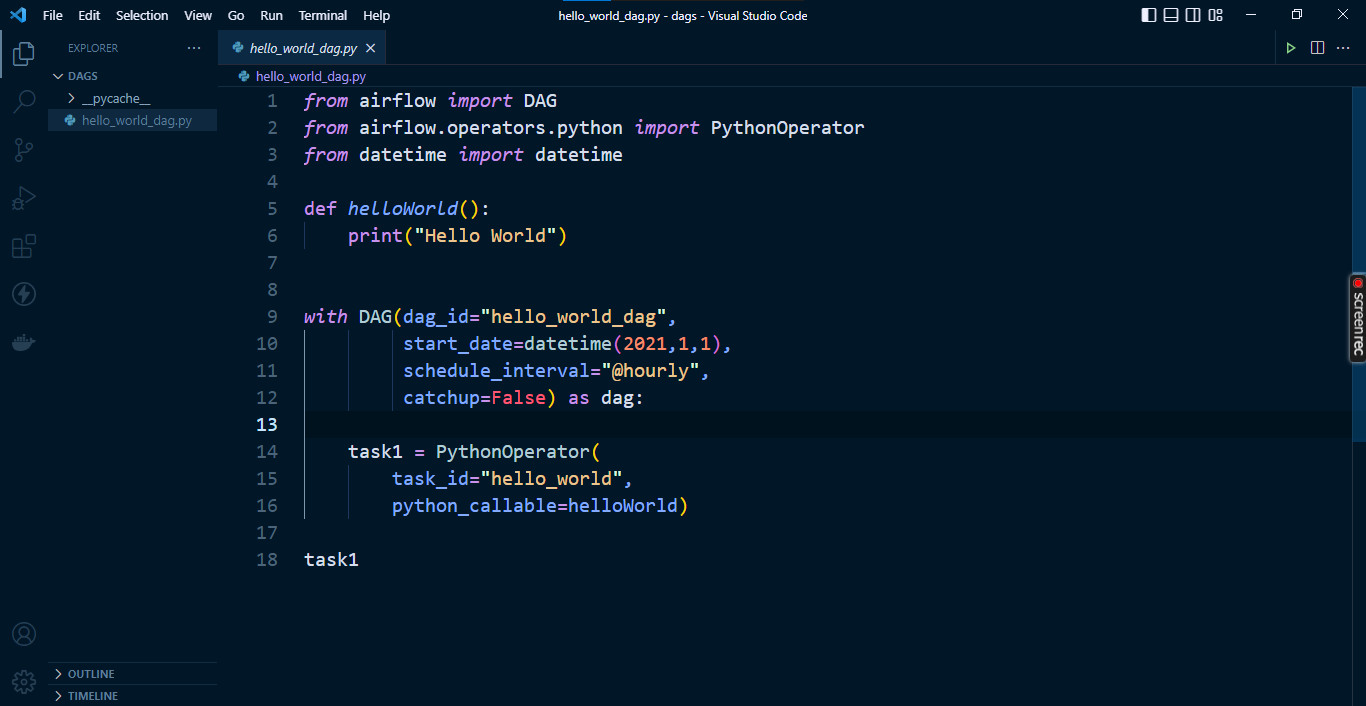 Example DAG script in VS Code editor
Go to the Airflow UI and search for hello_world_dag. If it does not show up, try refreshing your browser.
That's it. This completes the installation of Apache Airflow on Windows.
Wrapping Up
This guide covered how to install Apache Airflow on a Windows machine without Docker and how to write a DAG script.
I do hope the steps outlined above helped you install airflow on your Windows machine without Docker.
In subsequent articles, you will learn about Apache Airflow concepts and components.
Follow me on Twitter or LinkedIn for more Analytics Engineering content.