
Developers need to install Xcode Command Line Tools before they can develop software on a Mac.
Apple provides a complete development environment for programmers named Xcode. If you are developing software for macOS, iOS, tvOS, and watchOS, you must install the full Xcode application.
It's not pre-installed, but you can install it from the Apple developer website or the App Store on your Mac.
What are Xcode Command Line Tools?
If you're not developing software for an Apple device, you won't need the full Xcode application (it requires over 40GB of disk space!).
Instead, you'll install Xcode Command Line Tools. It's a smaller package for software developers with tools that run on the command line, that is, in the Terminal application.
Programmers have used these tools on Unix operating systems since computing's beginnings, and they serve as the foundation of almost all software development.
Luckily, the Xcode Command Line Tools package only requires 1.2GB of space on your disk.
You have three choices to install Xcode Command Line Tools on a Mac:
- install the full Xcode package
- install Xcode Command Line Tools when triggered by a command
- install Xcode Command Line Tools as part of a Homebrew installation.
I don't recommend installing the full Xcode package unless you're developing software for an Apple device. The download will take too long and it will consume unnecessary disk space. Instead, try either of two faster methods.
How to Install Xcode Command Line Tools from a Command Prompt
Apple has made it easy to install Xcode Command Line Tools because certain commands will prompt you to begin installation.
Here are examples of commands that will trigger a prompt to install Xcode Command Line Tools:
clang– a compiler that turns source code into an executable programgcc– the GNU compilergit– the save-as-you-go version control system
Running any of these commands in the terminal will bring up a prompt to install Xcode Command Line Tools. I've written elsewhere about How to Open Terminal on MacOS – just click the Spotlight icon in the menu bar and type “terminal.”
You can also enter the command xcode-select --install in the terminal to begin the installation process. You'll see a panel that asks you to install Xcode Command Line Tools.
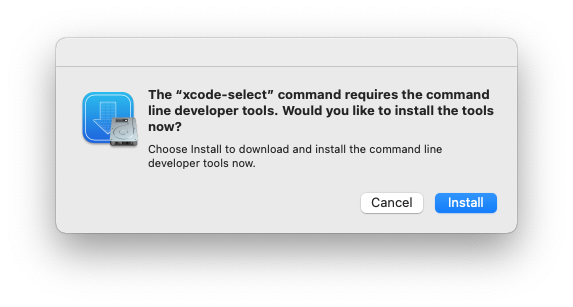
Click 'Install' to begin the download and installation process.
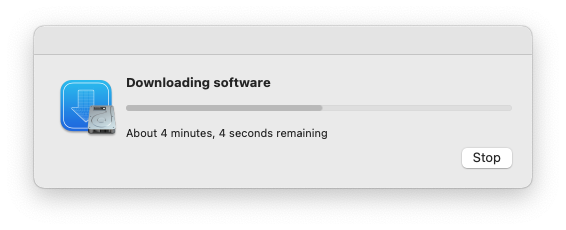
Installation takes 8 minutes on a 2021 Mac M1 Mini, with a 100Mbps Internet connection. It's significantly slower on Mac Intel over a slow Internet connection.
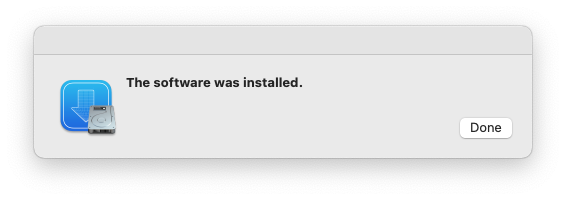
You'll see a confirmation message when installation is complete.
Verify that you've successfully installed Xcode Command Line Tools:
$ xcode-select -p
You should see the following:
/Library/Developer/CommandLineTools
How to Use Homebrew to Install Xcode Command Line Tools
As easy as it is to use the command prompt to install Xcode Command Line Tools, I recommend an even easier method: using Homebrew.
This option was only recently added to Homebrew, so many developers are not aware of it.
Homebrew is the popular Mac package manager. Most developers need programming languages and utilities that don't come installed on macOS and are not included in the Xcode Command Line Tools package. Homebrew can install almost any open-source tool for developers.
Since you'll probably need Homebrew, you might as well let Homebrew install Xcode Command Line Tools for you.
First, check if Homebrew is already installed.
$ brew
If Homebrew is not installed, you will see:
zsh: command not found: brew
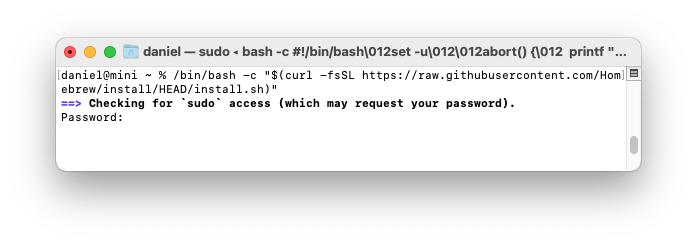
Homebrew provides an installation script you can run with a single command (check that it hasn't changed at the Homebrew site).
$ /bin/bash -c "$(curl -fsSL https://raw.githubusercontent.com/Homebrew/install/HEAD/install.sh)"
The Homebrew installation script will ask you to enter your Mac user password. This is the password you use to sign in to your Mac.
Password:
You won't see the characters as you type. Press enter when you are done.
If you haven't already installed Xcode Command Line Tools, you'll see a message that "The Xcode Command Line Tools will be installed." Press return to continue when prompted by the Homebrew installation script.
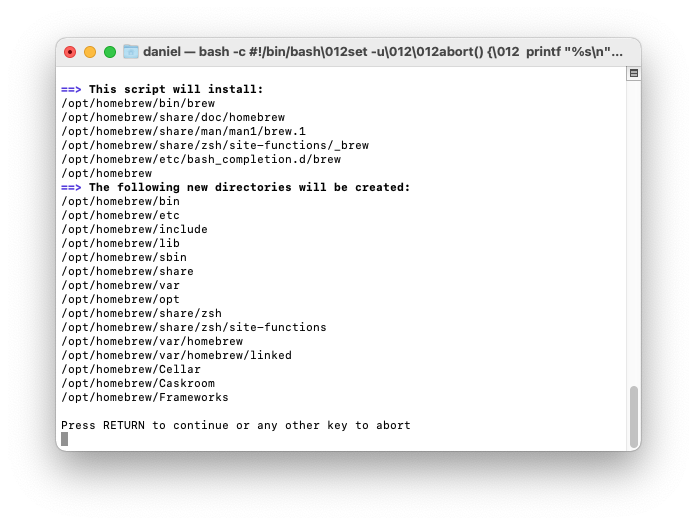
You’ll see diagnostic and progress messages. Homebrew installation takes 2 to 15 minutes on a 2021 Mac M1 Mini, with a 100Mbps Internet connection. It's significantly slower on Mac Intel over a slow Internet connection.
On Mac Intel machines, that's all you need to do – Homebrew is ready to use. On Mac Intel, Homebrew installs itself into the /usr/local/bin directory, which is already configured for access by the shell with the macOS default $PATH.
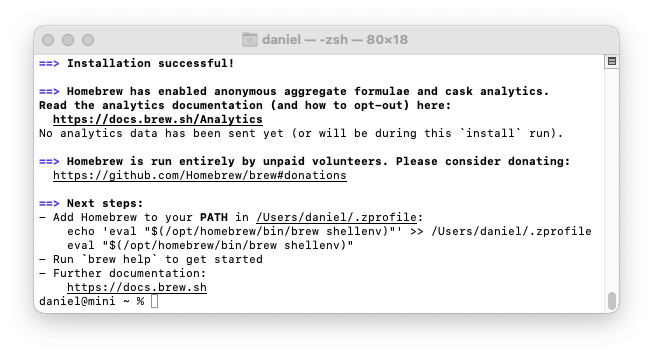
On Apple Silicon machines, there's one more step. Homebrew files are installed into the /opt/homebrew folder. But the folder is not part of the default $PATH. Follow Homebrew's advice and create a ~/.zprofile file that contains a command which sets up Homebrew. Homebrew shows instructions at the end of the installation process:
- Add Homebrew to your PATH in ~/.zprofile:
echo 'eval "$(/opt/homebrew/bin/brew shellenv)"' >> ~/.zprofile
eval "$(/opt/homebrew/bin/brew shellenv)"
After you've installed Homebrew, check that Homebrew is installed properly.
$ brew doctor
You should see this:
Your system is ready to brew.
If Homebrew is successfully installed, there will be Homebrew files in /usr/local (for macOS Intel) or /opt/homebrew (for Apple Silicon).
Now you have both Xcode Command Line Tools and Homebrew installed. If you want to learn more about adding Homebrew packages to set up your development environment, see Install a Homebrew Package.
More information
I've written an in-depth guide to Install Xcode Command Line Tools that goes beyond these basics.
In the guide, I explain how to check if Xcode Command Line Tools Are Already Installed. I go into more detail about how to Install Xcode Command Line Tools with Homebrew. Finally, I explain how to Uninstall Xcode Command Line Tools, Reinstall Xcode Command Line Tools, and provide a List of Xcode Command Line Tools that you can use.
There's also a complete guide to Install Homebrew for Mac that explains how to Update Homebrew, Uninstall Homebrew, and keep up with other Housekeeping for Homebrew.
Your development environment
MacOS is the most popular platform for software development because the operating system is based on Unix, the longtime standard for software development.
With Xcode Command Line Tools installed, you'll have a solid foundation for adding almost any open source development tool.
Add Homebrew and you have a package manager that can install version managers, programming languages, and almost any other tool you may need.
Combined with a text editor and terminal application, you'll be prepared for any tutorial you'll find on freeCodeCamp.