
In JavaScript, a promise is a placeholder (proxy) for the value of an ongoing operation.
You typically use a promise to manage situations where you must wait for the outcome of an operation. For example, uploading files to the server and awaiting the response of an API call, or just asking the user to choose a file from their computer.
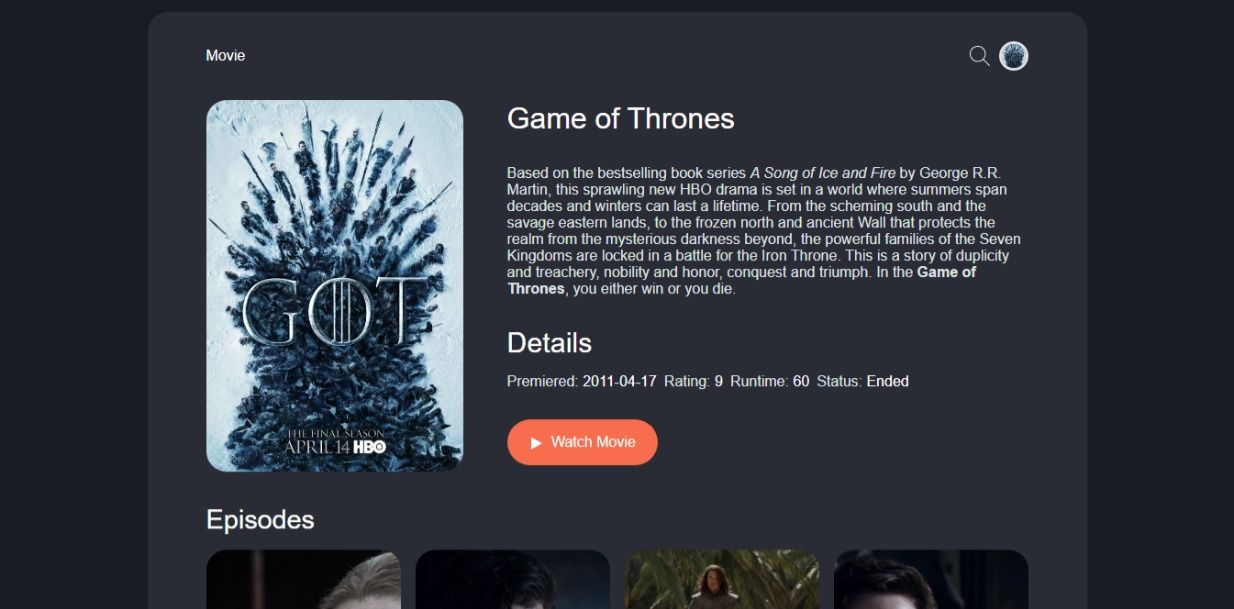
You will learn about JavaScript promises in this article by building a real-world example app like the one below:

What is a Promise?
A promise is simply a function that returns an Object which you can attach callbacks to.
The callbacks attached to a promise object will only get called when the operation completes. The callbacks will have to wait until the operation is fulfilled or rejected:
fetch(`some_api_url`).then((response) => {
  // Everything here will wait the fetch operation to complete
});
Before a promise finally settles (the promise either fulfills or gets rejected) it has to go through different states:
| State | Description | Callbcak |
| pending | Means the operation is still running and the promise is pending | - |
| fulfilled | The operation was completed and it was successful | .then() |
| rejected | The operation was completed but there was an error | .catch() |
| settled | The promise has either resolved or rejected, either way this callback gets called | .finally() |
When a promise is created the initial state is pending. Then depending on the output of the operation the promise either gets fulfilled or rejected.
From the table above you can easily see the callback that will get called depending on each state of the Promise:
fetch(`some_api_url`).then((response) => {
  // This will get called when the promise fulfills
}).catch((error) => {
  // This will get called when the promise is rejected
}).finally(() => {
  // This will get called all the time
})
How to Use Promises in JavaScript
Now that you have learned what a promise it, let's demonstrate how you can use promises in JavaScript by building the movie search app we saw earlier.
A basic movie search app should have an input field where users can search for their favorite movies. It should also have a UI to display some basic info about the movie they searched for.
Let's get started by creating the HTML.
How to write the HTML
For the sake of this tutorial and to display live examples, I am going to be using Codepen, but you can use your favorite code editor.
Create an index.html file and add the following code:
  <div class="wrapper">
      <header class="header">
        <div class="header_logo">Movie</div>
        <div class="header_actions">
          <form onsubmit="handle_form(event)" id="header_form">
            <div class="header_form-icon">
            <input type="search" class="header_form-input" placeholder="Search, Press Enter to Submit" />
            <svg class="icon" width="22px" height="22px"><use href="#icon-search" /></svg>
          </div>
          </form>
          <img id="img_icon" width="32px" height="32px" src="" alt="" >
        </div>
      </header>
      <main id="main">
        <section>
          <article class="movie">
            <div class="movie_img">
              <img id="img_src" src="" alt="" srcset="">
            </div>
            <div class="movie_info">
              <header><h1 class="movie_title"></h1></header>
              <div class="movie_desc"></div>
              <div class="movie_details">
                <h2>Details</h2>
                <ul class="flex">
                  <li>Premiered: <span id="movie_date"></span></li>
                  <li>Rating: <span id="movie_rating"></span></li>
                  <li>Runtime: <span id="movie_runtime"></span></li>
                  <li>Status: <span id="movie_status"></span></li>
                </ul>
              </div>
              <a href="" class="btn" target="_blank" rel="noopener noreferrer">
            <svg class="icon" width="16px" height="16px"><use href="#icon-play" /></svg>
                Watch Movie</a>
            </div>
          </article>
          <div class="episodes_list">
            <h3 class="episodes_title"></h3>
          <ol class="episodes" id="episodes"></ol>
        </div>
        </section>
      </main>
    </div>
Above we just created the skeleton of our movie app. So now let's breath some life into it with some CSS:
How to fetch a movie
To fetch our movie, we are going to use the TVMAZE API. Create the main.js file and add the following code:
const get_movie = (value = "Game of thrones") => {
   fetch(
    `https://api.tvmaze.com/singlesearch/shows?q=${value}&embed=episodes`
  ).then((response) => create_UI(response.json()));
};
We created a function get_movie(value = "Game of thrones") that uses the JavaScript fetch API. We use it to make a GET request to our movie API endpoint.
The fetch API returns a promise. To use the response from the API we attach the .then() callback in which we pass the response.json() into a new function create_UI(). Let's go ahead and create the create_UI function:
const create_UI = (data) => {
  const movie_img = document.querySelector("#img_src");
  const movie_icon = document.querySelector("#img_icon");
  const movie_title = document.querySelector(".movie_title");
  const movie_desc = document.querySelector(".movie_desc");
  const movie_link = document.querySelector(".btn");
  const movie_date = document.querySelector("#movie_date");
  const movie_rating = document.querySelector("#movie_rating");
  const movie_runtime = document.querySelector("#movie_runtime");
  const movie_status = document.querySelector("#movie_status");

  // set the UI
  movie_icon.src = data.image.medium;
  movie_img.src = data.image.original;
  movie_title.textContent = data.name;
  movie_desc.innerHTML = data.summary;
  movie_link.href = data.officialSite;
  movie_date.textContent = data.premiered;
  movie_rating.textContent = data.rating.average;
  movie_runtime.textContent = data.runtime;
  movie_status.textContent = data.status;
};
The above function, as the name implies, helps us create the UI for our movie app. But of course we still need a way to collect the movie name from the users, so let's fix that.
The first thing we need to do is to add an onsubmit event handler to our HTML form:
<form onsubmit="search(event)" id="header_form">
  <input type="search" class="header_form-input" placeholder="Search, Press Enter to Submit" />
//
</form>
Now in our main.js file we can handle what happens when we submit the form:
// handle form submit
const search = (event) => {
  event.preventDefault();
  const value = document.querySelector(".header_form-input").value;

  get_movie(value);
};
Anytime the user submits the form we get the value they entered in the search box and we pass it to the get_movie(value = "Game of thrones") function we created earlier.
Promise Chaining
Unlike what we have been seeing in our previous examples, the .then() callback is not really the end. That's because when you return value of a promise you get another promise. This becomes very useful when you want to run a series of asynchronous operations in order.
For example, our movie API doesn't just return info about a movie, it also returns information about all the episodes. Let's say that we really don't want to display all the episodes in Game of Thrones, we only want the first four (4) episodes.
With promise chaining we can easily achieve this:
const get_movie = (value = "Game of thrones") => {
  fetch(`https://api.tvmaze.com/singlesearch/shows?q=${value}&embed=episodes`)
    .then((response) => response.json())
    .then((data) => {
      if (data._embedded.episodes.length > 0) {
        const new_data = data._embedded.episodes.slice(0, 4);

        create_UI(data);
        return create_episodesUI(new_data);
      } else {
        return create_UI(data);
      }
    });
};
This is still our get_movie() function, but this time instead of passing the data to the create_UI function we return the response .then((response) => response.json()). This creates a new promise, which we can attach more callbacks to.
Ideally this chain can keep going on and on for as long as you want. Remember all you have to do is to return the value of the promise.
How to Handle Errors in Promises
Errors that happen within a promise go immediately to the .catch() callback:
fetch(`https://api.tvmaze.com/singlesearch/shows?q=${value}&embed=episodes`)
    .then((response) => response.json())
    .then((data) => {
      // any error here will trigger the .catch() callback
    }).catch((error) => {
    // all errors are caught and handled here
    })
The .catch() callback is short for .then(null, (error) => {}). You could also write the above as:
fetch(`https://api.tvmaze.com/singlesearch/shows?q=${value}&embed=episodes`)
    .then((response) => response.json())
    .then((data) => {
      // any error here will trigger the .catch() callback
    }, (error) => {
    // all errors are caught and handled here
    })
With our movie search app, for example, when we encounter any errors we can handle and display a nice error message to users in the .catch() callback:
const get_movie = (value = "Game of thrones") => {
  fetch(`https://api.tvmaze.com/singlesearch/shows?q=${value}&embed=episodes`)
    .then((response) => response.json())
    .then((data) => {
      if (data._embedded.episodes.length > 0) {
        const new_data = data._embedded.episodes.slice(0, 4);

        create_UI(data);
        return create_episodesUI(new_data);
      } else {
        return create_UI(data);
      }
    })
    .catch((error) => {
      console.log(error.message);
      // Challange: display your error here
    });
};
Now if for any reason we get an error, the .catch() callback is called and we display the correct error to the user.
How to Create Promises in JavaScript
Now that we have learned what promises are and how to use them, let's see how we can create a promise in JavaScript.
To create a promise in JavaScript, you use the promise constructor. The constructor takes one argument: a function with two parameters, resolve and reject:
const is_true = true
const new_promise = new Promise((resolve,reject) => {
  if(is_true) {
    // everything went fine
    resolve()
  } else {
    // Oops there was an error
    reject()
  }
})
Then we can go ahead and use our new_promise by attaching the callbacks:
new_promise
  .then((response) => {
    // everything went fine
  })
  .catch((error) => {
    // handle errors
  });
Conclusion
In this tutorial, we learnt about promises, what they are, and how to use them by building a movie search app. The entire code and live preview of our movie app can be found on Codepen: Movie Search App.
Challenge
While creating our movie app, I left out some parts which I think would be great for you to practice your new Promise skills:
Our movie app looks frozen when we are waiting for the API response. You can try adding a loader to tell the user that the promise is pending.
We currently just use
console.log(error)to log out errors. But we don't want that, so you can figure out how to display all errors to users in a friendly way.
If you created something wonderful with this, please feel free to tweet about it and tag me @sprucekhalifa. And don't forget to hit the follow button.
Happy coding!