
Coding games is a fun way to improve your JavaScript skills.
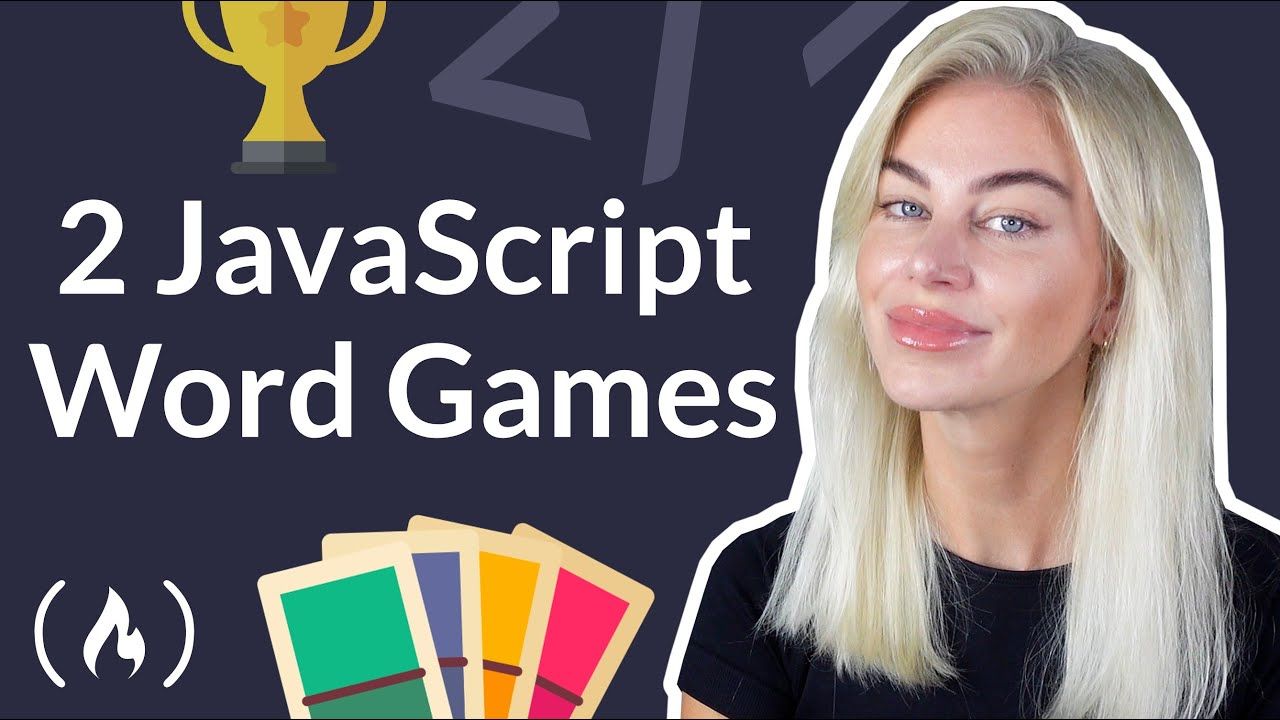
We just published a full course on the freeCodeCamp.org YouTube channel that will teach you how to code two word games in JavaScript.
Ania Kubów developed this course. Ania works for freeCodeCamp and has a popular tutorial YouTube channel.
In this JavaScript tutorial, you will learn how to build a Jeopardy game and a word associations game. This tutorial is for those who have already learned the basics of JavaScript.
The Jeopardy game has been adapted to work well for one player . You score points by answering questions correctly.
In the word association game, you are given three words and then have to choose one of two options that are associated with the three given words. The total amount of points is based on the amount of correct and wrong answers you choose.
Watch the full course below or on the freeCodeCamp.org YouTube channel (2-hour watch).
Transcript
(autogenerated)
Hello, everyone out there on freeCodeCamp.
My name is Ania Kubow and I'm a software developer, as well as your guide for this fun JavaScript tutorial in this JavaScript tutorial, we're gonna be building two words, games that is a jeopardy game that I've adapted to work well for one player and a game of word association.
This tutorial will be for those who have learned the basics of JavaScript and wanna practice some fun games.
Okay? So there'll be a lot of work with objects, arrays loops and everything like that.
In fact, here is a full list of all the JavaScript properties and methods we'll be using in this tutorial.
So let's dissect the first game.
The first game will be my adapted game of jeopardy.
As you can see here, the signing is very basic.
This is a JavaScript tutorial.
Okay.
I won't be focusing that much on the style, cuz that part is up to you in this game.
When you flip a card, you won't be able to flip any of the other cards until you answer the question.
And if you answer correctly, you get some points.
And of course, if you don't well, no points for you.
And in the next game of word association, you will have some cards which will be populated from an array and you have to essentially get the word associated with the three tips above.
If you get the answer, correct, you get a point and if you don't, that's a minus a point for you.
The total amount of points will be reflected based on the amount of correct and wrong answers you choose.
Okay.
So what are we waiting for? Let's get to practicing some JavaScript.
Okay.
So let's get started.
I'm gonna start off with first off creating my project.
I am using WebStorm as my code editor or technique IDE of choice, but please feel free to use whatever code editor you wish such as FIS code or you know, similar.
Okay.
So what I'm gonna do is just go ahead and create a new project and I'm gonna call this word association
Game.
Okay.
So that's all I'm gonna call it and it's gonna be stored in my WebStorm projects directory.
And I'm just gonna go ahead and click create.
So there we go.
You'll see a directory called word association game that has been created.
The next thing I wanna do is actually add the files necessary.
So this is gonna be an HTML file.
Just gonna call this index HTML.
You can put the extension, but as I've chosen the HTML file, it will just be added for me.
So there we go.
We are telling our code editor of choice to treat this as a HTML file.
Great.
And we're just gonna call this word a so ation.
Okay.
Maybe let's make it a little bit bigger.
So there we have it.
The next file we're gonna create is for our style sheet.
So I'm gonna click style sheet and let's call the styles and I'm just gonna select the CSS file for those of you not using webstore just type CSS and that should be created for you.
So now our code editor knows who treat this as a CSS file.
One more and that is a JavaScript file.
So this one I'm just gonna call app and hit enter once again, if you're not using, webstore make sure to put in the dot JS extension so that your code editor knows who treat this as a JavaScript file.
Great.
So now that we have all three files, what I need to do is connect these two files to my index HTML file.
So we're gonna do so now with a link tag and a script tag.
So style sheets, we actually do this in between the two ahead tags.
I'm going to get the link tag like so, so this is actually a self-closing tag and I'm just going to put the rail as style sheet and the ref is just gonna be the part of where our style sheet lives.
Well, it's in the root of our project, so I'm just gonna type in styles, CSS.
Okay.
We don't need to go into any directories or anything like that.
It's just a very simple project.
Everything is just in here and now for the script tag.
So the script tag, we're gonna have to make sure to put this at the bottom of our body.
So once any sort of, uh, I guess elements we want to put in.
So if we put in elements here, we need to put the script tag afterwards.
Okay.
So make sure that's at the bottom of your two body tags.
And I'm just going to put the source again as the path to the app JS file.
So great.
Now you will see some code being suggested for me.
So as you can see, this is being suggested for me, if you aren't seeing this, this is because I am using the tab nine, uh, extension, which will give me next generation code snippet suggestions.
So if you aren't seeing that, don't worry.
There's nothing wrong with your code editor.
It's just a, uh, extension that I have installed.
Okay.
So great.
So we've linked up our style sheet.
We've linked up our app JS file.
The next thing to do is actually start adding some stuff into my HTML file in order to start building up, you know, the skeleton of our word associated game, this is a JavaScript tutorial.
So the majority of our work is actually gonna be done in the app JS file, but a small piece of, um, HTML is still kind of needed.
So I'm going to put in a div, let's give this the class of app so we can pick it out later in our CSS and style it up.
So here is our app and what do I wanna put in the app? Well, I'm gonna have a question area.
So I'm gonna put diviv and give this the class of question area like so, so that we can once again, pick it out in our CSS file to style it up.
Now my question area, well, one thing I definitely wanna have, and I don't wanna change is just going to be, you know, the head of the app.
This is gonna say welcome to web association.
Okay.
And then let's also have an H three tag, which is gonna show us our score and this will change.
So I'm just gonna put your score is, and then I'm going to use a span element.
Okay.
The span element will allow us to interrupt this H three tag in line.
So it won't do anything funky.
It will still look like it's part of, you know, I guess one sentence, uh, and these score where we're gonna have to inject this with our JavaScript, which is why I wanna pick out this span element and I'm gonna do so by I giving this an ID.
So the ID I'm gonna give this is score, display just like salt.
So now I can pick it out with my job script.
Okay.
So we have the question area.
It's got H one tag, it's got an H three tag.
The next thing I wanna do is add a diviv and I'm gonna give this the class so we can style it up of questions.
Okay.
But I'm also gonna give this the ID so we can also pick it out in our JavaScript.
We can pick it out by class, but it's just neater, I think, to do it by IDs.
But again, each to your own, there's so many ways you can code this game.
It's absolutely crazy.
So we've given it a class so we can silo up.
We've also given this ID so we can pick it out in our JavaScript.
And essentially what we're gonna be doing is injecting.
We're gonna be injecting elements into here using JavaScript.
So I hope you're excited for this.
That's why we're picking this out.
We're gonna be literally appending elements into here, all in here.
Great.
So we're pretty much done with this page.
Now let's move on to the app JS file.
So the first thing I said we're gonna do is just pick out this element, right?
Well, we're gonna pick up both these elements.
Maybe let's start with these score first.
What should we save this? As I'm gonna say, this is score display.
It's gonna make it a little bit bigger for you.
We can actually minimize this.
So score display.
I'm gonna use document.
Cause I'm looking in the entire HSL document.
The whole thing I'm gonna use, get element by ID and I'm gonna get it by score display, making sure it's spelled exactly the same way that we spelt it here.
So now we've picked out this entire thing.
Okay.
Because we're gonna want to inject the score into here.
The same for the question display, because we're gonna inject elements into here.
So what should we call this? Well for consistency, I'm just gonna call it question display.
And if I hit enter, that's actually been auto completed for me by tab nine.
So there we go.
We are picking things out.
We're saving them as cons so that we can use them later on in our code.
So great.
So now that we have that, let's carry on.
The first thing I actually wanna do is actually just write some questions that we're gonna be, you know, displaying in our wide association game.
So I'm gonna show how to do that.
It's gonna be an array.
So I'm gonna call this constant questions and make an array and it's gonna be an array of objects.
Okay.
So each object is gonna contain, you know, the actual, uh, words.
So you're gonna have three words and then we're gonna have to pick a answer based off two words that the, um, word is most associated with.
I didn't explain that very well, but hopefully I'm gonna show you now how to do it.
And then we're also gonna tell ourselves, which is the correct score.
So for example, if I have three words and those words are gonna be value, and then the next word is gonna be estimate, and then the third word is gonna be a value.
Wait, so we've got three words as the quiz words, and then our options to select from, as in which word is most likely, uh, associated with these three words.
Well, the first one I'm gonna put is jury, which doesn't really make sense, right? Jury isn't associated with these three words, however assess is okay.
So the viewer is gonna see these three words and then have the option of these two to pick which one is more associated with these three.
So, and then I'm also gonna put the correct answer is option two out of these, we could go by index zero or one.
It's up to you.
I'm not going to just purely because, uh, I do do this video in, on my personal channel using an API.
And that API actually happens to use this format.
So not using indexes, but just simply saying that option one is not correct, but option two is correct.
So that's why I've done it this way.
Again, it's up to you how you would like to do it.
So there's our first question.
Let's go ahead and create some more.
So for now, I'm just gonna make a few, of course you can have as many as you like, like I did say I do do this tutorial on my own channel using an API that actually gets loads and loads of questions.
There's a huge amount.
So if you wanna check it out, please do use the link in my description below in order to, uh, essentially get the link for this a tutorial.
Okay.
So these are just hard coded for us as I mentioned.
Okay.
So I'm just going to paste another three that I pre-made earlier.
So there we go.
Okay.
Those three, I've just pasted in, please pause here if you need, or the code will be available in the description below as well.
So those are my five questions along with the correct answers.
Okay.
So where now you're gonna use this array in order to create a new elements using loops.
Okay.
So this means if you wanna add more questions, then you know, each the elements will be easily created for us and so on.
So the first thing that I'm gonna do is, well actually let's start with the score.
So the score is gonna change, which is why I've used let, and now it's not good enough just saying that the score is zero.
We're gonna have to actually put it into our HTML and we're gonna do so.
Cause we've already picked out this score display.
So I can use this context and I'm gonna use text content and I'm just gonna use these score variable.
Okay.
So that's all I've done and now making sure that's just one equals.
And now if I view this, I'm just going to open this up in WebStorm.
I can actually just use this button right here and I will open it up in my browser.
Okay.
So you will see the score has been added TA wonderful.
Uh, for those of you not using WebStorm you can just copy the path.
So you'd copy the path here and then paste it in your browser.
So I'm just gonna do it, uh, for you.
I'm gonna get the absolute path and then paste it in here.
Like, so it's the same thing.
Great.
I was gonna minimize this again.
So wonderful.
So we are showing the score.
The next thing that we're gonna do is write a function to populate the question.
So just like we got the score display here, we're gonna now get the question display and populate it with questions.
So I'm gonna do this all in a self-contained function.
However, so the function is gonna be called Pope questions.
Okay.
It's just what I've chosen to call it.
Now we're going to actually use four each.
So essentially a loop in order to create a bunch of DS that are gonna be our question.
Boxes are gonna hold all the question stuff together.
So based on how many items I have in this array, so I'm gonna get this array.
So I'm getting the array.
I'm gonna use four each and for each item in my array.
Now we know there's five items I'm gonna choose to call those items.
Each one of them a question.
So for each item, which I have chosen to core question, what I wanna do is essentially create an element.
I wanna create a diff, okay.
And let's just save this as question box so we can use it in a JavaScript const question box.
Now I'm actually gonna add a class list so we can do so with class list add, and I'm gonna add the class of question box to the div that we just created.
Okay.
So that is how you would do it.
You would use this method in order to add the question box class.
So the div we just created, of course we won't be able to see anything quite yet.
We haven't styled any divs and we haven't actually put that div back into the HTML.
So I'm gonna show you how to do that next.
So for now, what can we do? Maybe let's start up the question box just so we can see things visually first.
So I'm just going to maybe make this a little bit bigger and grab the question box, like, so, and let's do some styling.
So my question boxes at the moment, I'm just gonna give them a background color.
Uh, I'm just going to use an RGB color for this, just like so, and give each one a margin of 15 pixels.
Okay.
So that's all I am going to do just so we can start seeing some things.
So we've created a div, we added the class of question box to it, which is essentially just make it black or the margin.
The next thing we're gonna do is put the question box into our question display so we can do so let's get the question, display display, and I'm gonna use a pen to put in the question box.
Okay.
And then I'm just gonna call the function.
So I'm just gonna call it to make this work.
And now if I refresh this, you will see, there are five question boxes in here.
We need to put something in them in order to actually see that they are black.
So all I'm gonna do is go back in here and for now, just so you can see that this is actually working, I'm just gonna put box.
Okay.
So just put in the string of box.
So there we go.
Box, box, box, perhaps, maybe let's, you know, give this text, let's make it white, just so we can see what is going on fat.
I'm just gonna make it slightly off white.
So RGB 2 30, 2 30, 2 30.
Great.
So amazing.
We are looping in order to get question boxes made for each of our questions let's carry on.
So hopefully that makes sense, because we're gonna be using this logic a lot in this tutorial.
We're just gonna be kind of repeating this in order to create more elements.
Okay, great.
While we are here, I'm actually just going to grab the app itself.
So the diviv of the class of app, just to make sure that everything is centered and I'm actually gonna apply the font family of Trabu sounds to it as well.
So, so tra butcher, Ms.
Sorry.
Uh, and then just some backup ones, two.
So maybe let's have Lucinda Grande for Donna.
Sure.
Those ones.
So to center, everything I'm gonna use display flex.
So this is flex box.
Okay.
You have to use display flex in order to do these next few lines.
Otherwise they will not be applied.
So justify content comes with flex box and then text align does not actually come with flex box.
So text aligned center, that's just the center or the text, and I'm gonna give it a padding of hundred pixels.
So the app is gonna have a PA of a hundred fix pixel.
Great.
And now the question boxes live in the questions.
Diviv right.
So we're inserting them in here.
So I'm just gonna style up this diviv a little bit too.
I just wanna make sure I'm gonna use flex box again, by the way, I'm use display flex.
And I just wanna make sure that they wrap.
Okay.
So if you change the size of your screen, they kind of wrap over each other and you do so with flex wrap wrap, and I'm also gonna center them.
So justify content center.
Wonderful.
And I'm just gonna start the question box a little bit more.
Um, let's make, give them a border radius.
I'm a big fan of the border radius.
Not to make things look harsh.
I think it's always like quite a nice thing to do.
I think three is fine.
Maybe let's go for 10 pixels.
I'm also gonna give a padding, but the padding's not gonna be equal.
I'm gonna give it padding zero from the top 40 pixels, uh, to the right 10 pixels on the bottom and 40 pixels to the left.
Okay.
So that's what I've done.
Great.
So that is our question box looking good.
And if we look in here, it just kind of looks more like that now.
Okay.
So each question box is ready to have our questions be actually put into them as well as, you know, some buttons, uh, and so on.
So let's continue.
So back here.
So instead of having this just say box, we're actually going to use four each to show each of the three quiz words from array.
Okay.
So we're gonna do that next.
So again, this is gonna be a four each we're gonna go into the questions, array we're then gonna go into the array and then find the quiz key.
And then we're gonna use four each and for each one of these, what should we call this? I guess it's a tip, right? We can call it a tip for each tip.
So tip, we are going to essentially create a PTAG so document create element and the element we wanna create is a PAG.
Okay.
So that's all I'm gonna do.
And let's save this as constant tip text.
Okay.
Again, you can call it whatever you wish.
So we've created a P tag.
The next thing we're gonna do is add a, uh, we're not gonna add a class lips.
We're gonna get the tip text, and we're going to use text content.
You can use inner HTML, it's whatever you wanna do.
And then we're just going to assign the tip itself.
Okay.
So we're just gonna assign fast and then quick and then prompt.
Okay.
And then finally, of course we need to put it in something, but we wanna put it in the question box this time.
Okay.
The question box we put into the question display, but into the, okay.
So let's go back here.
The question box.
This thing is looking here.
So I'm going in, here's our HTML.
And then we grab this, this is the question display.
And we inject these question boxes.
Now in each question box, we also wanna inject the tips.
Right.
So we're gonna do that.
So I'm going to this time, get the question box that we created up here and I'm gonna use a pen tip text.
Okay.
So now if we look in here, so once again, see, we are just adding elements, adding them using JavaScript.
So now each question box has P tags with are tips.
Great.
Okay.
So hopefully this is solidifying a bit more, the more we do it let's carry on.
I also wanna put in a logo.
So let's do that above here.
So before these get injected in the question box, cause these Jews kind of stack up when you inject things.
So you need to make sure that whatever order, uh, you wanna put things in has to go from top to bottom.
So let's call this logo.
Um, yeah, let's just call it all logo display.
Sure.
And I'm gonna create a element actually let's make an H one tag because our logo's actually just gonna be some symbol.
Okay.
Off the internet.
of course you don't have to, you can make an image or something, but what I'm gonna do go logo display.
So I'm gonna grab this logo display, and I'm gonna use text content, and I'm gonna use this, uh, because it's a word association game.
I'm gonna use this pen symbol right here.
Okay.
So that's all I've done.
It's just a text symbol.
So we've added that.
And of course, once again, we need to put it in the question box.
We're gonna get our question box and we're gonna append.
You can append child append actually allows you to add multiple things, uh, where child just allows you to append one, I believe.
And the thing we're gonna append is the logo display after we've added some text to it.
So great.
So once again, if I refresh this, there is our logo.
Cool.
Of course we can style it up as well.
If we wish simple way to do this without giving this a class name, actually so that we, you know, we don't want too much, too much overkill is I can actually go into the question box and any H one tag that lives in it will have this styling.
So I'm just gonna make it go left by going a line text line left, and let's maybe change its color two.
So I'm gonna go RGB 1 77, 1 3 6 2 1 1.
Okay.
But of course, if you put in any H one tags into the question box, this will have the same sting.
So just keep that in mind.
But otherwise it looks like this.
Great.
So we have our tips.
The next thing we'll do is our two buttons that will show us the two, uh, potential answers we could have.
So let's do that next.
So we've just added the tips here and we are putting the question box into the question displays, but before we do that, we need to do some more stuff.
So the next thing I wanna do is actually create a diviv that will store our two buttons so that we can keep them together.
So I'm gonna use document, create element, and we're gonna create a div D just like so, and let's store this as question buttons.
Is this gonna hold our question buttons? Uh, and this time I will actually be adding a class list to this.
So question buttons, class list, add question buttons.
Thank you.
Tab nine.
And of course also we need to append it.
So this time I'm just gonna go grab the question box again and append question buttons.
Okay.
So we've put in the div that has the class of question buttons into the question box.
The next thing we need to do is add some actual buttons into the questions, buttons this time.
So I wanna do this.
We are still in the loop.
So if you can see here for each question with make sure you're still in between these curly braces, cuz we're looping over each one of these.
Okay.
1, 2, 3, 4, 5, and in the loop, I want to get the options.
Okay.
So we've called each item in the loop question, which means that I'm gonna get the question quiz and for each quiz item, what do we want to call this for each fast for each option? Let's call it.
Well, what do I want to do? I wanna create a button.
So let's use document, create element button.
I'm gonna save this as the constant question button.
Okay.
So singular this time.
So we're essentially creating two buttons as we have two items in the quiz array.
And now I'm just gonna give this a class list.
So question button, class list.
Add question button singular.
Okay.
Well of course we are yet to write this class and I'm just gonna give it some text content too, so we can see what's going on.
Question button, text, content, and that's gonna be the option.
Okay.
And of course let's not forget that we need to actually append this into the question buttons.
So I'm gonna put it in here.
Question buttons, append the question button singular.
Okay.
So it's gonna loop once.
It's gonna put in the first one, it's gonna loop a second time.
It's gonna put in the second one after we've course, we assign it the class list and assign it the actual option itself.
So let's have a look in here and oh, we've picked the wrong thing.
I mean, that's good.
Right? We are figuring this out.
It's not questions, quiz.
It's question.
It's options.
So each of the questions, options, so TA so we are doing it.
We have our two options.
This is looking good.
Let's take a break from some JavaScript and start this up a little bit more.
Okay.
Because we still have a bit to do we need to add an event listener to the question button itself.
That's gonna check for answers, disabled buttons.
Make sure we can't click on a button again and so on.
So let's take a quick break and relax our brains with some styling.
So let's actually pick out the question buttons and question button to style up.
So I'm just gonna use the class of question buttons and I wanna make sure that everything in here.
So the two buttons that we created are gonna be next to each other.
So I'm gonna use display flex.
And just to be sure, I'm gonna give it a flex direction of not column but row.
And now for each individual question button, I'm gonna give each one, a margin of five pixels,
Some padding, 10 pixels from the top and bottom and 20 from the left and right, I'm gonna give it a border radius, which is going to be 20 pixels.
Make sure to spell that correctly.
I'm gonna say border nuns.
We get rid of the generic, uh, button styling and then background color.
I'm just gonna go with RGB 75 1 3 4 1 1 1.
Okay.
And the text is just gonna be white, but I would like to make it RGB.
So maybe just make a tiny bit off white RGB, 2 5, 5, 2 5, 5, 2, 5, 5.
Great.
However, if we also then get the, uh, question button and if we add disabled to it, this is gonna be for later.
I actually want the background color to be like a dark gray RGB, 8, 9 1 8 9 1 8 9.
Something like that.
Maybe even a little bit darker.
Okay.
Of course that hasn't happened yet.
But when we do disable the buttons, uh, because we will be doing that, that's just what I wanna do.
And then also the text, I wanna look kind of like this grayish as well.
So it looks like we can't click on it.
Great.
So now let's carry on.
This is what our buttons should look like right now.
Okay.
And you can see, these are wrapping just like, so I'm just gonna make this movie a little bit smaller or a little bit bigger.
It's totally up to you.
How you wanna view this.
Let's move on.
So now that we have that, let's actually add, uh, an event listener to our buttons so that it handles checking for results.
So we're gonna do that here.
So again, we're gonna grab the question button.
So the question button that we just created and use ad event listener to listener for clicks.
And if a click is done, we wanna check answer.
So this is a callback function that we are yet to write.
Okay.
In fact, just for now, I'm just gonna do this down here.
I'm gonna write function, check, answer, and I'm just gonna console log checked just so we can see this is working.
Okay.
But again, expect this page, get the console log up.
And if I click on any button, it'll say checked, see, checked, checked, checked, check, check, check, checked.
So we know that has been hooked up.
The event listener is working.
Let's carry on.
Now.
We don't just want the console log to say something, right? What do we wanna happen? Well, let's think about it.
I actually want to check if the answers correct.
And we already have this data stored in an array.
And if it is correct, I wanted to say correct below.
Or if it's wrong, I wanted to say wrong.
And I also wanna disable the button cause we clicked on it.
We can't click it again.
And if it's correct, I wanna add a score and if it's wrong, I wanna minus score.
Okay.
So by the end you have a final score.
That's based off how many wrong and right answers that you have.
Cool.
So let's do it.
Let's do all of that logic next.
So to do this, I'm actually gonna have to pass some things through, into my check answer function.
So I'm gonna pass some things through.
So I've gotten it open, not by parenthesis, but uhoh this means I'm calling the function.
It's not a callback function anymore.
So we need to do this to make it a callback function.
Okay.
Otherwise this will just check, answer without me clicking.
It'll just be like blah open.
Cuz obviously we're using parent parenthesis.
So it's going like and releasing all of its function wonderfulness.
So make sure to write that in order to make this a core back function again, and the things we're gonna have to pass through are, well, let's have a think about this.
I actually wanna pass through, well, I wanna pass through the, I definitely wanna pass through the option.
So by that means, I wanna pass through this.
I'm gonna pass through this and then I'm also gonna pass through whichever index.
This is because we know that for example, this is the correct answer, right? It says two.
So we're gonna pass through the questions, correct answer.
Also gonna pass through the option that we clicked and then it's index value.
Okay.
Where it sits in this array.
So let's do that now.
So we're gonna have to give this an index.
So I'm gonna choose to call this option index.
So for example, I'm just gonna show you what I mean by this.
I'm gonna pass through the option and I'm gonna pass through the option index and here I'm just going to console log the option that I've passed through.
So let's pass through the option and then let's also console log the option index.
Okay.
And if I go in here, let's click on option one, two click.
So option we clicked on is assess the option is passing through the option.
Index is not to find why is that? Let's go back here passing through the option index.
Ah, but we're not passing it through into the check answers function.
So now let's click on this one.
Great.
The option is assessed and the option index is one because this says option index zero.
Okay.
So each of them, this would be 0 1 0 1.
You can check it.
That's what it should be.
So we want a way to say that, you know the correct an we also pass through the correct answer.
So let's go ahead and do that.
We need the questions, correct answer.
So we know this is either gonna be a one or a two, right? So let's change the option index.
Let's add plus one to it.
So instead of dealing with indexes, we're just literally going, it's either option one or two.
So that correlates with the way that we are counting the correct answer here.
So it's one or two.
So we just need to know that if this equals this, then it's correct.
Right.
So let's pass that through.
I'm gonna name it.
Something else here.
Because as long as it's in the correct order, it's uh, we don't have to call it the same thing.
In fact, it'll be probably less confusing if we just call this the correct answer.
Right? Okay.
So this means that if I'm just gonna move this up, if option index equals the correct answer, doesn't really need to be strict.
Then we know that it is well correct.
Let's just put that back in there cuz it's shouting at me.
So then we'll just add one to the score, right? And of course we need to display the score.
So score, display, text content score, because otherwise we add into the score, but we're not updating our browser to show the new score.
So that line is important.
Okay.
So that's all I am doing else.
If it's not, we're gonna minus one from the score.
And again, we need to show this new score, right? Cause it's not good enough just updating the score and here we need to actually show that in the browser two.
Great.
So let's check it out.
So if I click assess cool, I get one to the score cause it's right.
And if I click jewelry, well minus has been added because we know that is wrong.
So this is working, this is looking good.
However, look we can cheat, right? And also be quite nice to disable the button if we've clicked on it already.
So let's work on disabling the buttons now to do this, we're actually gonna have to collect which items we have already clicked.
So I'm going to make an array.
Let's go ahead and maybe do that here.
So let clicked.
So we might wanna, you know, change that could be con let's just keep it as let for now just because I'm not exactly sure what I wanna do with this yet.
So here's our array and if we click on something, well, no matter if it's right or wrong, I'm just gonna put it in the array.
So here's my array.
I'm gonna push the option in.
So this means actually I'm just gonna console log out the clicked array for us here.
So no matter if it's right or wrong, we're just collecting things in our clicked array, right.
We're collecting them so that we know this is clicked and we're gonna disable buttons.
Thanks to this.
So great.
Just get rid of that.
So this means that actually, maybe let's pass through the question button in here as well into the check answer function.
So the actual button itself, because we can do that.
You can do pretty much anything.
And now we're gonna get the question button and disabled, uh, is not gonna be true.
We're actually going to look in the clicked array.
And if the clicked array includes the option, then we know.
So the option that we clicked, then we know that the button should be disabled.
So let's try it out.
Click.
Oh, it's disabled.
Click disabled.
Yes.
This is looking awesome.
How cool is it's amazing.
So great.
Now one last thing, it would be quite nice to have, you know, like a display right or wrong under here.
Right.
So that we know immediately if we are right or wrong.
So I'm gonna show you how to do that now, in fact, okay.
We are going to create, create.
So at the bottom, once we've put in everything, I'm actually gonna create, put in another diviv that's gonna show our answer.
So I'm gonna do so right at the bottom here.
So I'm gonna use document, create element.
I'm gonna create a div this time and I'm gonna call it, answer display,
And we're gonna get the answer display.
And I'm going to give it the class list, class list, add of answer display, which we're gonna start up later.
And of course we need to put this into our question box.
So question box, append, answer display.
And now let's style it up a little bit.
Perhaps we should just, we can do that.
So I'm gonna get in my CSS file.
Let's get our answer display.
And I'm going to just actually hard code a height for this.
So no matter if it's empty or not just gonna have the same height and I'm just going to center everything in here.
So once again, I'm gonna use flex box display, flex align items, center justify content center.
So there we have it.
Okay.
So we've got our answer display and now I'm just gonna make this smaller again.
I'm actually going to write another function.
So there's our function check answers.
We're gonna get function, get results, or maybe add results cuz that's what we're technically doing.
Adding the result into the answer display.
So function add result.
Well, what do we wanna do? Well, this time I'm actually going to,
Based on the question box we are in.
So when do we want to call this function? I guess we wanna call it after here.
Right? We wanna do it here or if we do it based on.
So if we are, if it's the correct answer, we're gonna add the score and we can pass through the actual question box.
Right? Cause we wanna add it to the question box.
Yeah.
So let's get the, all we could do.
Answer display.
Yeah.
Let's pause through the answer display.
So you've got the question box.
I'm gonna pause through the answer display as well into check answer.
And we're gonna say that we're gonna add the results to the answer display and that result is going to correct.
Okay.
Which means that again, we can just use the same function to pass through different variables to change the outcome.
So let's have this say wrong.
Okay.
So this means that we know we're passing through the answer display and we're also gonna pass through the actual answer.
Okay.
So this means we can grab the answer display, uh, and then we can use text content.
In fact, we probably wanna clear anything that's in there, right? Because otherwise we'll just be adding more.
We'll be adding correct wrong, correct wrong.
Depending on which one we click.
Cause it'll keep adding.
So we wanna clear anything that's in it.
And then we wanna get the answer, display, text, content, and chooses to put the answer that we pass through.
Okay.
As the second parameter.
Okay.
So we're, we're gonna either pass your correct or wrong depending on if we're here or if we're here.
Okay.
So that's all I am going to do.
And I feel this should be it because we're already putting in the want to display into the question box up here, but let's check it out.
So jury let's see answer display.
No, it seems we are not putting that in here.
Answer display, answer display, just to see what we are clicking.
So if we click on here, answer display adjacent,
Ah, because we're adding the answer display here because it needs to be after the options.
We can't then obviously add it in here.
That's my bad.
So what I'm going to do instead is pass through the question box.
We've just created inter check answer, because we can pass that through.
And then that means we are passing that through inter check.
So let's get rid of this and pass through the question box, which means that on the ad results, we're gonna pass through the question box, pass through the question box.
This is a question box and it means that we are going to get question box and get the, uh, Bo or we can use query selector, actually query selector to find the div with the class name of answer display.
So before, if you notice, uh, dis looking in the entire document, you can actually just look in a, uh, element.
So that's what I've done here.
And let's save this as answer display.
So we don't want document again.
We wanna look in the question box.
Okay, cool.
In fact, we might not actually need this cuz it overrides it.
So just get rid of that
And and great.
So this is looking good.
One last thing I wanna do in that is just change the color of this based on if it's right or wrong.
But this is super, super simple.
All I'm gonna do is of course get the answer display.
Uh, I'm just gonna remove any class list that might exist.
So if wrong exists, I wanna remove it cuz otherwise it will just add, you know, it might cause some funky issues.
So remove if there's a wrong class or a correct class, remove both of those and I'm gonna get the answer display and use class list add, and I'm just gonna add, well actually we can just pass it through in here to make our lives easier.
So the class name I wanna add is correct.
And if it's wrong, the class name I wanna add is wrong.
So I'm gonna pass through class name and just use that to add a class name.
And there's also means of course we need to do it here so we can make sure that it's just on the answer display if I do.
Correct.
So there you go.
This means that it's on the same div.
The class is on anything with the class answer display
And the color of the text is gonna be RGB 2 0 1 2 0 1 1 1 7.
And then I'm also gonna do answer display wrong and wrong is gonna be 2 1 1 1 3 4 1 1 7.
Okay so great.
There we go.
We have now finished our game.
Okay.
It's kind of foolproof because we are disabling buttons.
So you can't cheat.
I don't think, uh, but let me know what you think of this game.
Okay.
So wonderful.
We've just finished our game in pure vanilla JavaScript.
If you are interested in taking this a step further and you like to learn how to use APIs in order to get random questions and please do check out the video.
As I said in the description below for this on my own channel.
Okay.
So I'm gonna start off on WebStorm, which is my IDE of choice is the code editor that I'm gonna be using today.
And I'm just gonna click new project right here and let's call this jeopardy.
So jeopardy,
Vanilla JS, just like so, and I'm just gonna click create.
So there you will see a directory has been created for me.
Of course there is nothing in this directory at the moment, we're gonna have to add some files.
So I'm just gonna go ahead and add a new file.
There's gonna be an HTML file.
I'm just gonna call it index and select that it's a HTML file.
Now, if you aren't using WebStorm, you will have to put the extension so that your code editor knows to treat this as a HTML file, but we are using WebStorm.
So I'm just gonna go like that.
Great.
And now let's call our project something.
This is what it's gonna display in the browser.
So I'm just gonna go ahead and call this jeopardy.
And now let's create some more files because we're gonna have to sort our style somewhere.
So I'm just gonna go in here, create a new file this time it's gonna do a style sheet.
It's a CSS file.
I'm gonna call this styles and select that it's a CSS file.
So there we go.
And you can see the extension has been added.
Wonderful.
And one more file.
This is gonna hold our JavaScript and I'm just gonna call it up.
And as you'll see, the JS extension has been added to our code editor knows who treat this as a JavaScript file.
Great.
Okay.
Now I'm just gonna make this a little bit bigger.
We need to link up the two files we made to the CMR file.
So we're gonna do this thanks to the link tag, just like so, and the reference to this is just gonna do the path to my style's CSS file, which is in the root of my project.
So I don't need to worry about going into any directories or anything and it just looks like that.
And next, we also need to link up our Java script and we're gonna do so with a script tag and the source of this.
We're also gonna give the path to our app JS file.
So just like that.
Okay.
Making sure that it's above any HTML that we write, because this needs to be loaded first.
Now in here, I'm just simply gonna put the bare minimum of what we need and that is gonna be an H one tag.
That's gonna say let's play Jeffrey.
Okay.
So just like that.
And I'm going to now make a diff that is gonna hold all of the game in it.
Okay.
We're gonna be injecting stuff with JavaScript into here.
So we of course need to pick this out and which is why I'm gonna give this the ID of game.
Okay.
And we're gonna be injecting stuff with our JavaScript.
We're gonna be injecting it exactly in here in between these two dips, but I will show you that later on.
So we've got the diviv with the idea of game.
The next thing I'm gonna do is just put an H two tag.
That's gonna show our score and I'm gonna use a span tag so that we can add in the score dynamically later on.
Okay.
So for, to do this, I'm gonna have to pick this out.
I'm gonna have to pick it out, um, in my JavaScript, which is why I've given it the ID.
And I'm just gonna give this the idea of score.
Okay.
So by using the span, it will just interrupt this H two tag and it'll appear just like one sentence.
Great.
So now that we've done that in WebStorm I can just click this button and it'll open up the game and the browser for me, or if you are not using WebStorm, you can just open this up by yourself.
You just need to right.
Click here, copy the path, make sure it's the absolute path and then just paste that in your browser.
Like so, so you're literally going to wherever your index HTML file is on your computer.
Okay.
And opening it up.
Great.
And if I inspect the page, this will allow me to get up my console log to carry on coding.
So let's carry on coding.
Let's get to adding our elements with JavaScript into here.
So to do this I'm of course going on to pick out this diviv I'm gonna pick it out based by its ID.
And I'm gonna do the same for this one right here.
So the span element too.
So in here, we're gonna use document, get element I can do by ID.
Why not by ID game? And I'm gonna save this as something, what should we choose to save as let's just save it as game and let's do the same for the score.
So I'm gonna call this score, display document, get element by ID and the ID was score.
So now we've essentially saved these two elements.
So the span and this so that we can work with it in our JavaScript based on these const.
Okay, great.
So before we carry on, let's actually get some data.
So of course we are just making a game using vanilla JavaScript.
If you do wanna learn how to use APIs, build out a backend and so on.
Uh, I do have a link to making this exact same game just with a open API.
So we won't have to do any backend work for this particular one, but I'll show you how to use fetch and just make an API request in order to get a lot more data that we're gonna be hard coding in here.
Okay.
So we're just gonna, hardcode an array of genres, five genres that have three questions, each ones, each so jeopardy category, I'm gonna save this as categories and this array is gonna hold essentially our, uh, categories.
So the genre, the first genre is gonna be who, and then each genre is also gonna have its own questions, which is gonna be an array of objects.
So there's gonna be fun.
There's gonna be a lot of like interesting stuff that we're gonna be working with today, especially for YouTube working with arrays and objects and data.
So the next genre I'm gonna actually have as where, and I'm just gonna have an empty array for the questions as well.
Okay.
And we're gonna have five of these.
Uh, in fact, I'm just gonna show you what the first object looks like, because all five are gonna have the same kind of, uh, shape.
So the questions in my questions, array, like I said, there's gonna be three questions.
Each, each one is gonna be symbolized by an object and the object's gonna look like this.
It's gonna have the question itself.
So for example, we can have who wrote Harry Potter? That's my question.
And then of course we'll have two answers we can choose from.
So I know in jeopardy you were just meant to shadow the answer, but of course this is an online game.
So I've just chosen to have two answers available to the user playing and then we'll show the correct answer.
So JK rolling's one answer, and then we're gonna have J R R Tokin as the second answer.
And then we're also gonna have the correct answer, which in this case is gonna be JK rowing, making sure to spell exactly the same.
Otherwise this will cause issues even with the capital letters and so on.
It needs to be exact.
And then the level we're gonna have easy.
Okay.
So this is what we're gonna have.
This is how our question's gonna look.
We're gonna have three in each object genre.
So I've actually pre-done this for you because you don't really wanna sit here watching me type up all the data I presume.
So I'm gonna just paste it in here, like so, so there we go.
As always, this will be available in the description below, the final code will be available.
So please don't worry.
So I'm just gonna talk you through this under the genre who we have an array of questions.
So here's the opening, uh, bracket to array and there's three questions.
One would level easy, one would level medium and one level hard.
And then we got the next object, which is exactly the same this time.
The genre is where though, and the questions are more around where, but again, they have the answers available, the correct answer, which is exactly the same down to the, uh, capitals and not capitals.
And then the level.
And then we have when, and then we have what, and then we have how many, okay, so please feel free to pause here and have a look at this data once again, get it from the description.
Just make sure you're comfortable with it before we carry on working with this data in order to build out our jeopardy game.
So the first thing I wanna do is add a category, right? So we've got our five jeopardy categories and I'm gonna use each of the categories in order to create a column.
The column is gonna have the name of the category and then each three of the questions.
Okay.
So that's what I'm gonna do.
There's gonna be a lot of four each and loops in loops.
Okay.
Cuz we're gonna loop out five columns that we're gonna loop in each column, the questions and so on.
So I'm gonna show you how to do that.
Now let's go and get you writing our first function.
So I'm gonna write function, add category and what do we wanna do? Well, actually, let's get this array.
I'm gonna get the jeopardy categories, jeopardy categories.
And for each let's call it a category.
I'm just gonna pass it through, into the add category function.
Okay.
So essentially all of this, here's our first category, right? From here to here, all of this is being passed through now into this ad category function, but we're not doing anything with it yet.
Let's actually pass it through.
Now we need to get the category genre first.
Okay.
So that's what we're gonna do and we're gonna make a title element with it.
So let's do it.
So the first thing I'm gonna do is actually use document, create element in order to create a diviv and let's save this as something, I'm gonna call this as a column.
Okay.
We're gonna create a column.
And in fact, we're gonna get that column and use classless, add a class of column so we can style it up later in our style sheet.
So that actually looks more like a column and not just a div, in fact, maybe let's be more precise and cool this genre column like so, so we made a div.
The first thing I said we wanna put in the column is a, like a div for a title.
So I'm just going to use document, create element diviv again, thank you.
Tab nine.
And let's call this genre title and this time genre title, let's give it class list, add genre title.
So we can again, style it up.
And I'm just going to use inner text to actually give it the genre name.
So like I said, we're going into here and getting the genre.
Okay.
So we're getting the string of who and then what and why and so on.
So all five categories.
So that's all I'm doing, even though at the moment, you won't see anything in the browser, right? Because we're, we've created elements.
We've given them class names, we've put some text inside them.
Okay, we've done all that, but we haven't actually put it back into our HDML.
Haven't we, we need to do that now.
So this is why I picked out the game.
So this is why I picked out this.
Cause I wanna put my first five columns that I'm making into here.
So I'm gonna do so like, so I'm gonna loop over.
So as soon as I make a column, I'm gonna get the game.
I'm going to use a pen to put in the column we just made.
So that will loop for each time we have that.
So we'll go five times, we'll add a column and it'll add another column.
Five times that'll do it.
But our column also needs to have all of this in it.
Right? So I'm gonna get the column before we put it back in the game column and I'm going to append the genre title in it.
So now if we look in the browser, da, da, and I'm just gonna show you what this looks like in HTML now.
So that's what we made before.
Remember that's where we wrote in our HTML, but with the thanks of JavaScript, I put in five DS that have the class of genre column and each one have another diviv with a class genre title and the genre itself.
So we've done it.
Okay.
We've done our first for each in order to create elements using JavaScript, take a break here, let that soak in because we are gonna be doing this again.
Like I said to add in each of the three questions into each column, uh, and first off let's actually take a mental break with some styling, cuz styling's really nice.
It's really easy.
And I'll allow our brains to maybe, you know, slow down a, a bit before we do another four each again.
So
First things first, I'm just gonna start the body up by getting rid of any margin and padding, just to make sure that it's, you know, spread out, uh, all over and I'm gonna give it a background, color, RGB, this kind it's RGB.
It's kind of, well, I'll show you.
Well, six, it's kind of like a dark gray that I'm gonna be using.
And the font that I wanna use in here is also all the font or the text, sorry is gonna be white, just so it stands out.
The next thing I wanna do is actually use flex box in order to make sure that everything is displayed in the center.
So by initializing flex box, I can now use this command, which is justify content to center.
I won't be able to use it without display flex.
So make sure display flex is there and align items center as well.
That's something I'm gonna use as well as flex direction, flex direction column to make sure it's stacked over each other.
Okay.
And great.
I'm also going to actually import a font family that is outside of what we have.
So if you go over to font or SIM, so if you go over to Google fonts,
The font I wanna choose is called Anton.
So I'm just gonna search for it.
Uh, I've already been using some here.
I don't actually want any of these, so let's go ahead and just remove Oswald, remove all
Anton.
So this is the one that I want.
So please go ahead and click that and just select this type.
There's only one style and you can choose whether to do it in your H share mile or CSS.
I'm gonna choose to put it in my CSS file.
Just gonna copy that.
And at the top of this file, I'm gonna import it like so as a URL.
And that just means that I can now use it next to this.
So great.
So I can now use the font family, Anton with Sans as a backup.
Wonderful.
So that is my body.
It just means that I've kind of styled everything up to look a bit more like this.
The next thing I actually wanna style is the, uh, game.
So let's pick out this div by the ID of game.
So this means I need to go for the ID of game, just like so, and I'm just gonna say that everything in here is gonna have the background color of RGB, like this kind of, uh, darker grayish color.
Okay.
So that's all I'm gonna do for now.
There were other thing I wanna do is just make sure that all of these columns are actually stacked next to each other.
So I'm also gonna use display flex to do this.
And that's what it should look like for now.
Of course, we are gonna be changing all of this up a little bit later, so what's the next thing we're gonna do? Well, let's actually get you, um, inciting cards.
In fact, while we're here, let's actually just add this styling for a card just so we can visually see things a little bit nicer when they happen, the width of a card I'm gonna hardcode is 160 pixels.
The height I'm gonna hardcode is 120 pixels.
Uh, the background color.
I'm just gonna make it be that, that jeopardy blue, which is RGB 26, 26, 2 55.
Now I'm gonna make it look beveled.
So border left, I'm gonna say solid RGB.
Uh, and then it's gonna be like this kind of lighter blue color that I picked out earlier, and it's gonna be 10 pixels thick.
And then I dunno if there's a shorthand way to do this, but I'm lazy.
So I'm just gonna do that left.
Right? And then we have top and bottom, and then I'm just gonna switch out the colors a little bit.
So I'm gonna make this like a dark blue.
I'm gonna make this another tone of blue just to make it look beveled.
And then again, same here.
So answer great.
Uh, I'm just gonna make sure all the text is centered to, and the font size I'm gonna use for the cards.
It's gonna be a hundred pixels.
Okay.
It's gonna be really big.
Let's give it a margin of five pixels.
So each card is gonna have a margin of five pixels and some padding.
And I'm also gonna give the line.
I'm gonna change the line height, uh, of the font.
Okay.
So that's all I've done.
So we created a class of card.
Now let's actually get you creating some cards.
So we've appended the column inside the game.
The next thing we need to do is actually work with the questions.
So at the moment we are still in this object, right? We've picked out the genre.
The next thing I wanna do is pick out this array of questions and we're gonna use four each again to loop over each item in this array.
So hopefully that makes sense based on what we have done previously.
So as we are currently for each in, so we're in the, for each loop currently, thanks to this.
Let's get a category and all I'm gonna do is get the category questions this time.
So the array and for each item or each question, sorry, let's call it a question.
What do we wanna happen? Well, as I said, I wanna make a card.
So document create element div, and I'm just gonna call this literally card, just like, so, and this time I'm gonna go classless, add, uh, cards, cuz that's the, the class that we have just created here.
So that's what I wanna apply to this div.
And of course we need to put it in the column.
So let's grab the column and use append and I'm gonna pen the card.
Okay, great.
You can use a pen child.
Append allows you to add multiple things, but you can use a pen child if you want to, if you just want append one thing, which I guess technically we are doing here, so great.
That's what we are doing at the moment.
We won't see much cuz it's just an empty div.
However, we can put some text in here.
Uh, in fact maybe let's do it by the level.
So we're looping over each item in the questions array, right? So I wanna get each questions level and if it's easy.
So right here after we put in the card, if question level equals easy, well then I wanna get the card and it's in a HTML or in a text, you can do whatever really in a H in a text, same thing.
Maybe let's keep it all consistent though.
So I know we did it somewhere here in a HTML.
We're just gonna hard code 100 cuz that's how many points you get for answering an easy question and let's do the same for the others.
So if it's medium, I wanna put in the inner HTML 200 and if it's hard, I'm gonna give us 300 points.
Okay? So that's literally all I'm doing.
So now if I look in here, da da, that's what we have made.
That's our card.
And that's the inner HTML that we've given our card.
This is looking great.
Now, if you watched my tutorial on making a word association game in that game, we actually, you know, had functions and we passed through a lot of stuff into them in order to work with events listeners.
So we passing through a lot of, um, information into functions.
This time, I'm gonna show you a different way to do this.
You can actually set attributes to elements so that you can add more data to them that you can pick out later and you can do so using the set attribute method.
So this is what I'm gonna be showcasing for us today.
Okay, I'm gonna get up this because we're gonna be needing to see exactly what I am adding to each div at the moment.
Each of these divs just has the class card and the inner HTML of 100, 200 or 300, I'm gonna be adding a lot more information to these with a help of set attribute.
Of course, this does mean that someone could, you know, inspect the page and cheat a jeopardy, but you know, this is just for fun.
So, but yeah, just be aware of that.
So I want to essentially append all the information about my question to this div so that we flip it.
We still have access to that information.
So like I said, we're gonna use set attribute to do this.
So I'm gonna grab the card.
So literally the card that we created, which is the diviv and that we added the classes to, and then we put in the column and then we added a HTML to next.
We're gonna use set attribute in order to add a data question, which is going to just be the questions question, right? Because we're looping over
This questions, array, which we called question, this is a question, which is why I've said question, question.
I mean, sadly, you know, it's just worked out that way that we have to use question question next.
We're gonna have question.
Correct.
And we're gonna go into the question object and get level and as well as the first answer in the second answer.
So that's what we've done here.
And in fact, if I show you what this looks like, if I refresh it, you'll now see that each div not only has the class of card, not only has the NEX content of a hundred, it also has now data question and the actual question, how many players in a football team, how many seconds an hour and how many people in China.
So that information is all attached to that div that we can't visually see, but it exists.
So I'm gonna do the same.
So card set, attribute for the other things I said.
So we've got the data question, let's have the data, correct.
Which is gonna be question correct.
And then also the answers, right? So set, attribute data.
Uh, let's do answer one and go question answers and then go into the first, get the first item from this array.
So this one, and then let's get the second one as well.
Tim's gonna copy I'm just gonna copy this line.
Get the second item by using the index value of one to enter this, to get the second item in the array.
Because as we know arrays use indexes.
Now I'm gonna do one last thing and you set attribute to add the data value and you might be thinking like, oh, what, but we've used all the information we can in here.
What, what else do you wanna do? Right.
Well, I actually wanna get this value and also set it to the di so that when we flip the card, we still know the value of the card and I can do so with a function so I can get the card and use, get inner HTML and call it.
So call the method in order to get the inner HTML of this diviv, which in this case is a hundred, the case is 200 and this case is
300.
So that's pretty neat if I do say so myself.
So now if I refresh this and we look on any one of these, you will see the data question, data, answer one data, answer corrects and the data value.
Why is the data answer two, not being added, ah, it's cuz data being overwritten.
So TA we have all that information as well as the data value now to our disposal.
Great.
So now let's get to flipping these cards.
So I'm gonna do so by adding an event listener to our card.
So card add event listener and on click of the card.
I just want to flip the card.
So this is a call back function.
We need to write this function and if we click on any card, this will be caught.
Okay.
But only if we click on the card, so let's go ahead and do that now.
So we are done with this function.
It is a long one.
So the function ad category is now done.
The next function we're gonna write is the function.
So function flip cut card.
So what do we want to happen when we flip the card? Well, we just wanted to visually look like the flip the card, right? So in fact, I just wanna get rid of the styling of the div.
So I wanna get rid of the styling and just make it look like I flip the card by adding some animations maybe, and then, you know, having, uh, the question, show up with the two options of the answers.
So let's do it.
So I'm gonna get this card.
So this element that I've clicked on, I'm gonna get it in a HTML and I'm literally just going to put an empty string.
Okay.
So it's kind of like a cheat way to empty it out.
Now, the next thing I wanna do is create a, uh, diviv that I've called text display so that we can display the text of the question in and then kind of style up a little bit.
So I'm gonna use, create element and I'm gonna create a div to do this.
Okay.
So now that we've created the diviv, once again, I'm gonna get text display and I'm gonna use class list, add to add a class list that we are yet to write.
We can use text display, or maybe let's choose card text, just like
So, so we're putting in the text display.
This is good.
The next thing I wanna do is add two buttons.
So once again, I'm gonna use document create element, and this time I'm gonna create a button element.
And once we have created that button, I'm just gonna call this fast button, cuz I'm not very imaginative, but we actually need two buttons.
So first button and second button again, just using the create element method to create a button element.
So once we have those, well, of course, we're gonna have to add, uh, classes to them.
So thank you very much, but this first button's gonna have the class first button and then the second one is gonna have the class.
You guess it second button.
So just like so, so we've added the classes and now we just need to add some texts into these, right? So I'm gonna go first button in a HTML and we are going to get this, whatever we clicked this, get attribute, gonna get the attributes, have a look again.
What's to our disposal, get attribute the view data, answer one, answer one.
And of course for the second one, we'll get data, answer two for the second button.
So we created the buttons.
We've added classes to the buttons.
We've also set the inner HTML of the buttons to either have one answer or another.
And of course we need to put these buttons into whatever we click.
So we're gonna use this again, this keyword, I'm gonna do a pen and I'm actually gonna pen the text display
And then the first button and then the second button.
Okay, great.
So that is looking good.
We of course also need to get the, uh, we need to add in a HTML.
We need to actually add the, uh, question itself.
So we're gonna use get attribute to get the data question, making sure to spell it exactly the same as we saved it.
So data question like so great.
So this should now look good.
Let's test it out.
So let's or something's gone wrong event.
Listener is not a function.
Okay.
Card.
Our ad event listener should be a capital L here.
Okay.
So if you click on one now, so that is disappearing and we are getting the question and we are getting two buttons.
Of course we need to do some styling cuz this is not looking good.
So one thing I can actually do is change.
We're probably gonna have to change the font size in here so we can do so using font style.
Uh, this style font size and let's change it to be 15 pixels.
So again, we're just using JavaScript to do this and we're also going to change the line height from here.
Line height is gonna be 30 pixels.
So now if we click on one of these amazing, amazing.
So that is looking much better.
There's of course still some things we need to do.
One thing we need to do is actually, um, add an on click to these buttons to handle it as the correct answer or not.
And also I wanna disable clicking on any of these.
If we are currently answering a question, right, we don't wanna cheat, no cheating aloud.
And then we also wanna add one to the score.
If the correct answer is clicked.
So I'm gonna show you how to do all of that first off, however, let's get to styling some things up.
The first thing that I'm gonna start up is the buttons.
So let's do that now.
Just gonna make some space and great.
So the first button,
I'm just gonna give this a background color of RGB, 2, 4, 1 7 1 2, 4.
We're gonna make it look kind of like retro.
And then of course the second button as well needs to have some styling two.
So one let's go with 1 90, 57 37.
So we just added two colors to the buttons.
We can't let's keep it this kind of retro style though.
Cause I'm kind of strangely into it.
You don't have to, of course you can choose to get rid of it if you wish.
Okay.
While we are here, let's also start the genre title.
So the class of this was genre title.
If I remember that correctly, I'm gonna give it a background color of the same blue that we had.
So RGB 2 6, 2 6, 2, 5, 5, like so, uh, let's text a line center.
Oops, text
Line center.
Let's make the font size.
I'm gonna make it 28 pixels and let's give it padding five pixels.
Okay.
And then also a margin five pixels too.
So that just looks a little bit more like this, just like the game.
Great.
Okay.
So we've done that.
The next thing I wanna do is handle the click.
So let's do that.
So now what you wanna do, do you know, actually, before we move on to adding the event listeners for the two buttons, I'm actually gonna say that if we flip the card, I wanna again, every single card, every single one and remove the event listener.
So I'm gonna use using document query, select all and look off anything with the class of card.
So that'll be all, all of these cards, okay.
All of these.
And I'm gonna remove the event listener for them, but only on this flip.
So all cards, I'm gonna save this as, and I think we need to make this an array.
I'm gonna make an array from these apologies.
If not, make sure this query is selected all.
Uh, and then we're gonna get all the cards and for each
Card, just gonna get each card and remove event listener.
And I'm gonna remove the click and I'm gonna remove the flip card so that now if a card is flipped, we can't click any of them.
The flip is disabled.
This is cool.
Right.
And I only want to enable it again if we choose an answer.
So now let's handle the clicks of the buttons.
So I'm gonna write another function.
This function's gonna be called, uh, let's call it, get result.
Okay.
So just like, so us move all of this.
Oops.
Let's just move all of this up a little bit.
So what do I want to happen? Well, I want to, if I click on the button, right? So let's add an event listener to the first do up here.
First button, add event listener.
If I click on it, then I want to get results just as they call back function.
Okay.
And then let's do the same for the second button as well.
So they're both going to essentially call this function if we click on them and if we click on it, I wanna get this or whatever.
I clicked, whatever button I clicked.
I wanna get as parent and as parent as the card.
So if we have a look at here, the button lives in the div with a class of cards, I wanna get the parent of this.
Right.
I wanna get the parent.
So this parent element.
So I'm just gonna show you the console log.
Uh, let's say this is something constant card of button to be really precise.
Cuz that's what we're getting.
We're getting the card the button belongs to.
And then do we have any other console logs in here? I feel like we do.
You do not.
Okay.
So here's our console log.
So if I click on this click on a button, it'll show me it's parent, which is this car that belongs to, and you'll see all that data that we need to work with.
Okay.
So that's quite cool.
It's carry on.
So to get the result, well, what I'm gonna do is say if card of button and then I'm gonna use get attribute to get the attribute of, well, I guess we want to get the data correct answer.
Right? We wanna get the data.
Correct.
Which is 11.
So we know that this is the correct answer and we wanna make sure it's the same as the inner HTML of the button.
So if that equals this inner HTML, then we know it's a correct answer.
Right.
So then we're gonna get this score and we are going to essentially add the score by getting again, um, the data value of the button, which is why we save the data value.
So there we go.
So I'm gonna, once again, go card button, get attribute, data value.
However, it's a stirring rights.
We need to pass this through pass inch to make sure that it's a number type and then we're gonna add it to the score.
So score plus the value and we're gonna assign it to the variable score.
Okay.
So are we actually saving score anywhere here? I don't believe we are.
So I'm gonna go let score equal zero to start.
Okay.
So that's what we're doing.
If it's, if the answer's correct, we're gonna add something to the score.
We're then gonna show the score in the browser.
Cause we're actually not doing that yet.
So just get the variable of score after we've added the data value to it and then show it in here.
The next thing I'm gonna do is actually, uh, get the card button and I'm going to also class list.
Add I'm gonna add a correct answer class so that we can change that symbolize.
That's correct.
Let's go like an orange or something and then let's, uh, actually remove everything in the card itself.
We're gonna remove the question.
We're gonna remove these two buttons and we're just gonna show the value that we want if it's correct.
So to do this, I'm actually going to leave a little bit of time, so it's not so abrupt.
Okay.
So I'm gonna use a set time out to do this and then we're gonna use a wild loop to essentially remove children.
We're gonna remove the last child and then the last child, until there's no children left in the parent div.
So while card of button, first child exists, it's gonna keep doing it until there's no first child.
Right? So while that is true, we're gonna get the card button, remove child card button, last child.
So we're gonna essentially, if that makes sense, we're gonna keep looping and get rid of the last child, get rid of the last child, get rid of last child until the last child is the first child get rid of that.
And then there'll be no flash child and this will kind of, um, finish running.
Okay.
So we're gonna do that.
We're gonna move everything in it.
Uh, and we're gonna do this after a hundred milliseconds and then we're just going to get the card button.
And then the ntml like we said, we're just gonna make it the value.
So get attribute data value.
We're just gonna show how many points we want.
So that's all happens.
All of this is what happens if you know the answer's correct else.
We're gonna say wrong answer.
So I'm essentially going to just take this line, but this time wrong answer.
So that'll be like a reddish color.
Maybe I haven't decided yet.
And this time we're gonna do set time out.
Uh, and then we're actually still gonna remove everything.
But this time we're just going to add a zero, cuz we want zero points.
We can do it as a number if you want.
It's totally up to you and we're gonna do this again after milliseconds.
Okay, great.
And then afterwards we're gonna add back.
Well actually we need to add back all the event listeners to the cards, but also we're gonna remove the event listener for this specific card because we are done with it.
Remove event listener, click flip card.
We're done with this card.
We've got our points no more cheating.
And this just means that actually, um, let's perhaps do it up here.
So once again, document queries, get all the cards again.
So everything with the class name of card and I'm gonna save this as all cards, make an array from this again, I'm not really sure if I have to do this, but I'm doing it now.
I've committed.
Uh, and then all cards for each card.
I'm going to well, just add back in the, remove the event listener.
Okay, great.
And then just some final styling to add the correct answer and incorrect answer.
So correct answer.
It's a correct answer.
I want the background color to change to RGB 1 8 6 1 8 6 24.
And if it's a wrong answer, then I wanna change the background color to be RGB 2, 2, 1 6 4, 5, 6.
Great.
So now let's share good art.
So this one, when is Christmas? I know it's here.
Yay.
It's correct.
So we see the value.
We get a hundred of the score and the background's turned yellow.
Now this one, what is the cast of Saudi Arabia? I'm gonna go Jed.
That's the wrong answer by the way, but I should get a red zero points and zero is added.
So this is looking wonderful.
And of course I can't click on anything else until I answer this question and then I can click on another question.
So even when this is here, can't click on anything Superman.
Wonderful.
So this is looking fantastic.
We have now finished our jeopardy game, so I hope you've enjoyed this tutorial.
I've really enjoyed making this for you.
I mean, I think we've done a really good job at this.
It is kind of foolproof.
Of course, if you, uh, come across any bugs, then let me know, but I'm quite happy with this.
And of course, please feel free to start this up.
However you wish that part is totally up to you.
Thanks so much again for watching and I hope to see you again soon.