

Hack The Box (HTB) is an online platform that allows you to test your penetration testing skills.
It contains a number of challenges that are constantly updated. Some of them simulate real world scenarios and some of them lean more towards a CTF style of challenge.
Note: Only write-ups of retired HTB machines are allowed.
Mirai is a good example of how improperly configured IoT devices led to one of the largest attack vectors in 2016. IoT devices are actively being exploited by botnets and used for long-term persistence by attackers.
We will use the following tools to pawn the box on a Kali Linux box:
- nmap
- gobuster
- Medusa
- Linux commands
Let's get started.
Step 1 - Reconnaissance
The first step before exploiting a machine is to do a little bit of scanning and reconnaissance.
This is one of the most important parts as it will determine what you can try to exploit afterwards. It is always better to spend more time on this phase to get as much information as you can.
Port scanning
I will use Nmap (Network Mapper). Nmap is a free and open source utility for network discovery and security auditing.
It uses raw IP packets to determine what hosts are available on the network, what services those hosts are offering, what operating systems they are running, what type of packet filters/firewalls are in use, and dozens of other characteristics.
There are many commands you can use with this tool to scan the network. If you want to learn more about it, you can have a look at the documentation here.
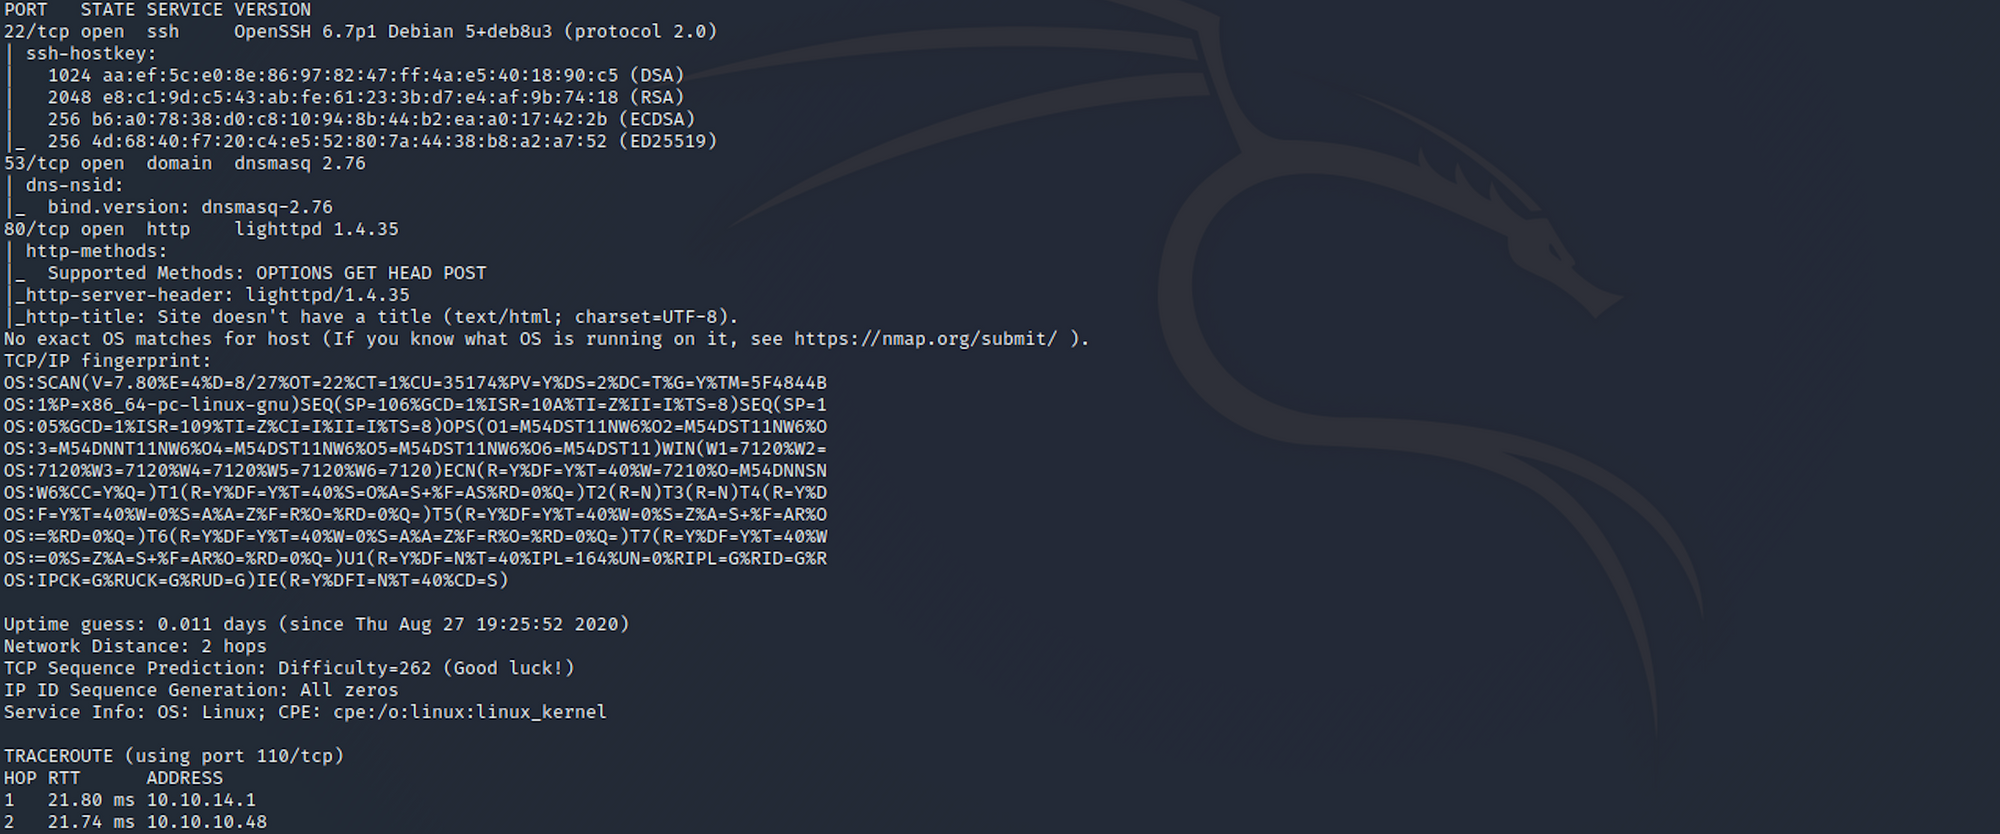
I use the following command to perform an intensive scan:
nmap -A -v 10.10.10.48
-A: Enables OS detection, version detection, script scanning, and traceroute
-v: Increases verbosity level
10.10.10.48:** IP for the Mirai box
If you find the results a little bit too overwhelming, you can try this:
nmap 10.10.10.48

We can see that there are 3 open ports:
Port 22. Secure Shell (SSH), secure logins, file transfers (scp, sftp) and port forwarding
Port 53. Domain Name System (DNS)
Port 80. Hypertext Transfer Protocol (HTTP). Here it's an IIS server.
Directory scanning
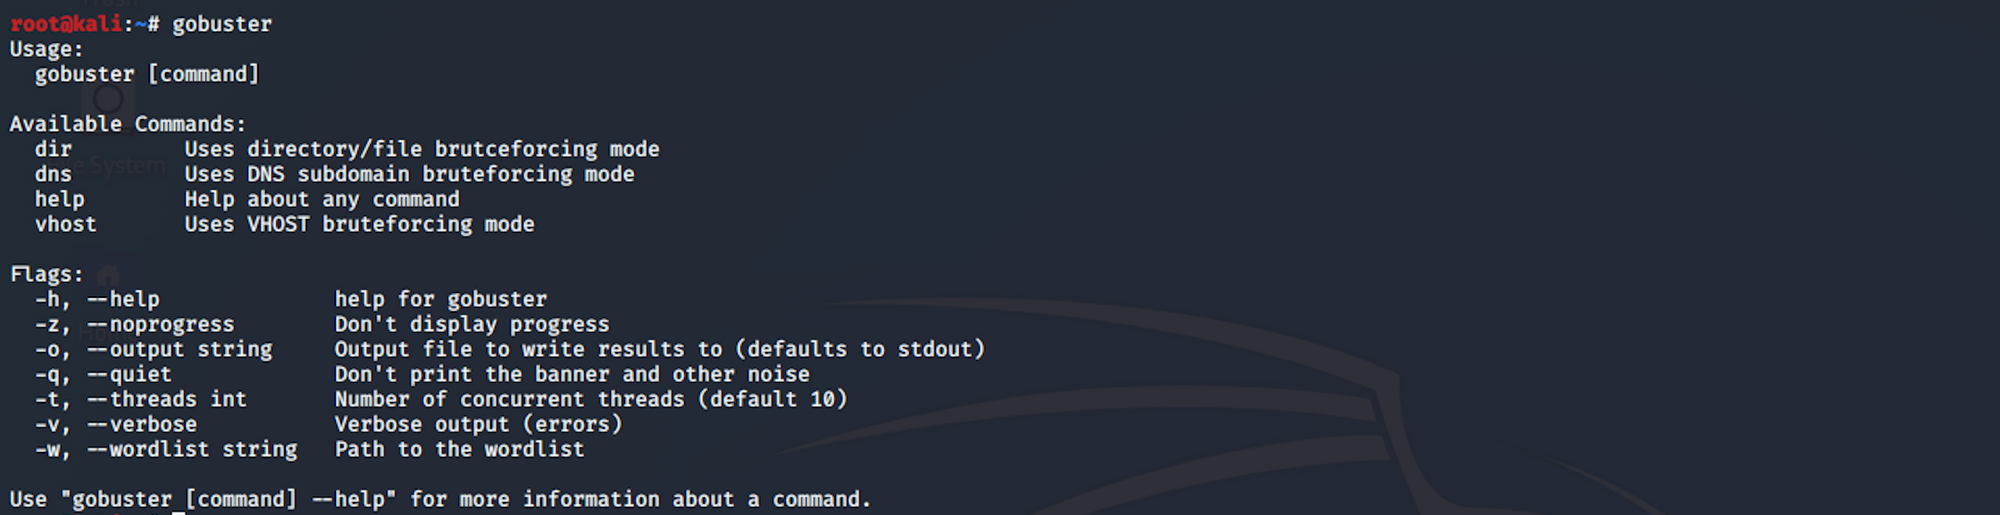
I use Gobuster. Gobuster is a directory scanner written in Go. You can find more info on the tool here.
Gobuster uses wordlists on Kali which are located in the /usr/share/wordlists directory. I'm using wordlists from dirb and dirbuster, but you can download more wordlists from SecLists here.
I use this command for the dirb common.txt wordlist:
gobuster dir -u 10.10.10.48 -w /usr/share/wordlists/dirb/common.txt
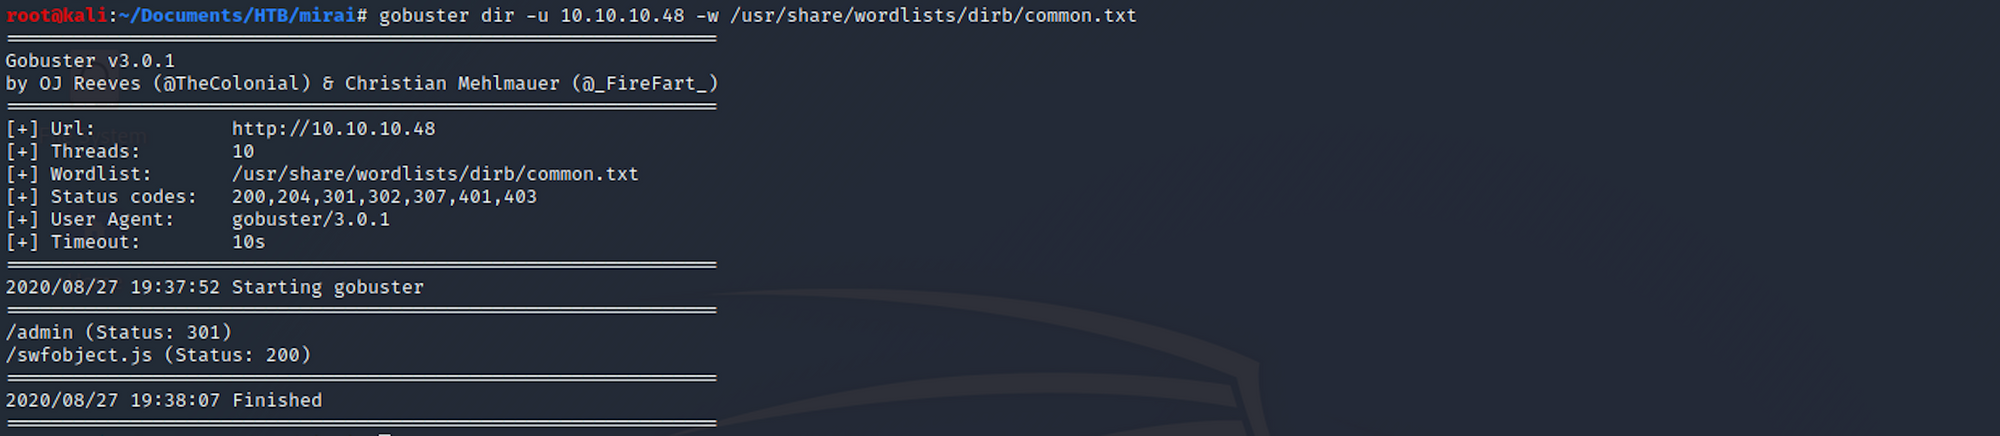
I can see some interesting folders. I do another directory scan with a different wordlist.
gobuster dir -u 10.10.10.48 -w /usr/share/worldlists/dirbuster/directory-list-lowercase-2.3-medium.txt
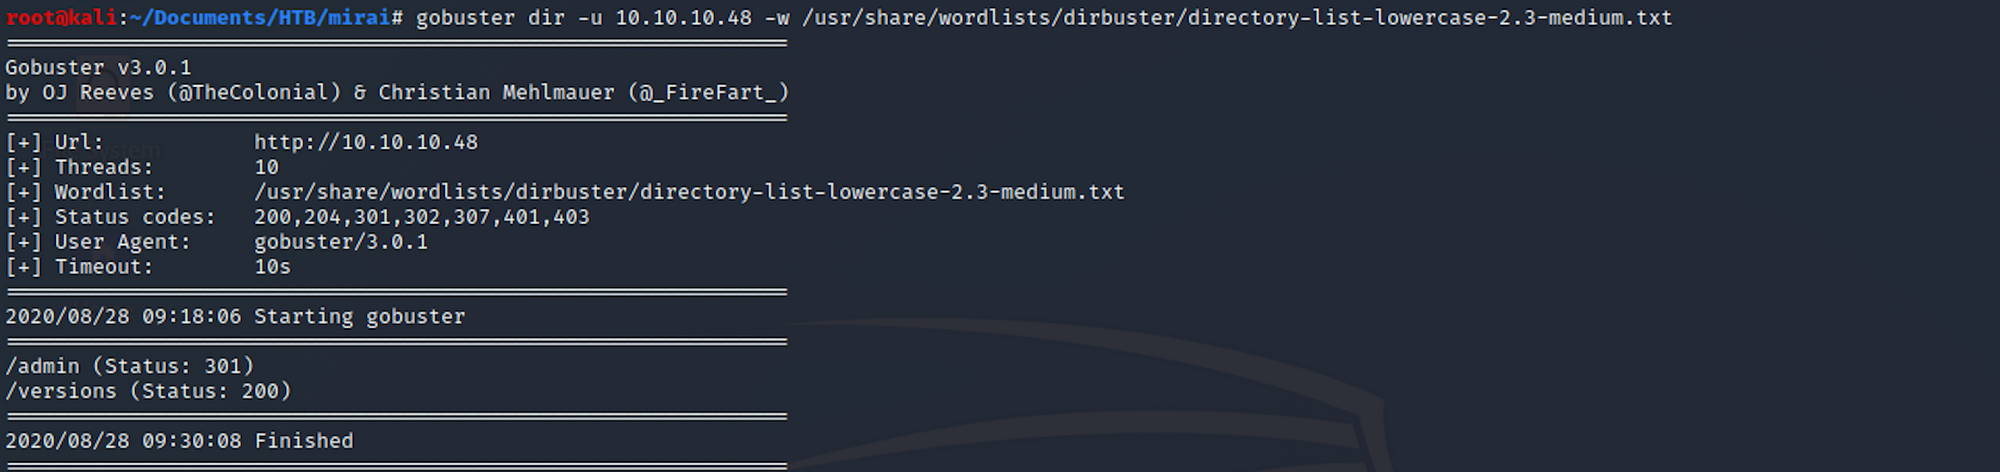
The admin folder is definitely one I will visit!
Step 2 - Visiting the web page
From the reconnaissance phase, I decide to start with port 80. And I get a blank page.

From the reconnaissance phase, I found the /admin folder with Gobuster. I navigate to this endpoint:
10.10.10.48/admin
I arrive on a Pi-hole admin dashboard.
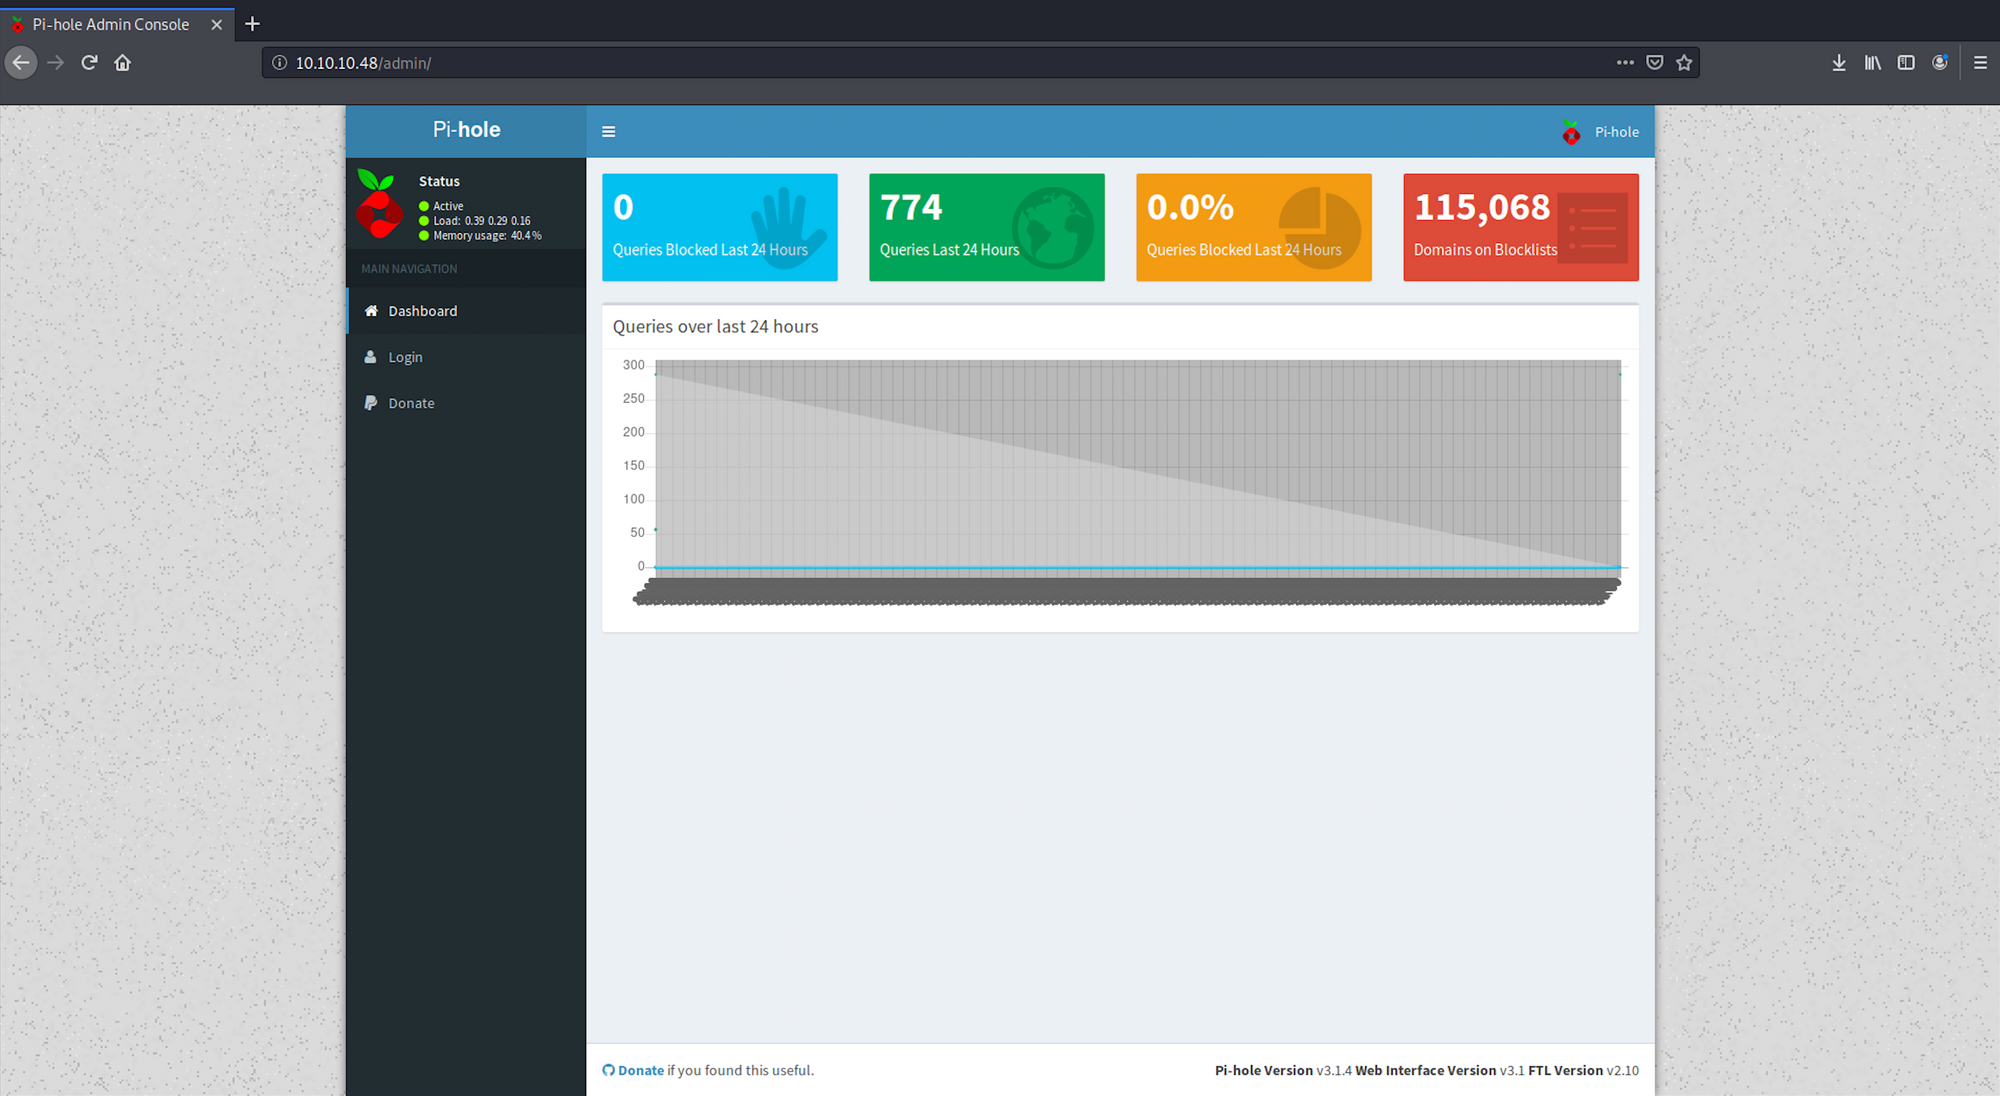
Pi-hole is a Linux network-level advertisement and Internet tracker blocking application which acts as a DNS sinkhole and optionally a DHCP server, intended for use on a private network.
Pi-hole has the ability to block traditional website advertisements as well as advertisements in unconventional places, such as smart TVs and mobile operating system advertisements - Wikipedia
You can read more here or learn more on the official website.

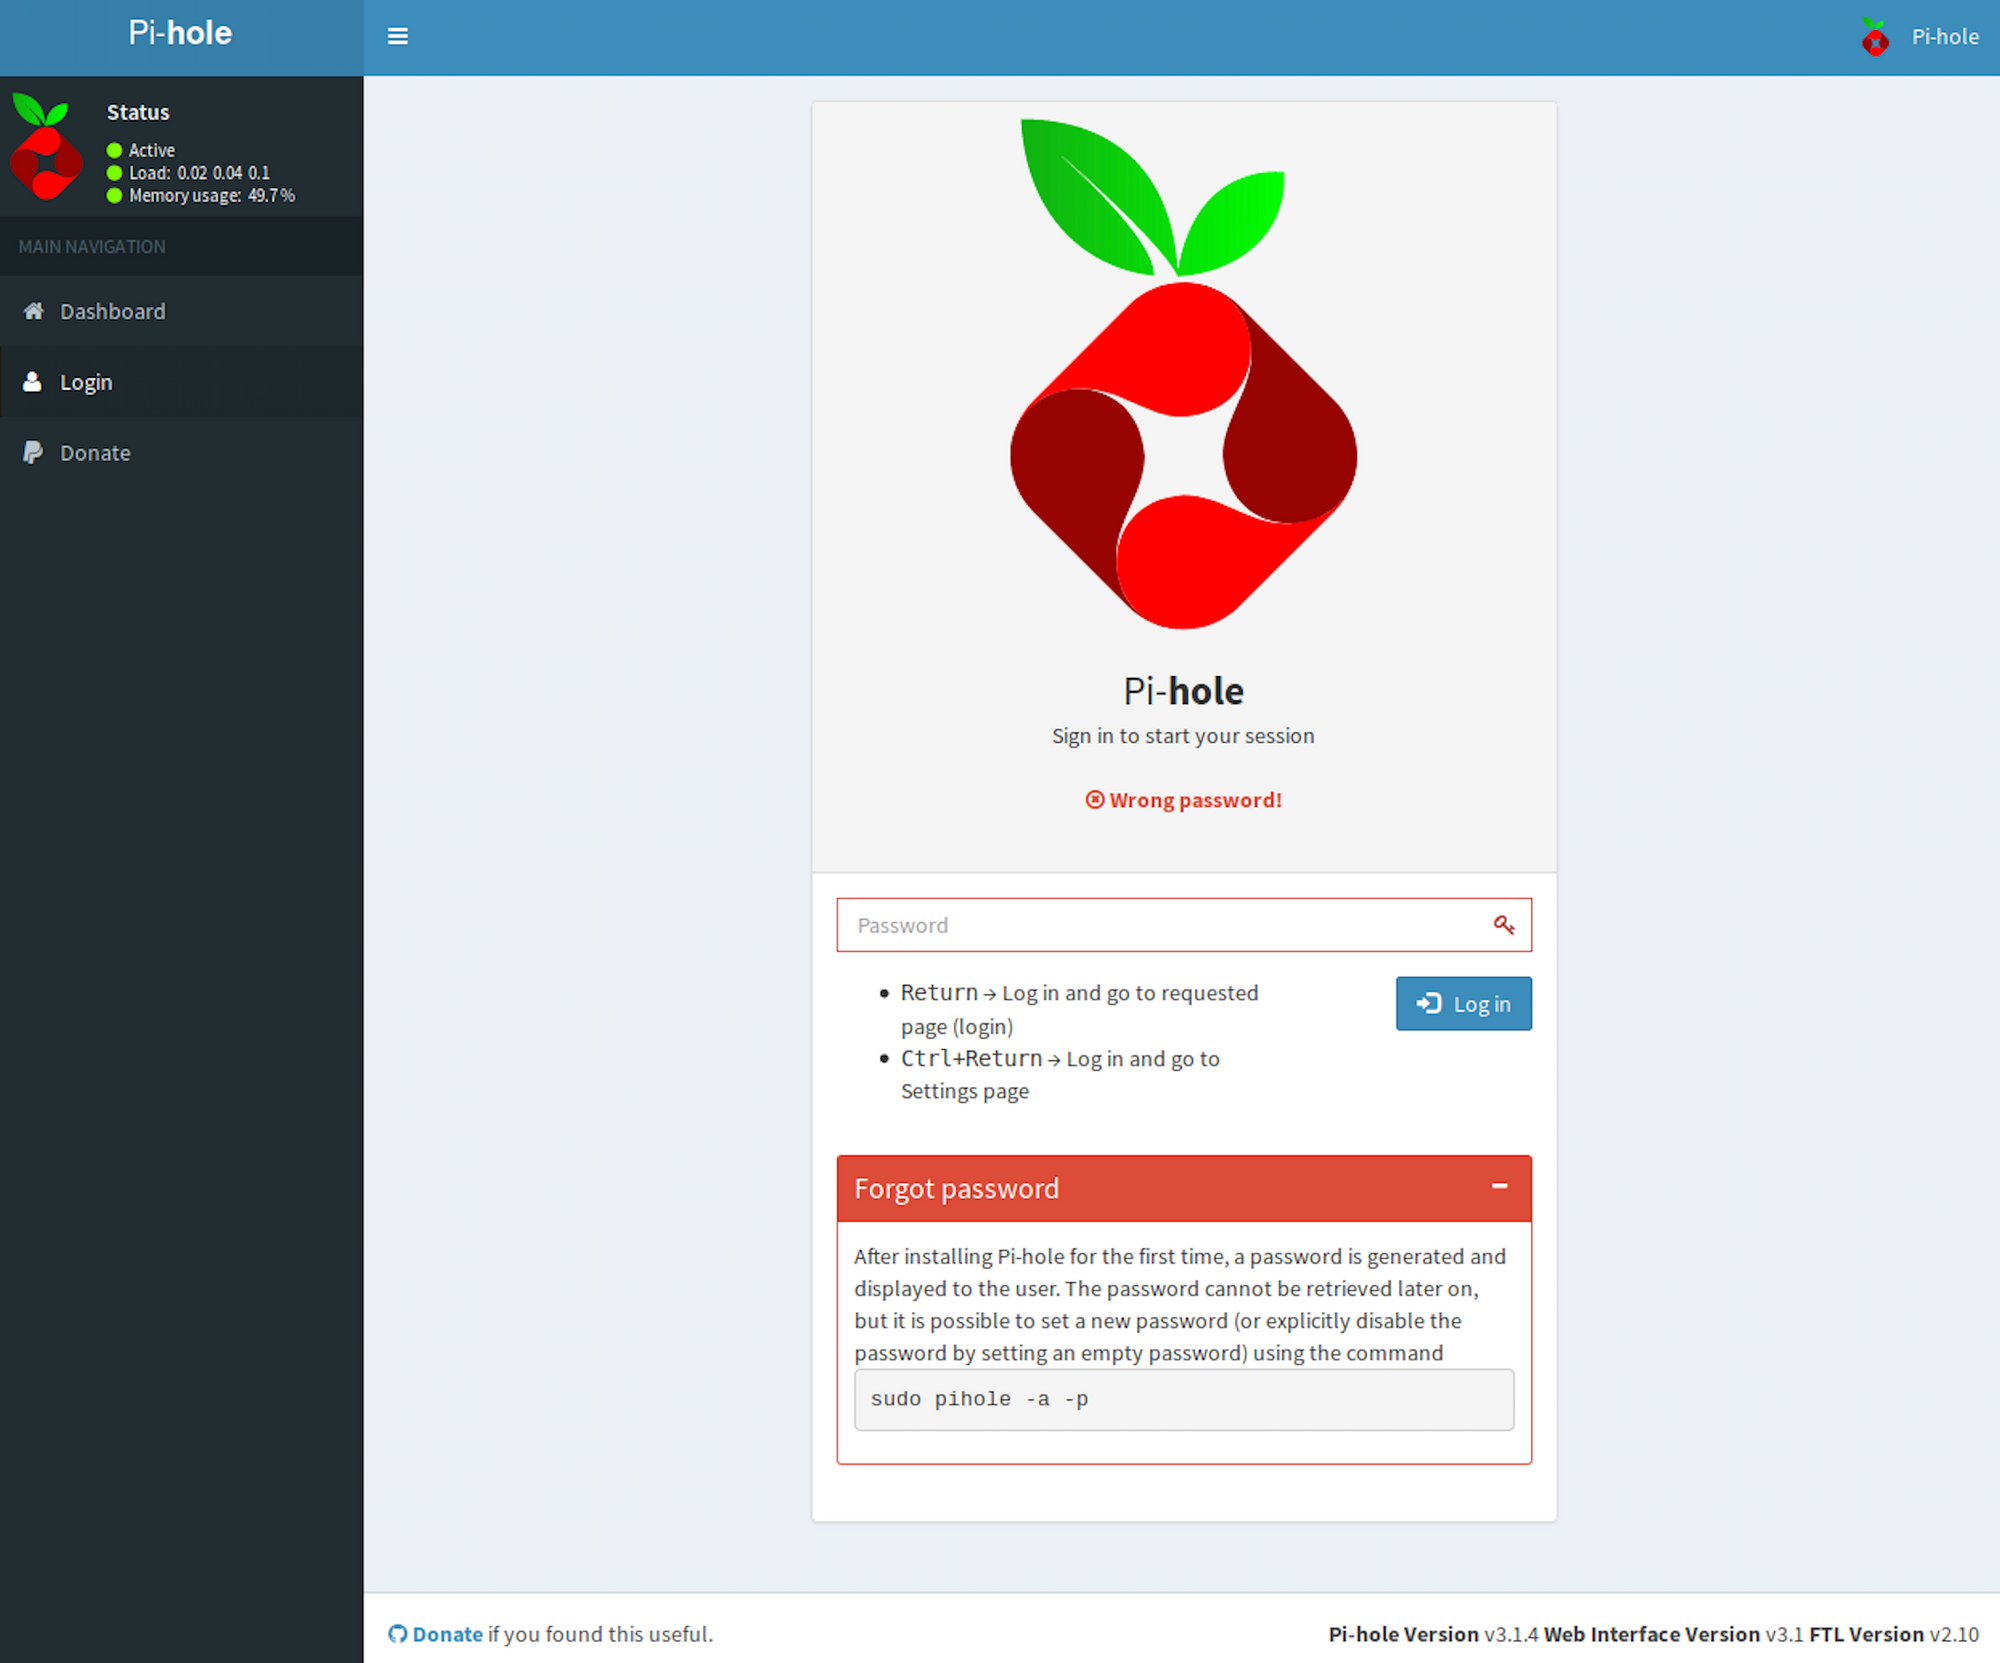
I click on the Login button on the left sidebar and I'm presented with a login screen. A quick search on the Internet, and I can assume that the target is a Raspberry Pi machine, and most likely running Raspbian (Raspberry Pi's OS).

I also found out that the default username should be "pi" with password "raspberry". I try the default password on this login screen, but it doesn't seem to work. We need to find another way.
Step 3 - Connecting to the Pi-hole through SSH
During the reconnaissance phase, we found out that port 22 was open.
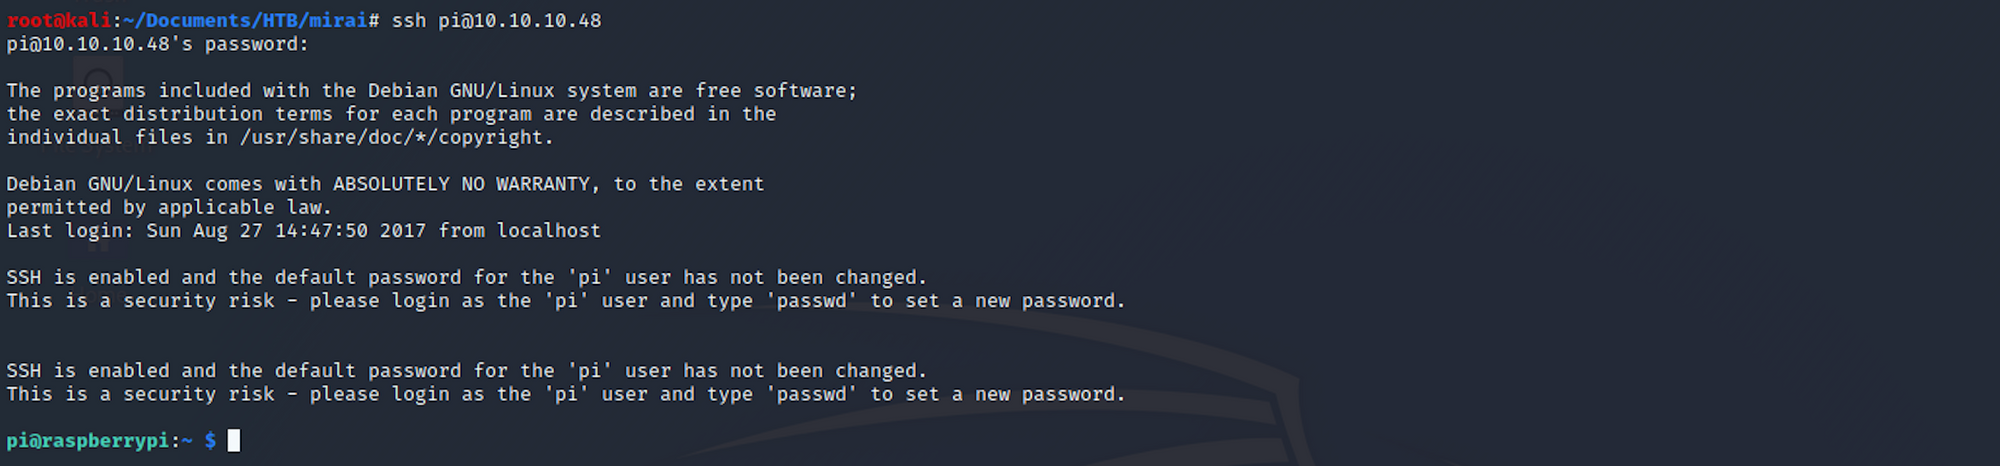
I use Medusa to check if the default credentials work with ssh. Medusa is a speedy, parallel, and modular login brute-forcer. You can find more information here on this tool.
medusa -h 10.10.10.48 -u pi -p raspberry -M ssh

Let's now connect using SSH with the following command, as we've just validated that the password is working:
ssh pi@10.10.10.48
To connect with SSH, you need the username and the host IP address. In our case, that would be"pi" for the username and "10.10.10.48" for the IP address. The password is "raspberry".
I get a session as:
pi@raspberrypi
Once logged in as a user, I can verify whether or not the user belongs to the sudo group using either the id or groups commands:

The user belongs to the group root.
Step 4 - Looking for the user.txt flag**
I list all the files/folders with the following command:
ls -la
I then move to the Desktop with
cd Desktop
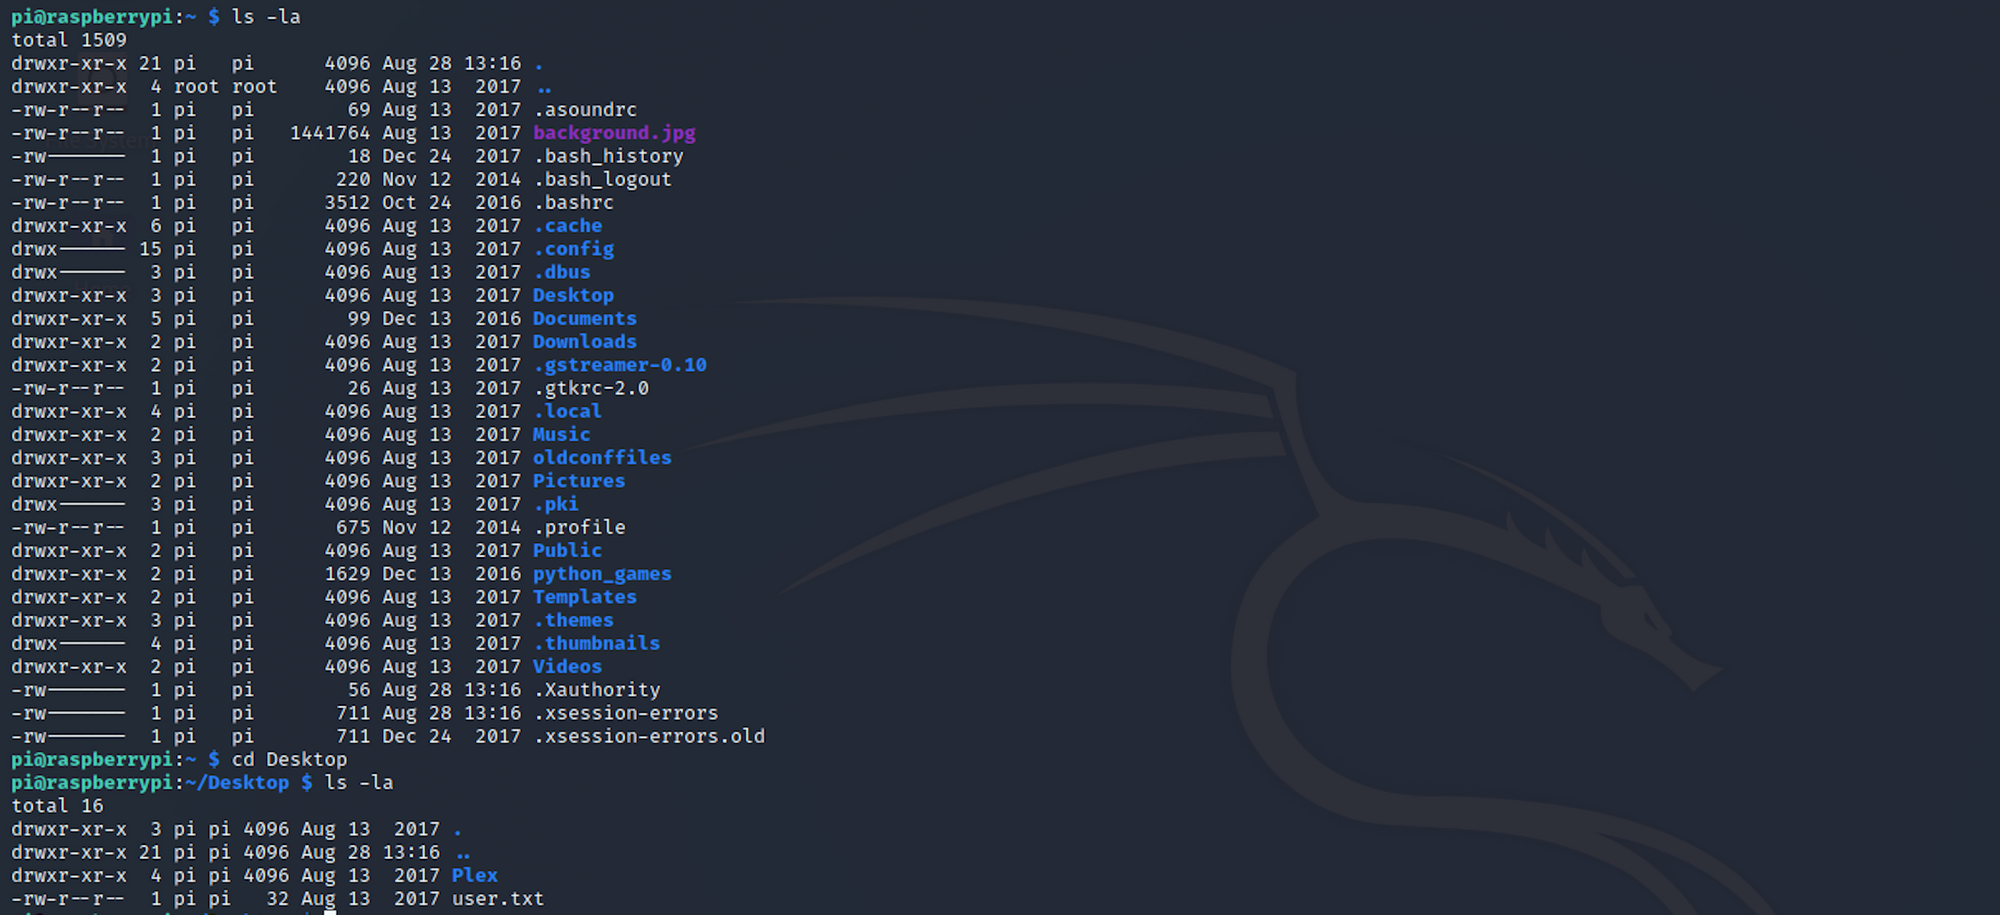
And I find the user flag! I can check the contents of the file with
cat user.txt
Step 5 - Looking for the root.txt flag**
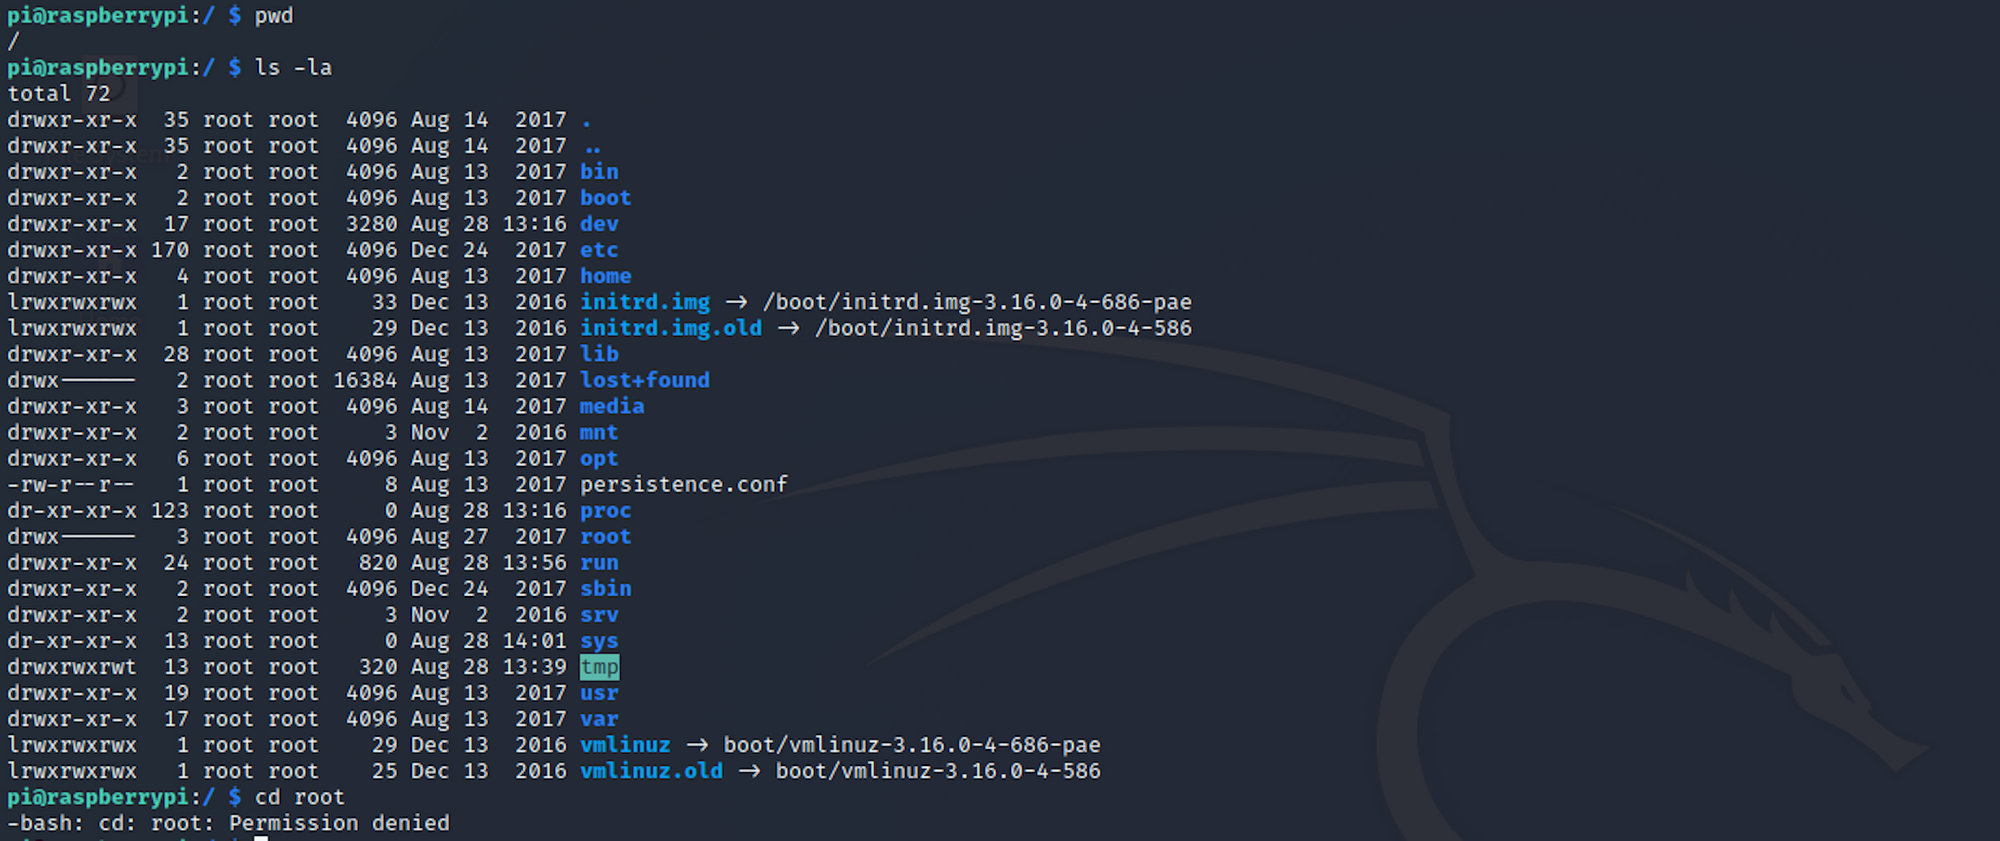
Let's find the root flag now. I navigate up to the / folder. You can check where you are with the command
pwd
which gives us the print working directory. I then move to the /root folder but access is denied.
I need to change to the root user to access this folder. I use the command
sudo -l
to understand which command I can run on localhost.
The root user has unlimited privileges and can run any command on the system and we know that the user pi is part of the root group.

I use the command
sudo su
The sudo command allows you to run programs as another user. By default the root user. su means switch user.

I can now navigate to the root folder. I find the root.txt file and check its content with
cat root.txt
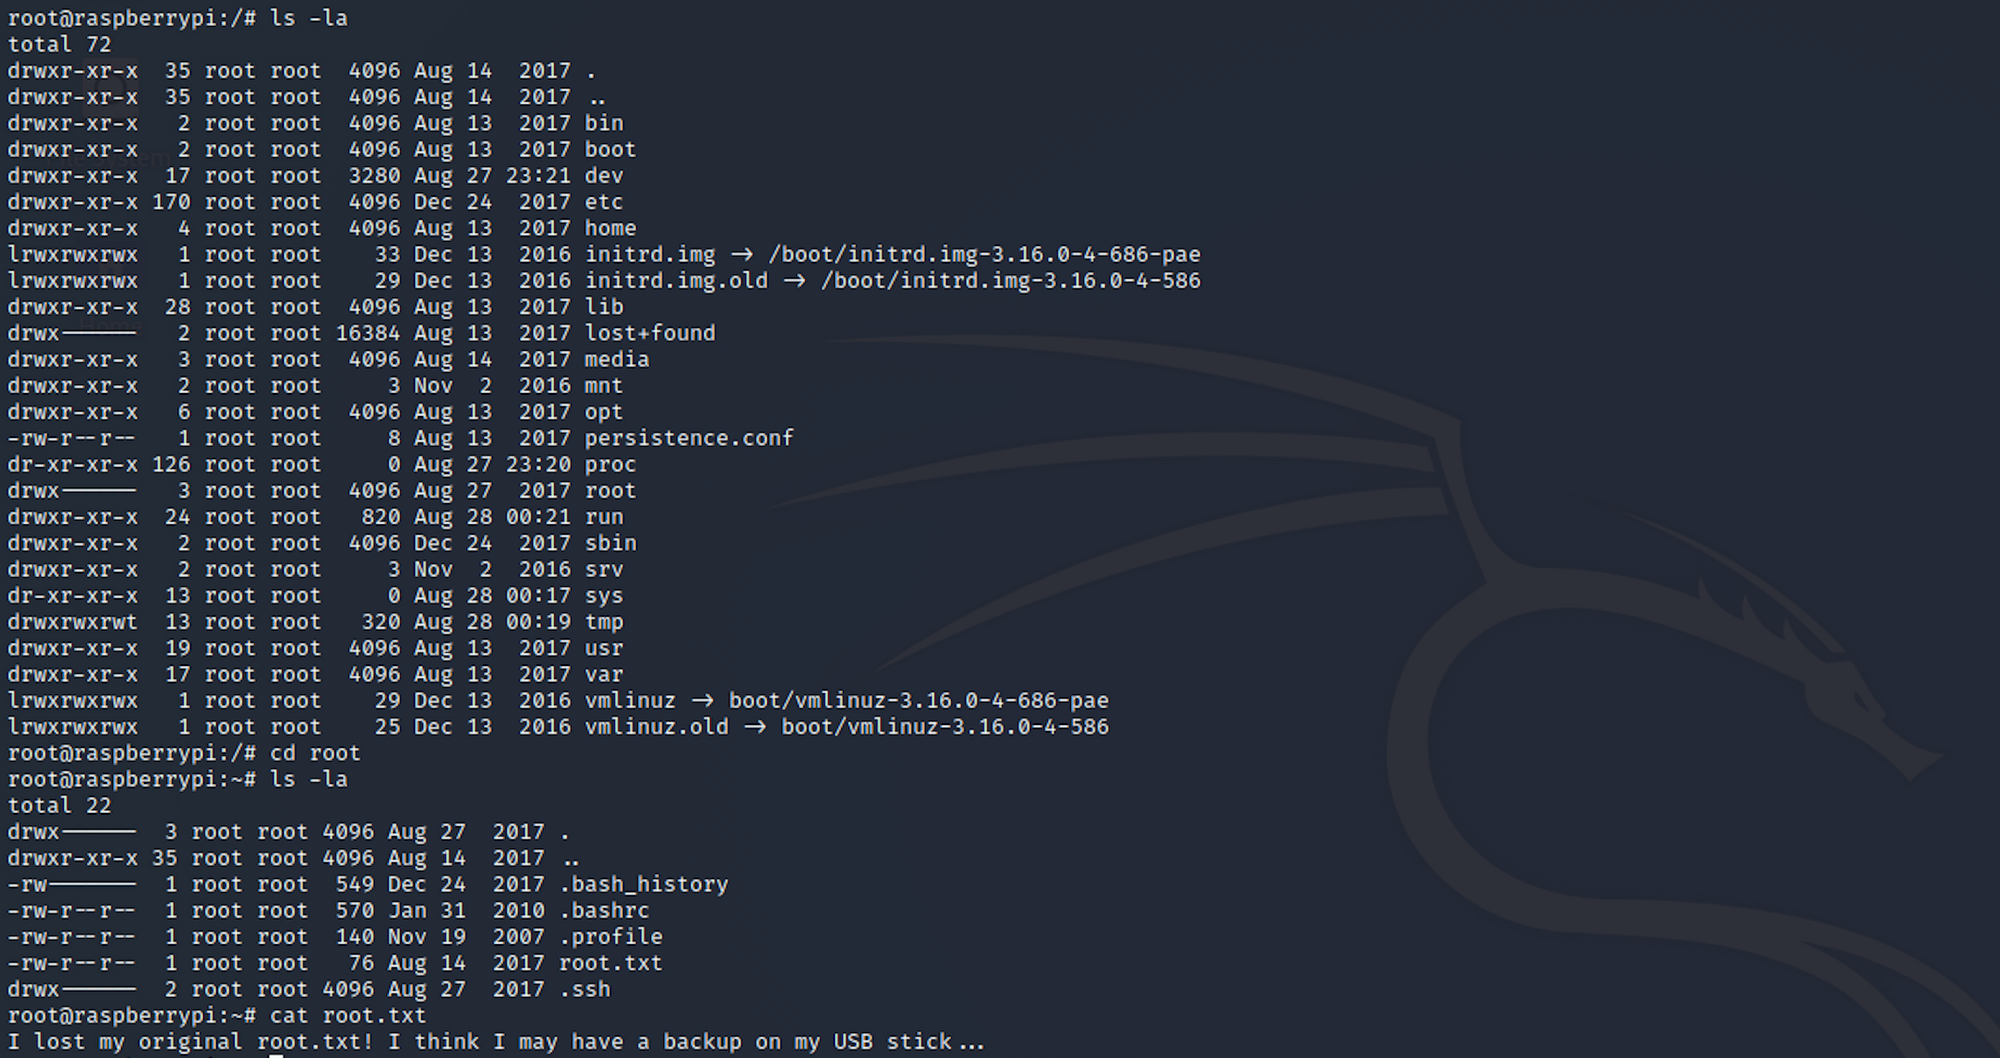
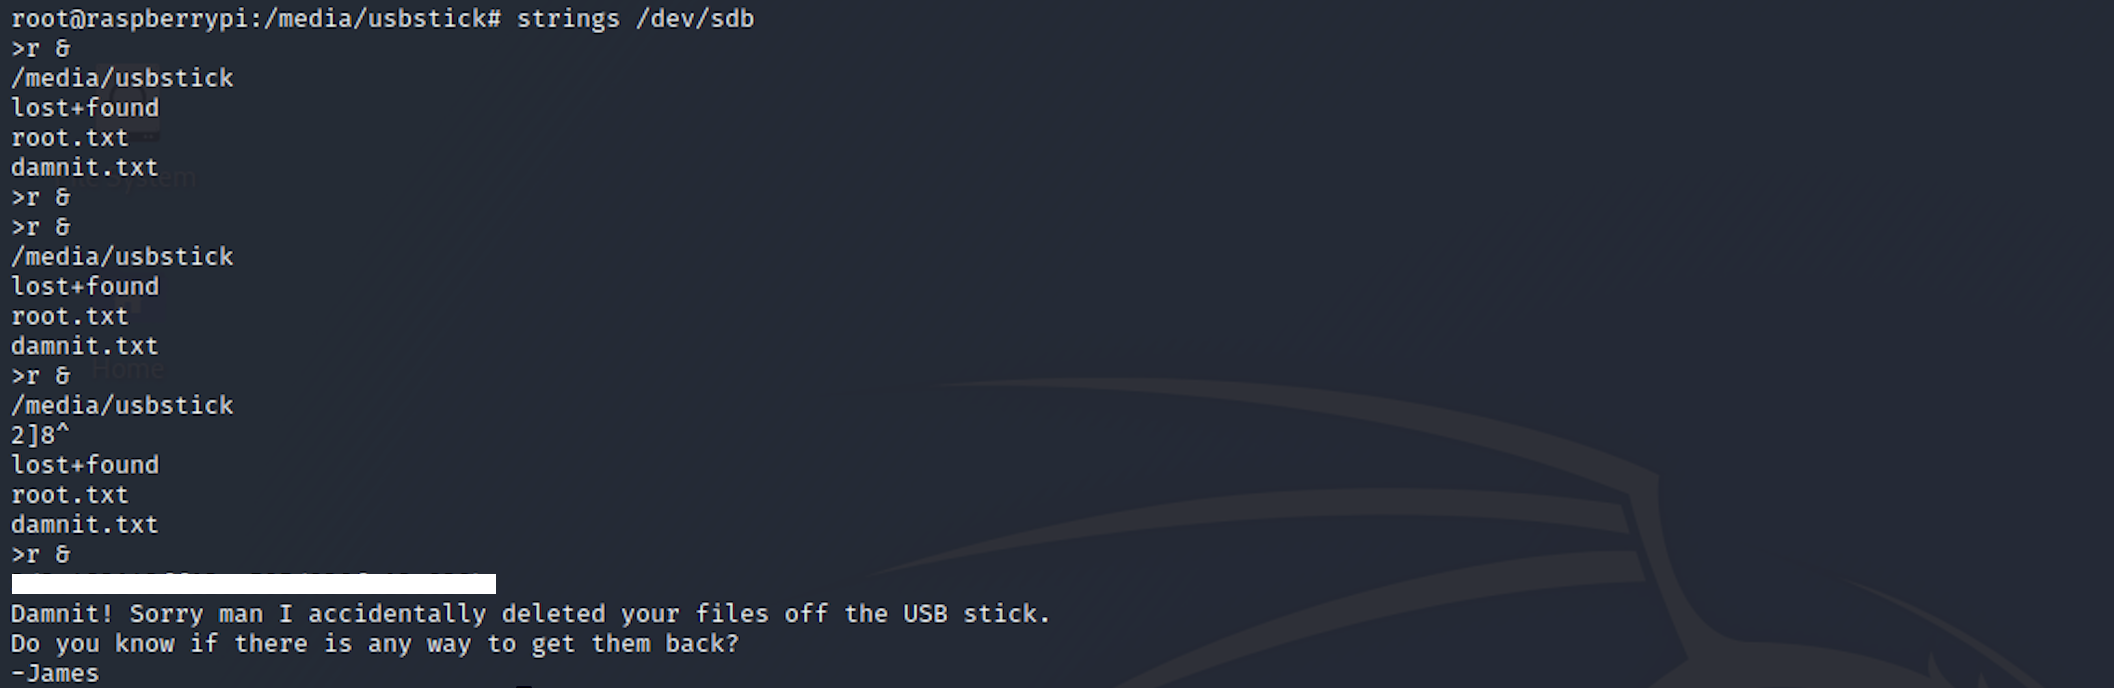
Unfortunately for us, it's not the flag but a message that was left instead.
I lost my original root.txt! I think I may have a backup on my USB stick...
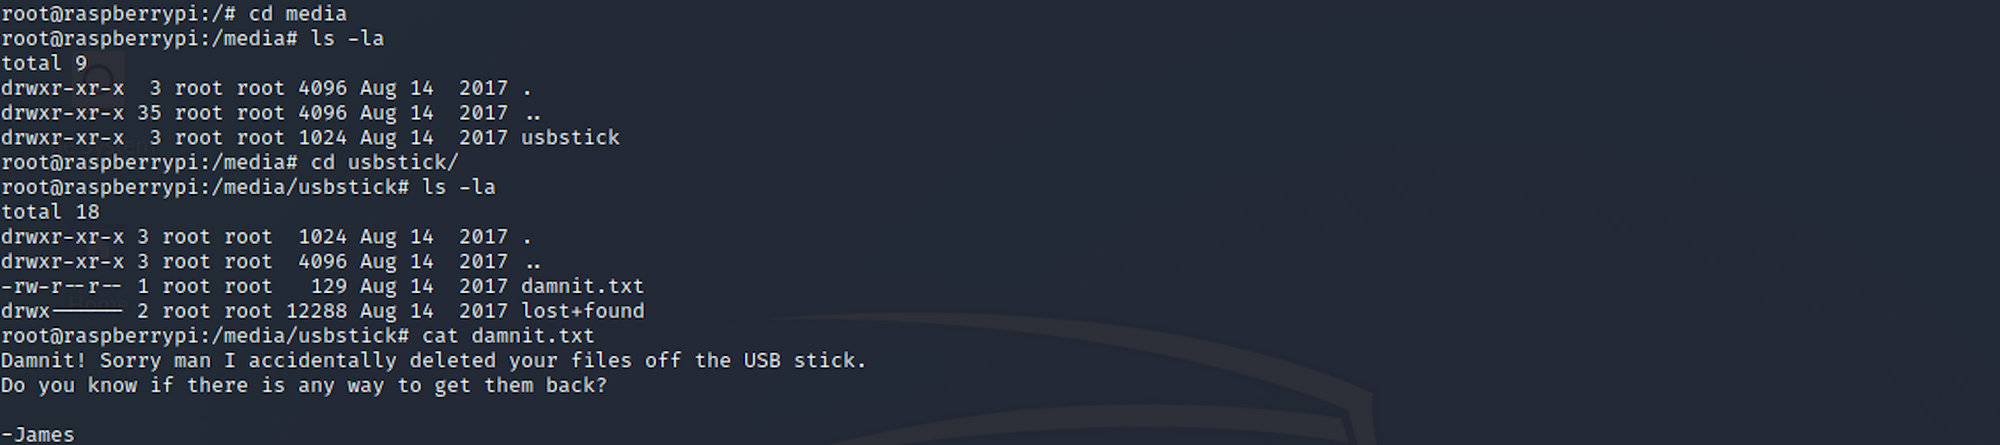
I now need to find where the usb is located with the command
lsblk
to list USB block storage devices. I can see there's one usbstick in the /media folder:

I navigate to this folder and find another message from a user called James.
Damnit! Sorry man I accidentally deleted your files off the USB stick.
Do you know if there is any way to get them back?

-James
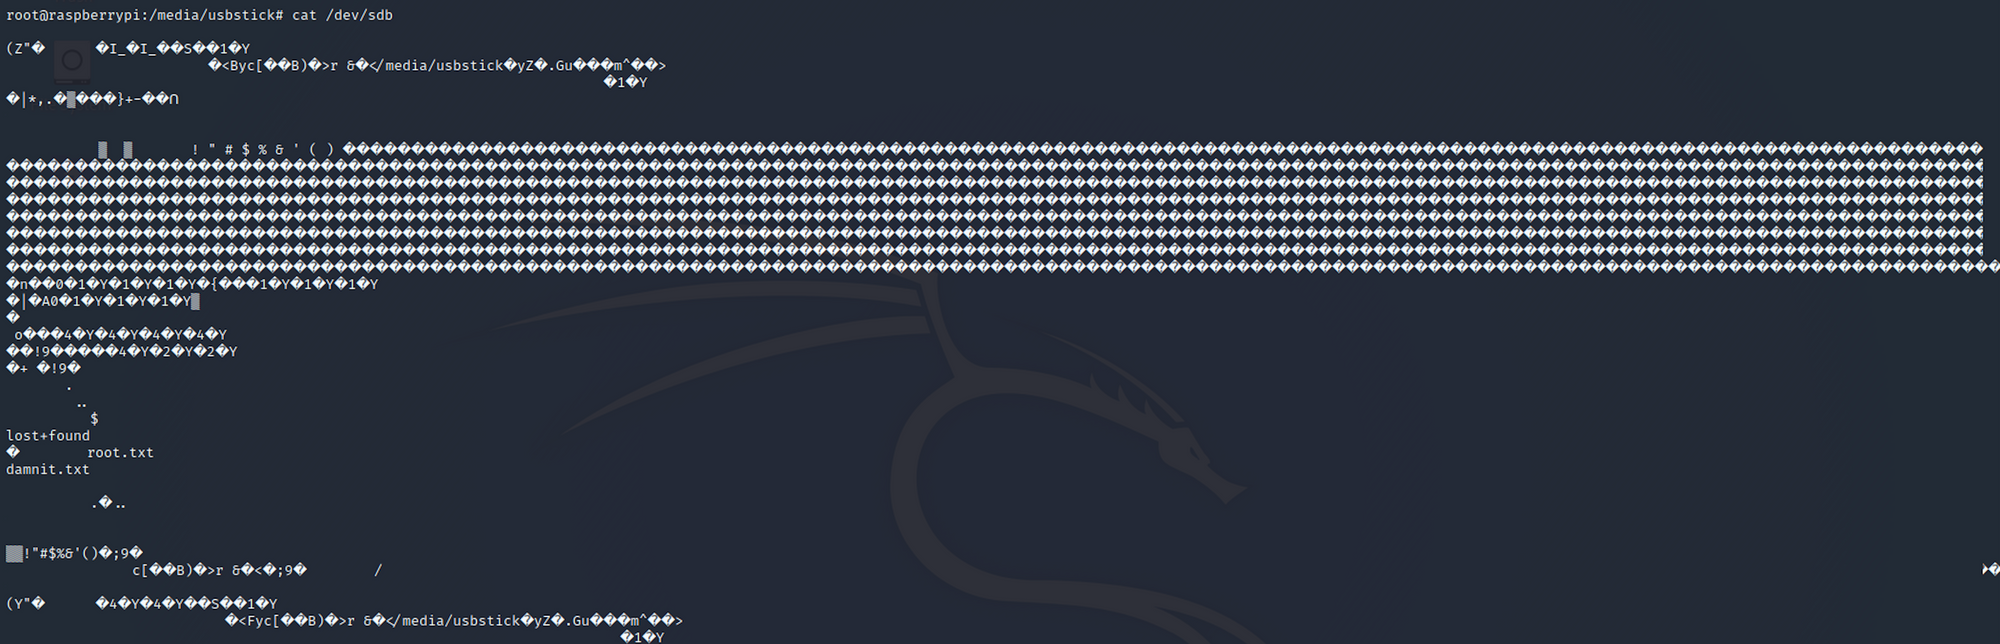
When we listed all the storage devices, we saw that the usbstick was located at sdb, which is under /dev/sdb/. More info here on disks and partitioning.
If we use the following command:
cat /dev/sdb
We will have a long output with a lot of weird characters. At the end of this input you should find the root flag.
A more elegant way to see the text inside a binary or data file is to use the command strings. This command pulls those bits of text—called “strings”.
strings /dev/sdb
Congrats! You found both flags.
Remediations
- You can read more about the Mirai DDoS botnet attack here
- Don't use default/generic passwords
- Disable remote access to your devices when not needed
Please don’t hesitate to comment, ask questions, or share with your friends :)
You can see more articles from the series Keep Calm and Hack the Box here.
You can follow me on Twitter or on LinkedIn.
And don't forget to #GetSecure, #BeSecure & #StaySecure!