By Piotr Wolak
Hello, everyone. In this step-by-step tutorial, I would like to show you how to deploy a Kotlin Microservice using Docker and AWS App Runner.
Together, we will learn:
- what exactly is AWS App Runner?
- how to configure AWS Command Line Interface on your local machine
- how to push Docker images to Amazon Elastic Container Registry (ECR)
- and finally, how to deploy our containerized application with AWS App Runner
I know, it might sound like a tremendous amount of work. But I am convinced that you will find out how simple it can be with the above tech stack.
Prerequisites
Before we start, make sure that you have Docker already installed on you local machine. We'll need to containerize our application.
If you don't have Docker, then the official Docker documentation will help you set it up in a few minutes.
What Exactly is AWS App Runner?
First, let's take minute to understand what exactly AWS App Runner is.
To put it simply, it is a fully managed service which allows you to build and deploy containerized web applications and APIs with ease.
It takes care of plenty of things, like traffic load balancing, or scaling, which helps developers like you and me focus on the code.
AWS App Runner oftentimes is a great choice when creating a demo or proof of concept, but it's also worth considering for smaller teams without a dedicated person working on infrastructure.
How to Create aSimple Kotlin Microservice
With that being said, let's prepare a simple REST API using Kotlin and Ktor.
If you are not interested in the Ktor implementation, then you can simply clone this GitHub repository and proceed to the How to Build the Docker Image step.
If you are using the IntelliJ IDEA Ultimate Edition, then you can create a Ktor project using the app. Otherwise, you can use the Ktor Project Generator tool and download project to your local machine.
Regardless of your choice, make sure to import the following plugins:
- ContentNegotiation
- kotlinx.serialization
- Routing
How to Configure Serialization
After you've imported the project, create the Serialization.kt file and register application/json content type to the ContentNegotiation feature:
fun Application.configureSerialization() {
    install(ContentNegotiation) {
        json()
    }
}
In simple words, with this code snippet we will be able to serialize Kotlin objects into JSON (and deserialize the JSON into objects, as well).
How to Create a DTO
Now let's implement a MessageDto data class like this:
@Serializable
data class MessageDto(val message: String)
Basically, we will use this generic class to provide messages for our API consumers.
How to Expose Endpoints
As the next step, let's create a Routing.kt file and expose a new endpoint:
fun Application.configureRouting() {
    routing {
        helloWorldRoute()
    }
}

fun Routing.helloWorldRoute() {
    route("/hello") {
        get {
            call.respond(HttpStatusCode.OK, MessageDto("Hello World!"))
        }
    }
}
As you can see, our application will respond with a 200 OK status code to each GET request to the /hello path.
How to Configure the App
Now, let's combine everything inside the Application.kt file:
fun main() {
    embeddedServer(Netty, port = 8080, host = "0.0.0.0") {
        configureRouting()
        configureSerialization()
    }.start(wait = true)
}
As you can see, our Kotlin microservice will be a Netty embedded server running on localhost:8080.
I highly encourage you to run the application and verify that everything is working properly:
GET localhost:8080/hello

Status: 200 OK
Response Body:
{
    "message": "Hello World!"
}
How to Implement the Dockerfile
Finally, let's add the Dockerfile to the root directory of our project:
FROM openjdk:8-jdk
EXPOSE 8080:8080
RUN mkdir /app
COPY ./build/install/com.codersee.ktor-app-runner/ /app/
WORKDIR /app/bin
CMD ["./com.codersee.ktor-app-runner"]
Make sure that the directory specified for the COPY and CMD commands matches the value of rootProject.name inside the settings.gradle.kts file. If the project's name is xyz , then these commands should reflect that:
...
COPY ./build/install/xyz/ /app/
...
CMD ["./xyz"]
How to Build the Docker Image
At this point, we have everything we need to build our Docker Image, which we will use later for the AWS App Runner deployment.
Run the Gradle Command
As the first step, let's run the installDist command with Gradle Wrapper:
./gradlew installDist
The above command is responsible for assembling the distribution content and installing it on the current machine. Although it might sound difficult, it will simply create necessary files inside the ./build/install/{project-name}/ directory.
Build the Docker Image
As the next step, let's build a Docker Image:
docker build -t ktor-aws-runner .
As you can see, we named our desired image ktor-aws-runner with the -t option (a shortcut for --tag).
Verify Docker Configuration
Finally, let's run our container to make sure that our Kotlin microservice is working properly:
docker run -p 8080:8080 ktor-aws-runner
As a word of explanation, the -p flag (--port) is responsible for publishing the container's 8080 port to the host 8080 port.
With that being done, after a few seconds we should see the following message in logs:
Application started in 0.078 seconds
Similarly, we can perform a GET request to check if the exposed endpoint is responding correctly.
How to Create and Configure an AWS User
With all of that being done, we can finally start working with AWS. But before we're able to push our Docker Image, we need to make sure that we have AWS CLI installed on our local machine.
We can do that easily with the below command:
 aws --version

 # Result:
 aws-cli/2.5.3 Python/3.9.11 Windows/10 exe/AMD64 prompt/off
The above result indicates that everything is setup correctly. Nevertheless, if we would like to install or update the CLI, then AWS ships with a really good article on that in their official documentation.
Additionally, we have to have the access to AWS Cloud from our computer – and that's what we are going to set up in this step.
In order to set up the access, let's sign in to the AWS Management Console and navigate to the Users feature of the IAM Console. We can do that easily with the search bar at the top:

On the next page, let's click the Add users button:

Then we'll specify the preferred User name along with the Access key – Programmatic access credential type:

With these settings, we will be able to access AWS using a combination of access key and secret.
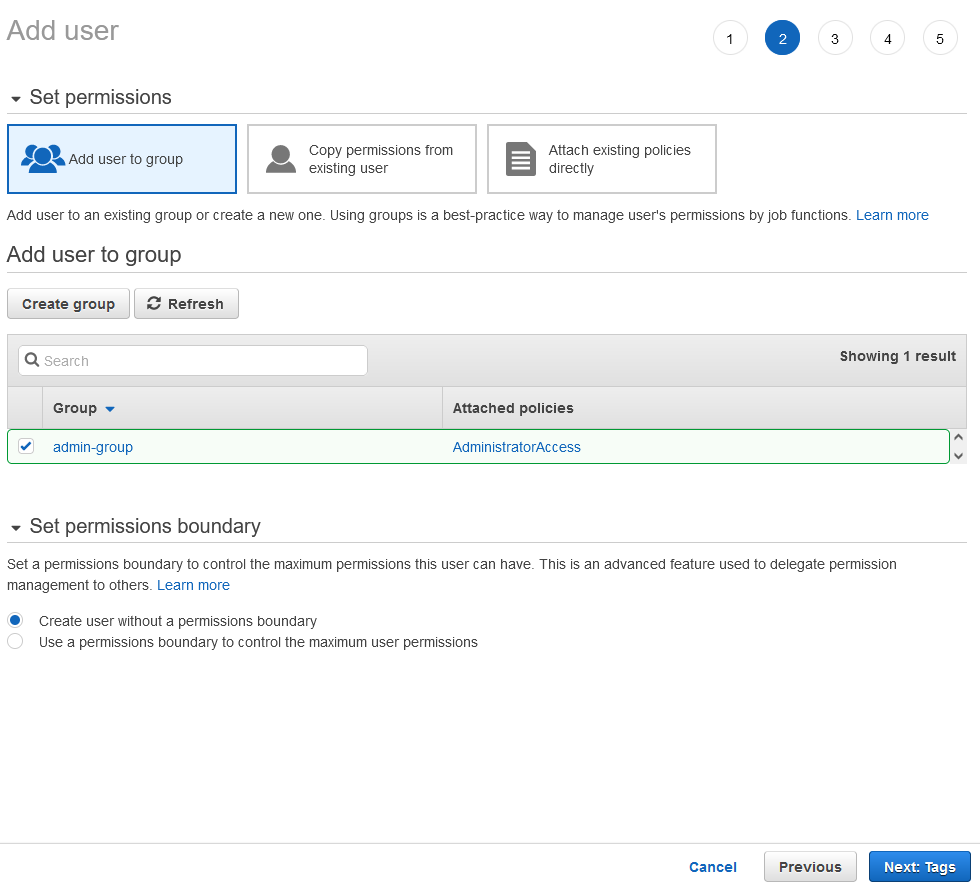
With that being done, let's hit the Next button. On this page, we have to select the group for our user. For the purpose of this tutorial, let's create a new one, using the button visible below:

Nextly, let's specify a Group name ( admin-group in my case) in the modal and select the AdministratorAccess:
For simplicity, we are going to use the AdministratorAccess. But in real-life scenarios, we should always stick to The Principle of Least Privilege.

After the group is created, let's hit the Next button once again:
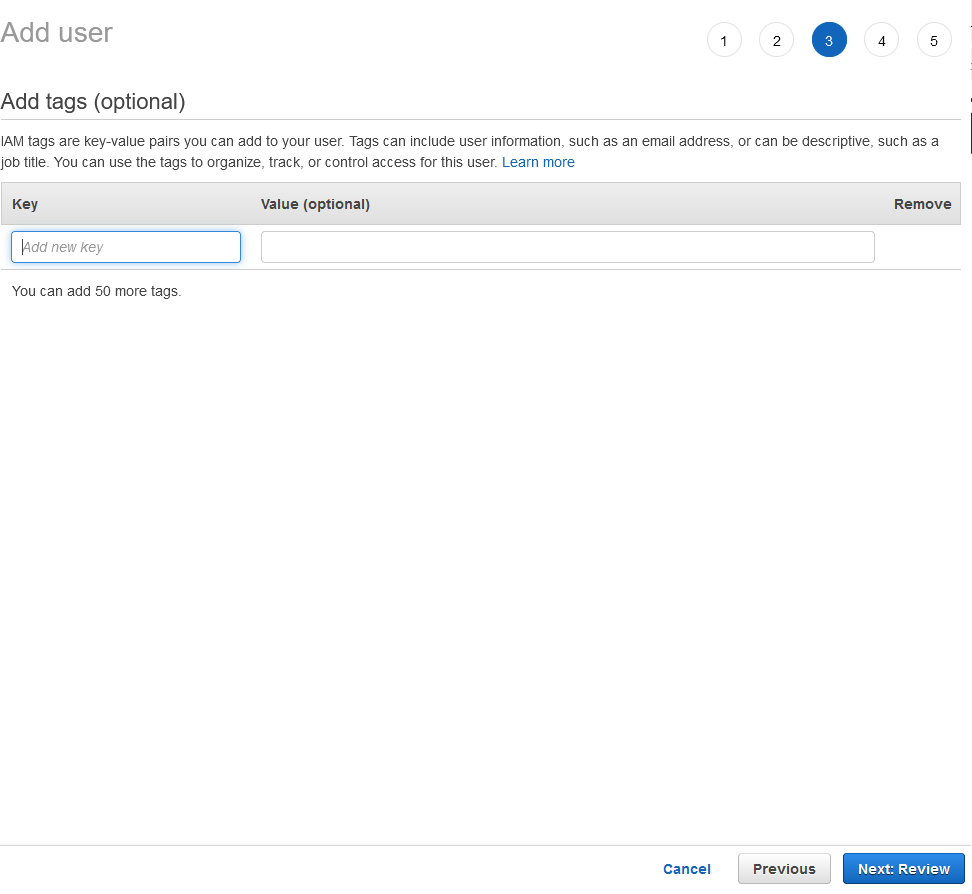
On the next page, we have the option of adding custom tags as key-value pairs.
But we won't need them today, so let's simply skip this page:
Finally, we will be redirected to the Review page, where we can validate our previous steps:
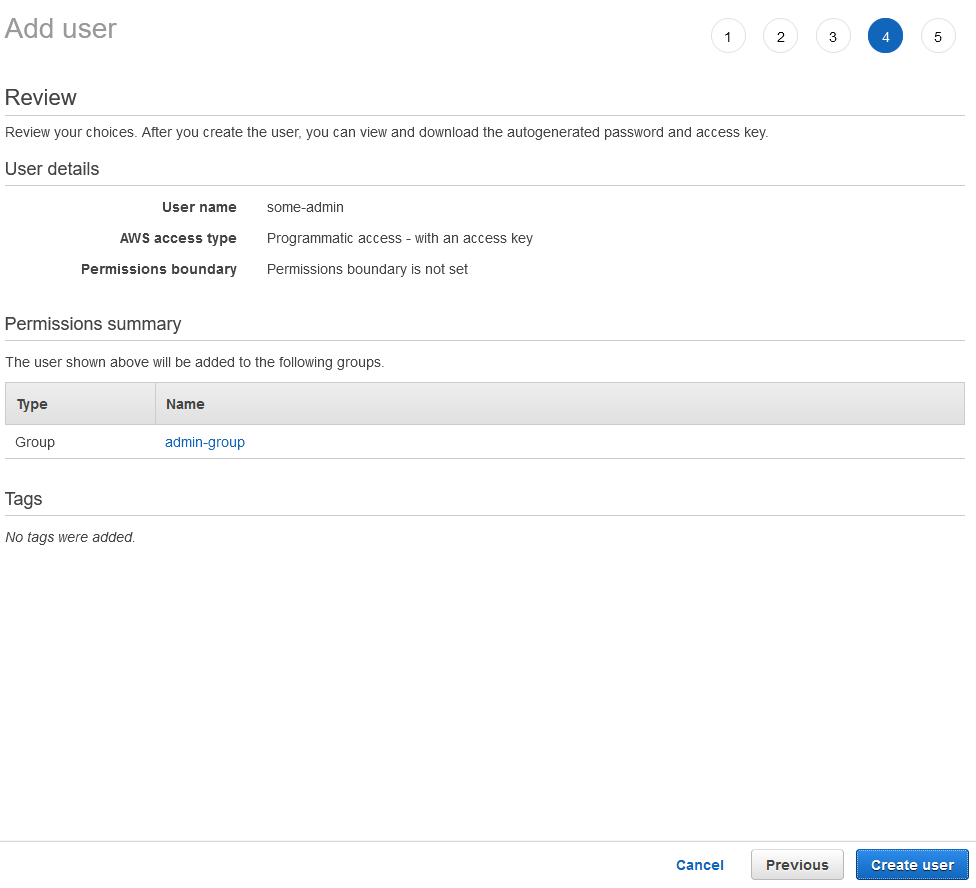
As you can see, everything looks good, so let's click Create user:

The user was created successfully, so we can finally import our access and secret keys.
Keep in mind that access and secret keys are highly confidential data and you should never share them with anyone!
Let's click the Download .csv button and fetch the file. Personally, I named it some_user_credentials.csv , but feel free to pick whatever name you like (and remember it :) ).
Next, let's navigate to the download directory and run the following command:
 aws configure import --csv file://some_user_credentials.csv

 # Result:
 Successfully imported 1 profile(s)
Given the above message, we can expect that everything was set up correctly. Additionally, we can verify that a new file called credentials has been created (or updated) inside the .aws directory.
If you are using Windows then your path will be C:\Users\[your_user_name]\.aws:
[some-admin]
aws_access_key_id = [your access key id]
aws_secret_access_key = [your secret]
How to Push the Docker Image to ECR
At this point, our CLI is properly prepared, so we can learn how to push our local Docker Image to the Elastic Container Registry.
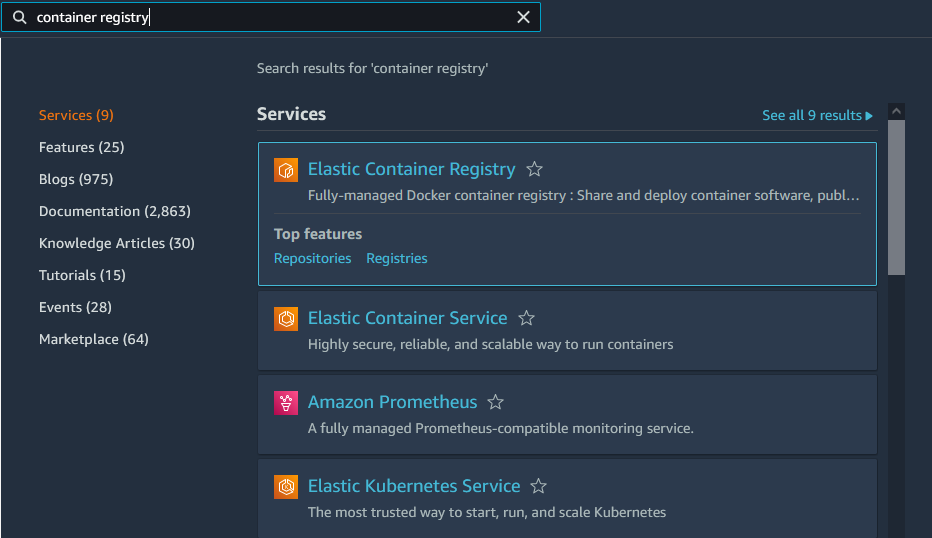
As the first step, let's get back to the Management Console and type container registry in the search bar:
Let's click on the Elastic Container Registry and on the next page, the Create repository button. On the next page, let's select a Private repository and specify a name for it:

For the rest of settings, let's leave the default values, just like below:

Finally, let's hit the Create repository button.
After that, we will be redirected to the Private repositories list, which now contains our newly created repository:

Let's copy the URI and specify the following command in the terminal on our local machine:
docker tag ktor-aws-runner:latest [your_registry_uri]:latest

# Example: docker tag ktor-aws-runner:latest 111111111111.dkr.ecr.us-east-1.amazonaws.com/my-ktor-registry:latest
Why do we need that? Well, basically, when working with Docker we need to tag images with registry host and port (if necessary) in order to push them to any private repository.
With that being done, let's authenticate to the Amazon ECR registry:
aws ecr get-login-password --profile some-admin --region us-east-1 | docker login --username AWS --password-stdin [your registry URI]

# Result:
Login Succeeded
After that, we can run the git push command in order to push the image to ECR:
docker push [your_tagged_image]

# Example: docker push 111111111111.dkr.ecr.us-east-1.amazonaws.com/my-ktor-registry:latest
Depending on your connection it can take some time, but finally, we should see the update list in our repository:

How to Deploy the Application to AWS App Runner
Now we have everything we need to share our Kotlin microservice with the world :)
Let's get back to the Management Console and search for app runner:

On the next page, let's hit the Create service button.
For the Source configuration, let's choose the Container registry along with Amazon ECR:

As you might have noticed, AWS App Runner can deploy services directly from a source code repository. If you are interested in such a configuration, just get in touch with me via email (contact[at]codersee[dot]com).
Next, let's click Browse and select previously created image:

Let's click continue and for the Deployment settings let's choose Manual and Create new service role:

The role name is not important in this tutorial, so we can specify any value.
As the next step, let's click Next and on the next page, let's provide a Service name along with CPU, Memory and Port information:
 Image presents Service name, cpu, memory, environment variables, port and additional configuration settings
As you can see, we have chosen the minimum available combination (and that's what I suggest you do as well).
If we would like to specify some additional environment variables or a custom Start command, then this page allows us to do so. But we won't need any environment variables and we have already added a start command to our Docker Image, so let's leave it as it is.
On the Auto scaling page, select the Custom configuration:

Next, let's create a new configuration called my-configuration:
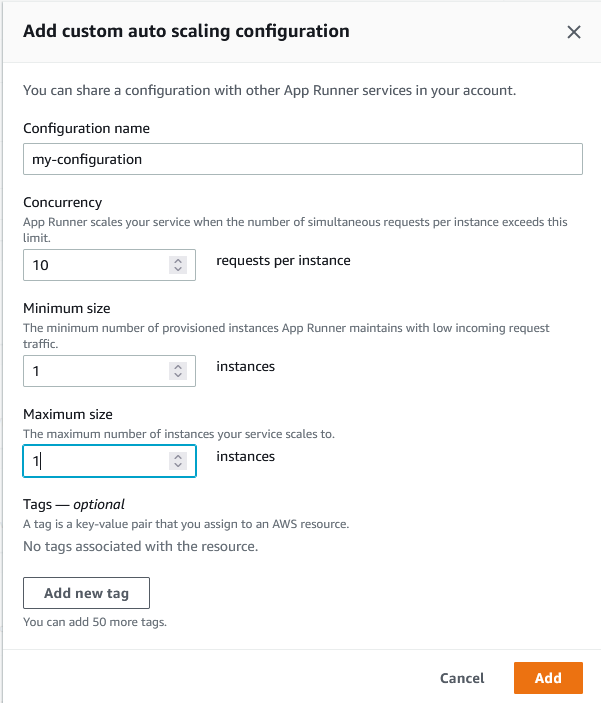
As I have mentioned in the beginning, AWS App Runner takes care of plenty of things out of the box. One of them is auto scaling. Although it is a great feature, we have to limit it to our preferences and always remember that more resources means higher costs.
As you can see above, this example configuration will not scale our Kotlin Microservice. However, if we increase the Maximum size, then a new instance will be created each time the number of simultaneous request increases by 10.
Let's add the above config and leave the rest of items with their defaults. After we click Next, we will see the Review page with deployment summary.
On this page, let's click Create and Deploy button, which will start the deployment process:


And again, this process can take a few minutes. After it finishes, the status will change from Operation in progress to Running and we will be able to test our Ktor REST API.
Just like previously, let's test the GET /hello endpoint. But this time, as a host name of our microservice, we need to use the value from Default domain:
#Example:

GET https://aaaaaaaaaa.us-east-1.awsapprunner.com/hello

Status: 200 OK
Response Body:
{
    "message": "Hello World!"
}
🛑 Important Notice
Please remember to delete all the resources we've created today, so that you won't be charged for them.
It's really easy to forget about all the things we create when learning AWS Cloud and at some point, you may exceed your free quota. Thus, it is a good practice to remove all of that.
Summary
And that's all for this tutorial on how to deploy Kotlin Microservice to AWS Cloud with AWS App Runner. I really hope that after following along with this guide, you're able to easily deploy your applications to Amazon Cloud.
If you enjoyed this material, then you might want to check my other articles. On my blog, I cover plenty of topics related to Kotlin, Ktor, and Spring Boot.
If you would like to ask me about anything, please reach out to me at contact[at]codersee[dot]com.