

What is Eleventy?
Eleventy (also called 11ty) is a simple yet powerful static site generator. It uses JavaScript to transform data and templates into HTML pages.
It’s beginner-friendly, has fast build times, and generates fast sites by default. It also has a very active and friendly community.
Eleventy excels at content-driven sites and is used by Google, Netlify, MIT, CERN, the A11y Project, ESLint, and more.
Since pages are generated ahead of time, they can be served as fast as possible from a Content Delivery Network (CDN). Eleventy also generates no client-side JavaScript, which helps your site to load faster.
In this tutorial, we're going to build a simple developer portfolio site to demonstrate some of the main features of Eleventy.

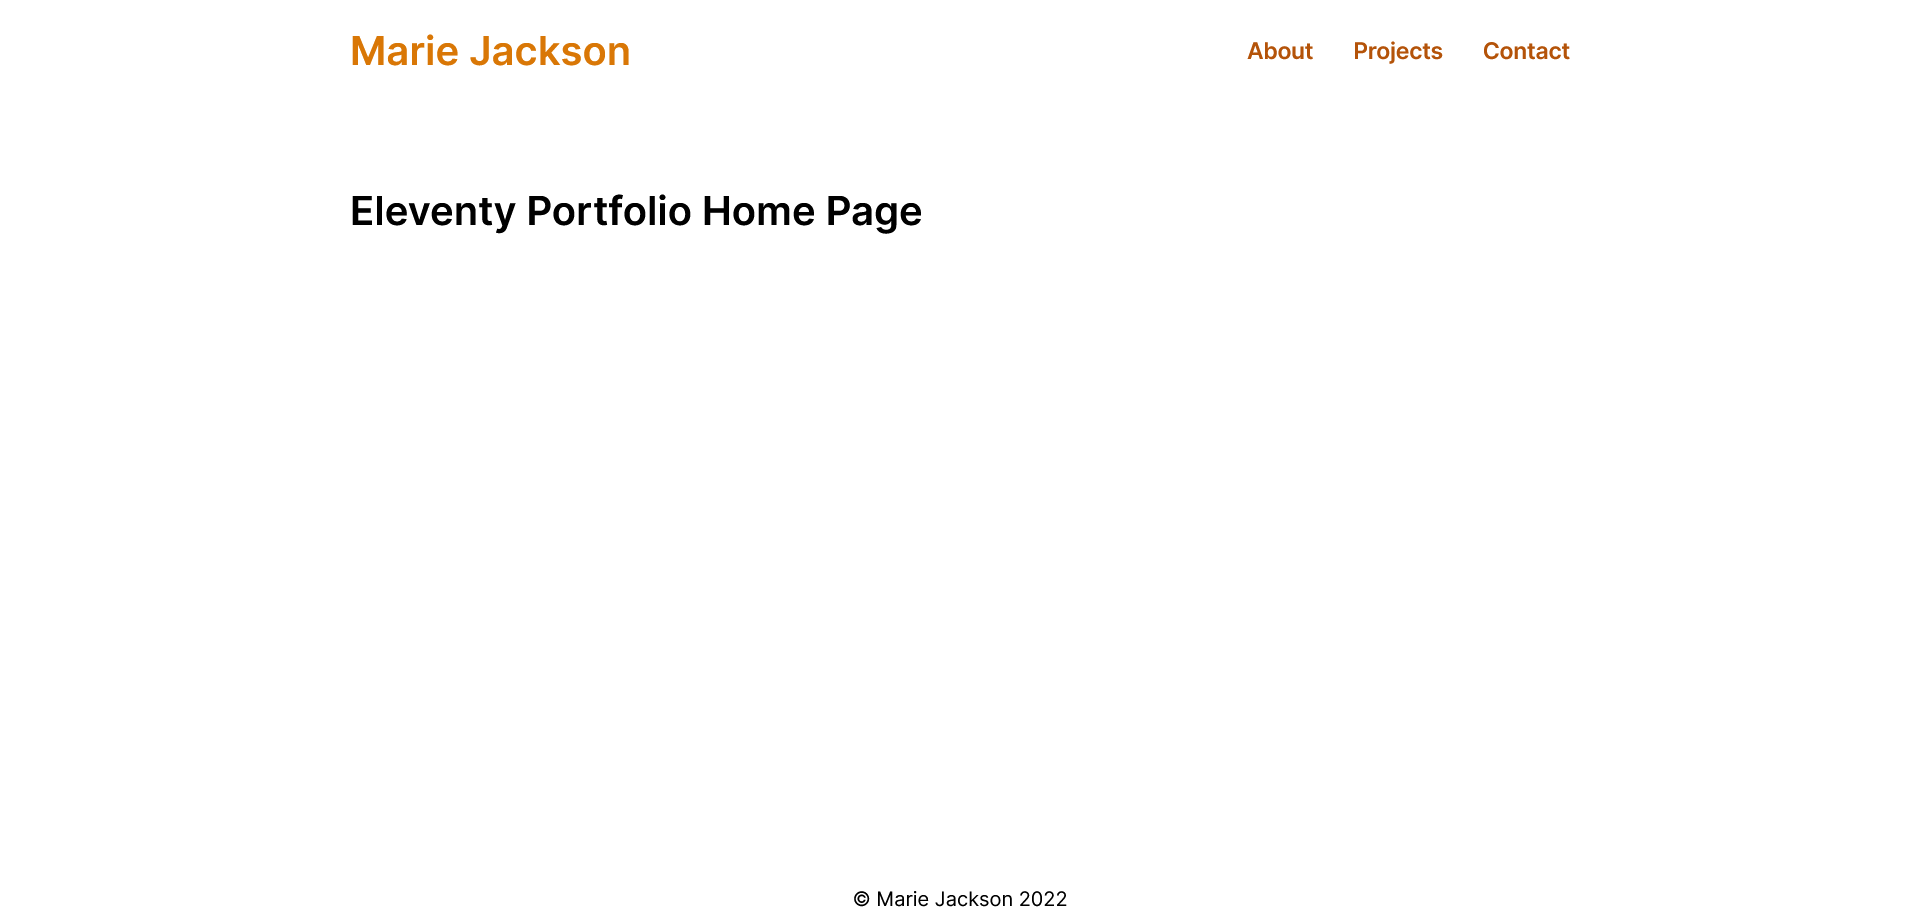
Eleventy portfolio homepage
We’ll learn about:
Setting up and configuring an Eleventy project
Templating and layouts
Handling CSS and images
Working with collections and data files
Shortcodes and Eleventy plugins
Deploying the site to Netlify
The portfolio site will have:
A Homepage
An About page
A Contact page (with contact form)
A Projects page
A page for each project (with case study)
Eleventy can pull in data from APIs, a Content Management System (CMS), or from local files. To keep things simple, we’ll store our project data in Markdown files.
The full code for the finished portfolio is available on GitHub. If you get stuck at any stage, please check your code against the finished site.
Table of Contents:
Prerequisite - Install Node.js
If you don’t already have Node.js installed, go to nodejs.org and follow the instructions for your operating system.
Open a terminal and use node --version to make sure it’s installed. As long as it’s version 12 or newer, you’re good to go.
Initial Project Setup
First, create a directory for your portfolio. You can call it eleventy-portfolio or whatever you want.
Open this directory in a terminal and run npm init -y to create a package.json file with the default settings.
Next, install Eleventy using npm install --save-dev @11ty/eleventy.
In the root directory of the project, create a .gitignore file with the following contents so that Git doesn’t track any unwanted files:
node_modules
/public
How to Configure the Project
Eleventy is “zero-config” by default. If you don’t change anything, Eleventy will take all the files in your root directory, run a build process, and output the resulting files to a _site directory.
But Eleventy also has flexible configuration options that let you customize your build process, watch for changes in certain file types, and manipulate content with filters and shortcodes.
Your Eleventy configuration goes in a .eleventy.js file in the root of your project.
For example, the default input directory is the root directory of your project, while the default output directory is _site. Some people prefer to change this, with src and public being common choices.
If you’d like this structure, create src and public directories in the root of your project and then set them as the input and output directories in .eleventy.js.
module.exports = function (eleventyConfig) {
  return {
    dir: {
      input: "src",
      output: "public"
    }
  };
};
In case you’re wondering, the eleventyConfig argument that is passed to the function is the default configuration object that Eleventy provides. Soon we’ll use this object to customize our Eleventy build process.
How to Add a Template
Let’s add our first template. We’ll keep things as simple as possible by using a Markdown file.
In the src directory, create an index.md with # Hello World from Eleventy as its contents. This is your first Eleventy template.
To build and view the site we can use the development server that comes with Eleventy.
In your terminal, make sure you’re in the root directory of your project and run eleventy --serve. This starts the development server, which will watch your src directory and automatically reload your site whenever you change your code.
After a moment you’ll see:
[Browsersync] Access URLs:
 ----------------------------------
    Local: http://localhost:8080
 External: http://your_ip_address:8080
 ----------------------------------
[Browsersync] Serving files from: public
Open a web browser and go to http://localhost:8080. Congratulations, you’ve made a (very simple) Eleventy site! 🥳🎉
At this stage, your project will have the following structure:
node_modules/
public/
src/
.eleventy.js
.gitignore
package.lock.json
package.json
Most sites need more than one page, so we’re going to need to learn more about templates.
Before we do that, we can customize our build commands if we want to. This step is entirely optional.
Optional Step – How to Create Custom Build Commands
The default command to run the development server is eleventy --serve, while the default command to build the site is eleventy.
If you’d like to replace these with different commands, such as start and build, open package.json and under scripts replace the “test” command with your preferred commands:
"scripts": {
    "start": "eleventy --serve",
    "build": "eleventy"
  },
Now we can use npm start in the terminal to start the development server and npm run build to generate a build of our site.
You can use ctrl/cmd + c to stop the development server whenever you need to.
How to Use Templates in Eleventy
Turning Markdown files into HTML is neat, but so far you aren’t really getting much benefit over just writing your site in plain HTML. This is where templates come in.
First, we need to clarify some terms:
Template – A content file that Eleventy will transform into a page, or pages, in the built site
Layout – A template that wraps around another template, usually to provide a structure to present content in
Partial – A template that makes up part of another template
Templates let you combine content and data to generate whatever HTML your site needs.
Layouts let you give multiple templates the same basic structure.
Partials let you build small reusable components that you can use in larger templates.
Eleventy supports ten different languages for templating, including: HTML, Markdown, JavaScript, Liquid, Nunjucks, Handlebars, Mustache, EJS, Haml, and Pug. (In version 1.0 Eleventy added support for custom templates using any arbitrary file extension, but this is probably better reserved for more custom/advanced use cases).
You can even mix different templating languages in the same file, such as Markdown and Nunjucks, if you want to.
In this project, we’ll use Nunjucks. It’s a templating language for JavaScript created by Mozilla, and is pretty popular in the Eleventy community.
In the src directory, delete index.md and create an index.njk file. If you’re using VS Code, type ! + tab to generate the basic HTML structure for the page. Change the title to "Eleventy Portfolio" and in the <body> element, add <h1>Home Page</h1>.
Your page should look like this:
<!DOCTYPE html>
<html lang="en">
<head>
  <meta charset="UTF-8">
  <meta http-equiv="X-UA-Compatible" content="IE=edge">
  <meta name="viewport" content="width=device-width, initial-scale=1.0">
  <title>Eleventy Portfolio</title>
</head>
<body>
  <h1>Home Page</h1>
</body>
</html>
Next, still in src, create about.njk and contact.njk files. You can copy the contents of index.njk into them and replace the <h1> with <h1>About Page</h1> and <h1>Contact Page</h1> respectively.
Start your dev server. if it isn’t already running. Go to http://localhost:8080 to see the homepage, http://localhost:8080/about for the About page, and http://localhost:8080/contact for the Contact page.
In our portfolio site, each of these pages is going to have the same basic layout. So instead of writing the same code in each page template, we’re going to use Eleventy layouts.
How to Use Layouts in Eleventy
Layouts are templates that wrap around other templates, presenting the content in a consistent way.
Inside the src directory, create a _includes directory. This is going to contain all our layouts and partials.
Inside _includes, create a base.njk file. This will provide a standard layout for every page of our site.
Copy the following code into base.njk:
<!DOCTYPE html>
<html lang="en">
<head>
<meta charset="UTF-8">
<meta http-equiv="X-UA-Compatible" content="IE=edge">
<meta name="viewport" content="width=device-width, initial-scale=1.0">
<meta name="description" content="I'm a Frontend software developer who builds sites and apps that help people reach their personal and professional goals."/>
<title>{{ title }}</title>
</head>
<body>
<div class="content">
<header class="header container">
<h1 class="header__title">
<a href="/">Marie Jackson</a>
</h1>
<ul class="header__links">
<li>
<a class="header__link" href="/about">About</a>
</li>
<li>
<a class="header__link" href="/projects">Projects</a>
</li>
<li>
<a class="header__link" href="/contact">Contact</a>
</li>
</ul>
</header>
<main class="main container">
{{ content | safe }}
</main>
</div>
<footer class="footer">
<p>© Marie Jackson 2022</p>
</footer>
</body>
</html>
The content value will be the main content of whichever template we use with base.njk as its layout. safe is a filter that prevents this content from being escaped (having potentially unsafe characters replaced).
Now, change index.njk to be:
---
title: "Eleventy Portfolio"
layout: "base.njk"
---

<h1>{{ title }} Home Page</h1>
Notice how the template has frontmatter data at the top of the file. By default this is written in YAML, but you can use other languages too.
This frontmatter lets you set values for your templates. In this case, the layout value tells the template to use the base.njk layout and the title value provides a title that we are using in our template's <h1> tag.
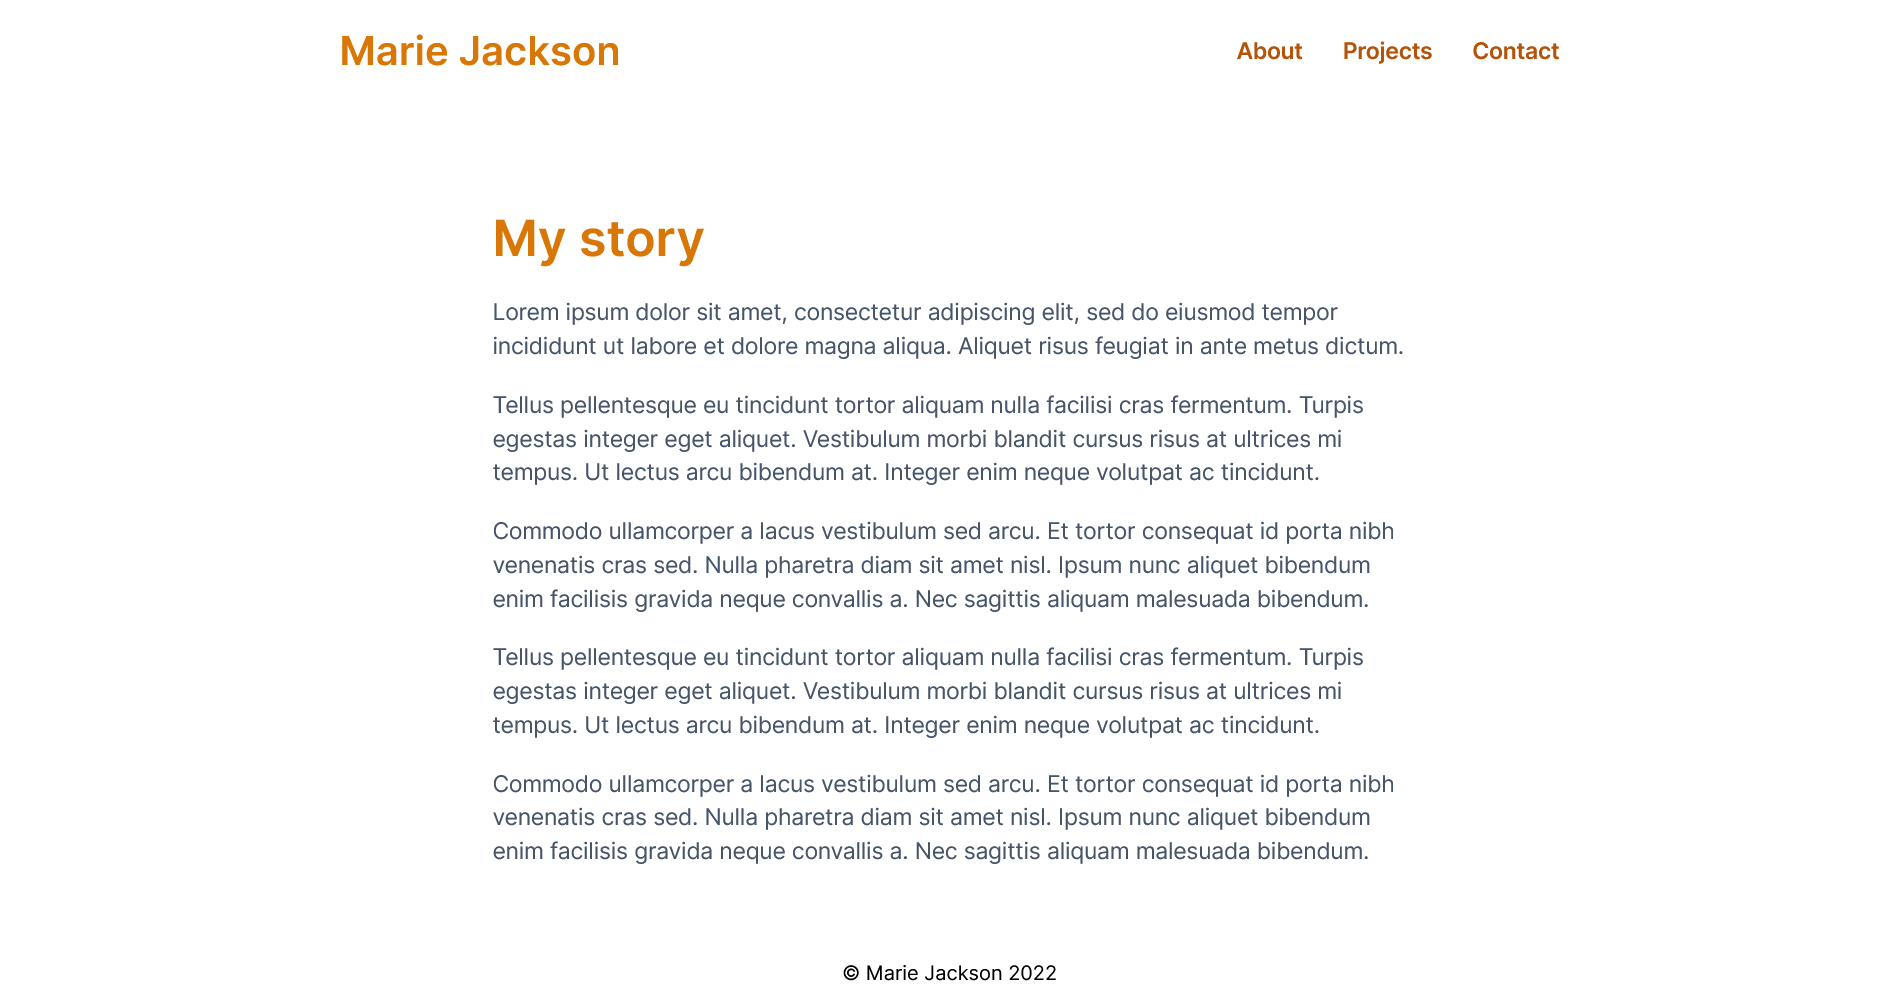
Next, delete everything from about.njk and paste in the following content:
---
title: "Eleventy Portfolio"
layout: "base.njk"
---

<section class="bio prose">
  <h2 class="heading--main">My story</h2>
  <p>Lorem ipsum dolor sit amet, consectetur adipiscing elit, sed do eiusmod tempor incididunt ut labore et dolore magna aliqua. Aliquet risus feugiat in ante metus dictum.</p>

  <p>Tellus pellentesque eu tincidunt tortor aliquam nulla facilisi cras fermentum. Turpis egestas integer eget aliquet. Vestibulum morbi blandit cursus risus at ultrices mi tempus. Ut lectus arcu bibendum at. Integer enim neque volutpat ac tincidunt.</p>

  <p>Commodo ullamcorper a lacus vestibulum sed arcu. Et tortor consequat id porta nibh venenatis cras sed. Nulla pharetra diam sit amet nisl. Ipsum nunc aliquet bibendum enim facilisis gravida neque convallis a. Nec sagittis aliquam malesuada bibendum.</p>
</section>
Now delete everything from contact.njk and paste in this content:
---
title: "Eleventy Portfolio"
layout: "base.njk"
---

<h2 class="heading--main text-center">Want to get in touch?</h2>
<p class="contact__sub-heading text-center">I'm always open to new opportunities and projects. </p>

<form class="form" name="contact" action="/success" method="POST" data-netlify="true">
  <div class="form__section">
    <label class="form__label" for="yourName">Name</label>
    <input class="form__input" name="name" type="text" id="yourName" required="true">
  </div>
  <div class="form__section">
    <label class="form__label" for="yourEmail">Email</label>
    <input class="form__input" name="email" type="email"  id="yourEmail" required="true">
  </div>
  <div class="form__section">
    <label class="form__label" for="message">Message</label>
    <textarea class="form__input" name="message" id="message" rows="4" required="true"></textarea>
  </div>
    <button class="form__button" type="submit">Let's talk</button>
</form>
We’re going to learn about how this contact form will work later in the tutorial.
Our portfolio is starting to take shape, even though things still look really bare. Let's get our CSS and images working next.
How to Configure the CSS and Images
While Eleventy can understand supported templating languages out of the box, it needs to be configured to process CSS and image files. Fortunately, this doesn’t require much configuration. While we’re at it, we’re also going to add a favicon to the site.
Inside the src directory, create three folders: css, images, and favicons.
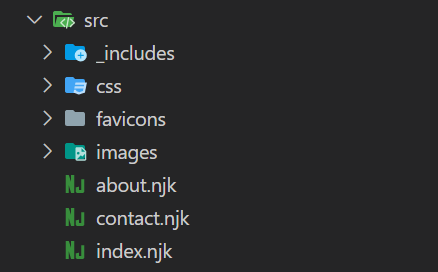
src directory structure
Inside the css directory, make a style.css file. Since this isn’t a CSS tutorial, I’m going to provide the CSS in the GitHub repo for the project. You can copy and paste it from there, but I’m not going to cover the CSS in any depth.
The images for this portfolio are also available in the images directory in the GitHub repo. Copy these images into the images directory of your project.
Finally, copy the files from the favicons directory in the GitHub repo into the favicons directory of your project.
In base.njk add these lines to the <head> element:
<link rel="icon" href="/favicon.ico" sizes="any">
<link rel="apple-touch-icon" href="/apple-touch-icon.png">
<link rel="preconnect" href="https://fonts.googleapis.com">
<link rel="preconnect" href="https://fonts.gstatic.com" crossorigin>
<link href="https://fonts.googleapis.com/css2?family=Inter:wght@400;500;600&display=swap" rel="stylesheet">
<link rel="stylesheet" href="{{'/css/style.css' | url | safe}}">
The first two links include the favicon, the next three will fetch the Inter font from Google fonts, and the last one will connect style.css to base.njk.
Now, if we reload our homepage we’ll see that… absolutely nothing has changed.
By default, Eleventy will only process template files. To tell it to include CSS files and images, we need to add a few lines of configuration.
Add these lines to the configuration function in .eleventy.js:
module.exports = function (eleventyConfig) {
  eleventyConfig.addPassthroughCopy("./src/css/");
  eleventyConfig.addWatchTarget("./src/css/");
  eleventyConfig.addPassthroughCopy("./src/images/");
  eleventyConfig.addPassthroughCopy({ "./src/favicons": "/" });

  return {
    dir: {
      input: "src",
      output: "public"
    }
  };
};
addPassthroughCopy tells Eleventy to pass the CSS, favicons, and image files through to the final build.
addWatchTarget tells the Eleventy dev server to watch the css directory and reload the site if the files in this directory change.
With the favicons, we’re also telling Eleventy to output these files to the root of the generated content so that the links in base.njk will work.
Restart the server and you’ll see that the CSS is finally being applied and the favicon is showing up. We'll include the images shortly.
Homepage with styles applied
About page with styles applied

Contact page with styles applied
The About page and Contact page are fairly self-contained. But the homepage for our site is going to have a couple of parts to it. It will consist of a header and footer, as well as a profile section, technologies section, and projects section. Each of these parts is going to use a partial.
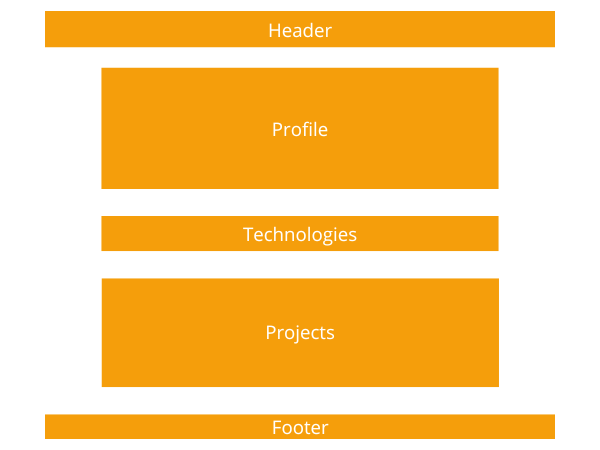
Layout of portfolio homepage
How to Use Partials in Eleventy
Partials are templates that make up part of another template. Partials help us to think about our site in terms of reusable components that we can include whenever we need them.
In the _includes directory, create a header.njk and footer.njk file.
Cut the header element out of base.njk and paste it into header.njk.
Cut the footer element out of base.njk and paste it into footer.njk.
Back in base.njk add {% include "header.njk" %} where the header element used to be and {% include "footer.njk" %} where the footer element used to be.
base.njk should now have this content inside its <body> tag:
<div class="content">
    {% include "header.njk" %}
    <main class="main container">
      {{ content | safe }}
    </main>
</div>
{% include "footer.njk" %}
The site won’t look any different but our base layout is already becoming more modular.
Next, still in the _includes directory, create a profile.njk file with the following content:
<section class="profile">
  <div class="profile__image-wrapper">
    <img class="profile__image" src="/images/profile.jpg" alt="Marie Jackson, Software Developer">
  </div>
  <div class="profile__card">
    <p class="profile__text">Hi! I'm <span class="profile__text--highlight">Marie</span>, a mathematician turned software developer from Hampton, Virginia.</p>
    <p class="profile__text">As a <span class="profile__text--highlight">Frontend Developer</span>, I love building sites and apps that help people reach their personal and professional goals.</p>
    <p class="profile__text">I focus on speed, security and scalability, using React.js and Firebase to create rich, dynamic experiences.</p>
    <p class="profile__text">I'm always open to new opportunities and projects. So don't hesitate to <a class="profile__link" href="/contact">get in touch</a>.<p>
  </div>
</section>
Next, create a technologies.njk file with this content:
<section class="technologies">
  <h2 class="technologies__heading">Technologies I love to work with</h2>
  <ul class="technologies__list">
    <li class="technologies__item">
      <div class="technologies__logo">
      <img src="/images/javascript.svg" alt="JavaScript logo">
      </div>
      <h3 class="technologies__title">JavaScript</h3>
    </li>
    <li class="technologies__item">
      <div class="technologies__logo">
      <img src="/images/react.svg" alt="React.js logo">
      </div>
      <h3 class="technologies__title">React.js</h3>
    </li>
    <li class="technologies__item">
      <div class="technologies__logo">
        <img src="/images/tailwindcss.svg" alt="Tailwind CSS logo">
      </div>
      <h3 class="technologies__title">Tailwind CSS</h3>
    </li>
    <li class="technologies__item">
      <div class="technologies__logo">
        <img src="/images/firebase.svg" alt="Firebase logo">
      </div>
      <h3 class="technologies__title">Firebase</h3>
    </li>
  </ul>
</section>
In index.njk replace the <h1> tag with:
{% include "profile.njk" %}
{% include "technologies.njk" %}
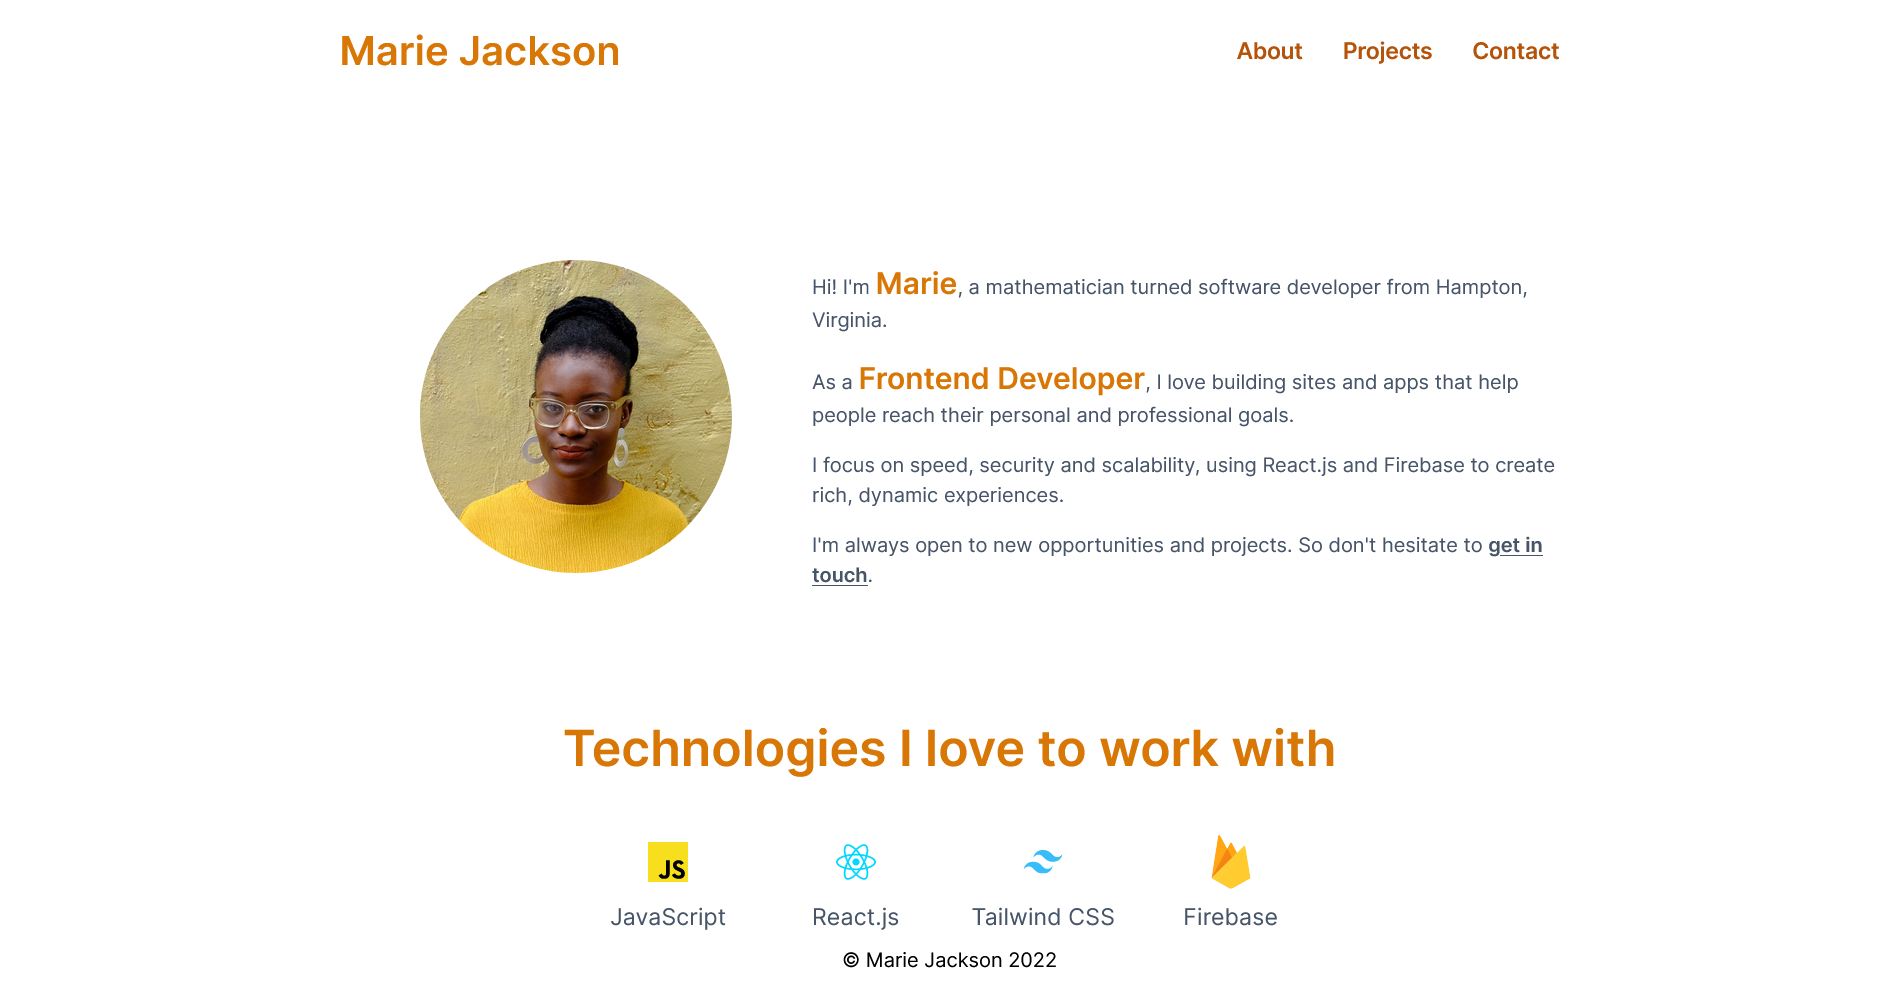
Portfolio homepage with profile and technologies sections
Our homepage is starting to take shape but the site still needs the most important part of any portfolio: projects.
To keep the project data organized, we’re going to use collections.
How to Use Collections in Eleventy
Collections let you group related content together. In our portfolio we’re going to create a projects collection using Markdown files to store information about each individual project.
Inside the src directory, create a projects directory. We’re going to need a Markdown file for each project. As placeholders, we’ll use three projects that I’ve been meaning to build.
Josh W Comeau has some great advice on building an effective developer portfolio and he strongly recommends describing your personal projects with detailed case studies. So for each of our projects we’re going to have a case study laying out:
What problem we solved
Why we chose these specific technologies
What challenges we faced
What lessons we learned
Copy the following three sample projects into the projects directory:
catch-up.md
---
title: "Catch Up"
summary: "Sometimes it's hard to keep in touch with friends and family. I made this app to remind me to schedule a call if we haven't talked in a while."
image: /images/catch-up.jpg
imageAlt: "Screenshots of catch up app"
tech:
- "Next.js"
- "Firebase"
- "Tailwind CSS"
siteUrl: "#"
repoUrl: "#"
---
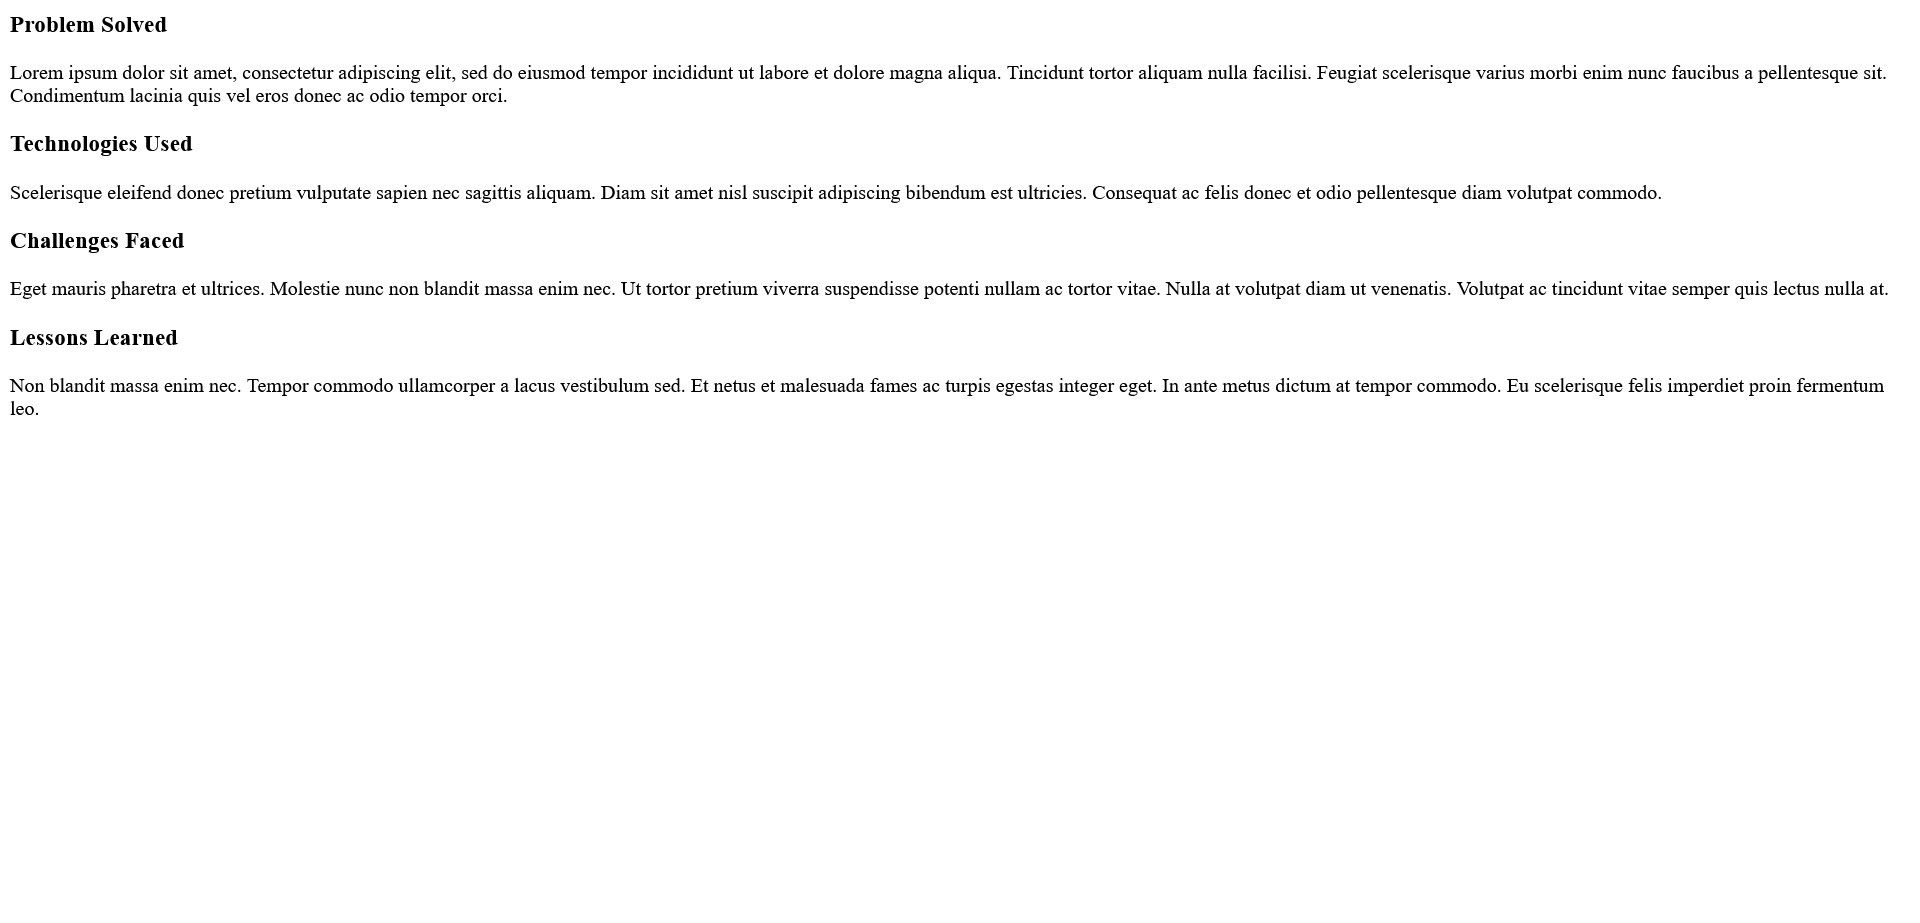
### Problem Solved
Lorem ipsum dolor sit amet, consectetur adipiscing elit, sed do eiusmod tempor incididunt ut labore et dolore magna aliqua. Tincidunt tortor aliquam nulla facilisi. Feugiat scelerisque varius morbi enim nunc faucibus a pellentesque sit. Condimentum lacinia quis vel eros donec ac odio tempor orci.
### Technologies Used
Scelerisque eleifend donec pretium vulputate sapien nec sagittis aliquam. Diam sit amet nisl suscipit adipiscing bibendum est ultricies. Consequat ac felis donec et odio pellentesque diam volutpat commodo.
### Challenges Faced
Eget mauris pharetra et ultrices. Molestie nunc non blandit massa enim nec. Ut tortor pretium viverra suspendisse potenti nullam ac tortor vitae. Nulla at volutpat diam ut venenatis. Volutpat ac tincidunt vitae semper quis lectus nulla at.
### Lessons Learned
Non blandit massa enim nec. Tempor commodo ullamcorper a lacus vestibulum sed. Et netus et malesuada fames ac turpis egestas integer eget. In ante metus dictum at tempor commodo. Eu scelerisque felis imperdiet proin fermentum leo.
sourdough-sensei.md
---
title: "Sourdough Sensei"
summary: "Like a lot of people, I got really into sourdough in 2020. I made this app to help me bake delicious bread by putting all my recipes and schedules in one place."
image: /images/sourdough-sensei.jpg
imageAlt: "Screenshots of sourdough bread app"
tech:
  - "React.js"
  - "Firebase"
  - "Tailwind CSS"
siteUrl: "#"
repoUrl: "#"
---

### Problem Solved

Lorem ipsum dolor sit amet, consectetur adipiscing elit, sed do eiusmod tempor incididunt ut labore et dolore magna aliqua. Tincidunt tortor aliquam nulla facilisi. Feugiat scelerisque varius morbi enim nunc faucibus a pellentesque sit. Condimentum lacinia quis vel eros donec ac odio tempor orci.

### Technologies Used

Scelerisque eleifend donec pretium vulputate sapien nec sagittis aliquam. Diam sit amet nisl suscipit adipiscing bibendum est ultricies. Consequat ac felis donec et odio pellentesque diam volutpat commodo.

### Challenges Faced

Eget mauris pharetra et ultrices. Molestie nunc non blandit massa enim nec. Ut tortor pretium viverra suspendisse potenti nullam ac tortor vitae. Nulla at volutpat diam ut venenatis. Volutpat ac tincidunt vitae semper quis lectus nulla at.

### Lessons Learned

Non blandit massa enim nec. Tempor commodo ullamcorper a lacus vestibulum sed. Et netus et malesuada fames ac turpis egestas integer eget. In ante metus dictum at tempor commodo. Eu scelerisque felis imperdiet proin fermentum leo.
spellbook.md
---
title: "Spellbook"
summary: "I'm a huge Dungeons and Dragons fan, but keeping my spells straight has always been a challenge. I built this app to put all the information I need at my fingertips."
image: /images/spellbook.jpg
imageAlt: "Screenshots of DnD project"
tech:
  - "Next.js"
  - "Firebase"
  - "Tailwind CSS"
siteUrl: "#"
repoUrl: "#"
---

### Problem Solved

Yes, I could have just used DnD Beyond. But where's the fun in that? Lorem ipsum dolor sit amet, consectetur adipiscing elit, sed do eiusmod tempor incididunt ut labore et dolore magna aliqua. Tincidunt tortor aliquam nulla facilisi. Feugiat scelerisque varius morbi enim nunc faucibus a pellentesque sit. Condimentum lacinia quis vel eros donec ac odio tempor orci.

### Technologies Used

Scelerisque eleifend donec pretium vulputate sapien nec sagittis aliquam. Diam sit amet nisl suscipit adipiscing bibendum est ultricies. Consequat ac felis donec et odio pellentesque diam volutpat commodo.

### Challenges Faced

Eget mauris pharetra et ultrices. Molestie nunc non blandit massa enim nec. Ut tortor pretium viverra suspendisse potenti nullam ac tortor vitae. Nulla at volutpat diam ut venenatis. Volutpat ac tincidunt vitae semper quis lectus nulla at.

### Lessons Learned

Non blandit massa enim nec. Tempor commodo ullamcorper a lacus vestibulum sed. Et netus et malesuada fames ac turpis egestas integer eget. In ante metus dictum at tempor commodo. Eu scelerisque felis imperdiet proin fermentum leo.
Just like with templates, the frontmatter at the top of these files makes values available that you can inject into your templates.
Since these Markdown files are ultimately inside the src directory, Eleventy will treat them as templates and create a HTML page from each file. Their URL will be in the format /subdirectory_name/filename, for example /projects/sourdough-sensei.
But Eleventy won't know what layout to use for these pages since they don't yet have a layout value in their frontmatter.
sourdough-sensei page without layout or frontmatter data
Right now these files aren’t a collection. Collections are defined by sharing a tags value, such as “tags”: “projects”.
Every file with the projects tag will be included in the projects collection.
Since we only have three projects, we could include a tags value in the frontmatter of our three Markdown files.
But if we had a site with a lot of content – for example dozens of blog posts, recorded talks, and tutorials that all shared dozens of tags between them – this could become difficult to manage. This is where directory data files are useful.
How to Use Directory Data Files
If you have certain values that are shared by every file in a folder, you can put these values in a directory data file.
Inside the projects directory, create a projects.json file. A directory data file should have the same name as the collection it’s attached to.
Any frontmatter fields that are shared by all the projects files should go in the projects.json directory data file:
{
  "layout": "project.njk",
  "tags": "projects"
}
The layout value means that every project will use the same layout (we’re going to create this project.njk file in a moment). The tags value is what turns them into the projects collection that we can use in our templates.
How to Use Collections in Templates
We’re now going to use the projects collection to:
Add a projects section to our homepage
Create a Projects page
Create a case study page for each project
To include data from a collection on a page of your site, you need to reference the collections object in a template.
We can use Nunjucks to loop over the collection and output its contents. To access a frontmatter value from a project in the projects collection, we use project.data.
For example:
{% for project in collections.projects %}
{{ project.data.title }}
{% endfor %}
In the _includes directory, create project.njk, project-card.njk and project-grid.njk files.
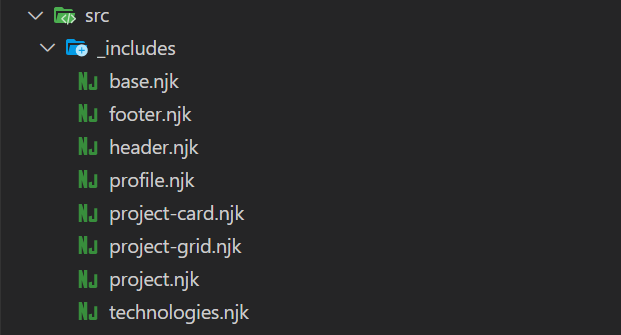
_includes directory structure
We’ll use project.njk to create a page for each of our projects.
Since these pages are generated from templates, we can access their frontmatter values directly, such as title, image, imageAlt, and content for the main content of the Markdown file.
---
layout: "base.njk"
---

<div class="project">
  <h2 class="project__heading">{{ title }}</h2>
  <div class="project__image-wrapper">
      <img class="project__image" src="{{ image }}" alt="{{ imageAlt }}">
  </div>
  <div class="project__content prose">
    {{ content | safe }}
  </div>
</div>
project-grid.njk and project-card.njk will form the list of projects on our portfolio homepage and Projects page.
project-grid.njk will loop over the projects collection and insert a project-card partial for each project in the collection.
Add the following content to project-grid.njk:
<section class="projects">
  <h2 class="project__heading">Recent projects</h2>
  <div class="project-grid">
    {% for project in collections.projects %}
      {% include "project-card.njk" %}
    {% endfor %}
  </div>
</section>
Add the following content to project-card.njk:
<article class="project-card">
  <div class="project-card__image-wrapper">
    <img class="project__image" src="{{ project.data.image }}" alt="{{ project.data.imageAlt }}">
  </div>
  <div class="project-card__body">
    <div class="project-card__tags">
      {% for tag in project.data.tech %}
        <span class="project-card__tag">{{ tag }}</span>
      {% endfor %}
    </div>
    <h3 class="project-card__title">
      <a href="{{ project.url }}">{{ project.data.title }}</a>
    </h3>
    <p class="project-card__summary">{{ project.data.summary }}</p>
    <a class="project-card__link" href="{{ project.url }}">Read project case study
      <svg xmlns="http://www.w3.org/2000/svg" class="project-card__link-icon" viewBox="0 0 20 20" fill="currentColor">
        <path fill-rule="evenodd" d="M7.293 14.707a1 1 0 010-1.414L10.586 10 7.293 6.707a1 1 0 011.414-1.414l4 4a1 1 0 010 1.414l-4 4a1 1 0 01-1.414 0z" clip-rule="evenodd" />
      </svg>
    </a>
  </div>
</article>
Since project-card.njk is accessing frontmatter values from a member of a collection, we need to use project.data to access these values in the template. Eleventy also generates a project.url value that we can use to link to the project's generated page.
In index.njk, add {% include "project-grid.njk" %} underneath the profile and technologies partials.
---
title: "Eleventy Portfolio"
layout: "base.njk"
---

{% include "profile.njk" %}
{% include "technologies.njk" %}
{% include "project-grid.njk" %}
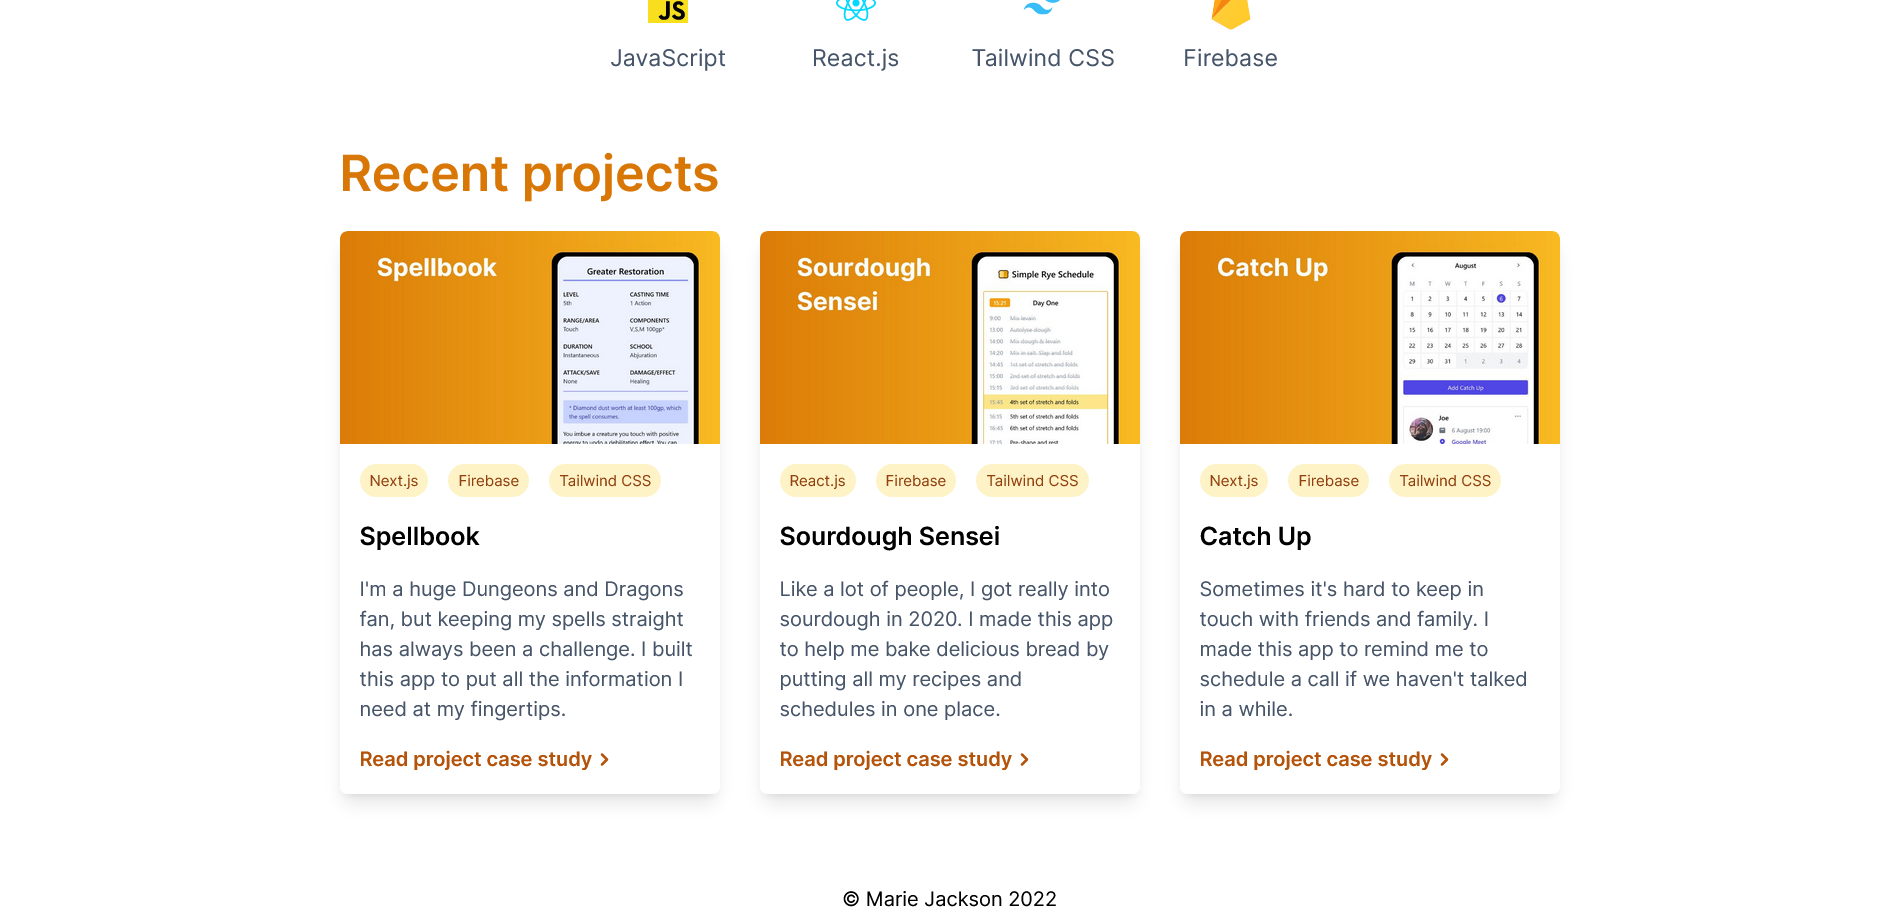
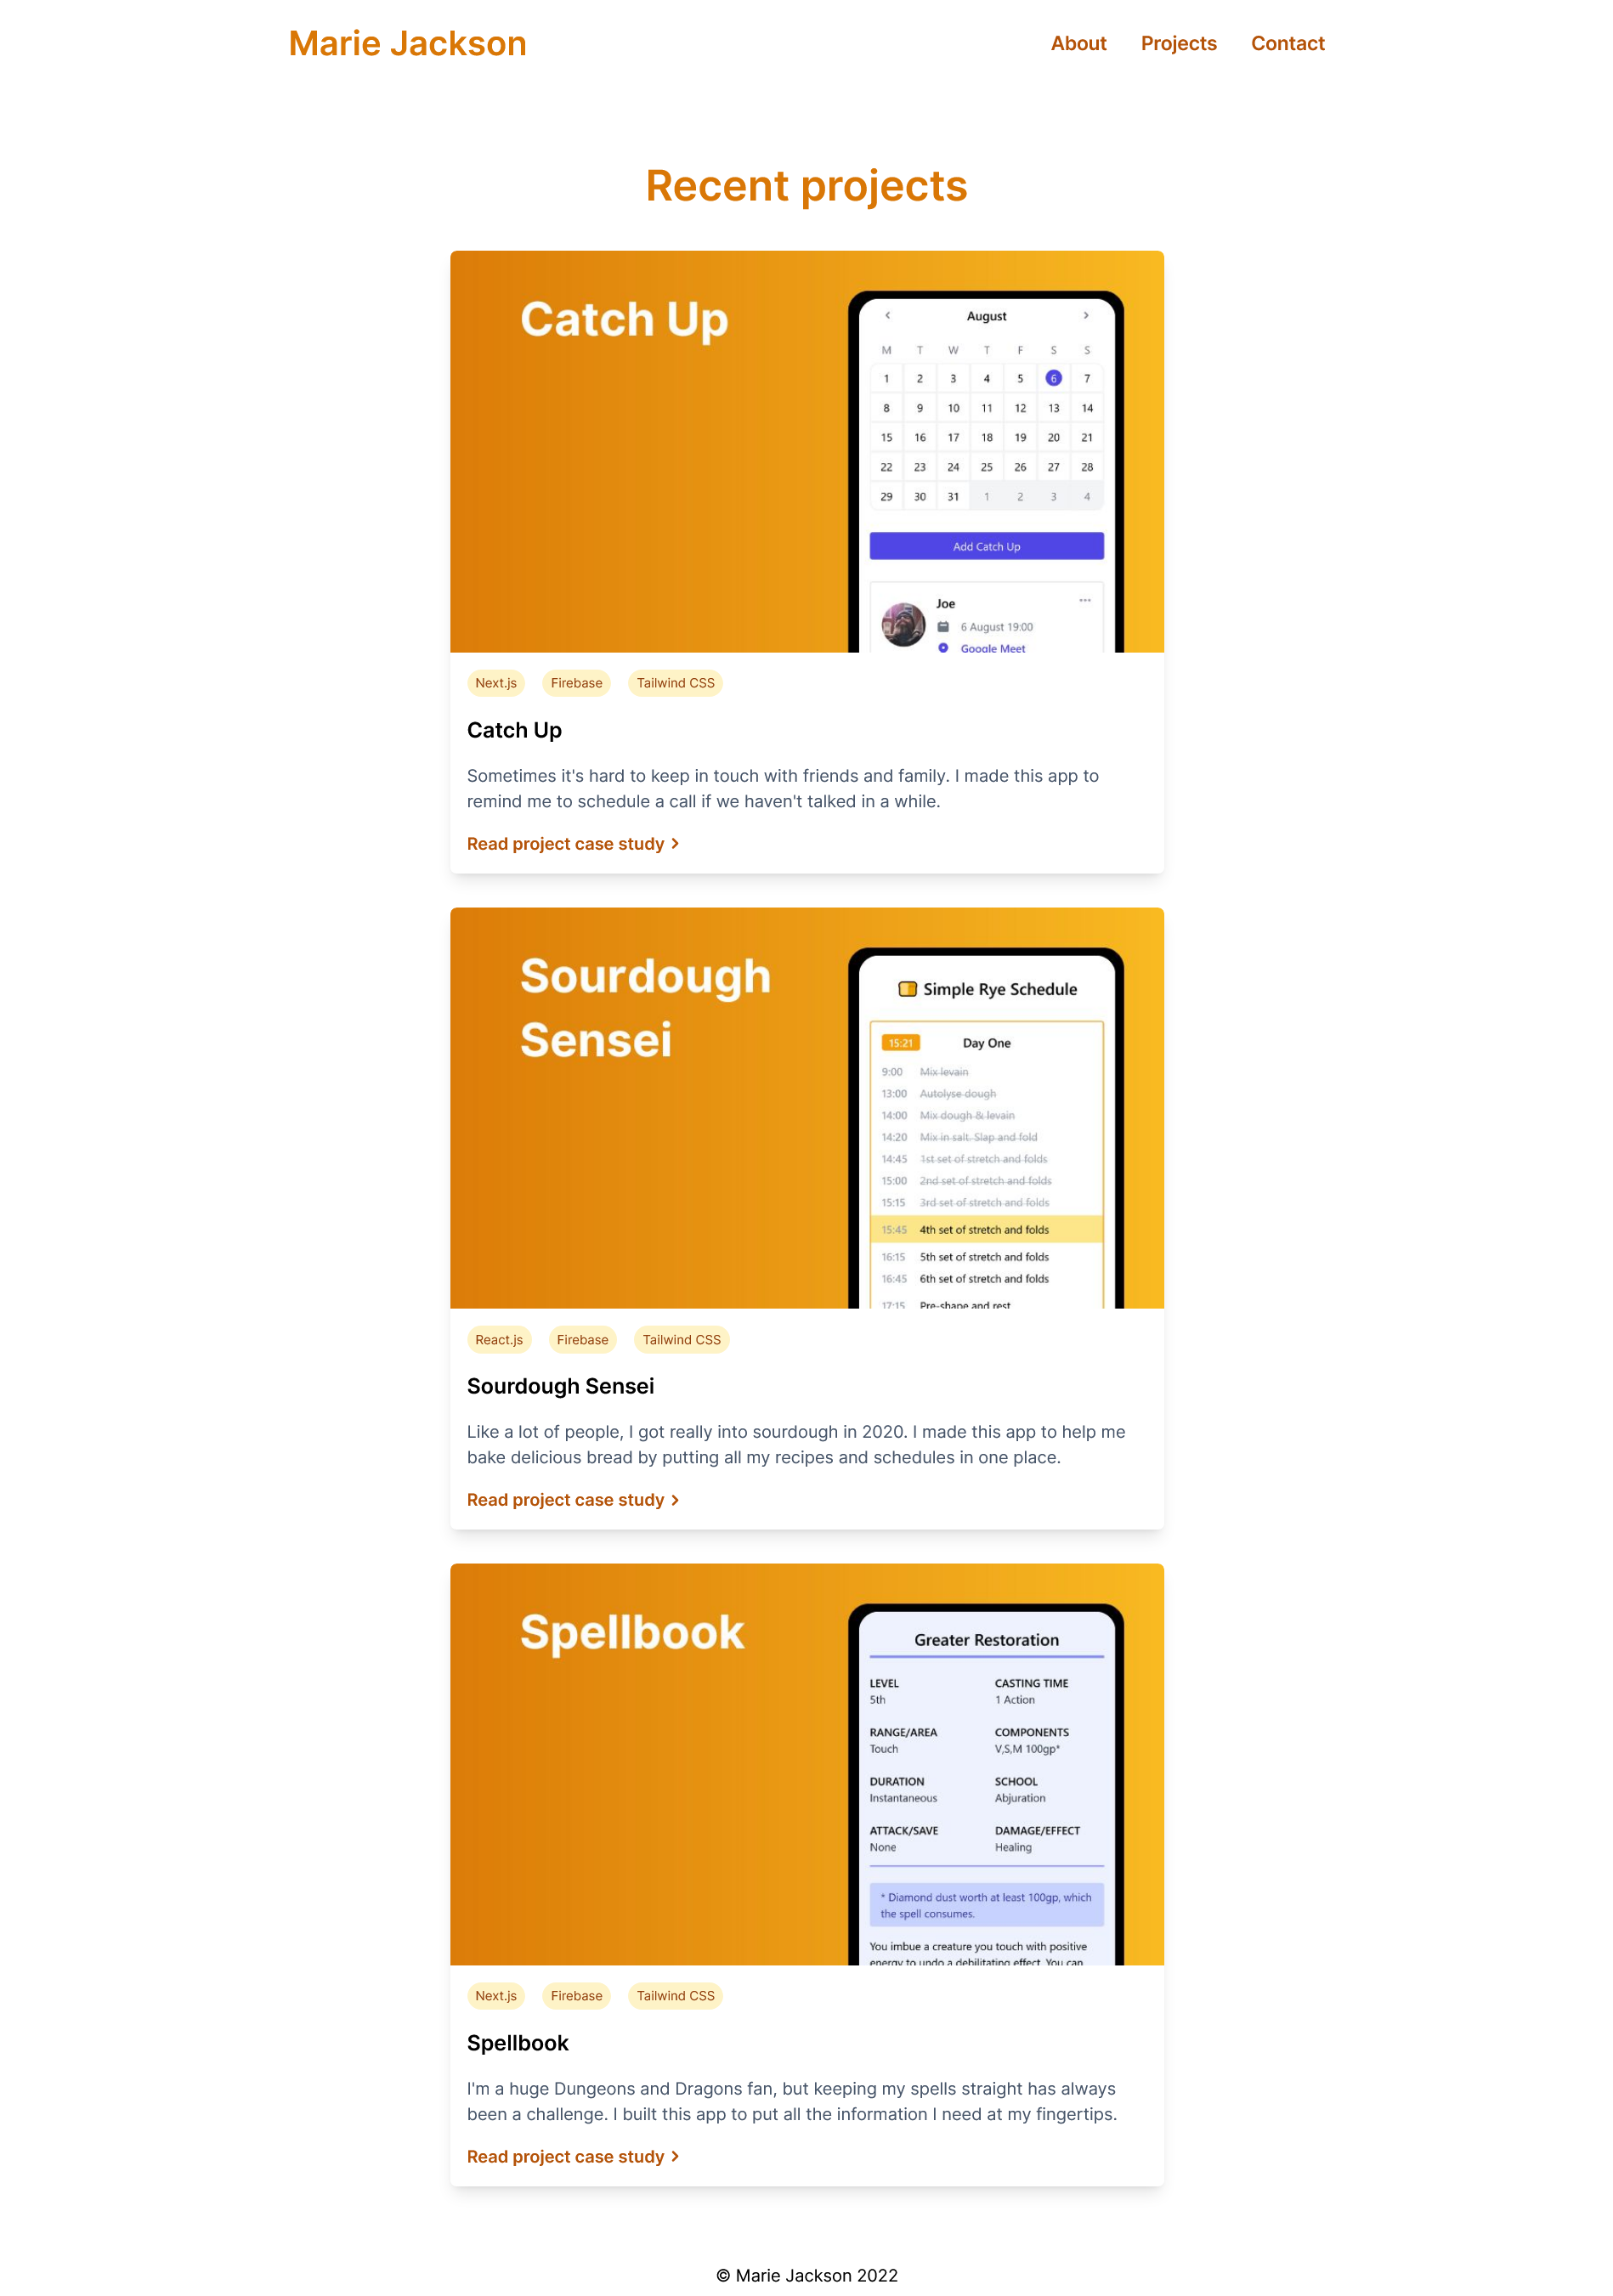
Grid of project cards on homepage
Next we're going to create a Projects page. In the src directory, create a projects.njk file with the following contents:
---
title: "Eleventy Portfolio"
layout: "base.njk"
---

<h2 class="projects__heading">Recent projects</h2>
<div class="project-list">
  {% for project in collections.projects %}
    {% include "project-card.njk" %}
  {% endfor %}
</div>
Projects page
The projects are now being displayed on our homepage as well as the projects page, and each project now has its own page with its case study.
We could stop here, but there are a few more Eleventy features that will make our portfolio site even better, namely shortcodes and plugins.
How to Use Shortcodes
A shortcode is a way to inject reusable content (often a JavaScript string template literal) into your templates.
We’re going to create a simple year shortcode that outputs the current year so that the footer in our portfolio site is always up to date.
Add the following line to the configuration function in .eleventy.js.
eleventyConfig.addShortcode("year", () => `${new Date().getFullYear()}`);
When you use the shortcode in a template the function will be run and the year value will be injected into the template.
In footer.njk use {% year %} to access the year shortcode.
<footer class="footer">
<p>© Marie Jackson {% year %}</p>
</footer>
You might need to restart your development server for it to recognize the shortcode.
Now whenever you trigger a build of your site in the future, your footer will always show the correct year.
Shortcodes can do a lot more than this. Next, we’re going to use the Eleventy Image plugin, which uses shortcodes, to optimize our site’s images and improve our page load speed.
How to Use the Eleventy Image Plugin
Eleventy has a number of official plugins, from ones to check your writing for inclusive language to others that let you leverage Serverless functions.
The Image plugin is particularly useful since images are often the largest resource your site loads. It optimizes your images so your site uses the appropriate size and format for the user's browser, saving bandwidth for your user and making your site load faster.
First we need to install the Image plugin from npm. In the root of your project, run:
npm install @11ty/eleventy-img
At the top of .eleventy.js, we’re going to import the Image plugin and configure the shortcode that the plugin will use to optimize our images.
const Image = require("@11ty/eleventy-img");

async function imageShortcode(src, alt, sizes) {
  let metadata = await Image(`./src${src}`, {
    widths: [300, 800, null],
    formats: ["avif", "jpeg"],
    urlPath: "/images/",
    outputDir: "./public/images/"
  });

  let imageAttributes = {
    alt,
    sizes,
    loading: "lazy",
    decoding: "async"
  };

  return Image.generateHTML(metadata, imageAttributes);
}
The image shortcode takes in arguments for src, alt and sizes. These will be the URL for the image, the text for the image’s alt tag, and the sizes that are used to display different sized images at different screen sizes.
The widths property specifies what size images the plugin will generate. In this case, 300px, 800px, and the image's original size.
The formats property specifies which image formats to generate. Here we're using avif (which produces high quality images at low file sizes) with jpeg as a fallback for browsers that don't support avif.
urlPath and outputDir tell the plugin where to get the images from and where to output the optimized images to.
The plugin adds loading and decoding attributes to the generated HTML to lazy-load the images and decode them asynchronously, both of which will help with page load times.
Next, we’re going to include the shortcode in our configuration function. We'll call it EleventyImage for the sake of clarity.
eleventyConfig.addNunjucksAsyncShortcode("EleventyImage", imageShortcode);
Notice that we’re using addNunjucksAsyncShortcode rather than addShortcode. This is because the image generation process is asynchronous. It will take some amount of time to generate different image sizes and formats and we want our shortcode to wait until these have all been generated before it injects the finished HTML into our templates.
Since our shortcode is asynchronous, we’re going to run into an issue with using this shortcode inside a Nunjucks for loop. We need to use asyncEach, the asynchronous version of Nunjuck’s for.
In projects.njk and project-grid.njk, replace this:
{% for project in collections.projects %}
{% include "project-card.njk" %}
{% endfor %}
with this:
{% asyncEach project in collections.projects %}
{% include "project-card.njk" %}
{% endeach %}
Now, in project.njk we can replace this:
<img class="project__image" src="{{ image }}" alt="{{ imageAlt }}">
with this:
{% EleventyImage image, imageAlt, "(min-width: 30em) 50vw, 100vw" %}
The image, imageAlt and "(min-width: 30em) 50vw, 100vw" values are the src, alt and sizes parameters for the Image shortcode.
Next, in project-card.njk, we can replace this:
<img class="project-card__image" src="{{ project.data.image }}" alt="{{ project.data.imageAlt }}">
with this:
{% EleventyImage project.data.image, project.data.imageAlt, "(min-width: 30em) 50vw, 100vw" %}
Finally, in profile.njk we can replace this:
<img class="profile__image" src="/images/profile.jpg" alt="Marie Jackson, Software Developer">
with this:
{% EleventyImage "/images/profile.jpg", "Marie Jackson, Software Developer", "(min-width: 16em) 50vw, 100vw" %}
When our site builds, the Eleventy Image plugin will do a couple of things:
there will be multiple formats and sizes for every image in
public/imagesour generated HTML will now use the
<picture>elementthe
<img>tags will haveloading="lazy"anddecode="async"attributes
Now our site will serve the optimal image format and size depending on the browser and screen size of the site visitor. And images will be lazy loaded as they are about to enter the viewport.
If we use the network tab in a browser's developer tools, we can test the difference. On an iPhone 12, the unoptimized image on one of our project pages would be 30.37KB, while the image optimized by the Image plugin is just 6.01KB, an 80% saving!

Unoptimized image on mobile - 30.37KB
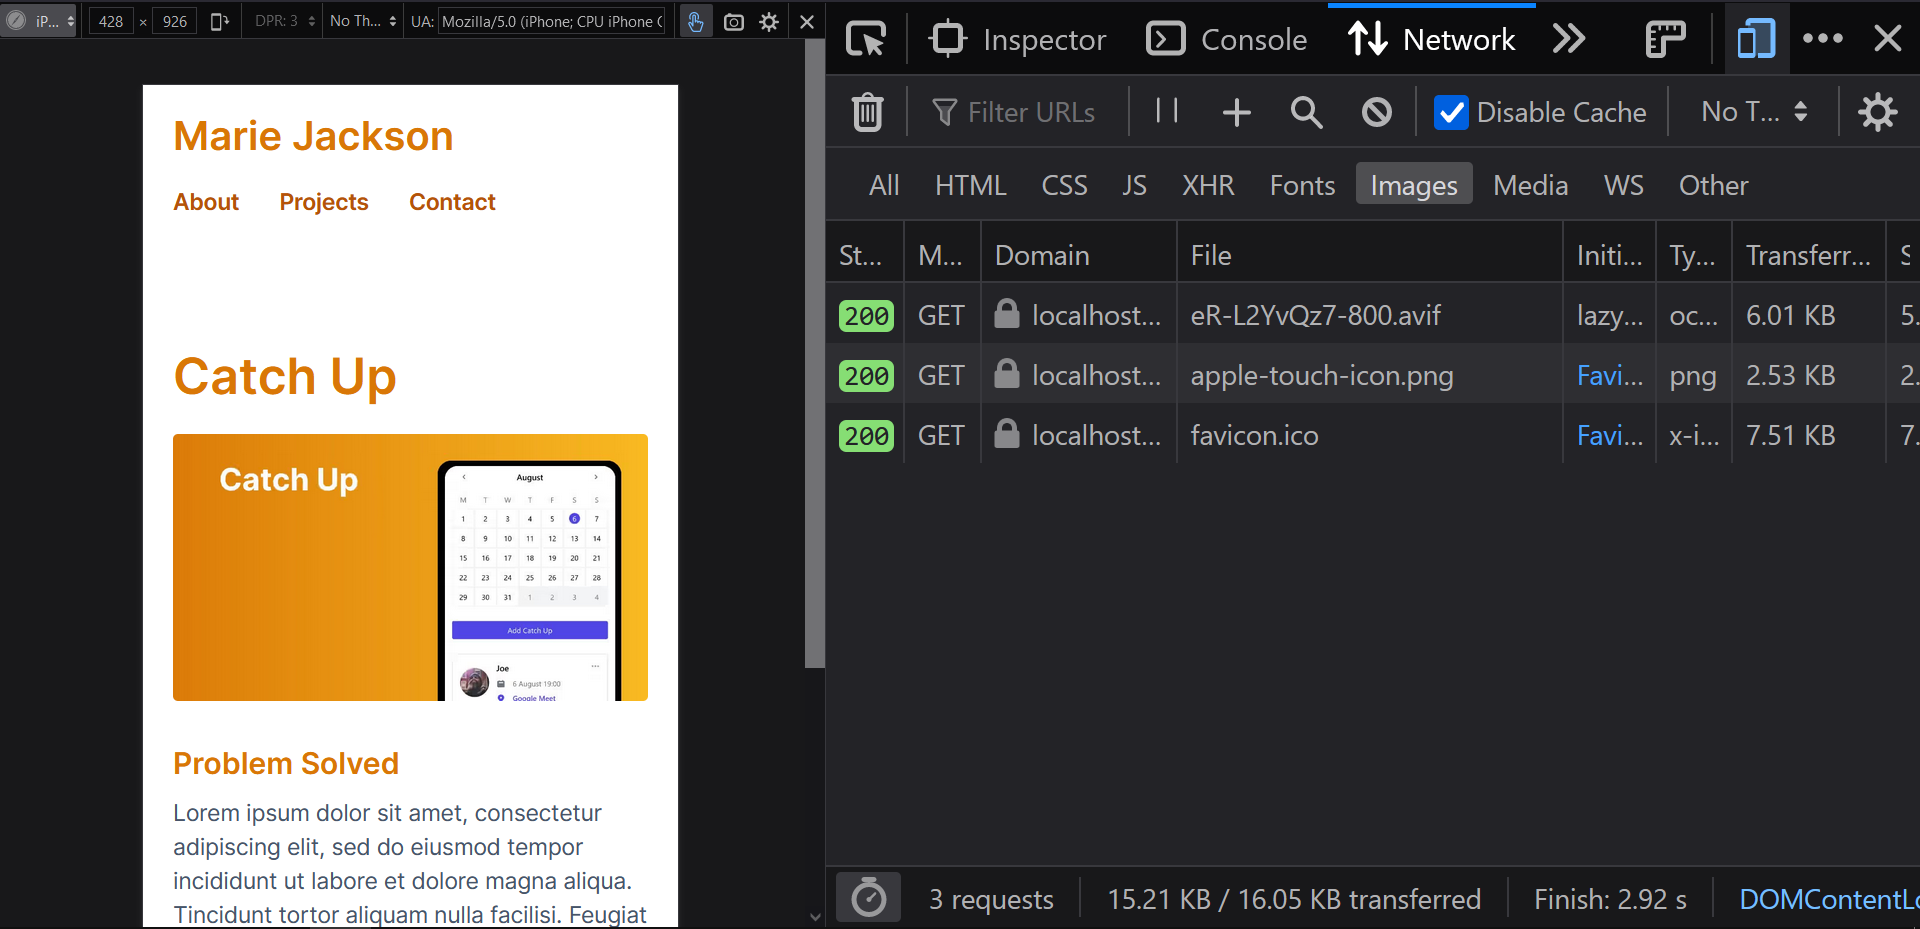
Optimized image on mobile 6.01KB
We’re almost ready to deploy our site. But before we do that, we need to complete our contact form.
How to a Build Contact Form with Netlify Forms
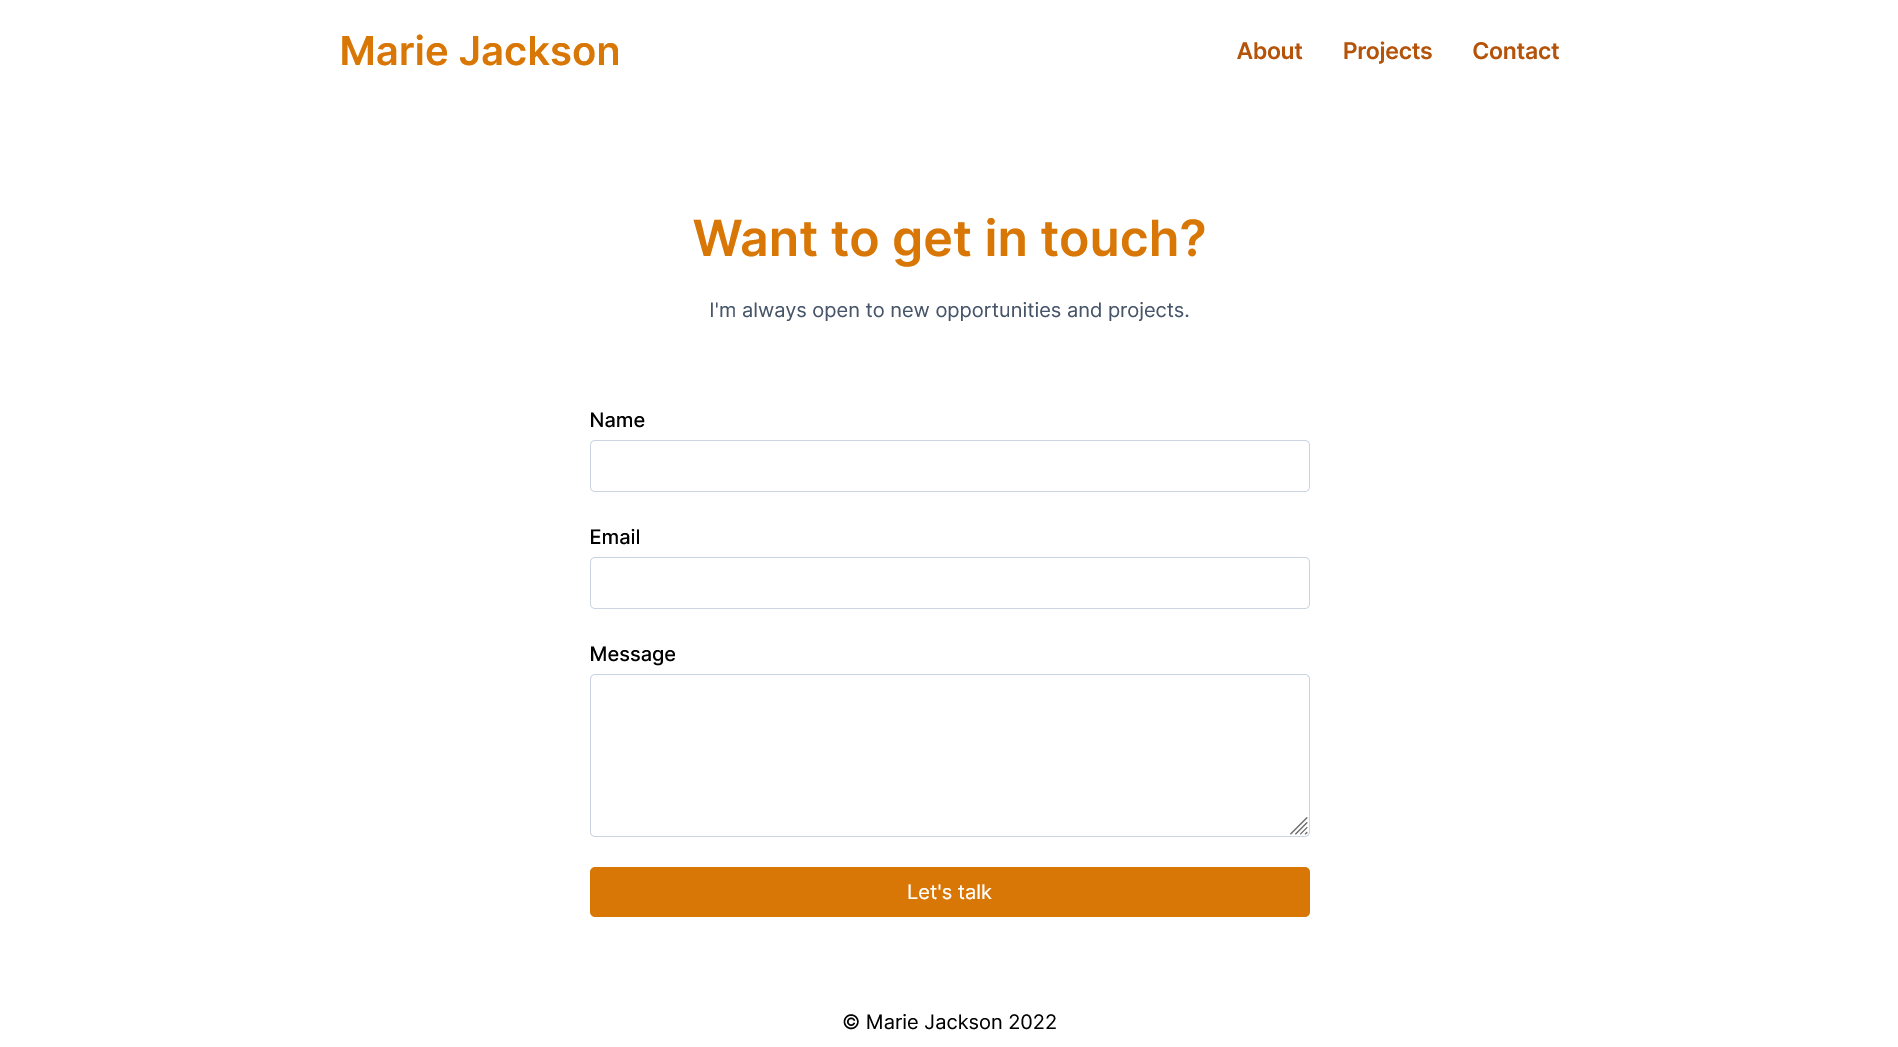
Contact page
Eleventy is a static site generator. But Eleventy works really well with the Jamstack architecture, where you statically generate as much of a site as possible in advance and use APIs and third-party services to add dynamic content and functionality.
In the past, if you wanted to have a contact form on your website, you would need some sort of server, such as a PHP app, to process the form submission.
We’re going to use Netlify Forms to add a contact form to our portfolio without needing to manage a server to handle the submitted forms.
To make this work, we need to make sure our form has two attributes. The most important one is data-netlify="true". The other is action="/success".
<form class="form" name="contact" action="/success" method="POST" data-netlify="true">
  <div class="form__section">
    <label class="form__label" for="yourName">Name</label>
    <input class="form__input" name="name" type="text" id="yourName" required="true">
  </div>
  <div class="form__section">
    <label class="form__label" for="yourEmail">Email</label>
    <input class="form__input" name="email" type="email"  id="yourEmail" required="true">
  </div>
  <div class="form__section">
    <label class="form__label" for="message">Message</label>
    <textarea class="form__input" name="message" id="message" rows="4" required="true"></textarea>
  </div>
    <button class="form__button" type="submit">Let's talk</button>
</form>
By having a data-netlify="true" attribute on our contact form, when the site is deployed to Netlify, Netlify will recognize this and take over handling the form submission.
By default, when someone completes a Netlify form, they will get a generically styled success message with a link back to the form page. But we can direct them to a custom page by including an action attribute on our form.
The action="/success" attribute means that when the form submits, the user will be redirected to a "success" page on your site (you can give this page a different name if you like). So we had better build that page now.
In the src directory, create a success.njk file with the following content:
---
title: "Eleventy Portfolio"
layout: "base.njk"
---

<div class="container text-center">
  <h2 class="heading--main">Thanks for getting in touch!</h2>
  <p>I'll respond as soon as I can.<p>
</div>
Once we deploy the site to Netlify, any submitted forms will show up in the Netlify interface. So let’s finally deploy our portfolio site.
How to Deploy to Netlify
You can deploy an Eleventy site on any static hosting platform: Netlify, Vercel, GitHub Pages, even an AWS S3 bucket.
I'll show you how to deploy to Netlify since we're using Netlify Forms for our contact form. On another hosting platform, you could use a Serverless function to handle submitting the form and sending an email.
If you don't already have a Netlify account, go to netlify.com and create a free one.
Netlify will give you the option to:
Import an existing project
Start from a template
Deploy manually
We already have our portfolio site, so we don't need a template.
I'll walk you through the two other options.
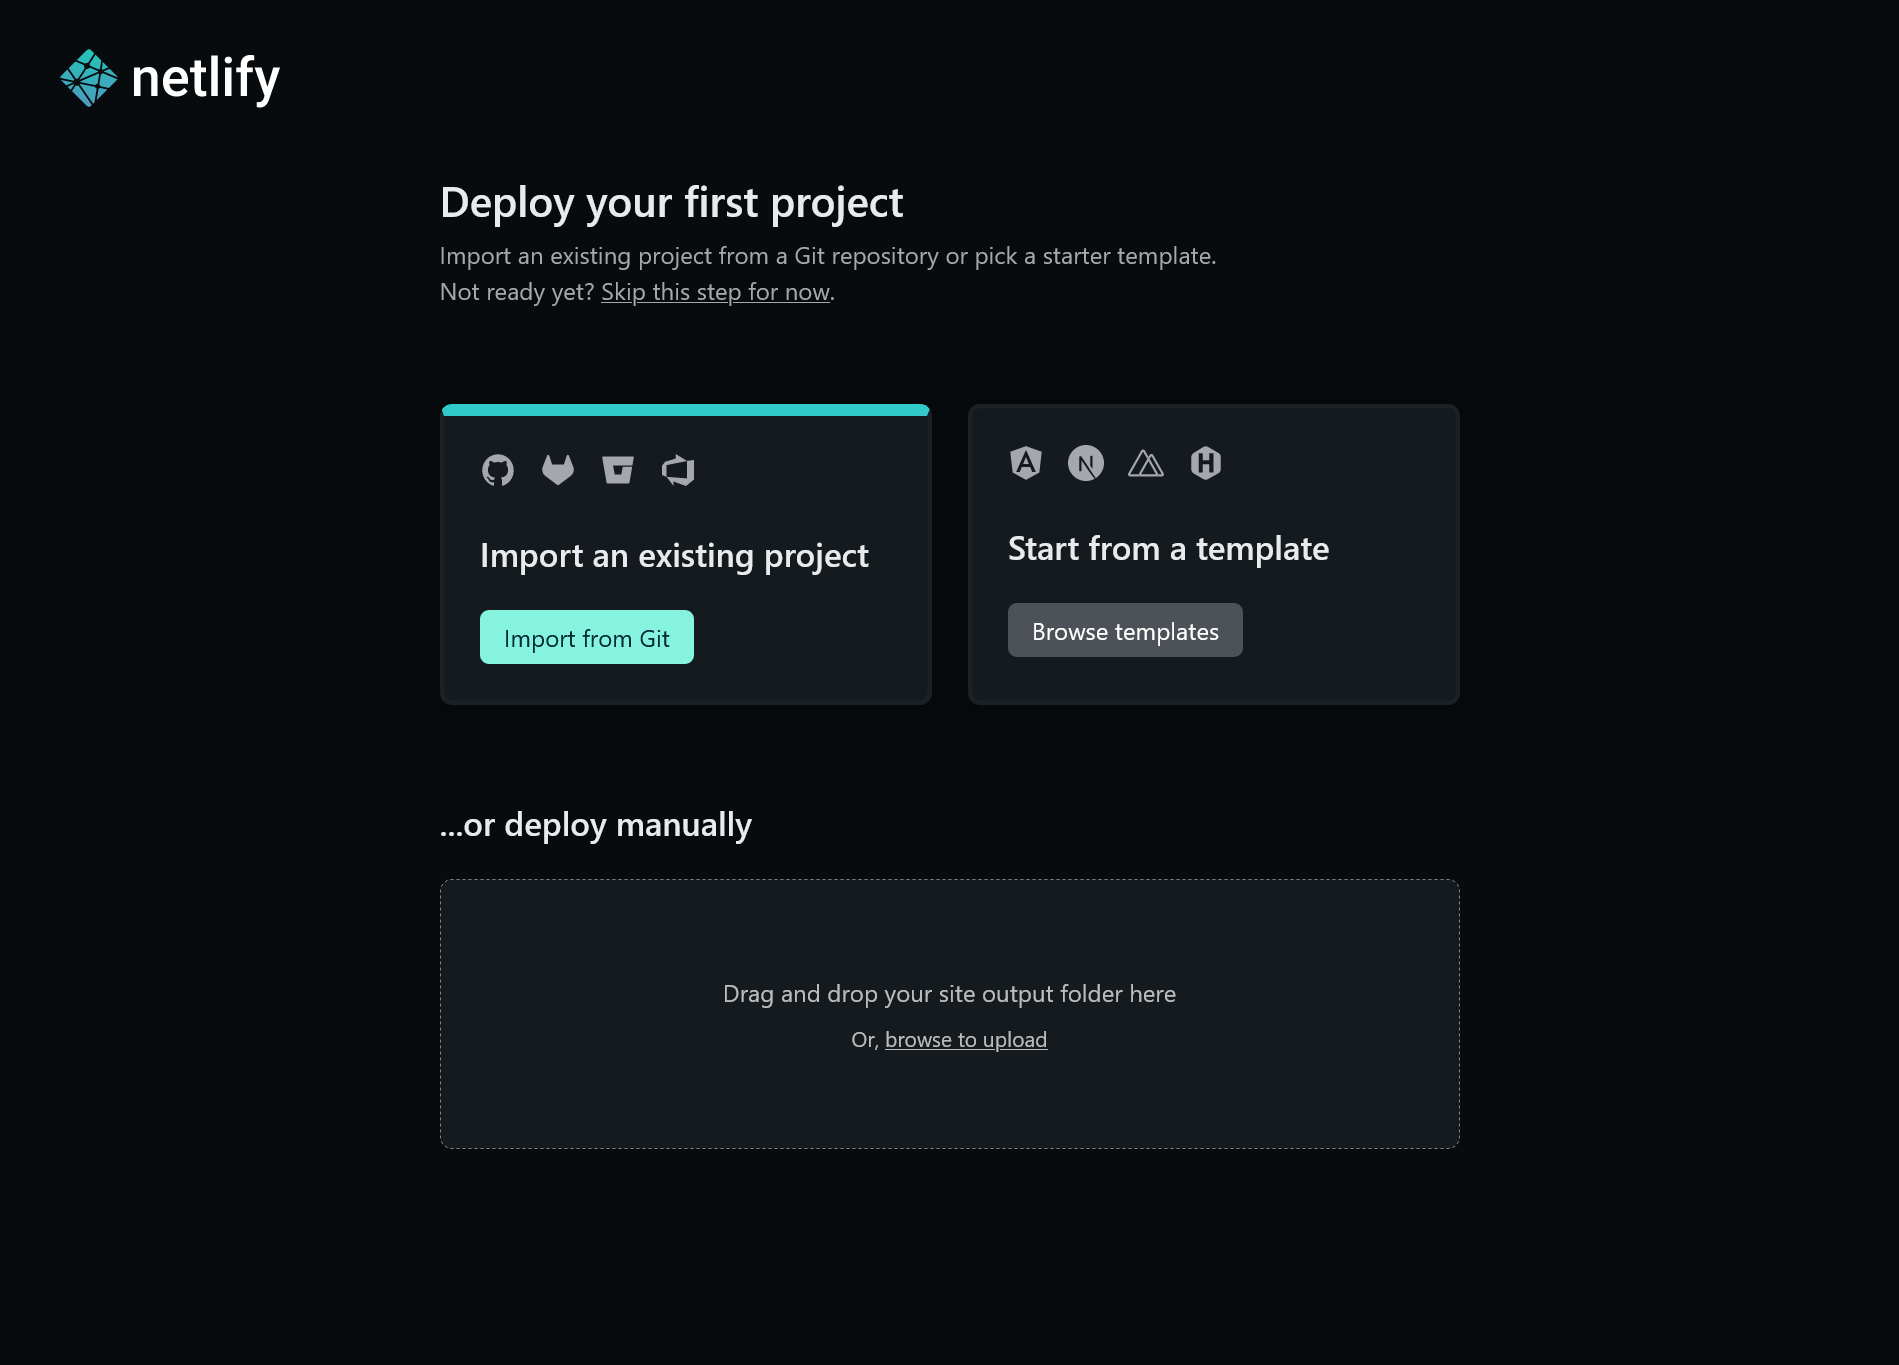
Netlify project start screen
Option 1 – How to Deploy Manually
If you're not comfortable with Git and GitHub, Netlify lets you drag and drop to upload a project into their interface.
On your command line, run npm run build or eleventy to build your site.
Now upload the site's public directory to Netlify's file upload interface. In a few moments Netlify will have the site live on a URL that you can visit.
If you want to make future changes to your deployed site, click on "Deploys" and scroll down to find the file uploader.
You can rebuild your site locally and upload the new version of your public folder to Netlify whenever you want.
Option 2 – How to Import a Project from Git
If you are familiar with Git and GitHub, commit your code and push it to GitHub. Then click on the "Import from Git" button.
Netlify will ask you to connect a Git provider. Choose GitHub and authorize Netlify to access your GitHub repositories.
Choose the repository that holds your portfolio site. You can search for "eleventy", or whatever name you gave it.
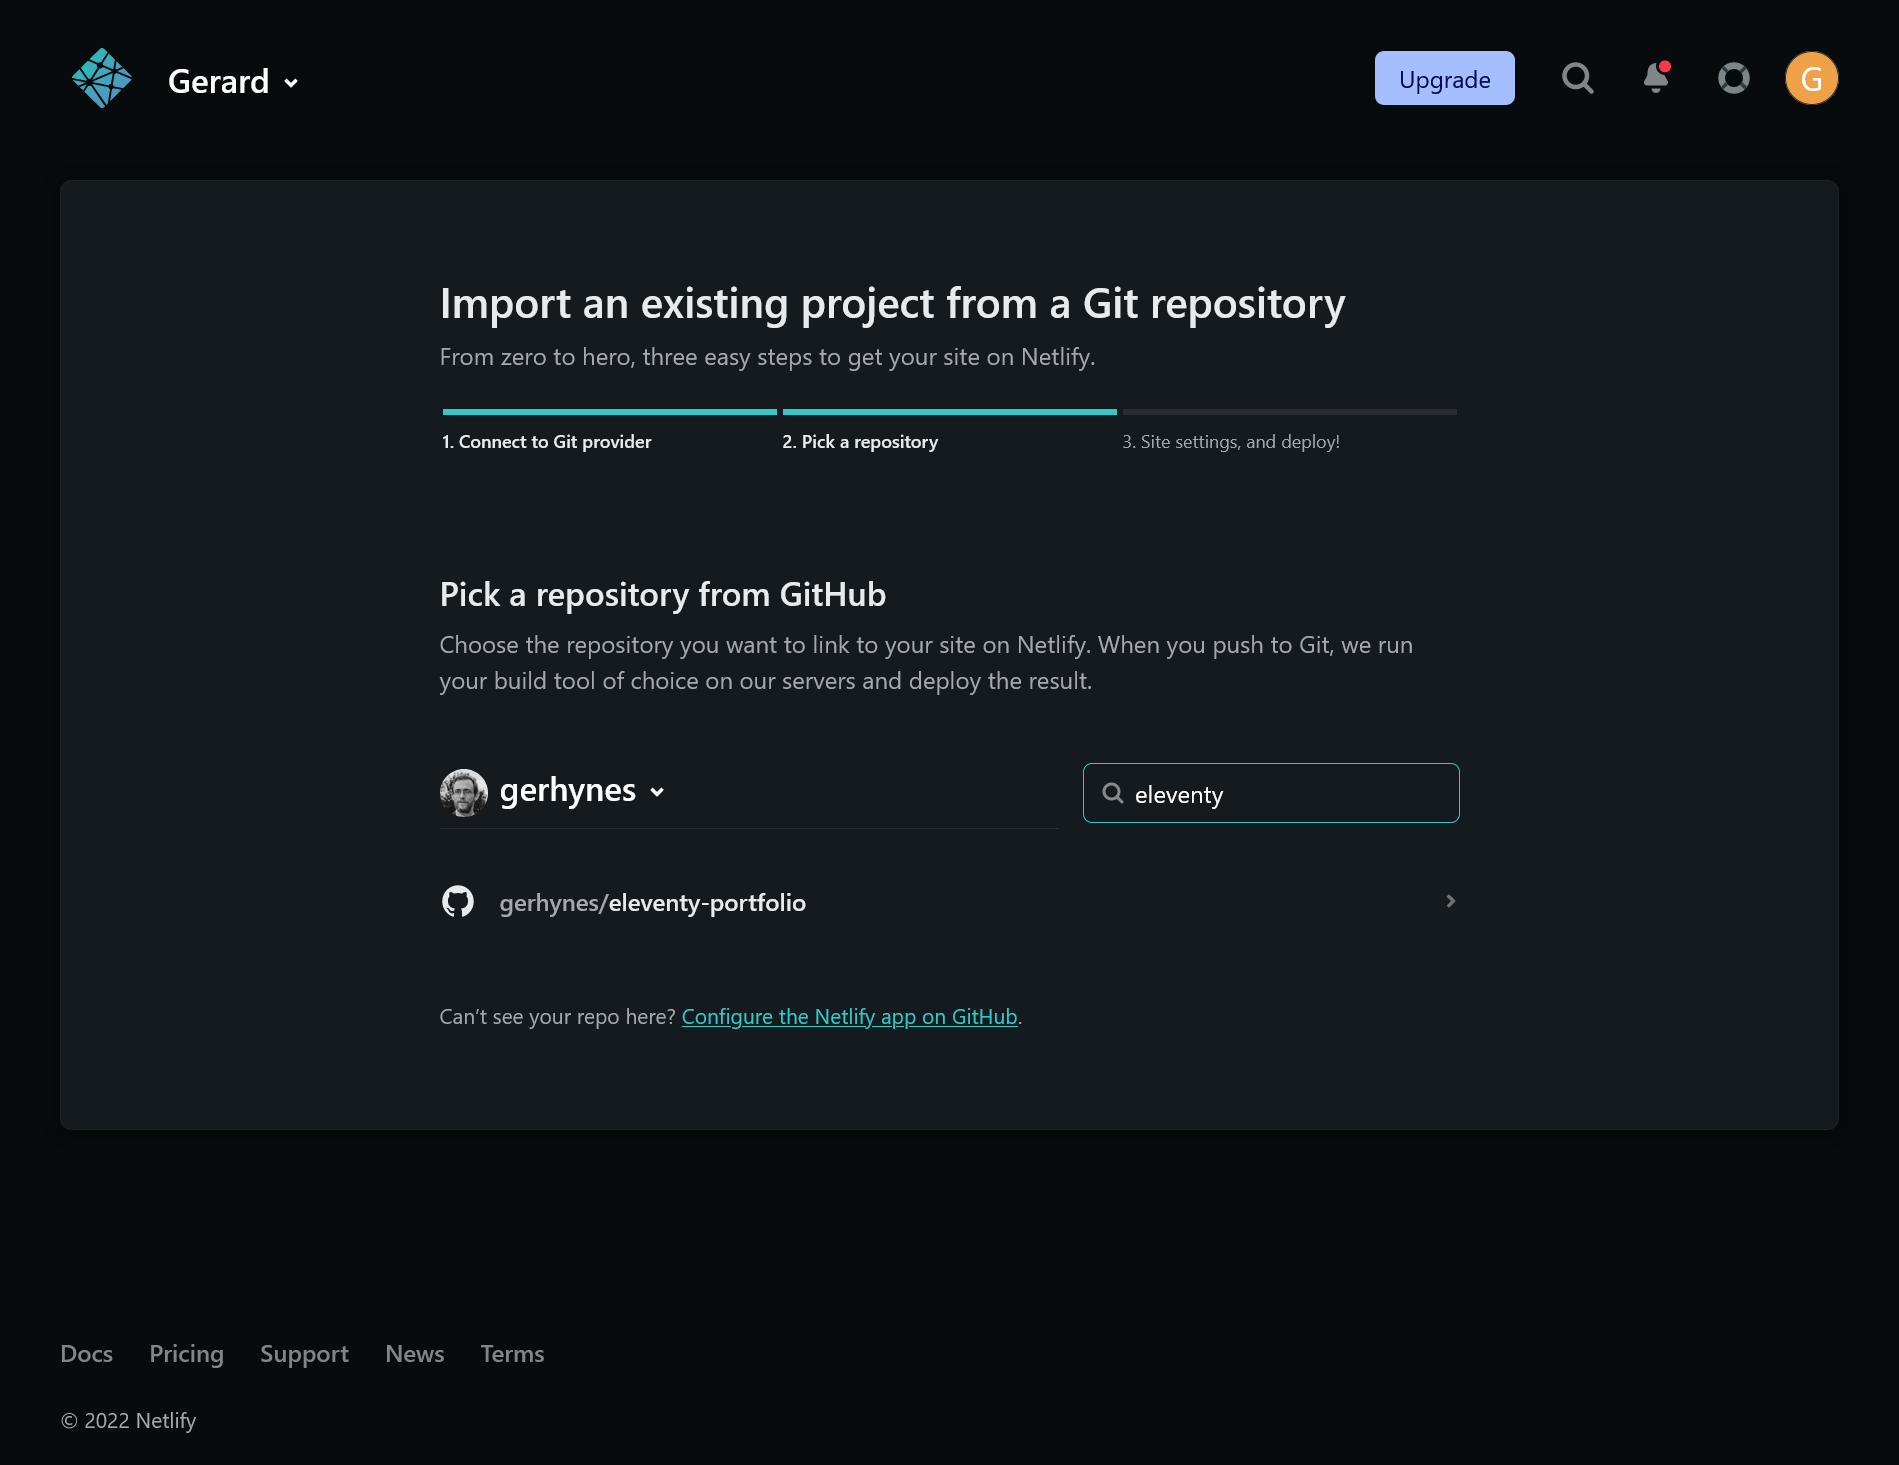
Netlify import project interface
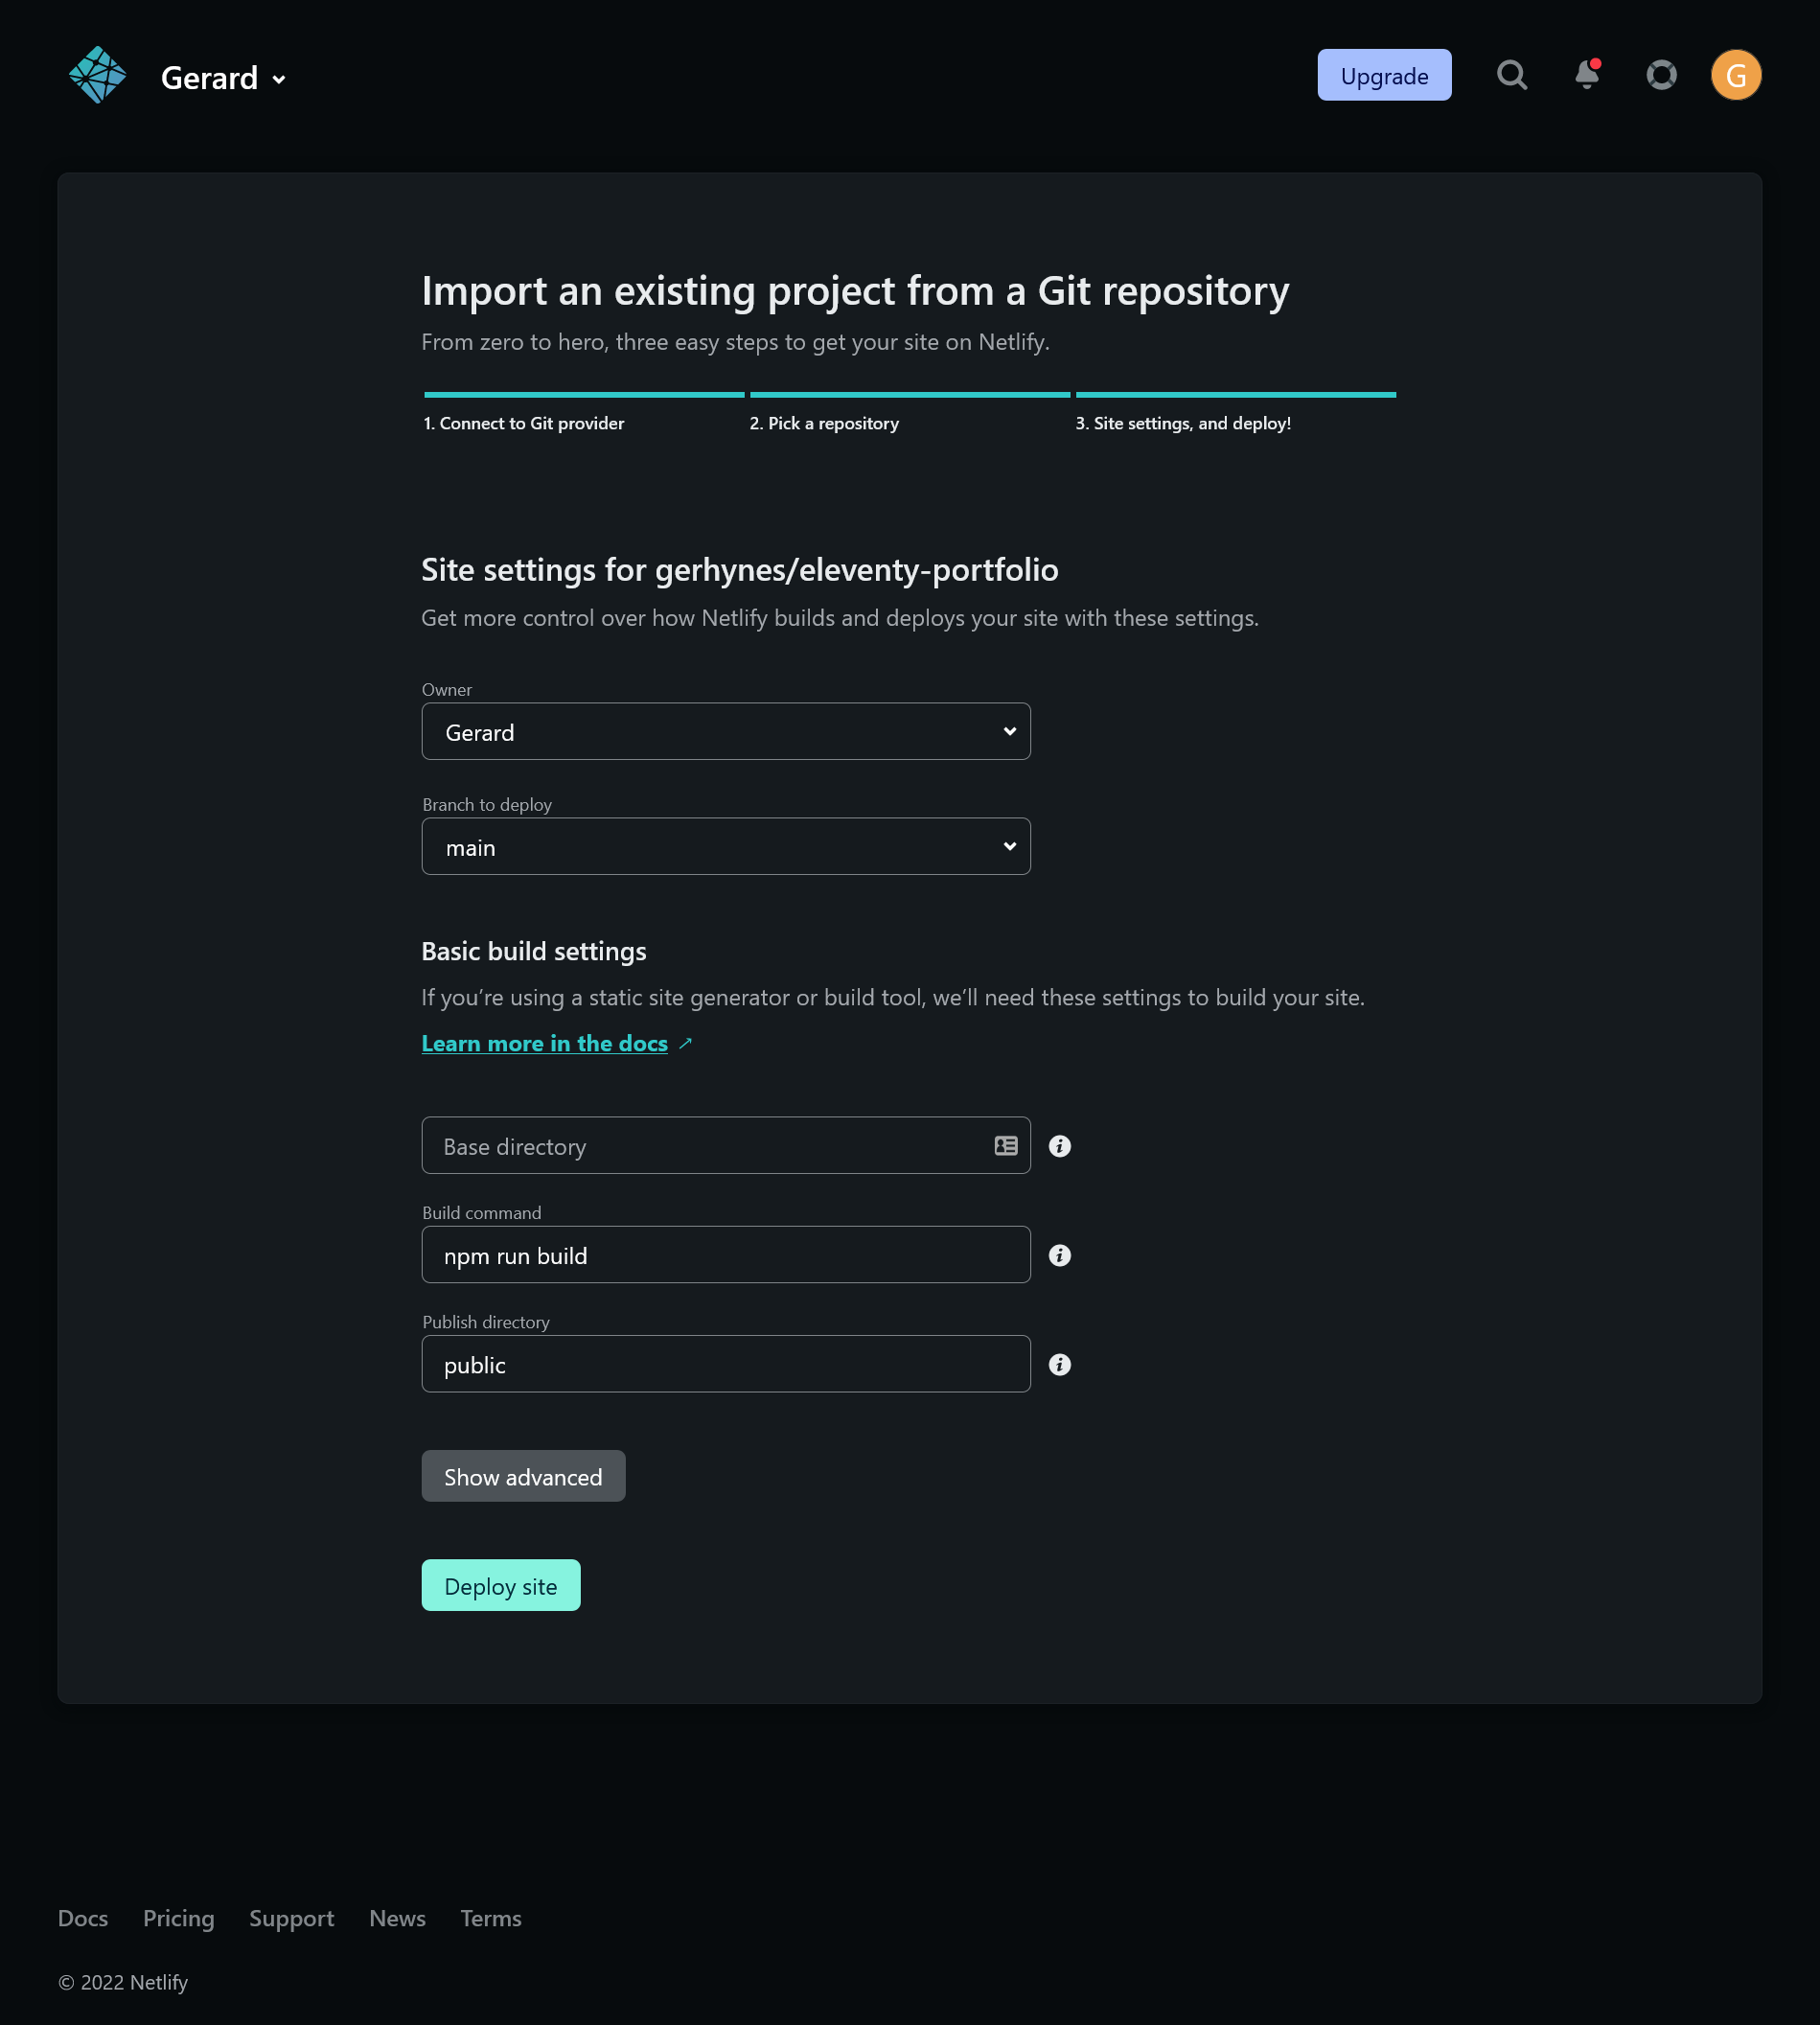
Netlify will detect that this is an Eleventy project and will ask you to confirm the basic build settings.
Make sure the build command is either npm run build or eleventy.
Under "Publish directory", enter public instead of _site.
Now click the "Deploy site" button.
Netlify build settings page
In a few moments Netlify will tell you that your site is live and give you a URL for it.
Once your site is live, if go to the Contact page, fill out the form, and submit it. You'll be redirected to the custom success page that you made.
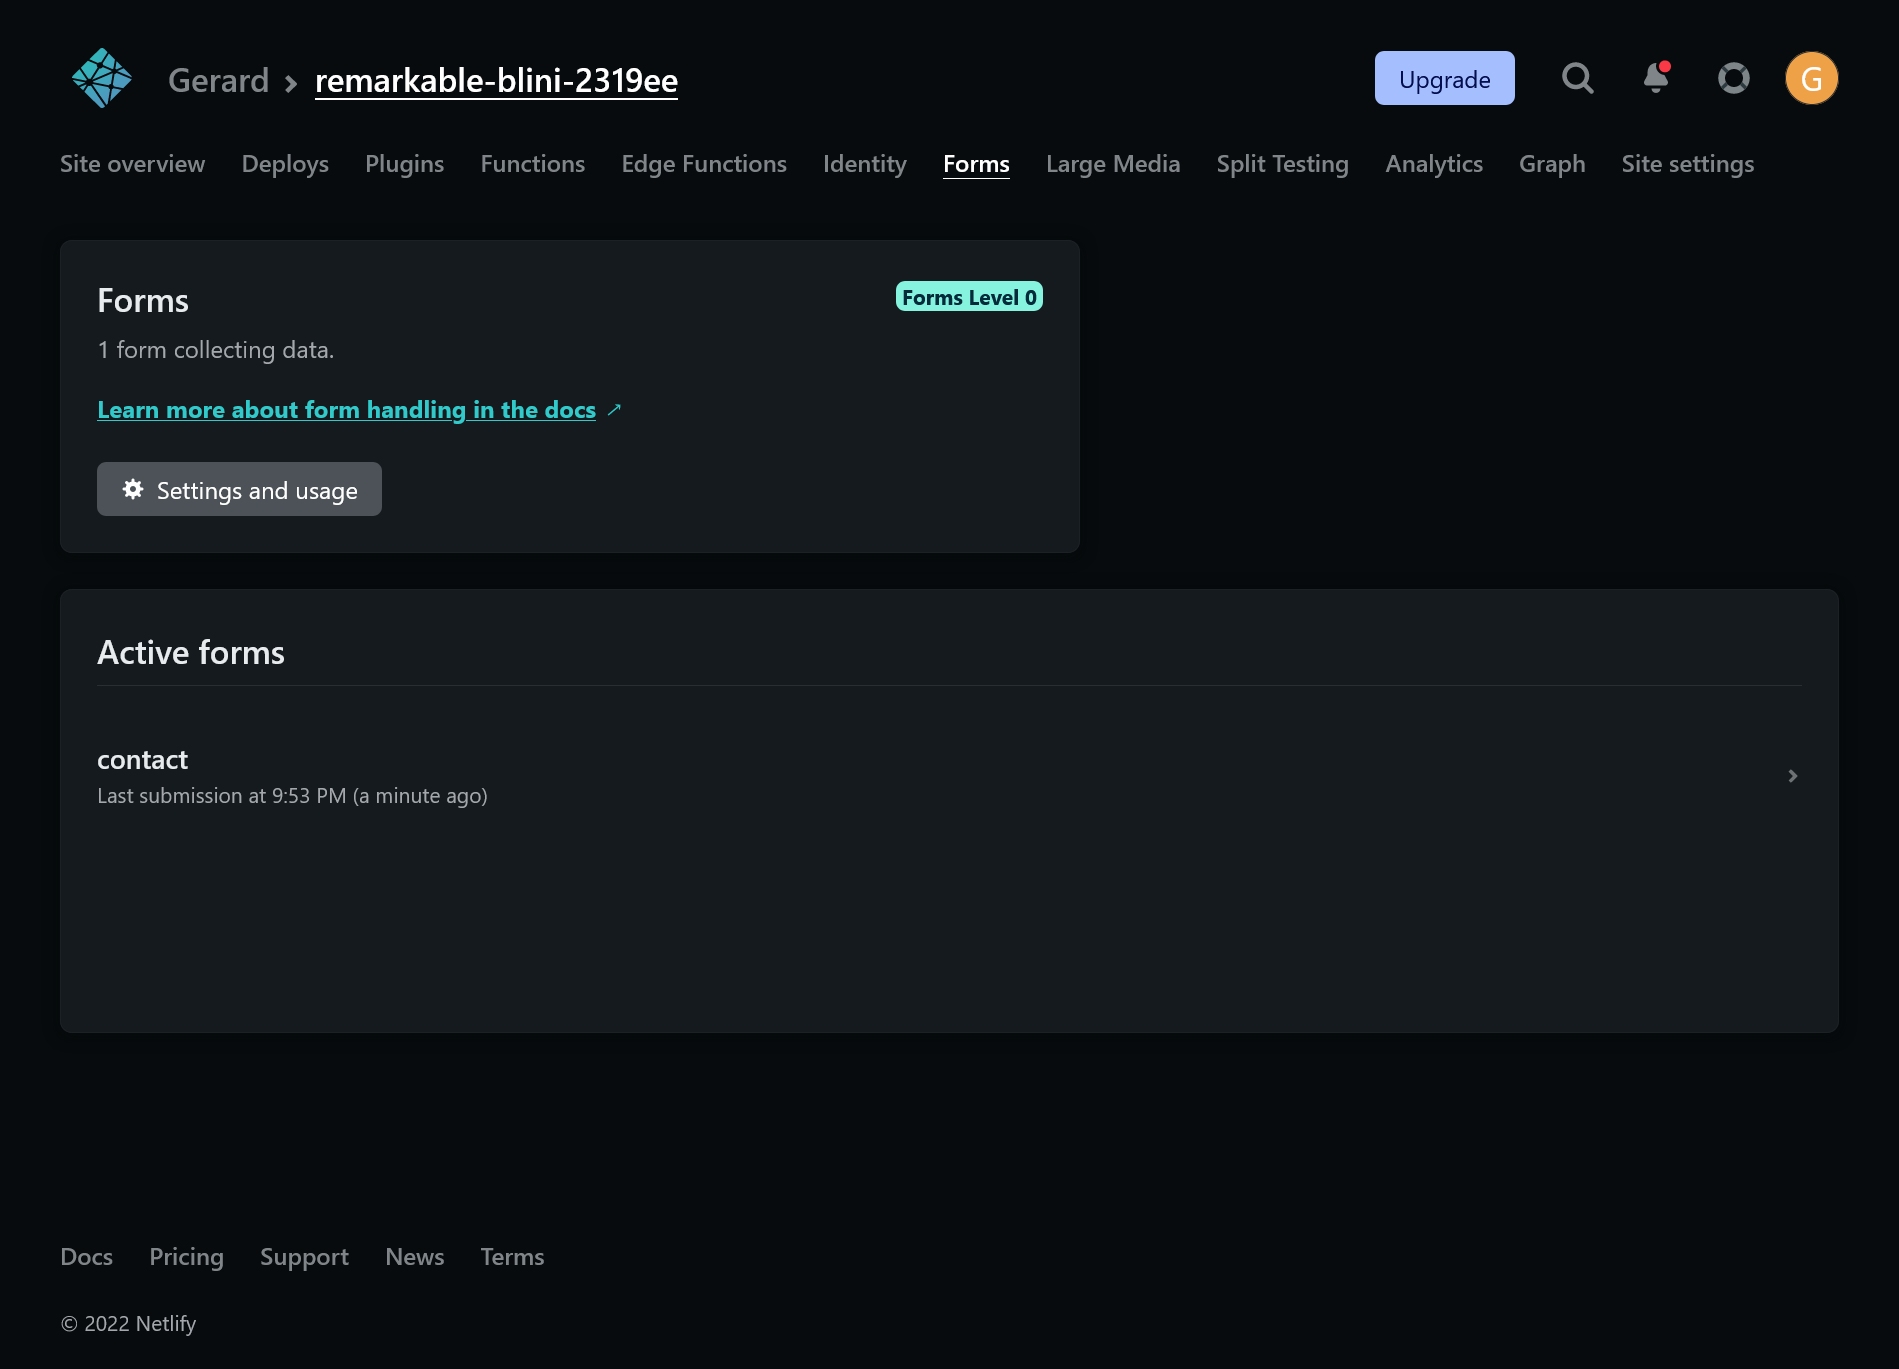
If you click on "Forms" in the Netlify interface, you'll be brought to the Netlify Forms dashboard.
The form will have whatever name you used in the name attribute on your contact form, in this case "contact".
Netlify forms dashboard
Congratulations, you've built and deployed an Eleventy portfolio site. 🥳🎉🎉🎉
Feel free to use this project as a template for your own portfolio and customize it any way you'd like. So many portfolios look similar, so it's always good when a portfolio shows off your personality and passions.
Where to Take it from Here
This tutorial has hopefully taught you the basics of Eleventy, and how to combine data and templates to make fast sites without a whole lot of tooling or configuration.
If you'd like to take your Eleventy journey further, the Eleventy docs are very good. There's lots more to learn about manipulating data, not to mention adding personalized content and dynamic interactivity with Serverless and Edge Functions.
11ty.rocks by Stephanie Eckles is also a great resource, with practical tips and helpful tutorials on all sorts of Eleventy features.
I hope this guide has been helpful and made you excited to learn more about Eleventy, static site generators, and the Jamstack.