

Version control is something all software developers should know. It helps you manage changes to your projects or programs.
This article will help you learn the basics of Git and versioning in order to effectively collaborate and manage your software projects.
Contents
- What are git and version control?
- Setting up your Gitbash
- Initializing your repository
- Making your first commit in Git
- Creating a branch in Git
- Reverting to a commit
- Creating a remote repository
- Syncing your remote repository to your local repository
- Updating your git repository (local and remote)
- What does "Origin" mean?
Pre-requisites
I assume you already have an account on GitHub. If you don't, just head over to GitHub to create one.
You'll also need to download and install git bash from git-scm.com or gitforwindows.org (if you're running a Windows PC).
Now let's go ahead and learn about version control.
What are Git and Version Control?
Git is a version control system that is used to track changes that are made to a file or project. It was made by Linus Trovalds (the creator of the Linux operating system).
GitHub, on the other hand, is an open-source cloud-based collaboration platform that allows developers to easily share software and collaborate on different projects.
Everyone from open source projects to private teams and individual projects can use GitHub. You can just upload your code and track changes made in a project for future use.
Recap: Version control is a system that records changes to a file or set of files over time so that you can recall specific versions later.
Setting Up your Git Bash
For the purpose of this tutorial, we'll be creating a new folder, which I've named babysteps2git. We'll be using it as our local repository throughout this article.
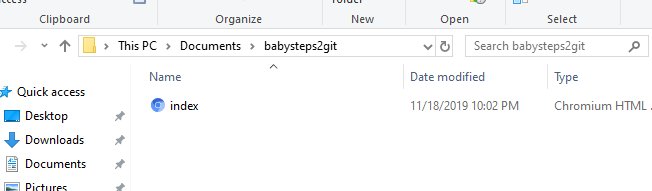 A new folder created just for this Git tutorial
Inside this babysteps2git folder, we have a file, index.html, which we'll be using for instances. I created it from my favorite command line Interface, Cmder.
You can create yours by typing touch index.html inside the babysteps2git folder (this should be done from your command prompt) or you can create one from your text editor.
Now, let's set up our Git globally by configuring our username and email (if this is your first time using Git).
Open up git bash, then use the command git config --global [user.name](http://user.name/) "Your name" to configure your username and git config --global [user.email](http://user.email/) "Your email" to configure your email.
In the instance below, my GitHub username is emmanuellar while my email address is emmanuellar805@gmail.com.
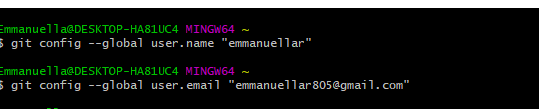 Configuring git on your device
To check if your configuration has been added, type in git config --global user.name to check your username and git config --global user.emailto check your email.
If your configuration was successful, you'll have your username and email address returned once you type in these commands and hit enter.
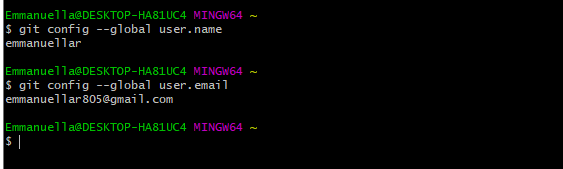 Checking your configuration
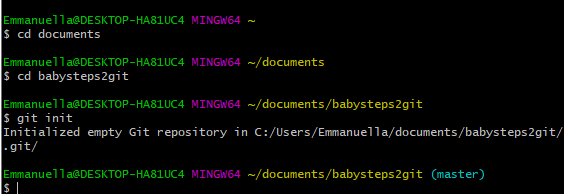
Initializing your Repository
Now you'll want to tell Git "Look, this is the folder/directory where I want Git to work in right now."
To initialize a repository, make sure you're in the directory that you're working on. In my case here, it's the babysteps2git folder.
Then type in git init and hit enter.
Making Your First Commit in Git
Committing in Git is the equivalent of saving when working on documents. It's a way of saving your changes to the repository and store them with a unique ID and a message.
The ID and message can be used to trace back to the version of the project you need to check on. This is one of the differences between git commit and save as.
Before you can make a commit, you have to stage your work. Staging is a way of telling the system, "Hey, I've made a whole lot of changes to my work, but this one, that one, and this other one are the ones I want to save."
So when you want to add changes, do this: git add name-of-files.
If you want to add all the files you've made changes to, type in git add . instead. Just make sure you're inside the project folder.
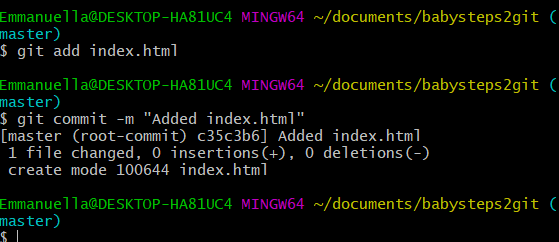 Staging and Committing files in Git
After adding/staging the files, you can now commit them.
You should commit your changes using short but detailed commit messages like the one shown above.
To view the status of your repository, and to know which branch you're on, which files were modified, which code is staged, not staged, or ready to be committed, just use the code:git status.
Creating Branches in Git
Let's say you're working on different versions of a project or you're collaborating on a project with some friends or colleagues. It is important to have a branch called "master", which is the default branch for every repository that stores the original and modified code from the various contributors.
To collaborate or work on various versions of a project, we have to work from different branches.
By developing in branches, it’s not only possible to work on multiple versions of your code in parallel, but it also keeps the main master branch free from questionable code.
So, for our babysteps2git project, we can decide to have several branches, each housing a different version of the code.
To create a new branch in git, use the command, git branch nameOfBranch.
To check out (switch) to the new branch, use git checkout nameOfBranch.
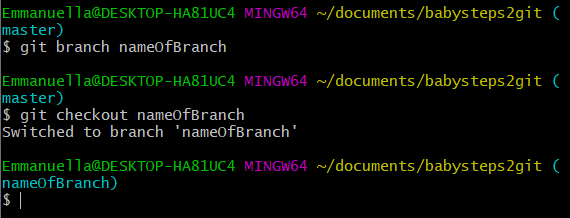
The above 2 commands can be done simultaneously using the command: git checkout -b nameOfBranch.
Reverting to a Commit
Here comes another very interesting thing about Git: the ability to revert changes you've made over time, something CTRL+Z cannot do.
While working with Git, you might want to go back to a particular state of your code, or even revert to an older version of your work. You can do this by reverting to the particular commit you want to get back to.
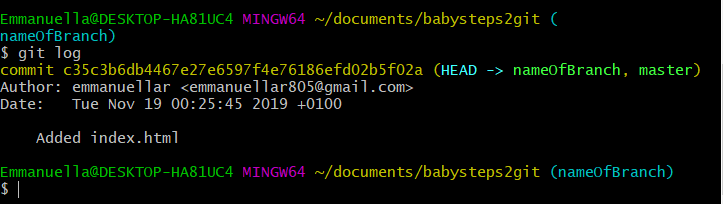
Each commit we make has a unique ID attached to it. To get this ID, you can type in git log.
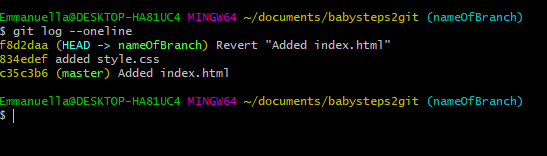
Alternatively, the output above can be logged in one line using git log --oneline.

From the above, you can see the ID and commit messages for each of the commits.
To revert, type in **git revert commit-ID**.
This command reverts to the state of that code at the time of that commit.
Creating a Remote Repository
To create a remote repository, we'll open up our GitHub account and click on the New button (as a first time GitHub user you'll probably see a green Create Repository button on yours instead).
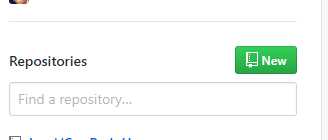
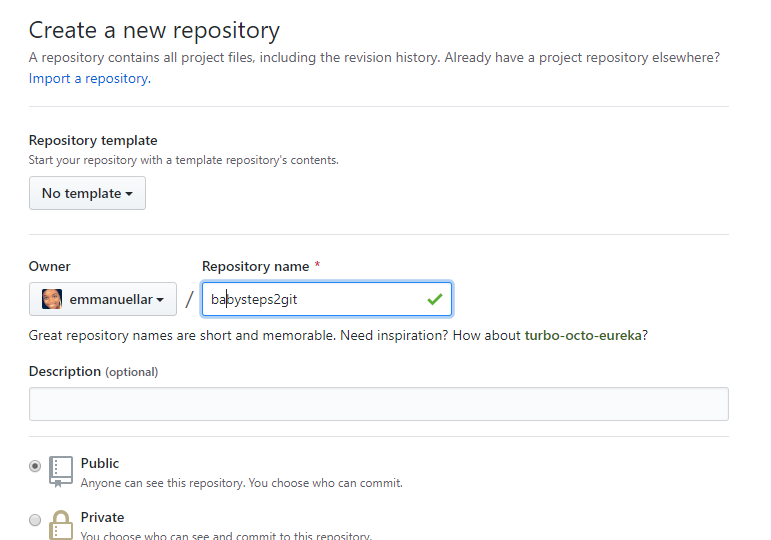
Whichever way you do it, it'll take you to the page where you enter the name of your repository and a description of your project.
It also gives you the option to make your repository private or public. You could also initialize your repository with a read me by ticking the read me check box.
###
When you click on create, a new repository would be created with a unique URL.
Syncing your remote repository to your local repository
Now that we've created our remote repository, we have to sync it with our local repository so they both can seamlessly communicate.
Open up your git bash, navigate to the folder you're working on, and enter the following code: git remote add origin url.
![]()
Updating your git repository (remote and local)
Let's go ahead and add some code to our HTML file:
<html lang="en">
    <head>
    <meta charset="UTF-8">
    <meta name="viewport" content="width=device-width, initial-scale=1.0">
    <meta http-equiv="X-UA-Compatible" content="ie=edge>
    <title>Document</title> </head>
        <body>
            <label for="inputEmail" class="sr-only">Email Address</label>
            <input type="email" class="form-control" id="inputEmail" placeholder="Password">
        </body>
</html>
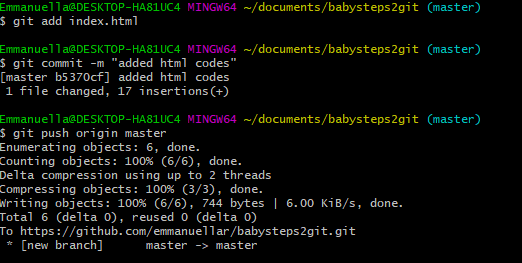
Let's repeat the process of staging and committing our changes:
git add index.htmlgit commit -m "added a form"
As it is, our local repository is currently a commit ahead of the remote repository.
To update the remote repository, we'll have to push our work from the local repository to the remote repository using the code: git push origin master. "master" is the default branch for every repository and most times houses the main project code.
You can also choose to create a new branch if, for example, you made a new feature but you are worried about making changes to the main project (master branch).
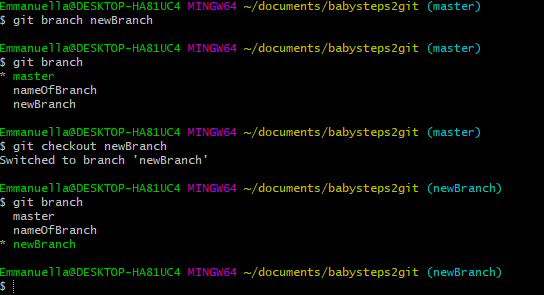
Just type in git branch branchName to create a new branch, and use git checkout branchName to switch to the new branch.
You can always use git branch to confirm the branches in this repository. The branch name with asterisks next to it indicates which branch you're pointed to at a given time.
You can also push changes from your new branch to your remote repository with git push origin branchName.
When you push to the remote repository, GitHub will automatically create the branch for you on your remote repository. This allows people to see the changes you've made.
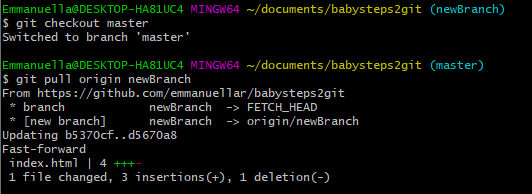
You might also want to update the main project branch (master branch) with the contents of the remote new branch.
You can do this by switching to the master branch and running git pull origin newBranch. This updates the master branch with all the changes implemented on the new branch.
What does "origin" mean?
Origin is a shorthand name for the remote repository that a project was originally cloned from. More precisely, it is used instead of that original repository's URL, and makes referencing it easier.
So to push your changes to the remote repository, you can use either of the following commands: git push origin nameOfBranch or git push https://github.com/username/reponame.git nameOfBranch.
Note that you could be prompted to enter your username and password. Your password won't show as you're entering it. Just type it in correctly and hit enter.
Conclusion
We've just looked at a step by step guide to using Git for the first time. Feel free to reference it whenever you get stuck.
You don't have to commit the commands to memory – you'll be able to remember them with time. :)
That's all for now!
I hope you enjoyed this article. You can follow me on Twitter.