Welcome to Part III of Learn Node.js With Brigadier Fluffykins, a series created to help you easily understand Node.js ❤
In Part II Brigadier Fluffykins and I walked you through how Node.js is an event driven language. You learned how this is important for asynchronous behavior, and how these events are processed via the Event Loop. You also learned how DOM events and events in Node.js are similar. Lastly, we created our first EventEmitter.
Let’s move on to the next lesson! OH YEAH!!

Today’s we’ll learn about:
- Types of request methods
- The Request Object
- Configuring multiple routes
- Difference between setHeader and writeHead
- How to serve files (HTML, CSS, etc.)
Types of Request Methods
The four main HTTP requests:
- GET — Used when the client is requesting data. For example, when they are asking to view your homepage, they will need the HTML, CSS, and JavaScript documents. These are all GET requests.
- POST — Used when the client is submitting data to the server or to a database. For example, submitting a form.
- PUT — Similar to POST, but not used much. Use this when you are changing something at a specific URL or updating a resource in the server. The main difference is that PUT is idempotent.
- DELETE — Deletes the specified resource.
GET and POST requests are used most often. PUT and DELETE aren’t used as much. Then there are requests such as HEAD, OPTIONS, and CONNECT. These are used even less often, but good to know just in case.
Since GET and POST are the most common, we’ll be reviewing these. The GET request will be discussed today, while we’ll discuss the POST method in the next lesson, as it’s going to make more sense then.
The Request Object
When we set up our server, we want the request event to listen for any incoming requests from the client. It’s important to remember that this is not the same as the request object in a callback. Also, the request and response objects look like parameters, and you can even change their names — like I did in the example below from ‘request’ to ‘req’ and ‘response’ to ‘res’ — but they are still objects. Keep that in mind.
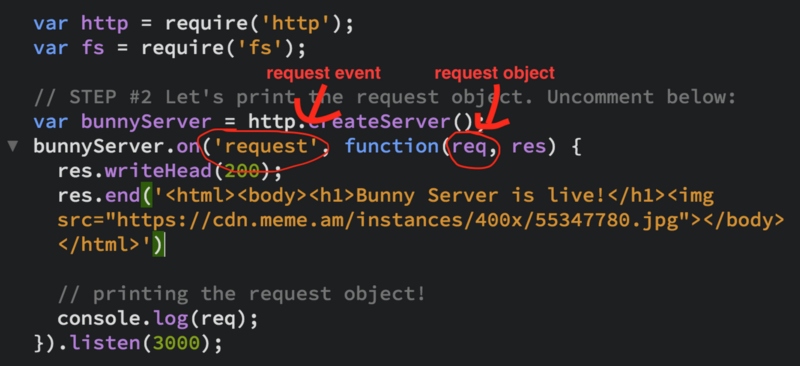
The request object is huge with many different properties, functions, and methods. Let’s try printing the request object in your terminal. Open up the server.js in the nodestory2 folder. All the files you need for the rest of this lesson will be here.
Before continuing, Brigadier Fluffykins and I want you to know:
If you feel overwhelmed by the amount of code in the zip folder, especially the server.js file — I know I did when I first started learning Node.js — just take a breather and know that we’ve got your back. We’ll be walking you through each section, step by step. Take as much time as you need.
Perseverance is key to progress in programming, and in life. Also, constantly save your file and restart the server if you made any changes in the file. Good luck! :)
You can also just create your own file with the same name — server.js and copy and paste this in:
Kudos if you know what to do next.
Locate your server.js file or the nodestory2 folder you downloaded. In the example below I went to my Desktop, then the nodestory2 folder then inside that folder was the server.js file.
Type in node server.js in the shell, go to http://localhost:3000/, and you should see the request object in your shell:
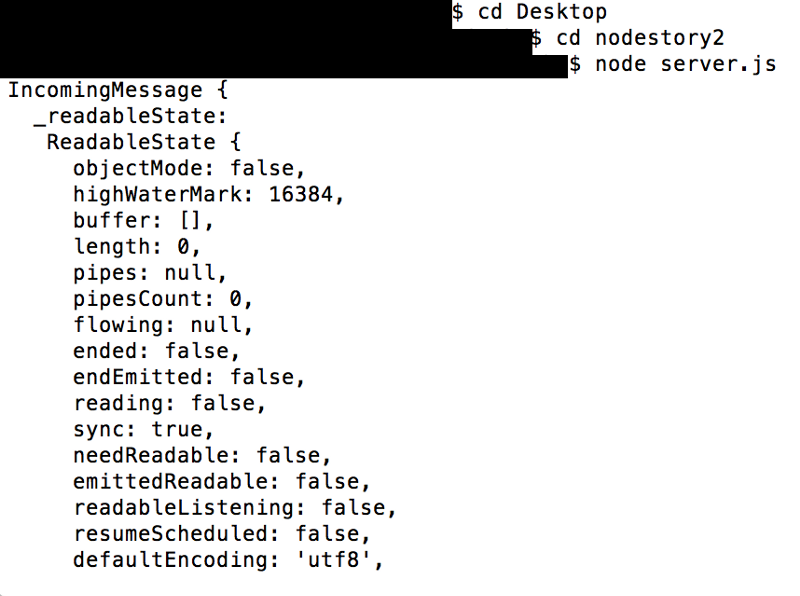
The screenshot above is after I’ve scrolled all the way up to the beginning.
It’s ginormous right?
The request object is an instance of the IncomingMessage object. You can read more about that here if you’re interested.
Throughout this series, we will discuss the more commonly-used properties of the request object, especially since you’ll probably only be using a handful of them in your projects.
The url and method properties are two that frequently work together. When we set up our server and have these two properties, we are saying “Hey server, if you see that the client is coming from this URL and they want information back (GET method), then trigger the callback”.
When you print the url and method properties of the request object what do you get? Comment out STEP #2 and uncomment STEP #2.1. Or copy and paste this into your server.js file:
Remember, as I mentioned in Part I, any time you make changes inside of a server file, you have to restart the server again for it to work properly. To stop the server manually go into your terminal and press control + C for Mac (again, I believe it’s killall node for Windows).
Now type node server.js in the shell to start the server, then go to http://localhost:3000/, and you should see something like this in your shell:

The request URL printed ‘/’. This is the URL for where the client is coming from, in this case the homepage — also called the ‘root directory’. And the request method printed ‘GET’, meaning the client wanted to view or get the necessary files for the page.
If you get a second GET request, it’s most likely for the favicon in your browser that’s automatically requested by default.
The headers method is also quite useful, as it gives us information about where the request is coming from. This including browsing info, cookies, and more.
Let’s try printing the headers and then accessing one. Be aware that it comes as an object of key value pairs. Uncomment STEP #2.2 and comment out STEP #2.1 or copy and paste this into your server.js file:
Restart the server. You should get an object of headers in your shell.
If you get two objects, again, probably that favicon, and thus a second header object was printed, just ignore it for now.
It’s important to note that if you are receiving headers that are the same name they will either be overwritten or presented as a string separated by commas, depending on the type of header it is.
If you really want the exact headers that exist — even if they have the same names (possibly because you need their different values) — you can use the rawHeaders method. So you would enter req.rawHeaders instead of req.headers.
Try it out! See what you get :)
Configuring Multiple Routes
This URL: / means the home page. To access a different page, we create a new GET request with a different name after the forward slash.
Let’s review everything we’ve learned so far and create two GET requests — one if the client is requesting the homepage and another one if they are requesting the /blueberries page. Why blueberries? It doesn’t actually matter. If you know the client is going to go to www.yourhomepage.com/blueberries then you know that you have to create a request in your server for /blueberries so when they type that URL path, they will see some content instead of an error message.
The truth is, Brigadier Fluffykins demonstrated his ninja skills to me and in payment, I had to choose that URL path:

Otherwise, it wouldn’t actually matter. Let’s continue:
Comment out STEP #2.2 and uncomment STEP #2.3 or just copy and paste this into your server.js file. Don’t forget to save after:
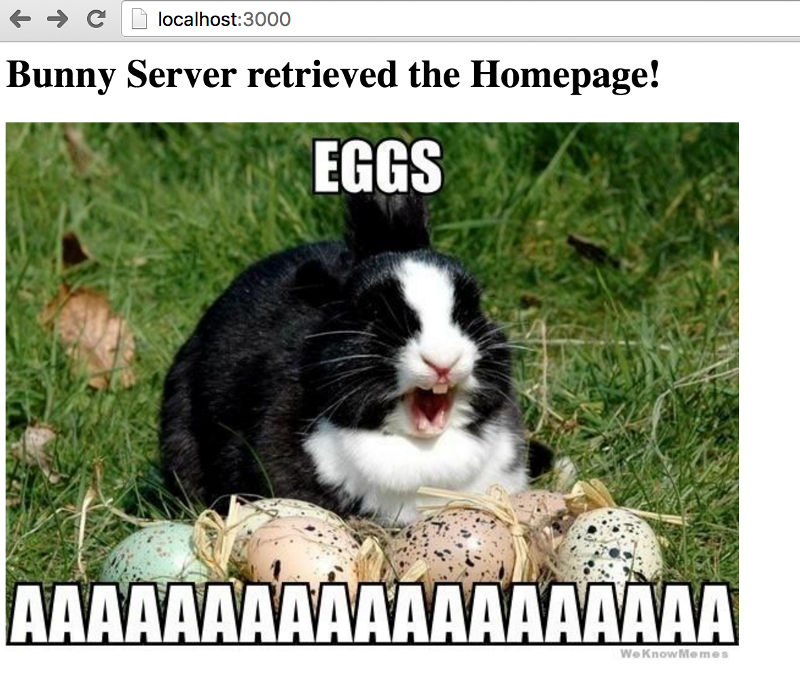
Now restart the server and go to http://localhost:3000/, you should see this:
Ok good, now let’s try out the other request we configured. Go to http://localhost:3000/blueberries. You should see this:
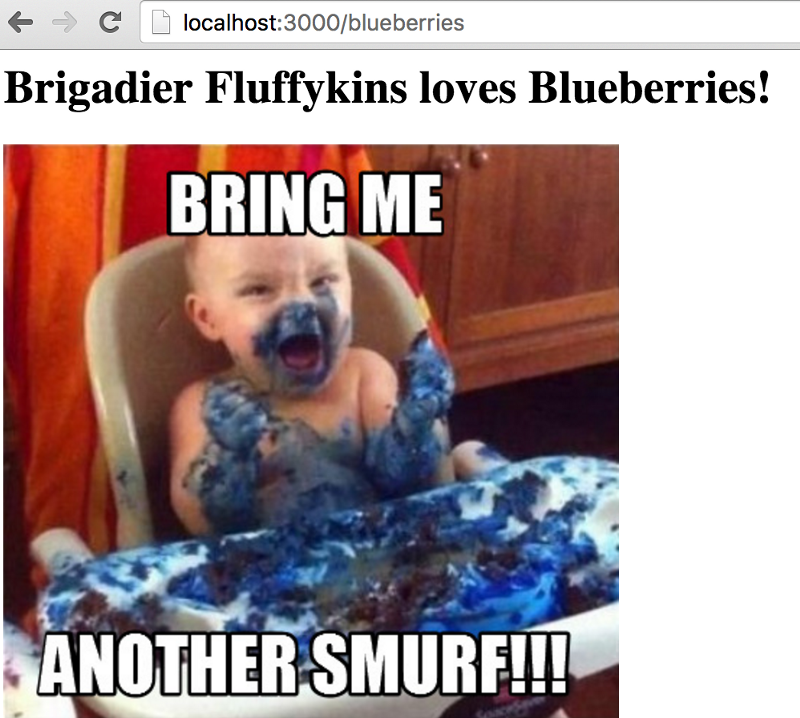
Do you see what happened there? We can change /blueberries to anything we want, as long as we configure what the client should see. So if you went to http://localhost:3000/something or http://localhost:3000/somethingelse, it wouldn’t work unless we created responses for these requests in our server.
Let’s demonstrate this by changing one line in our code. Change this line:
if (req.url === '/blueberries') {To this:
if (req.url === '/carrots') {Save and restart your server. Now go to: http://localhost:3000/blueberries
See how it no longer works? Go to http://localhost:3000/carrots
It should work now because we have a response configured for the /carrots path, while the path for /blueberries no longer exists (unless we choose to create it).
The difference between setHeader and writeHead
The setHeader method takes a name as its first parameter, and a value for its second. You can call this method multiple times in the same request, but make sure you don’t include invalid characters or you’ll receive an error — specifically, a TypeError.
Let’s try this out, change your home page request to this:
Save and restart the server.
You should see the new headers on the homepage in your Network tab.
To access your Network tab, right click → inspect → choose the Network tab(in the same row as Console).
Or on a mac: Cmd + Option + J → Network tab.
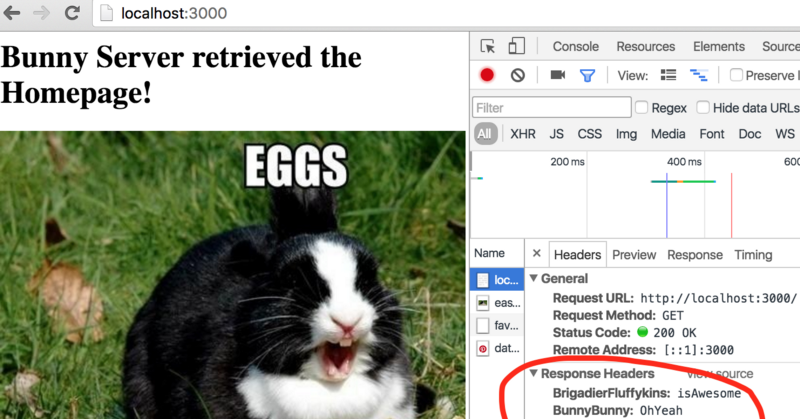
It’s not particular useful to set random headers, but if you’re working with authentication or cookies in the browser, setHeader is part of that process.
In our last lesson we set the header via writeHead method. There we set the status code. The difference between setHeader and writeHead is that setHeader sets one header at a time, and you can use as many setHeader methods as you need before you send the response.
On the other hand, writeHead can set the status code (first parameter), and multiple headers inside of an object (the second parameter) at the same time.
Setting the status code manually helps ensure that the page will load correctly. If you include setHeader and writeHead in the same request, they will merge together with writeHead taking precedence. This also means any headers with the same name in both setHeader and writeHead will be overwritten by writeHead headers.
How to Serve Files
Have you noticed how our responses have only been plain words and simple HTML? As a developer you will often serve actual documents, so let’s learn how to do that!
Either paste this into your server.js or uncomment STEP #2.4 and comment out STEP #2.3. Can you guess what’s happening here?
This should be in your index.html file:
…and this little snippet should be in your style.css file:
.see-me { background-color: black;}Take a look at the code in server.js on STEP #2.4. Read through the code comments and see if you can understand what’s going on before continuing.
readFile is a method of the file system, one of Node.js’s core modules, which we briefly covered in Part I. And that’s why we required that module in our code and stored it in the fs variable. It will read the file asynchronously and trigger the callback. When the callback is triggered, the file is inside of it. So the next thing we did was send it to the client using the end method.
You can also send over .js files — and even JSON — just don’t forget to set the Content-Type headers to avoid errors. For example for a .js file, the Content-Type should be set to application/javascript. These are also known as the MIME types.
__dirname basically means the current directory of the server.js file. More on paths, modules and libraries in the next lesson!
Did you notice how we configured the request for the style.css?
Why do you think we need to do this?
Most likely the client won’t be typing in yourwebsite.com/style.css. The client just wants your style.css to automatically be there so that your HTML page looks great right? You could test it out and visit localhost:3000/style.css and you’ll see it there, but how do we get it sent to the client automatically?
You probably remember making HTML pages and including your CSS in a different file. To get that CSS to work, we needed to include the CSS link tag inside of the html page. We already did this in index.html:
<link rel="stylesheet" href="style.css">So now when a client requests the index.html page, the server will scan the code inside index.html for any other important tags such as the link (CSS files) or script (JavaScript files) tags.
In our case we only included the CSS page. It will find this link tag and essentially this is like sending an automatic GET request. Basically the servers are like:
“Hey look, the client wants the HTML page! OK, let me check if this HTML page has anything else I need to send. Oh look, a link tag for the file style.css! That must mean there is a css page for this html page. Ok let’s go back into my server.js file. Yep! I have a response for this CSS file too, so I’ll be serving back both the HTML file and CSS files!”
If you visit the home page now and open the Network tab, you should see the CSS working properly. If you don’t see it right away, refresh the browser. And if you still don’t see it, make sure you saved the file and restarted the server:

Otherwise, if we didn’t configure the style.css request in our server.js, only the HTML page would be sent and we would see an error in our network tab for the style.css page.
We may also experience abnormally long load times because the server is searching for the configuration of the style.css. It would be thinking:
“I see that the HTML file has a link tag but I can’t find any response for this CSS file in server.js. I don’t get it. Where is it? Where is it?”
And I’d like to close today’s lesson with a nifty little trick. It may look intimidating at first, especially if it’s your first time seeing regex. I just wanted to share this handy snippet with you anyway in case in the near future you’re setting up an app and all it needs is to serve files that end with .js, .html, or .css. instead of writing multiple requests.
It’s OK if you don’t understand it right away — just save it for later and come back to it when you’re ready! It’s good to have in your back pocket :)
if (request.url.match(/.js$|.html$|.css$/)) { return response.end(fs.readFileSync(__dirname + '/..' + request.url));}Check out these extra resources
- The response object has some similar properties as the request object, but while the request object inherits from the IncomingMessage object, the response object inherits from http.ServerResponse object.
- Learn more about headers here.
- Review Request Types
Congrats! You’ve made it through Learn Node.js With Brigadier Fluffykins Part III! You learned about the different request types, how to configure GET requests at different URLs, and how to serve files!
On top of all this you should now have a basic understanding of the request object, and some useful methods! Great job today!
We’ll learn more about these topics as well as others we’ve only scratched in the next few lessons. Thank you for reading and stay tuned.
Keep your wisdom up to date by clicking the ❤ below and following, as more Learn Node.js With Brigadier Fluffykins is coming soon to Medium!
Part I: Sync, Async, and Creating Your First Server!

