By Per Harald Borgen
According to people in the know, React Hooks are hot, hot, hot. In this article, we follow Christian Jensen's 14-part tutorial to find out about the basics of this new feature of React. Follow along to find out more!

Intro
Hooks are new to the React library and allow us to share logic between components and make them reusable.
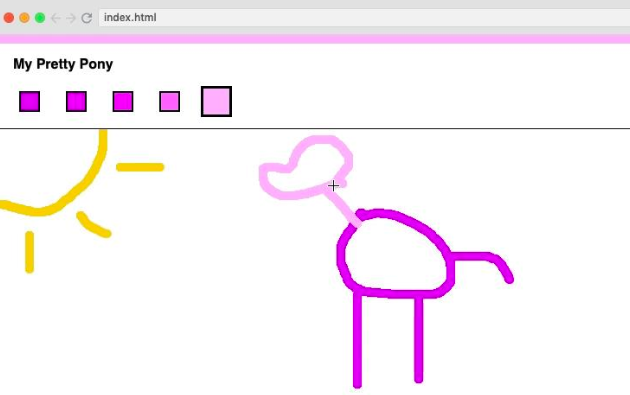
In this course, we will be building a paint app similar to Microsoft Paint, which will allow us to name our project, switch out colors, get a new batch of colors and of course paint.
Scrimba allows you to pause screencasts at any time and play with the code. It's a great way to learn by doing!
Prerequisites
The course assumes some prior knowledge of ES6, JSX, State and Props, but no worries, we've got you covered - check out our Scrimba articles by hitting the links above.
If you are completely new to React, be sure to check out our Scrimba React course
useState - Part 1
First, we give our application a way to manage state using useState.
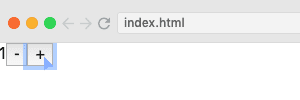
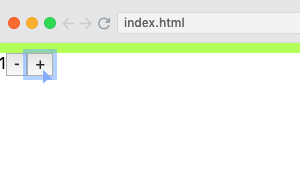
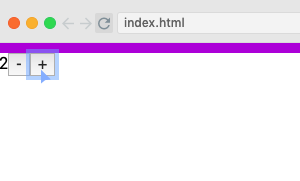
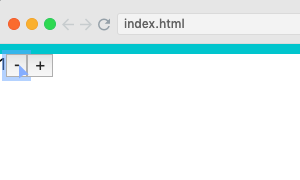
In our <Playground.js /> component, we declare a component called <Playground /> and create buttons to increment and decrement it. We then give useState an argument of (0) and use state restructuring to get state and setState (the function which updates the state) from our useState function. These are now renamed to count and setCount. We then render our count in the browser.
Lastly, we render buttons which update the count using an inline function which will be triggered on the click.
To ensure our count is accurate, we pass a function to our setState function instead of a value. This function takes the current state as its argument, which is then updated:
import React, { useState } from "react";
import randomColor from "randomcolor";

export default function Playground() {
    const [count, setCount] = useState(0);
    return (
        <div>
            {count}
            <button onClick={() => setCount((currentCount) => currentCount - 1)}>
                -
            </button>
            <button onClick={() => setCount((currentCount) => currentCount + 1)}>
                +
            </button>
        </div>
    );
}
If you're worried about the performance of inline functions, take a look a this blog.
useState - Part 2
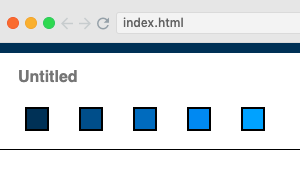
Now we add our name input to the <Name.js /> component so the user can name their project.
To set up<Name.js /> with a useState Hook, we need to import the Hook with a named import and then set our state up. Our state will be name and we will update it with setName. We then call useState and pass in an empty string as our default state value.
We now need an input element with four properties. These are:
value, which will always be the statenamefrom aboveonChange, which will usesetStateinline to updatenameby passing the value intosetStateonClickwhich uses setSelectionRange which takes a start index of 0 and end index of the length of the string to select the entire name, making it easier for the end-user to change the name.placeholder, which we set to 'Untitled'.
import React, { useState } from "react";

export default function Name() {
    const [name, setName] = useState("");
    return (
        <label className="header-name">
            <input
                value={name}
                onChange={(e) => setName(e.target.value)}
                onClick={(e) => e.target.setSelectionRange(0, e.target.value.length)}
                placeholder="Untitled"
            />
        </label>
    );
}
We can now name our project and select the name to reset it with just one click:

useEffect
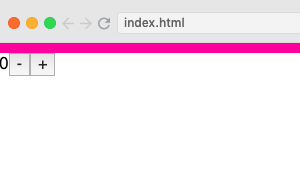
Currently, our Playground.js component is simply rendering a counter where can increment or decrement the count. Now we will update this so that every time the count is changed, the color of something is also changed.
We use the useState Hook to set up the initial color, which we set to null and the function to update it (setColor). Now, we set up useEffect to update this color. useEffect's first argument is setColor, which we want to set to a randomColor.
As we only want a change in count to trigger useEffect, we set this as the second argument. If the count value hasn't changed, the Hook will not run the effect and the color will remain the same.
import React, { useState, useEffect } from "react";
import randomColor from "randomcolor";

export default function Playground() {
    const [count, setCount] = useState(0);

    const [color, setColor] = useState(null);
    useEffect(() => {
        setColor(randomColor());
    }, [count]);

    return (
        <div style={{ borderTop: `10px solid ${color}` }}>
            {count}
            <button onClick={() => setCount((currentCount) => currentCount - 1)}>
                -
            </button>
            <button onClick={() => setCount((currentCount) => currentCount + 1)}>
                +
            </button>
        </div>
    );
}
Now, our color changes every time we increment or decrement our count.
useState & useEffect Challenge
It's now time to test the skills we have acquired so far. In this screencast, a function which gets some random colors for us has been added to :
const getColors = () => {
    const baseColor = randomColor().slice(1);
    fetch(`https://www.thecolorapi.com/scheme?hex=${baseColor}&mode=monochrome`)
        .then((res) => res.json())
        .then((res) => {
            setColors(res.colors.map((color) => color.hex.value));
            setActiveColor(res.colors[0].hex.value);
        });
};
Our task is to write the functions for setColors, which will give us an array of hex colors and setActiveColor, which will tell use what the active color is.
If we set up everything correctly, the UI will update with five colors which we can click on to expand. We only need useState and useEffect for this test.
#useState & useEffect Solution#
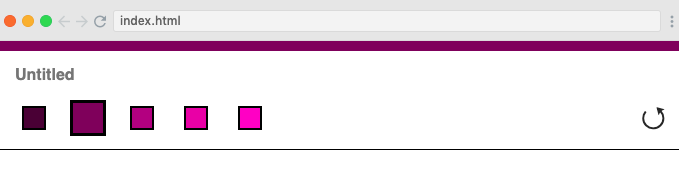
In this screencast, Christian walks us through how to give functionality to the <ColorPicker /> component. At the end of it, we now have some colors:
useEffect Clean Up
Now we add a component called <WindowSize.js /> which will show the window width and height at the bottom of the screen when the user resizes the window. This then disappears after half a second.
When we set up a timer or an event listener, we also need to clean it up once the component unmounts. This requires two pieces of state - the window size and visibility of the <WindowSize /> component:
export default function WindowSize() {
    const [[windowWidth, windowHeight], setWindowSize] = useState([
        window.innerWidth,
        window.innerHeight,
    ]);
    const [visible, setVisible] = useState(false);
}
Now we set up our effect, which adds the event listener:
useEffect(() => {
    const handleResize = () => {};
    window.addEventListener("resize", handleResize);
});
Next, we set up the cleanup phase. This returns the function and an empty array is passed in to tell it that useEffect should only run on the first mount. The cleanup will then run and remove the event listener:
useEffect(() => {
    const handleResize = () => {};
    window.addEventListener("resize", handleResize);
    return () => window.removeEventListener("resize", handleResize);
}, []);
We now set up the window size, the visibility and the timer so that the the resize window appears and then disappears after 500 milliseconds:
const [visible, setVisible] = useState(false);
useEffect(() => {
    const handleResize = () => {
        setWindowSize([window.innerWidth, window.innerHeight]);
        setVisible(true);
        setTimeout(() => setVisible(false), 500);
    };
    window.addEventListener("resize", handleResize);
    return () => window.removeEventListener("resize", handleResize);
}, []);
However, we do not want to add a new timer every time the user resizes the window, so we also need to clean up the timer with clearTimeout(timeoutId):
timeoutId = setTimeout(() => setVisible(false), 500);
To give clearTimeout the timeoutId from the last time the function ran, we use closures, which means that we declare our timeoutId variable outside the handleResize function. This way, the variable is still available to the inner function. Every time the function runs, the previous timeout will be cleared and a new one will be set up.
Lastly, we render our resize function to the browser.The final code can be seen in the screencast.
Now, whenever the user resizes their window, the window size is set to the current window size, the visibility is set to true, and a timer is started to set the visibility to false after 500 milliseconds.

useRef Challenge
If you need to access to actual DOM elements in React, you may need to use Refs. React has a Hook, useRef, which is dedicated to Refs.
To use a Ref, it needs to be added to the element:
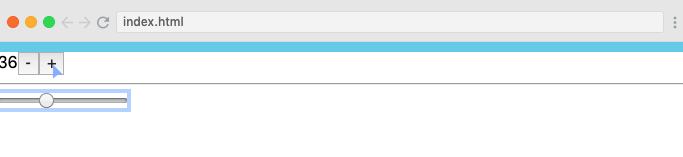
<input
    ref={inputRef}
    type="range"
    onChange={(e) => setCount(e.target.value)}
    value={count}
/>
This input is a slider which updates the count and therefore the selected color. As the value is also tied to the count, the slider will also adjust if the count is changed via the buttons we added earlier.
We have now declared our Ref, but we also need to set it up by calling useRef:
const inputRef = useRef();
In order to focus the input every time we change the count with the buttons, we simply add the necessary logic inside the effect which runs when the buttons are clicked:
 useEffect(() => {
    setColor(randomColor())
    inputRef.current.focus()
  },
Currently, the canvas is set to the height of the window itself, which makes it possible for the user to scroll within the canvas, which can lead to empty whitespace if the image is exported.
Our challenge now is to ensure that the canvas of our paint app is only as big as the window minus the header height. To do this, we need to use useRef to get the height of the header and subtract it from the window's height.
useRef Solution
In this screencast Christian walks us through how to get the correct canvas height with useRef.
After this, the user is no longer able to scroll, except for a few pixels offset between Scrimba's browser and a regular browser. There is now no whitespace at the bottom of the image.
useCallback & useMemo + Challenge
In this screencast, we are introduced to the concept of memoization. This is when a pure function returns the same output from a calculation it has previous processed, rather than re-running the entire calculation:
function Calculate(num) {
    // first call, num === 3... ok I will calculate that
    return fetchComplicatedAlgorithmToAdd47(3); // returns 50 after a while

    // second call, num === 5... ok I guess I have to calculate that too
    return fetchComplicatedAlgorithmToAdd47(5); // returns 52 after a while

    // third call, num === 3... WAIT, I've seen this before! I know this one!
    return 50; // immediately
}
React provides two Hooks which allow us to use memoization: useCallback and useMemo.
###useCallback###
We start off with a very simple component in Playground.js which renders the number of times the function has rendered:
function Calculate(num) {
    const renderCount = useRef(1);
    return <div>{renderCount.current++}</div>;
}

Now let's say that the component should only render when the count changes, but not when the color changes. To achieve this, we could use useCallback. We assign the result of useCallback to a variable called calculate:
const calculate = useCallback(<Calculate />, [count]);
We will now render our new calculate variable instead of the <Calculate /> component. Now, the component only renders when the count is changed, and not when the 'Change Color' button is clicked.
We also need to render our <Calculate /> component instead of the variable we previously used and create a callback function. We use useCallback and assign it to a variable called cb. The count is the only dependency, meaning that if the count changes we will get a new function instance:
const cb = useCallback((num) => console.log(num), [count]);
Now we pass in a number (which is set to the count) to the Calculate component and the callback function, which we log to the console. Whenever the Calculate component re-renders (i.e. when the plus and minus buttons are clicked), the current count will be logged to the console.
However, with this method, the count is also logged to the console when we click the 'Change Color' button. This is because we are using memoization for our console.log function, but not for our actual component, meaning that is not checking whether the callback function is the same as a previous one.
React.memo
To solve this, we add React.memo to the Calculate component. Now, it will check the inputs and see whether they are the same, and will not render if so:
const Calculate = React.memo(({ cb, num }) => {
    cb(num);
    const renderCount = useRef(1);
    return <div>{renderCount.current++}</div>;
});
The 'Change Color' button now no longer logs the count to the console.
###useMemo###
To see what useMemo can do, we add a useCallback call right next to a useMemo call:
useCallback(() => console.log("useCallback"));
useMemo(() => console.log("useMemo"));
This tells us that useMemo is used every time the function renders. This is because useCallback returns the functions, whereas useMemo returns the result of the function:
useCallback(() => console.log("useCallback")); // return the function
useMemo(() => console.log("useMemo")); // return the result of the function
useMemo can be used for some expensive functions which you want to memoize. UseCallback, on the other hand, is better for passing a callback into a component when you don't want to render the component unnecessarily.
The screencast finishes with a new challenge. Our paint app currently offers only a few colors to work with. Our challenge is to add some functionality to a newly-added refresh button so that the user can click the button and get some new colors. This should take place in RefreshButton.js, which is currently taking in a callback and should be calling that callback when the refresh button is clicked. Our challenge is to pass in the callback using useCallback or useMemo.
As a bonus challenge, we are also asked to use React.memo to memoize the <Name /> component, which is currently rendering unnecessarily every time we change our colors.
useCallback Solution
Now, Christian walks us through the solution to the previous challenges, follow him in this marvellous screencast.
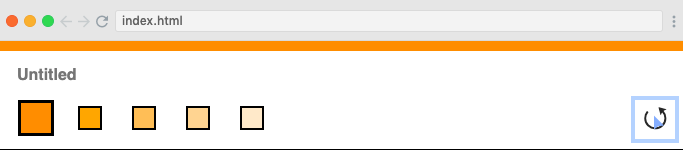
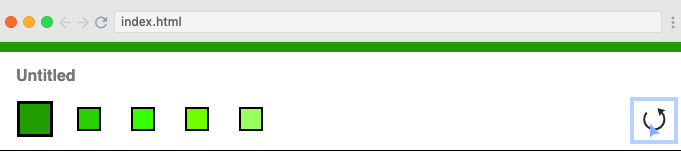
At the end of the screencast, our refresh button is now supplying shiny new colors when clicked:
Custom Hooks
Here, we learn about custom Hooks by refactoring the <WindowSize /> component into a Hook. This is great for reusability.
Currently, <WindowSize /> is handling two different sets of state; the window size and visibility. As visibility might not be needed in future uses of <WindowSize />, we move its logic into our <Paint /> component, which is also where we will use our useWindowSize Hook.
The following lines are removed from WindowSize.js:
let timeoutId;
///
setVisible(true);
clearTimeout(timeoutId);
timeoutId = setTimeout(() => setVisible(false), 500);
Additionally, the following lines now need to be returned from <Paint.js /> instead of <WindowSize />:
<div className={`window-size ${visible ? "" : "hidden"}`}>
    {windowWidth} x {windowHeight}
</div>
The window width and height will be returned from <WindowSize />:
return [windowWidth, windowHeight];
To make the windowWidth and windowHeight variables available, we add the following code to <Paint.js />:
const [windowWidth, windowHeight] = useWindowSize();
To implement the visibility logic so that we can show and hide the window size as necessary, we pass in a callback to our useWindowSize Hook and use a Ref to make timeoutID available between renders:
let timeoutId = useRef();
const [windowWidth, windowHeight] = useWindowSize(() => {
    setVisible(true);
    clearTimeout(timeoutId.current);
    timeoutId.current = setTimeout(() => setVisible(false), 500);
});
We can now call this when we need to from <WindowSize />:
export default function useWindowSize(cb) {
    const [[windowWidth, windowHeight], setWindowSize] = useState([
        window.innerWidth,
        window.innerHeight,
    ]);

    useEffect(() => {
        const handleResize = () => {
            cb();
            setWindowSize([window.innerWidth, window.innerHeight]);
        };
        window.addEventListener("resize", handleResize);
        return () => window.removeEventListener("resize", handleResize);
    }, []);
    return [windowWidth, windowHeight];
}
We now have the same functionality as before but the <WindowSize /> logic is in a reusable Hook.
The lessons ends with another challenge - to convert the <Canvas /> component into a function which uses Hooks instead of lifecycle methods.
Building the paint app with Hooks
This screencast walks us through how to convert <Canvas /> into a functional component using Hooks. It also shows us how to refactor our app to make it much cleaner and more readable. A big advantage of using Hooks is that all related logic is next to each other, in contrast to our old components in which related logic items were separated from each other.
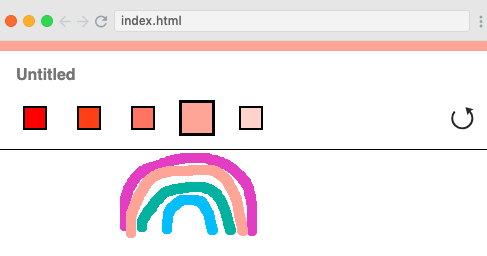
At the end of the screencast, our paint app is finally finished and we are ready to paint our masterpieces:
Outro
We have now finished the React Hooks course. We have learnt about:
useState, which manages stateuseEffect, which does side effects,useRef, which gets references to DOM elements and keeps values across rendersuseCallback, which creates functions which don't need to be created on every renderuseMemo, which memoizes expensive computationsReact.Memo, which can go around a React component and memoize itcustom Hooks, which allow us to create our own reusable logic.
There are two rules to keep in mind when using any of these Hooks:
- Only call Hooks at the top level of the React component, i.e. not within if blocks or anything similar.
- Only call Hooks from React functions, not your own custom functions.
Congratulations on following the tutorial and learning all the skills used in this project. To further your learning, check out Scrimba's free, six-hour Learn React for Free course which aims to make you a React wizard!
Happy coding!