
There are only so many HTML tags that people typically use when building websites.
But as there are over 100+ HTML elements, I wondered if there were any more beginner-friendly tags that I didn't know about – and that others might find useful, too.
After doing some research, I came up with this collection of some less well-known, but still very useful, HTML tags.
 Source: imgur
1. The <base> element
When you set the href attribute on an a tag to a relative URL, the default base URL it considers is the location.href URL.
You can override this behavior by defining this tag above all HTML elements which deal with relative URLs.
For example, if I do this:
<head>
    <base href="https://syntackle.live" />
</head>
<body>
    <a href="/contact/">Contact</a>
</body>
then, the href URL for the a tag will be https://syntackle.live/contact/.
Keep in mind that there can be only one <base> tag per page. If you define multiple <base> tags, then only the first tag will be considered.
You won't need this element most of the time, but if you feel like all of the URLs on a page point to another site, then declaring it is beneficial.
2. The <aside> element
You can use this element for any content not directly related to the main content of the page. It works well for displaying advertisements, related posts, promotional content, blockquotes, nav elements, and so on.
<main>
    <h2>Post</h2>
    <p>This post is about a breed of dogs.</p>
    <aside>
        <p>Learn more about cats.</p>
    </aside>
</main>
For example, in the above snippet, the post is mainly about dogs and their breeds. But if you wrote an article about cats and you wanted to link to it from the dog article, then you could use the aside element to mention it. The content in the aside element can be tangentially related to the page.
The HTML specification provides some good examples on how to use the <aside> element.
3. The <search> element
You can use the <search> element as a container for elements dealing with search or filtering. For example, a form sending a POST request to get search results or a search component relying on JavaScript for filtering.
// search component relying on JavaScript
<search>
    <input type="text" id="searchInput">
    <div id="results"></div>
</search>
Here's another example:
<search>
    <form action="search.js" method="POST">
        <input type="text" id="searchInput">
        <button type="submit">Search</button>
    </form>
</search>
In both of the above examples, the elements wrapped within the search element play a role in the search functionality of a site.
You should use this element because it provides semantic value to the browser and accessibility tools such as screen readers.
4. The <q> element
Most people just use quotation marks (") to quote something. But there is a dedicated HTML tag just for this. Using it, you can quote something from another source and by defining its cite attribute, you can also link to that source.
<q cite="https://another-source.com">This is a quote from another source.</q>
However, according to the HTML spec:
The use of q elements to mark up quotations is entirely optional; using explicit quotation punctuation without q elements is just as correct. - html.spec.whatwg.org
5. The <var> element
If you are dealing with math in your webpage, explaining a concept, or solving a problem, then this element can come in handy when mentioning variables while describing the problem.
<p>These are three variables, <var>a</var>, <var>b</var> and <var>c</var><sup>2</sup>.</p>
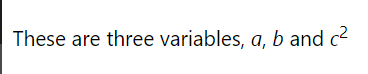
You can use this element to show a visual representation of known or unknown variables, as shown above.
6. The <samp> element
This element depicts the output from another software or computer system. There's also a kbd element (used for displaying user inputs) which is visually similar to this element.
You can use this element to display the output of the console or the output of a computer program.
<pre>
    <code class="language-javascript">console.log(1 + 2)</code>
    <samp>3<samp>
</pre>
7. The <datalist> element
You might be familiar with the select element that lets you provide users with a bunch of options to select from. A similar element is the datalist element.
The only difference between them is the datalist element provides suggestions instead of a finite set of options. Users can also type in their own input if none of the suggestions match their requirements, whereas when using the select element, users must pick from the list of options in the dropdown.
You can use <datalist> with the input element so the user can type anything they want. Then if it matches the values in the datalist, the user can select that value.
In order to link the input element with the datalist, you'll need to use a list attribute on the input element. The value of the list attribute must be the id of the datalist.
<label>
    Cars:
    <input name=car list="cars">
    <datalist id=cars>
        <option value="Ferrari">
        <option value="Mercedes">
    </datalist>
</label>
It supports different types of inputs but it comes with partial browser support.
8. The <progress> element
The native progress element in HTML, as the name suggests, is used to track the progress of a task.
You can use this element in two ways: determinately or indeterminately. A determinate progress bar knows where it currently is, and if the max value is specified, you can also figure out how much more is left.
To create a determinate progress bar, you need to specify the value attribute. The default range of the value is from 0.0 to 1.0. But you can also specify a custom max value which has to be a valid floating point number.
<progress value="0">0%</progress>
<!-- or -->
<progress value="0" max="100">0%</progress>
To increment/decrement the value of the progress bar, set the value attribute to the desired number. Here's a dummy implementation of progress update:
<body>
    <progress value="0" max="100"></progress>
</body>
<script>
    const progressBar = document.querySelector("progress")

    setTimeout(() => {
        setTimeout(() => {
            progressBar.value = 100
        }, 300)
        progressBar.value = 65
    }, 500)

    progressBar.value = 10
</script>
To display an indeterminate progress bar, you should not include the value attribute in the <progress> element. Indeterminate progress bars are useful when you can't precisely tell how much time the user will have to wait for something to load.
<progress id="indeterminate-progress-bar">Indeterminate</progress>
9. The <dialog> element
I consider this the most useful element nowadays because it saves you from the hassle of creating your own modal with z-index workarounds. But that doesn't mean you should overuse it. You can use it to create modal/non-modal interactive dialogs in order to alert users or show a one-time message.
For example, if you want to show a one-time message to users visiting your site, then you can wrap a form element in a dialog and then mention "dialog" as the form method. Clicking on the button inside the form will close the dialog.
This is a type of non-modal dialog and it doesn't require JavaScript. The open attribute tells you that the dialog will be shown as soon as the page loads.
<dialog open>
    <p>This is a one time message. Click the button to close it.</p>
    <form method="dialog">
        <button>Ok</button>
    </form>
</dialog>
To create a modal dialog, you need a bit of JavaScript to handle click events to show and hide the modal. There are two methods — showModal() and close() – which you can use on the dialog element after accessing it with JavaScript.
<dialog>
    <p>This is a dialog box.</p>
    <button id="close">Close</button>
</dialog>
<button id="open">Open Dialog Box</button>

<script>
    document.querySelector("#open").addEventListener("click", () => {
        document.querySelector("dialog").showModal()
    })

    document.querySelector("#close").addEventListener("click", () => {
        document.querySelector("dialog").close()
    })
</script>
There's so much you can do with the dialog element but it's only good for certain use cases such as presenting the user a sign up form which is closable, displaying a warning before the user performs a critical action, and so on.
One situation where you shouldn't use them is during the checkout process of an ecommerce application. This is because the user is performing something critical, and if they accidentally close the dialog, then it creates disruption in user flow and experience.
Semantic HTML
The elements mentioned above fall under an umbrella term: Semantic HTML. Semantic HTML gives meaning to your HTML content – not only to users but to browsers, crawlers, and accessibility tools as well.
Not everyone can see the screen or use devices such as a mouse to navigate the web. Instead, they rely on assistive technologies which help them interpret the content.
Also, search engines can find relevant content more easily by traversing through semantic HTML. That's why it should be one of your top priorities when you're building a website.
You also don't want your website to be just a bunch of divs because a div element doesn't mean anything to a browser in terms of content — for a browser, it's just a division element to separate content.
 a bunch of div elements (Source: imgur)
Conclusion
Today, you learned about some HTML elements or tags which you probably didn't know about earlier.
There's a specific purpose for each HTML element and you should wrap your content within the appropriate elements.
You also learned about semantic HTML and that it's the best way to give meaning and structure to your content.