
Did you know that 96% of the top 1 million web servers are running Linux?
Yes. You heard that right. So being able to work with Linux servers is a great skill to have.
In this article, you'll learn how to connect to a Linux server using SSH, how to communicate with other users on the server, and you'll see a handy file transfer mechanism.
A quick note before we dive in: the IP address that I've given in the example commands and the one in the example screenshots will vary. The reason is, I don't have a server to demonstrate everything, so I made my laptop a server. So, all my example screenshots will be displaying my local IP addresses beginning with 192.168....
How to Log in to a Server Running Linux
I love to develop software, but I really dislike DevOps and deployments. When I have some kind of DevOps work, I'll hand it over to the specialist in my team and stay away.
The reason is my lack of experience in handling servers. But sometimes, when my team members are not available, I'm forced to do deployments.
So, the initial step for a (manual) deployment is to log in to the server. To log in, you need to know the IP address and the password of the server.
Above all, you need to have the SSH client installed on your machine. This comes pre-installed on almost all Linux distros.
If you don't have it installed, you can install it by running the below command in the terminal:
sudo apt install openssh-client
In order to access the server via SSH, the server should have SSH Server installed and the service running in it. This will be pre-installed on almost all Linux servers.
Let's connect to the server now.
You need the following items to login to the server:
- IP Address of the server machine
- Username of the server
- The password of the user
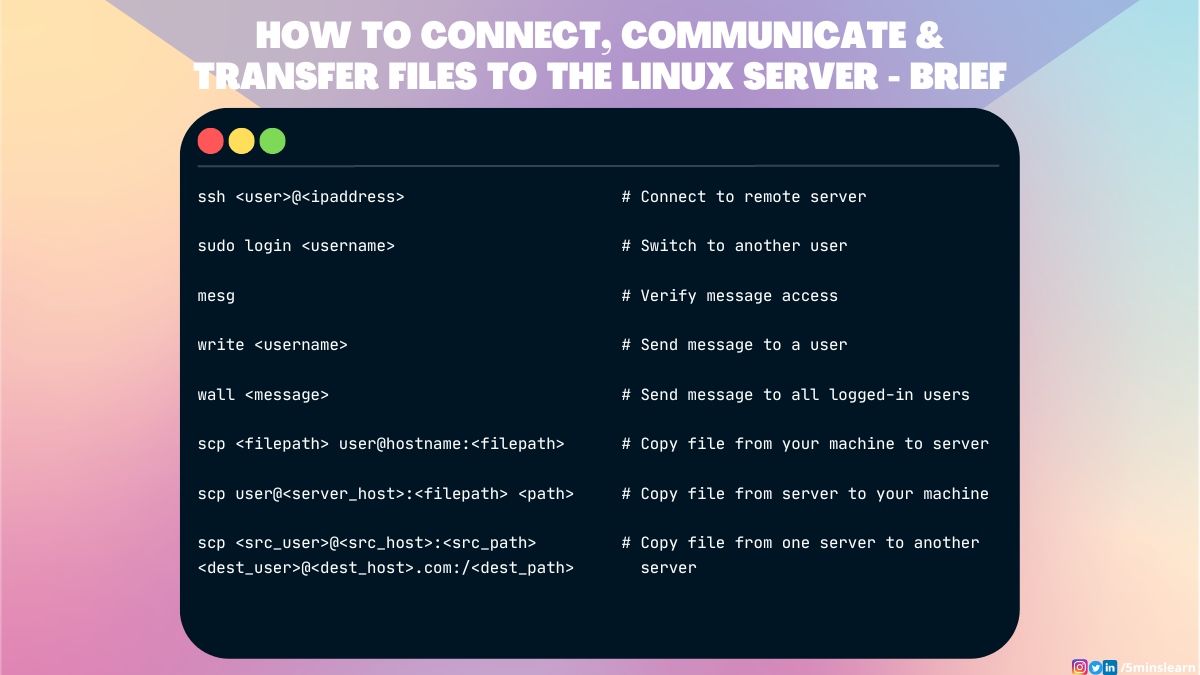
ssh user@<ipaddress>
Here's an example command:
ssh ubuntu@45.244.96.73
The above command will ask for the password. If you enter the password, it will log in to the server.

Alternatively, you can log in without any prompt by adding the -p option with the sshpass command prepended to ssh command. You need to have sshpass installed to try this method.
The syntax looks like this:
sshpass -p <password> ssh user@<ipadrress>
And here's a quick example:
sshpass -p password ssh user@45.244.96.73
This is not the recommended way. Command line arguments are visible to all users (for example, ps -ef | grep sshpass). sshpass attempts to hide the argument, but there is still a window during which all users can see your password passed by argument.
There's also a command in Linux called history which displays your past commands. Any user who gain access to your machine may run the history command and find your server login credentials. But if you've entered the password in a prompt, it'll not be shown to users in the history command.
Here's the output of history command:

history command displays past commands
How to Log in to a Particular User in the Linux Terminal
In Linux, we can log in to different users using two different approaches:
- ssh
- login
How to log in with SSH
As already discussed with the SSH command, we can login to another user using the same syntax.
ssh <user>@<ipaddress>
ssh root@45.244.96.73
How to log in with the login command
You can use the login command to switch the user inside the server.
Let's assume you've logged into the ubuntu user in the 45.244.96.73 server. Later you found that you want to switch to the ak user to perform some admin operations. In such a case, you can quickly switch the user using the login command.
Syntax for the login command is:
sudo login <username>
And here's an example to switch to the root user:
sudo login ak
The above command will prompt for the password similar to login via SSH.

Hurray, we successfully logged in to another user. Now let’s explore how to communicate with these sessions.
A quick note before jumping onto the communication section. If you wish to log out of the logged-in user, you can simply run the logout command.
How to Communicate Between Sessions in Linux
Did you know that you can use your Linux terminal as a chat interface?
Well, yes – you can. If you and your colleagues are connected as their own users to the same server using SSH, then you all can communicate via the terminal.
As with all such features, there are a few pre-requisites to continue.
First, make sure that message access is enabled in the receiver system. To verify that, type the following command in the terminal:
mesg

The response will be either yes or no.
is y – Message access enabled
is n – Message access disabled
To toggle this feature, you have to pass the symbol along with the mesg command.
mesg y      # Enable message access
mesg n      # Disable message access
Let's try to communicate with others.
There are two commands available to communicate:
writewall
The write and the wall commands use a fairly simple mechanism. Both commands take a message from one session and deliver it to other session(s).
How to use the write command
You can use the write command to message a single user (Direct Message).
write <username>
write ak
After entering this command, it prompts for the input message to send. We can send any number of messages using the write command.
Here's an example showing the communication between the users ak and gogosoon:


Let's turn off messaging on the ak user and try to send a message from the gogosoon user.
mesg n

ak user

ak user from gogosoon user
How to use the wall command
You can use the wall command to write messages to all logged-in users. This command will display the message or the contents of a file to all the logged-in users. Basically, it will broadcast the message to all the sessions.
wall <message>


gogosoon
Here we can see the message in the user ak. Similarly, it prompts the message to every logged-in user.
How to Transfer Files to/from the Server Using the Linux Terminal
I believe most people would recommend using FTP to transfer files from and to the server. FTP provides more control over the files such as the ability to rename, delete, move, and modify files from the remote computer.
But FTP does not offer protection against anyone who may be trying to view your network credentials.
We can do this using a Linux terminal – and believe me it's super simple.
You can transfer files using the scp command.
SCP stands for Secure Copy Protocol. This command allow the user to share the files in a secure way. Unlike FTP, SCP is highly secure. It uses secure shell to encrypt both your data and credentials. SCP does not provide facilities to control files.
Since this command follows the end-to-end encryption protocol, it uses encryption over an SSH connection. This will protect the files from suspicious attacks.
Transferring files via SCP will be slow when compared with FTP. But, it's a better alternative to FTP if you need a one-time movement of files.
The syntax for the SCP command looks like this:
scp [OPTIONS] <user>@<src_host>:<file_src_path> <user>@<dest_host>:<file_dest_path>
Using the SCP Command we can do the following operations,
- Copy the file from our machine to the server machine
- Copy the file from the server machine to our machine
- Copy the file from one server to another server
Let's look at each of these operations in more detail now.
How to copy the file from the client machine to the server machine
When copying files from the local to the server machine, you should enable SSH in the server. This is because SCP uses SSH to establish the connection between the client and server machines.
scp <filepath> user@hostname:<filepath>
scp sample.txt ak@45.244.96.73:/home/ak/


Sample.txt has been transferred to server
The above screenshots show that the file was copied to the server.
How to copy the file from the server machine to the client machine
Let's see how to transfer the file from the server to our local machine:
scp server_username@<server_host>:<filepath> <local_path>
This command will copy the file server_file.txt from the server machine to the local machine in the test directory.
scp ak@45.244.96.73:/home/ak/server_file.txt /home/gogosoon/test
If you leave the local_path empty, the file will be copied to the home directory.


How to copy the file from one server to another server
Let's assume you're taking a backup of a file from a server. You don't want this file to be stored on your machine due to some security concerns. But, you want to transfer this file to another server.
Copying files from one server to another server is also possible with the scp command:
scp <src_user>@<src_host>:<src_path> <dest_user>@<dest_host>.com:/<dest_path>
scp ak@45.244.96.73:/home/ak/script.sh gogosoon@45.244.196.173:/home/gogosoon/
Conclusion
Alright, we've come to the end of this tutorial. I hope you all enjoyed learning about these helpful commands.
If you are a DevOps Engineer, Linux Developer, or you're learning Linux, these commands will be very useful. If you enjoyed this guide, please share it with your colleagues/friends who are more into working on servers.
To learn more about Linux, subscribe to my email newsletter on my site and follow me on social media.