
By Boudhayan Biswas
As iOS developers, we are already aware of managing different environments like Development, QA, Beta, and Production. For these different environments, there are different server URLs, app icons, and configurations.
So before creating a new build pointing to an environment, we need to keep in mind that we also have to change the server URL. We could do this by changing some hardcoded flag value in the constant file or using macros, but it makes everything more complicated.
But if we think for a little while, we can come up with an idea. And by applying this idea, we can easily handle any scenario. So the idea is, if we create different schemas and configurations, then it allows us to change the application server URLs, App icon, Plist file, and configuration.
In this tutorial, I will show you how to manage different environments using schemas and configuration.
These are the steps:
Project Setup:
Open XCode and create a new single view application with a proper name.
Add Schema and Configurations:
Before adding a schema, we need to know that every XCode schema comes with two different build configurations: Debug and Release. Then if we want, we can make changes specific to a particular build configuration.
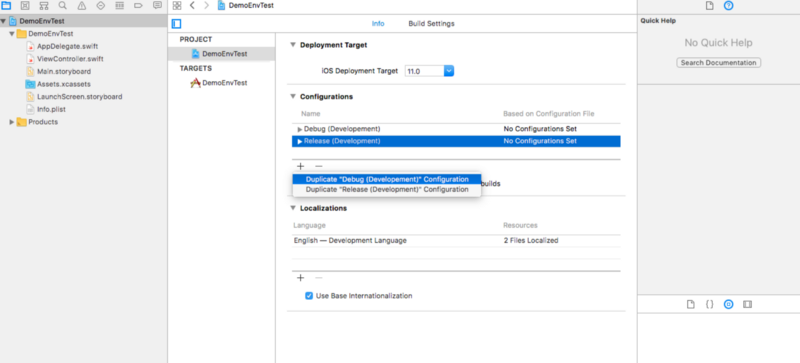
Now to add our build configurations, select the project in the Project Navigator pane on the left. Then select Info from the two options (Info and Build Settings). In the Configurations, we have to add our own configuration for the five environments (Development, Production, QA, Beta, and UAT) there.
 Add a new configuration for an Environment (Debug and Release)
First of all, double click on Debug and rename it as Debug (Development). Similarly, double click on Release and rename it as Release (Development). Now click +, and select Duplicate Debug (Development) and Duplicate Release (Development), then change the duplicate environment name with the others available names.
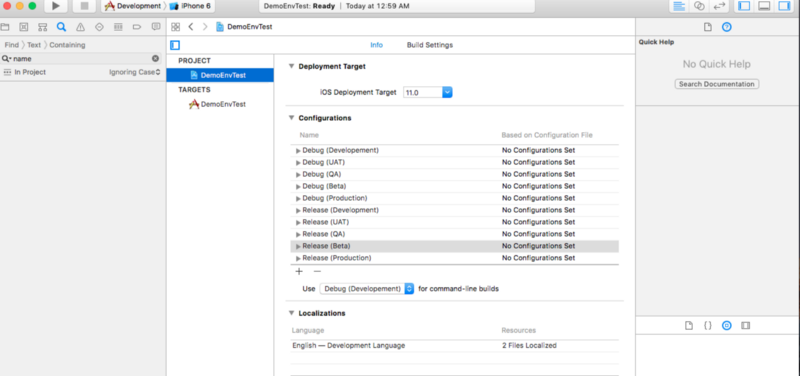 After adding all the configurations for different environments
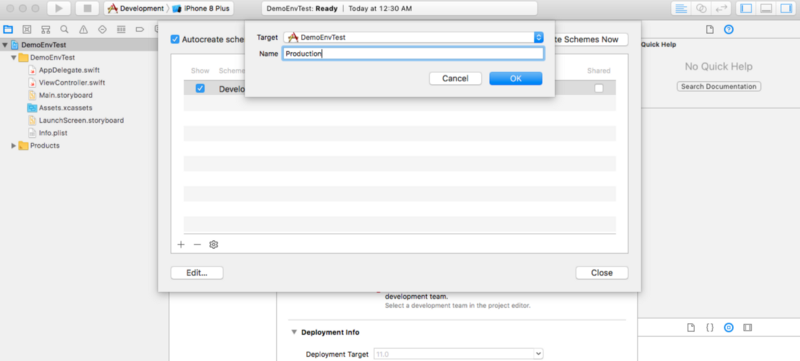
For the schema creation, go to manage schema in top left corner of XCode. There you can see that one schema is already available. Rename it as Development — or you can delete the existing and add a new one with the name Development. Then add the rest of the four schemas for the other environments.
 Add a new schema for an Environment
Oops, don’t forget to check the shared box there. After adding all the schemas, the manage schema screen should look like this:
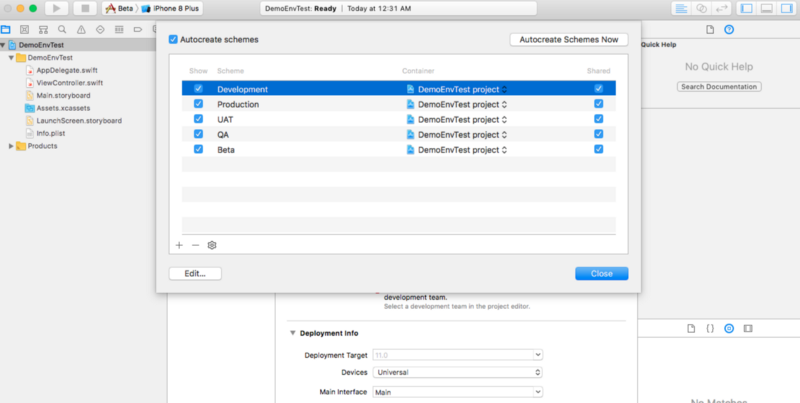 All the schemas are added
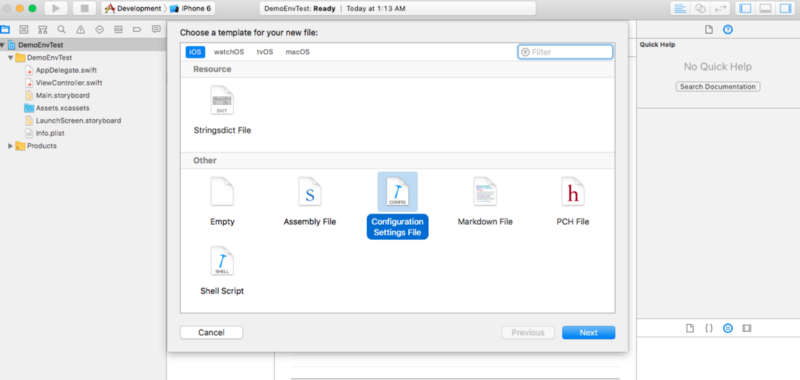
Add Configuration Settings File:
Right click on Project, select new file, then add Configuration Settings File and give it the same name as the environment.
 Configuration Settings File
After adding all the config files, your Project Navigator left pane should look like this:
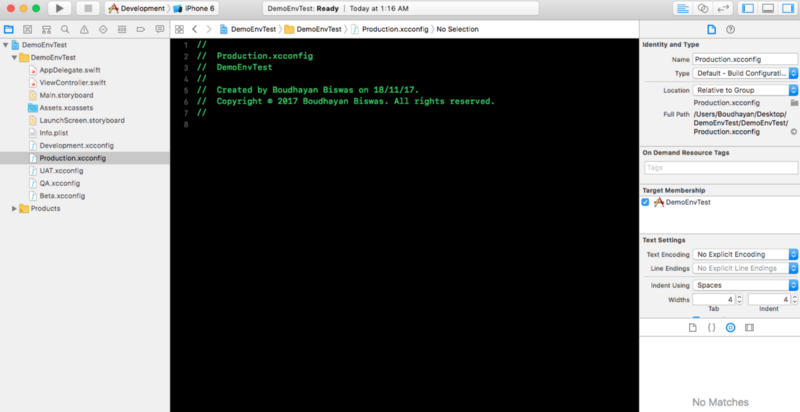 Configuration Files added
Now the most important part starts: add your server URL and other customized key value in the corresponding configuration file.
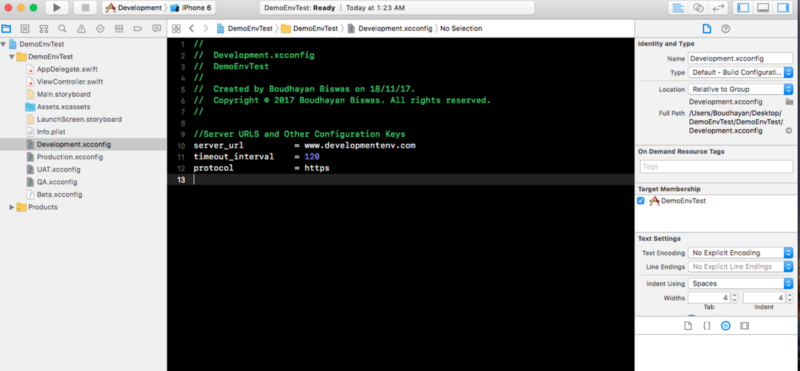 Server URL added in Configuration File
Add Plist Files:
Rename the info.plist file as development.plist. Copy and paste the same plist file for the different environments inside the project, and rename each of the plist file with the environment’s name. You can set some environment-specific keys and values in the plist files. After that, add the keys from the configuration file to the plist files like this:
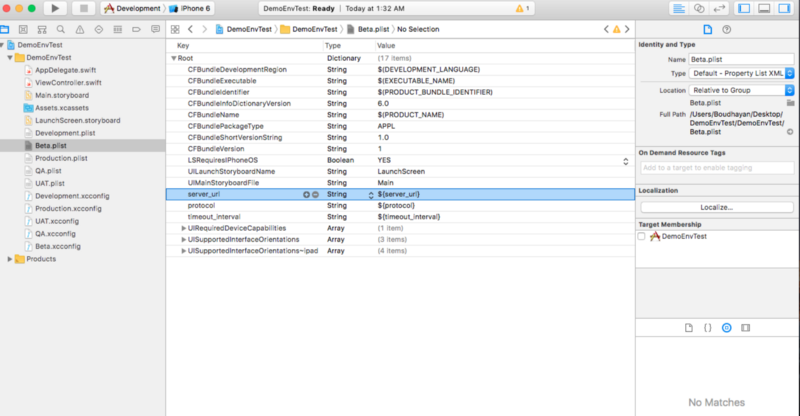 Add keys in Plist File
Now we have to set the appropriate plist path for each build configuration. From Targets, just select a plist file, and rename it with the same name for the Debug and Release configuration.
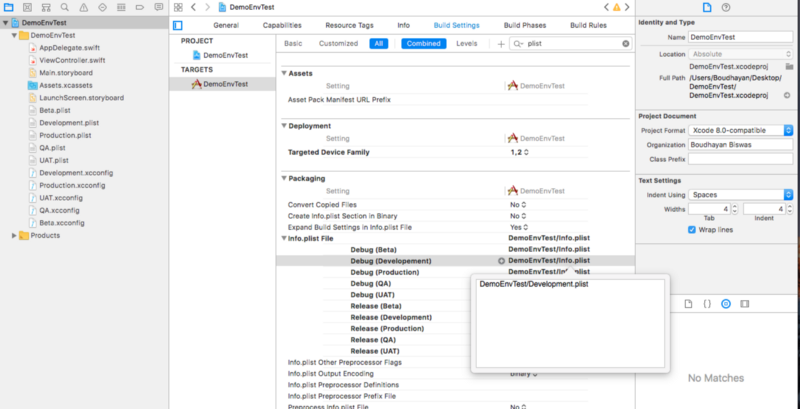 Add Plist Path for build configuration
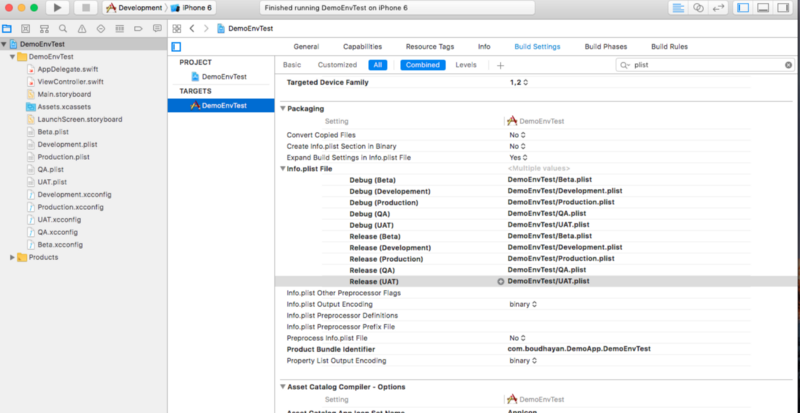 Renamed Plist Files
Linking Build Configuration with the Configuration File:
Select all the build configurations (Debug and Release) in Projects Info one by one. Then set the appropriate configuration file, which you have added to the project.
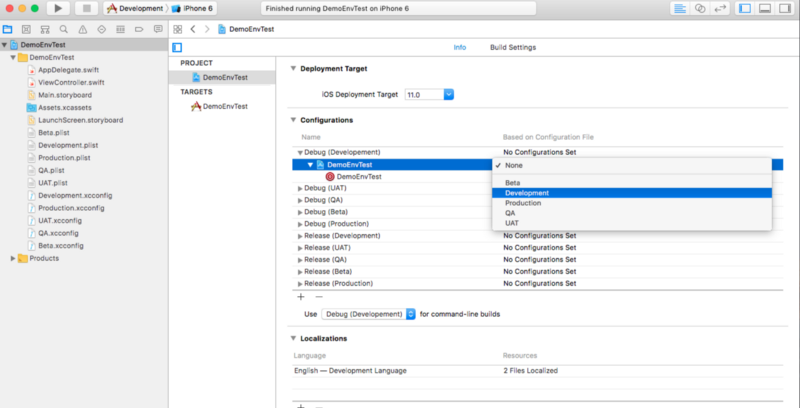 Set Configuration File to Build Configuration
After adding all the configuration files, your Build settings should look like this:
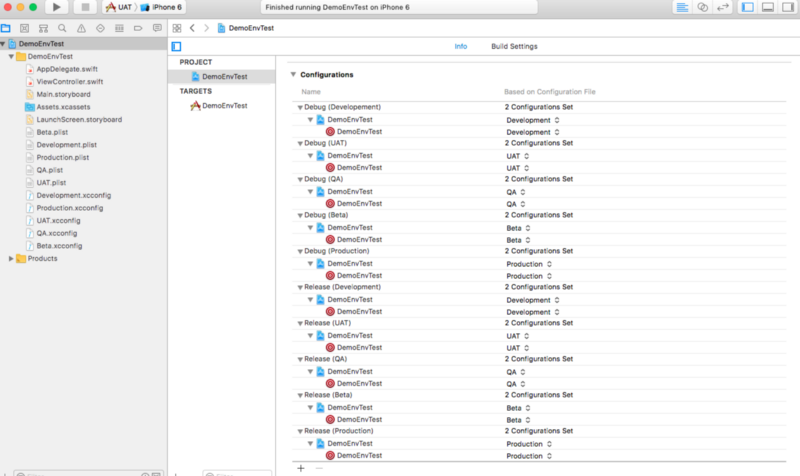 Configuration File and Build Configuration
So we have now successfully linked all the configuration files to the respective build configurations.
Linking Schema with the Build Configuration:
Now the last step is linking the schema with the build configuration. To do this, select any schema, go to edit schema, and set the appropriate build configuration there.
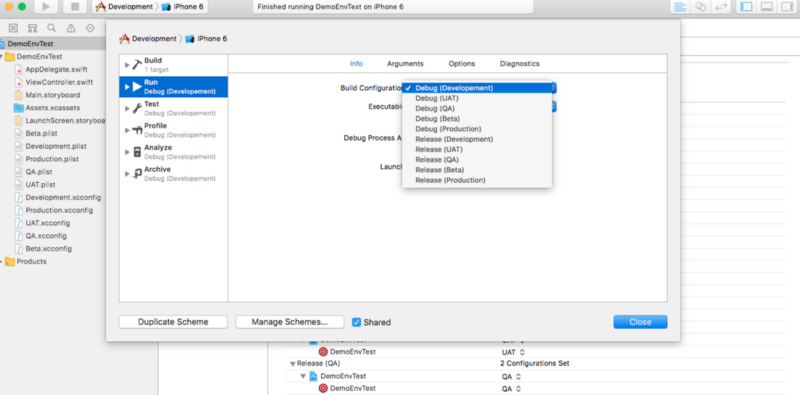 Linking Schema and Build Configuration
Ready to Run the Project:
Now all the set up is done. The only thing you have to do select the schema and run — the environment will be automatically selected for you. So for fetching the server URL and other values, I have created an Environment.swift file. Check it out:
To fetch the server URL or other settings in ViewController.Swift or any other file, you have to write only one line of code:
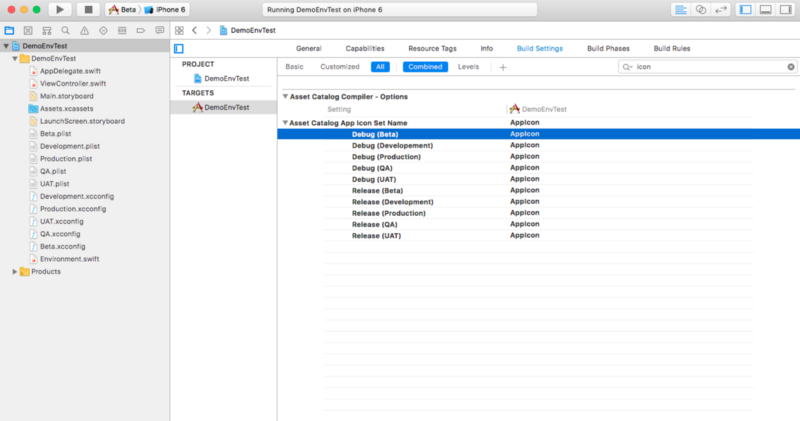
You can also manage different app icons for different environments from build settings. Then, you will only have to look for a second to see which environment build is installed on your device.
The complete project is available on GitHub. You can download it if you have any questions.
Don’t spend extra time changing the server URL or some other configuration every time you build your project. This is the easiest way to manage different environments, app icons, and configurations.
If you like this, please don’t forget to give a clap. It will inspire me more. For any suggestions, please feel free to write an email to mail2boudhayan@gmail.com.