

Django is a super useful tool for building web applications with Python. It follows the Model-View-Template (MVT) architecture, which is a popular design pattern for building web apps.
In the MVT architecture, the Model refers to the internal representation of information stored, the View is responsible for processing user requests and returning appropriate responses, and the Template is responsible for rendering the data received from the View.
This guide focuses on the Model part of the architecture, which is the central component of your application and where you typically start when designing your applications. The Model is responsible for the internal representation of your data and provides an interface for interacting directly with the database.
In this tutorial, you will learn how to use Django's interactive shell to create, read, update, and delete objects. You will also learn about registering models in the admin interface, which is useful for designing well-organized databases for your Django projects.
These skills will allow you to manage your projects more efficiently and ensure they function smoothly.
Prerequisites
To get the most out of this tutorial, you'll need to have a basic understanding of Python and Django.
How to Set Up the Project
To help you understand the concepts in this tutorial, you will develop a simple 'todo' app.
To get started, create a new directory where you will host the project, then change directories into it.
Once inside the folder, install virtualenv, a tool for establishing isolated Python environments.
pip install virtualenv
virtualenv venv
source venv/bin/activate
pip install virtualenv installs the necessary tool. virtualenv venv creates a virtual environment called venv. Lastly, source venv/bin/activate activates the virtual environment, allowing for isolated Python development within the designated environment.
Feel free to replace "venv" with the name you chose during the virtual environment creation.
Make sure Django is installed. If not, install it via the command line like this:
pip install django
Start a project using the following command:
django-admin startproject todoproject
Change into the project directory, todoproject, then create a new app.
cd todoproject
python manage.py startapp todoapp
Next, include the app's name in the INSTALLED_APPS list in settings.py. In your code editor, navigate to settings.py file.
 INSTALLED_APPS = [
    'django.contrib.admin',
    'django.contrib.auth',
    'django.contrib.contenttypes',
    'django.contrib.sessions',
    'django.contrib.messages',
    'django.contrib.staticfiles',
    'todoapp' # new app
]
Django Models
A model is like the go-to expert for all your data in Django. It's like a detailed plan that says what info you want to store, how to store it, and how it can be retrieved.
The todo app will store tasks. You will keep it simple by only storing the title of the task to be done and it's completion status – that is, whether or not the task has been done. Open the models.py file in your text editor and add the following code:
from django.db import models

class Task(models.Model):
    title = models.CharField(max_length=100)
    completed = models.BooleanField(default=False)
In this super simple model:
Taskis the name of the model.titleis a field of typeCharFieldwith a maximum length of 100 characters. This field is suitable for storing short text.completedis a field of typeBooleanFieldwith a default value ofFalse. This field is a boolean (True/False). The default value is set toFalse, assuming tasks start as not completed by default.
The main part of a model is the list of things it stores (called fields). title and completed are fields, which are of the BooleanField and CharField field types.
Other examples of field types you can use include:
AutoField: anIntegerFieldthat automatically increments.BooleanField: represents true/false values.CharField: stores text-based values.DateField: represents a date using adatetime.dateinstance.DateTimeField: represents date and time using adatetime.datetimeinstance.DecimalField: represents a fixed-precision decimal number using aDecimalinstance.EmailField: aCharFieldvalidating the value as a valid email address.ImageField: inherits fromFileField, ensuring uploaded objects are valid images.IntegerField: stores integer values within a safe range.SlugField: represents a short label for something, typically used in URLs.TextField: a large text field.TimeField: represents time using adatetime.timeinstance.URLField: aCharFieldfor URLs.
Other field types explain the relationship between the tables:
ForeignKey: represents a many-to-one relationship.ManyToManyField: represents a many-to-many relationship.OneToOneField: signifies a one-to-one relationship. Essentially, it's akin to aForeignKeywithunique=True, but the "reverse" side of the relationship directly yields a single object.
To synchronize your database with the latest changes in your Django models, you must run migrations. Make sure you are in the same directory as the manage.py file is, and then run the following:
python manage.py makemigrations
python manage.py migrate
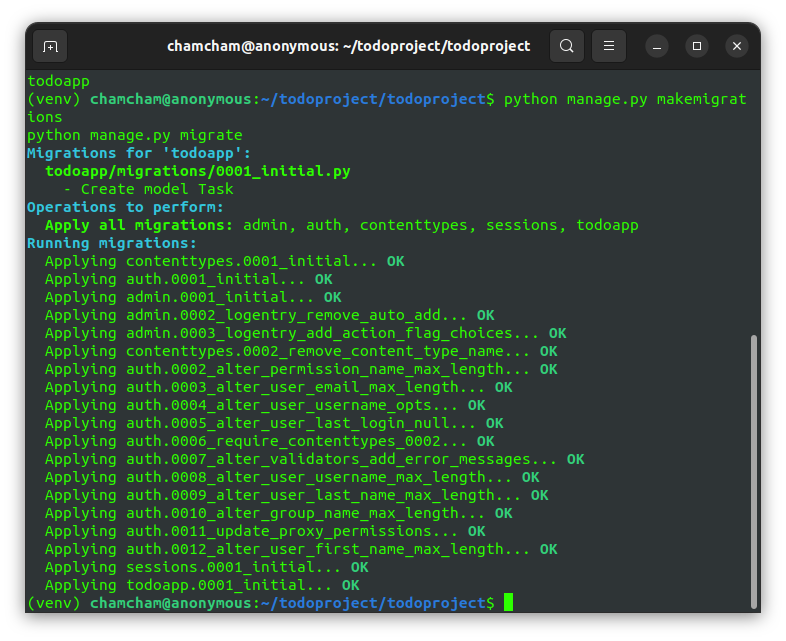 making migratiions
Register your models in the admin.py file. This enables administrators to view, add, edit, and delete instances of the Task model through the Django admin interface. It's a convenient way to interact with your data during development and testing.
#admin.py
from django.contrib import admin
from .models import Task
# Register your models here.

admin.site.register(Task)
You need to create a superuser in order to access the Django admin interface. In the terminal, run the following:
python manage.py createsuperuser
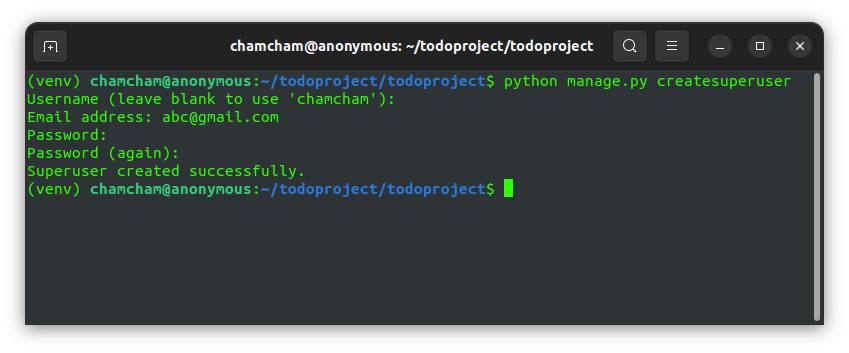 creating a superuser
Follow the prompts, and you should have a superuser account to access the admin interface.
The Django Shell
You would typically write your logic in a view, but because we want to do more experiments, you will use the Django shell. It is a powerful and versatile tool that enhances the development and testing experience of your Django projects. The shell also provides a dynamic and interactive environment for working with your code, data, and models.
To access the shell, run the following command from the project directory:
python manage.py shell
Start by importing the Task model.
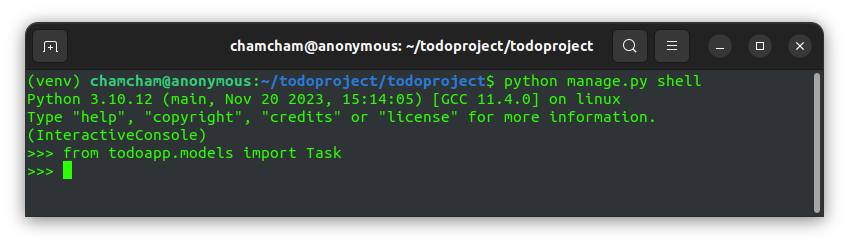 importing the model to the Django shell
The basic operations performed on a model will typically be creating, reading, updating, and deleting – hence the name CRUD application. You will learn how to perform all four operations here.
CREATE
To create a new task, type the following in your shell:
>>> new_task = Task(title='Complete Assignment', completed=False)
>>> new_task.save()
Alternatively, you can use the create function, like this:
Task.objects.create(title='Another Task', completed=False)
To check all the tasks, enter the following:
Task.objects.all()
You should get something similar to what you see in the below image. Notice that a queryset is returned with the task you just created:
 creating objects in Django shell
READ
Once you have created the objects, you should be able to read them. To do this, Django provides the get() and filter()methods.
The get() method retrieves a single object from the database based on specified conditions. It raises exceptions if no object or multiple objects are found, making it suitable for unique queries.
The filter() method retrieves a queryset of database objects matching specified conditions. It doesn't raise exceptions if multiple or no objects are found and is, therefore, ideal for queries with multiple possible results.
You can use the get() method to retrieve the task with a specific title.
specific_task = Task.objects.get(title='Complete Assignment')
print(f'Title: {specific_task.title}, Completed: {specific_task.completed}')
The output of the above code is the following:
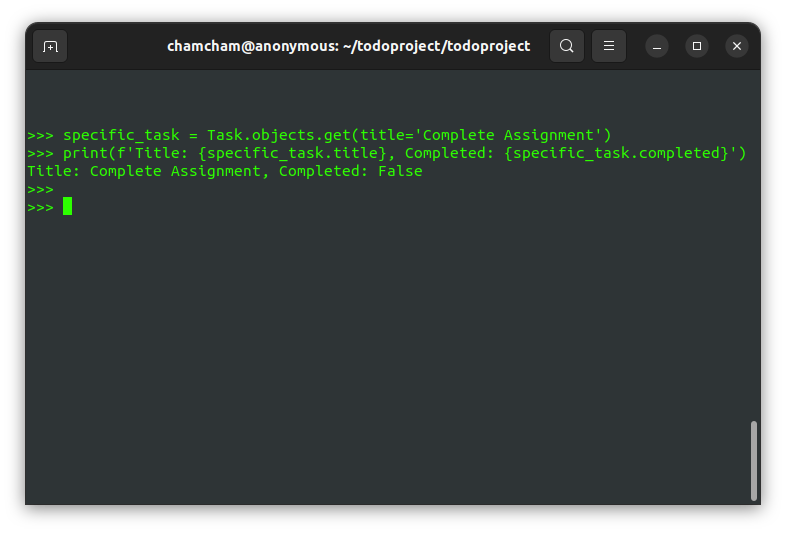 retrieving a specific object in Django shell
You can also retrieve a task if it meets a specific condition. This is where the filter method shines.
Say you wanted to get incomplete tasks, that is tasks with the completed field set to False. You can add this code:
incomplete_tasks = Task.objects.filter(completed=False)
for task in incomplete_tasks:
    print(f'Title: {task.title}, Completed: {task.completed}')
This will return all the tasks that have not been completed.
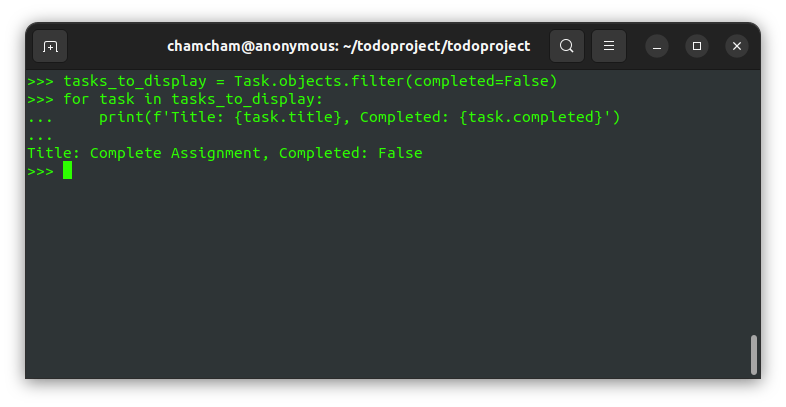 retrieving objects that meet specific condition in Django shell
This method is ideal for retrieving multiple objects based on certain conditions.
UPDATE
If you want to make changes, then you can do so using the update() method. Suppose you've completed all the tasks and now want to mark them as done. Here's the code for that:
incomplete_tasks = Task.objects.filter(completed=False)
incomplete_tasks.update(completed=True)

all_tasks = Task.objects.all()

for task in all_tasks:
    print(f'Title: {task.title}, Completed: {task.completed}')
The output of the above code is:
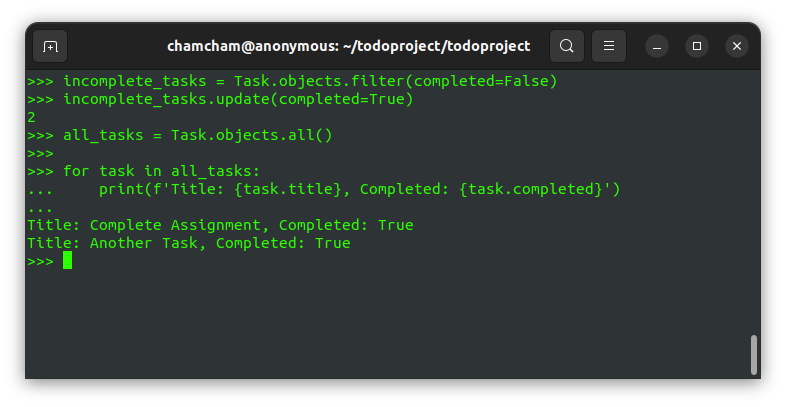 updating objects in Django shell
This first updates the status of the tasks to completed, then prints the completed tasks.
DELETE
After everything, you may want to delete all the tasks or a specific task. You can do so by using delete() method, like this:
task_to_delete = Task.objects.get(title='Another Task')
task_to_delete.delete()
all_tasks_after_deletion = Task.objects.all()

for task in all_tasks_after_deletion:
    print(f'Title: {task.title}, Completed: {task.completed}')
The code above gets the task with the title "Another Task" using the get method and then deletes it using the delete method. Finally, it prints the details of all remaining tasks to verify that the deletion was successful.
The output is:
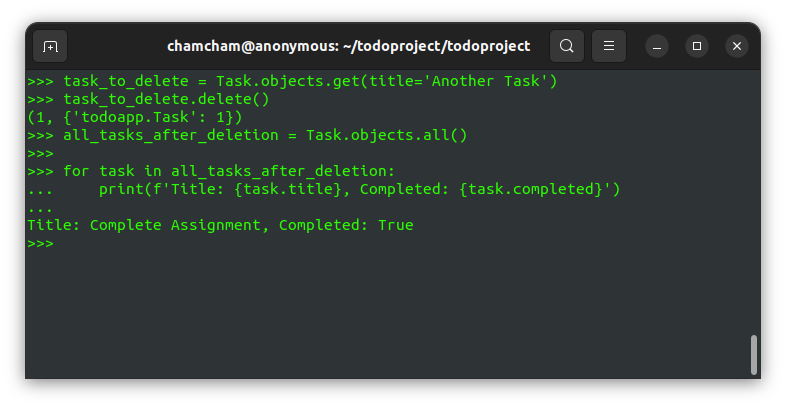 deleting objects in Django shell
Alternatively, you can simplify the code above like this:
task_to_delete = Task.objects.get(title='Another Task').delete()
all_tasks_after_deletion = Task.objects.all()

for task in all_tasks_after_deletion:
    print(f'Title: {task.title}, Completed: {task.completed}')
You can access all the tasks that you created in the Django admin panel. Start the server in the terminal as follows:
python manage.py runserver
Then on your browser, visit the site http://127.0.0.1:8000/admin/ and enter the superuser credentials you created earlier. There, you can access all the tasks that you created.
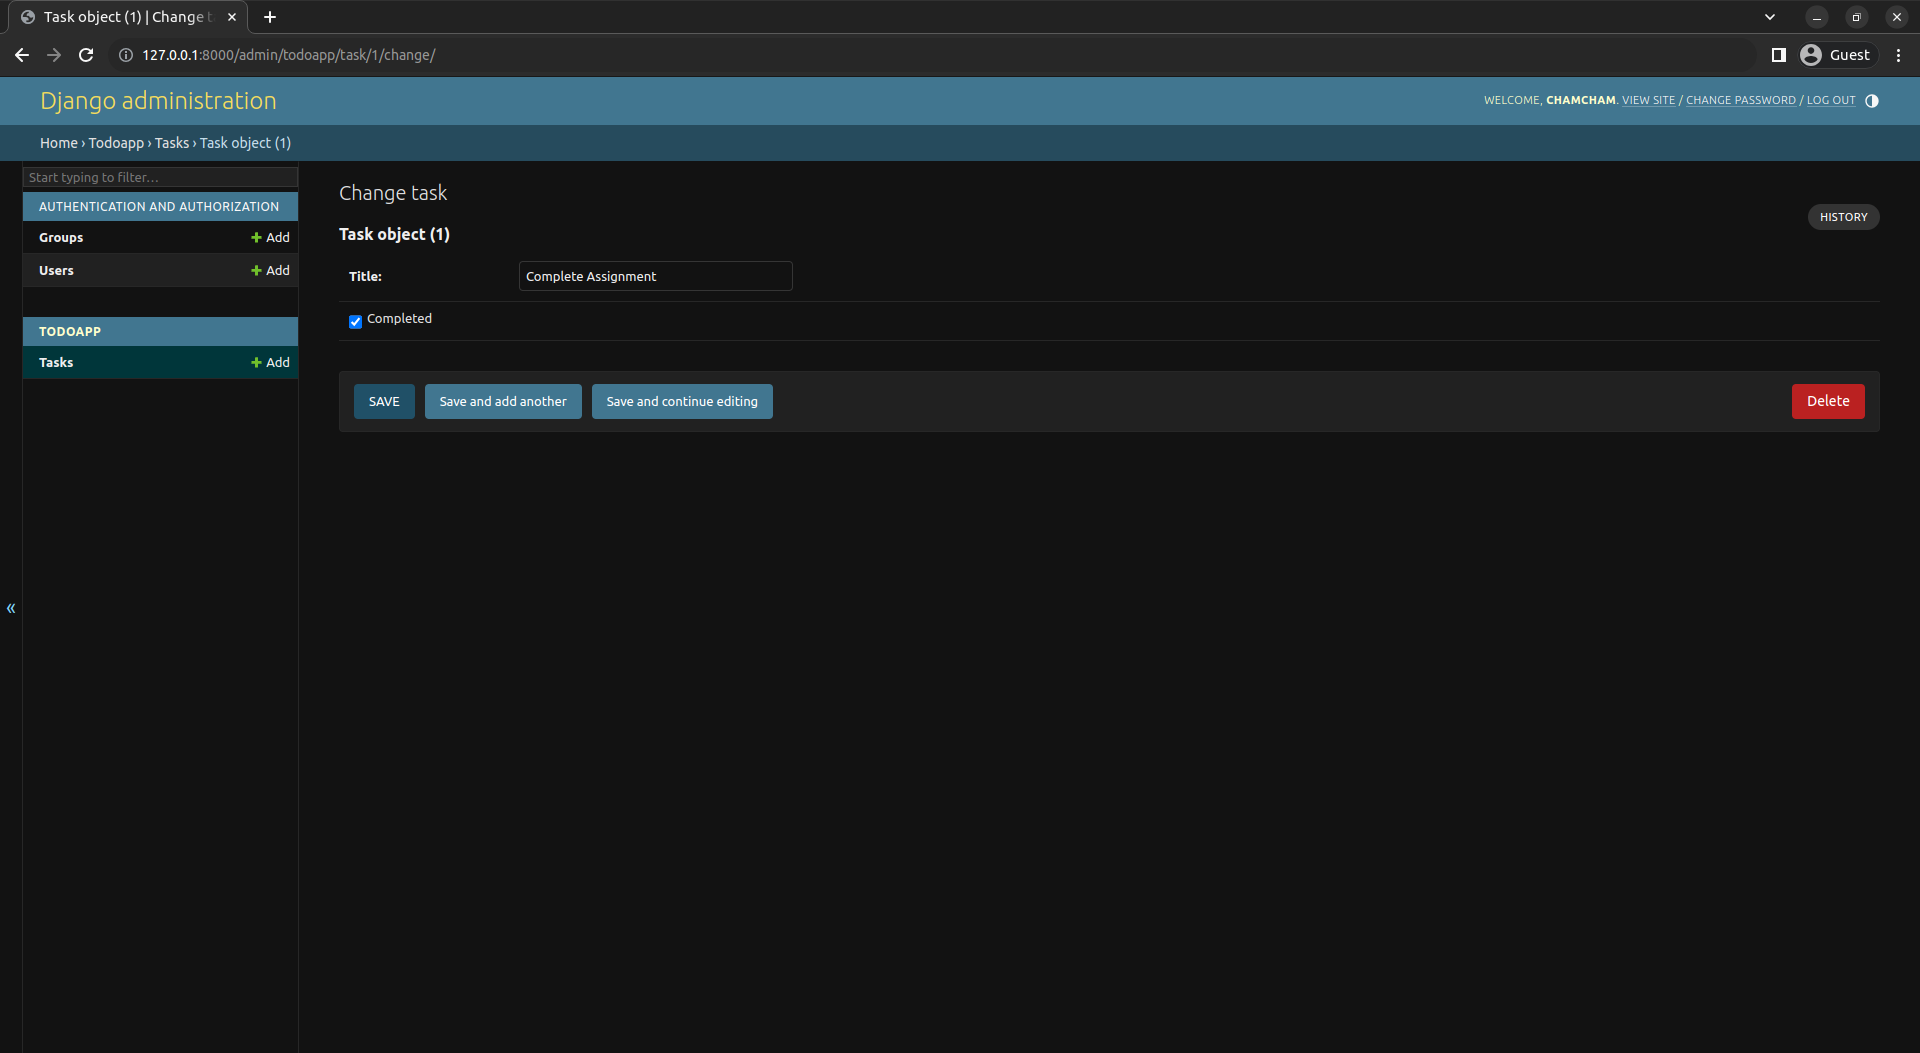 Django admin interface
We deleted the other task, so the remaining task is the 'Complete assignment' task as shown above.
Conclusion
In this tutorial, you explored practical examples of creating, reading, updating, and deleting objects, enhancing your proficiency in using Django's interactive shell.
You also learned about the importance of registering models in the admin interface for easy management during development.
With this knowledge, you're now equipped to design robust and organized databases, ensuring the smooth functioning of your Django projects. Explore Django's capabilities and unleash your creativity in building dynamic and interactive web applications.
Happy coding.