

Model–View–Controller is a popular software pattern used to break up the logic of your application into three different components.
In this article, I will break down the three components behind the MVC pattern, provide some history, and show you how it can be used in an application.
History of the Model–View–Controller Pattern
The MVC pattern was first introduced in 1979 by computer scientist Trygve Mikkjel Heyerdahl Reenskaug. He wanted to come up with a solution on how to break up a complex user application into smaller manageable components.
The MVC pattern was first used in the programming language Small Talk. One of the original names for the pattern was going to be Model-View-Editor but it was changed to Model-View-Controller.
Throughout the 1980's and early 90's, the MVC pattern was primarily used in desktop applications. But by the late 1990's, it became pretty popular within web applications.
In today's web applications, the MVC pattern is a popular design choice for organizing your code.
Here is a list of a few popular web frameworks that use the MVC pattern.
- Ruby on Rails
- ASP.NET MVC
- Laravel
- Angular
What are the three components behind the Model–View–Controller?
This is a basic breakdown of the MVC pattern:
- Model – This is responsible for the data logic behind the application
- View – This is what the user sees and interacts with in the application
- Controller – This acts as the brains behind the application and communicates with the Model and View.
How does the MVC pattern work in a web application?
To better understand how the MVC pattern works, it would be best to show you in a demo application.
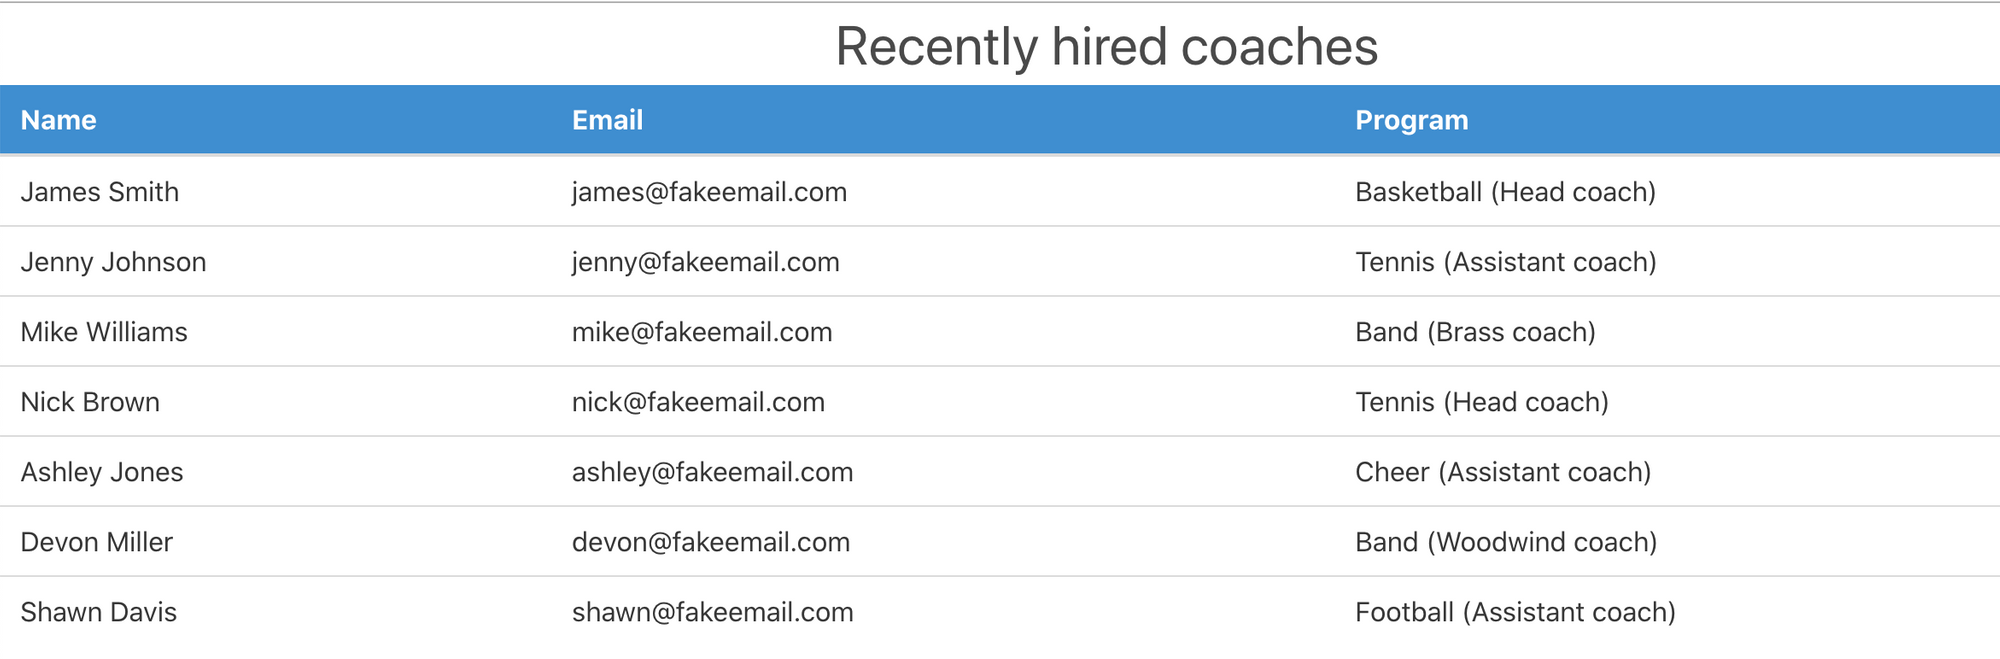
This MERN (MongoDB, Express, React, Node) stack application greets a fictional office manager and shows them a table of recently hired high school coaches.
It also shows which coaches have not completed their TB tests, Covid vaccines, new coach application, and background checks.
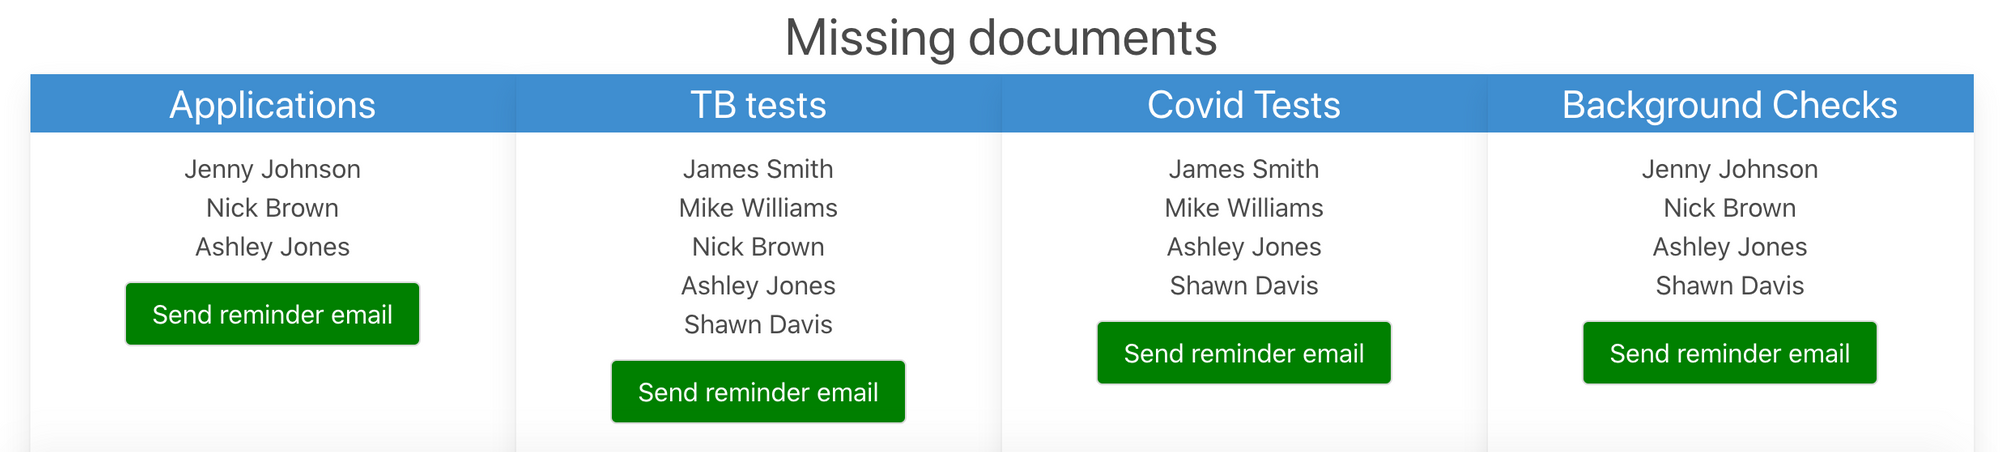
The office manager can send reminder emails to those coaches who are missing their documents.
The Model Component
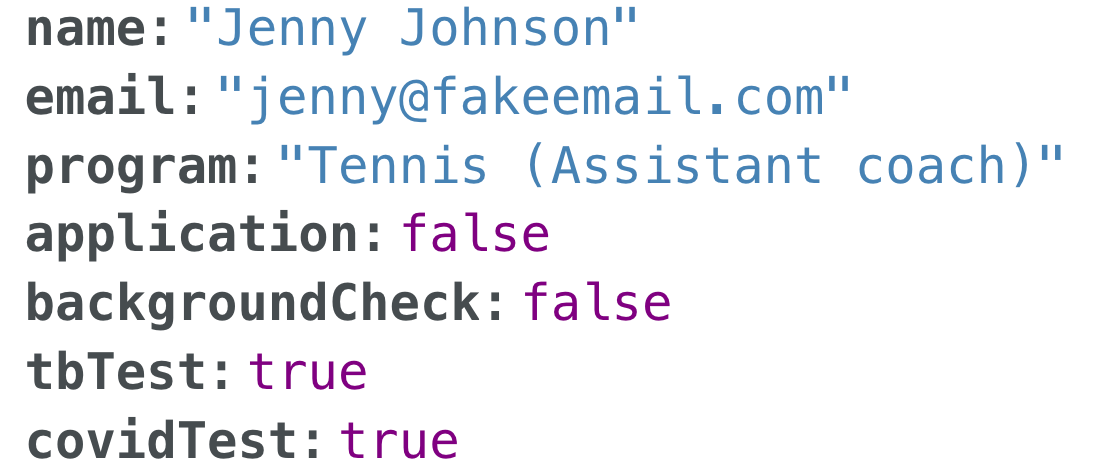
The Model is responsible for the data logic of our application. I am using MongoDB for the database of coaches.
I first had to define the properties that will be applied to each coach in the database. Each coach will have a name, email, program, application, backgroundCheck, tbTest and covidTest.
const coachSchema = new Schema({
    name: {
        type: String,
        trim: true,
        maxLength: 32,
        required: true
    },
    email: {
        type: String,
        trim: true,
        maxLength: 32,
        required: true,
        unique: true
    },
    program: {
        type: String,
        trim: true,
        maxLength: 32,
        required: true
    },
    application: {
        type: Boolean,
        required: true
    },
    backgroundCheck: {
        type: Boolean,
        required: true
    },
    tbTest: {
        type: Boolean,
        required: true
    },
    covidTest: {
        type: Boolean,
        required: true
    }
}, { timestamps: true })
type:Boolean represents a true or false value for the application, backgroundCheck, tbTest and covidTest properties.
If the coach has any of those four properties marked as false, then that means they haven't completed that part of the application process.
I created seven entries for our coach database and that information is being stored in MongoDB Atlas.
Here is an example of one of the database entries.
The Controller component is going to communicate with the database and get the necessary information to send to the View component.
The View Component
The View component is responsible for all of the visual aspects of the application. I used React to display this data to the user.
When the application first loads, you see a welcome message displayed on the screen.
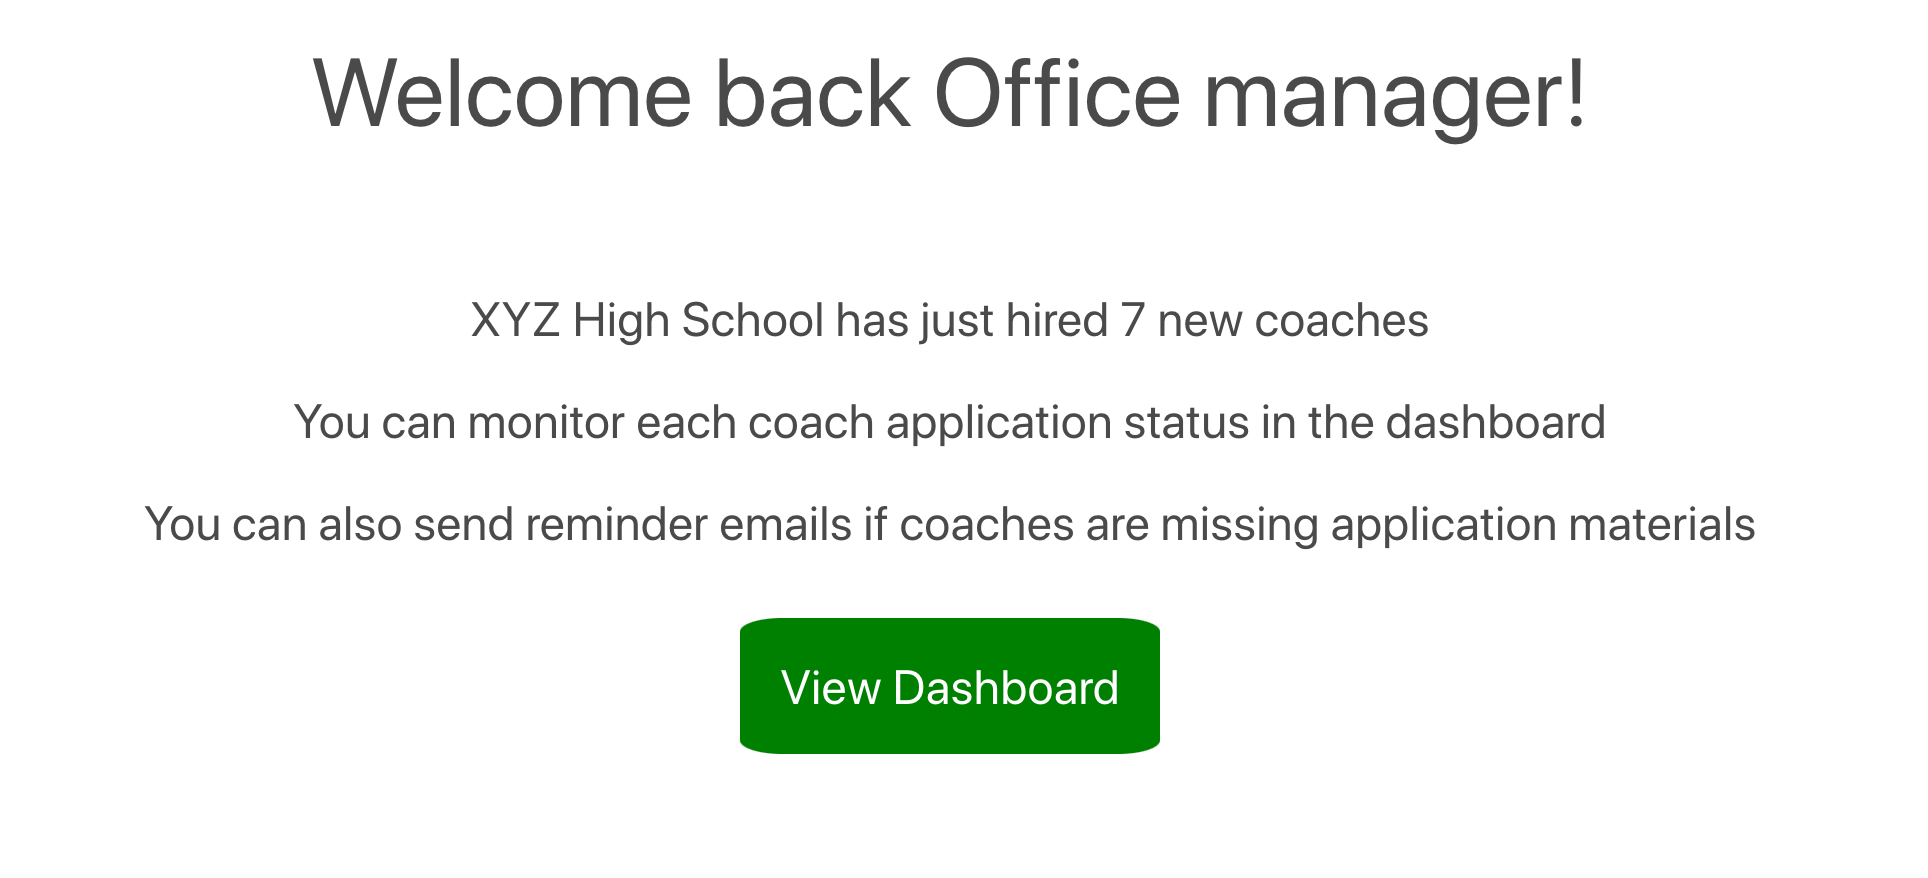
When you click on the View Dashboard button, it takes you to the coaches table and missing documents list.
The View is not communicating directly with the database because our Controller is doing that. The Controller provides that information to the View so it can be displayed on the page.
This is what the code looks like when the View makes a fetch call to get the data from the Controller:
await fetch('https://mvc-project-backend.herokuapp.com/coaches')
We then use the map() method to go through each coach and display their name, email address, and program in the table.
    coachData.map(data => (
                        <tr key={data._id}>
                          <td>{data.name}</td>
                          <td>{data.email}</td>
                          <td>{data.program}</td>
                        </tr>
                      ))
For the missing documents section, we fetch data from the backend to get the list of coaches who are missing applications, TB tests, Covid vaccines and Background Checks.
We use the map() method again to display the names for each category.
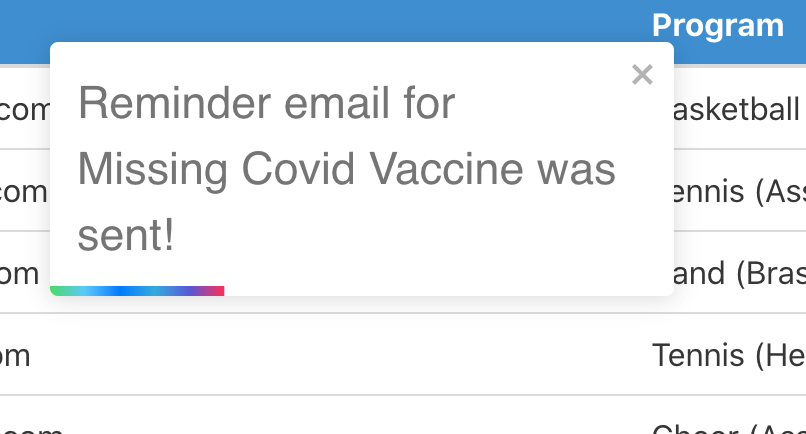
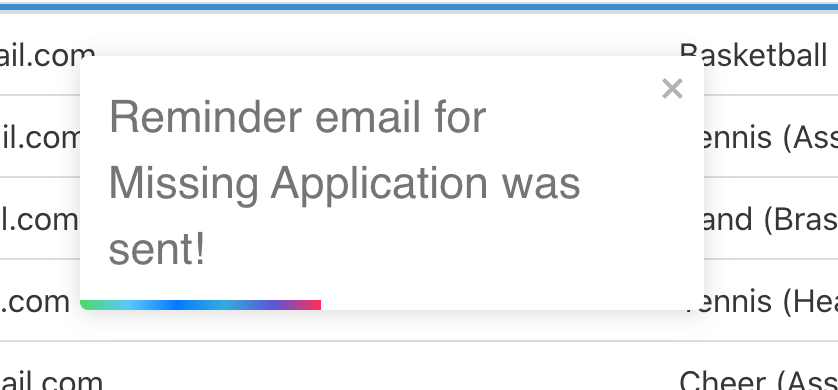
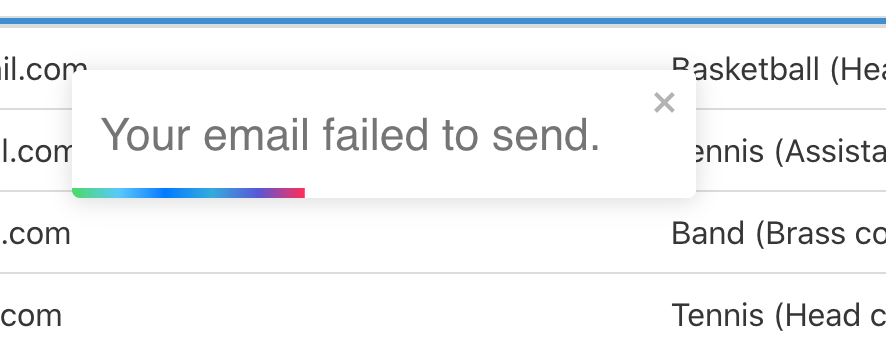
When the Send reminder email button is clicked, that information is sent from React to the backend. The Controller is responsible for sending the email and communicating with the View on whether or not the message went through.
Based on the information it receives from the Controller, the View will display a success message or failure message to the user.
The Controller Component
The Controller communicates with both the Model and View components and takes care of all the logic for our application. This section of the code was built in Node.JS and Express.
The Controller is going to get that complete list of coaches from the Model and send that information to the View.
The Controller is also responsible for filtering through the Model and providing the lists of coaches who have not completed the four missing document categories.
All of that data is sent to the View so it can be displayed to the user.
For the email functionality, the Controller is responsible for checking to make sure the sender's email is valid before sending the email.
I used Nodemailer here to send the emails.
   transporter.sendMail(mailOptions, (err) => {
        if (err) {
            console.log(`Applications: There was an error sending the message: ${err}`)
            res.json({ status: 'Email failure' })
        } else {
            console.log(`Applications Success: Email was sent`)
            res.json({ status: "Email sent" });
        }
    })
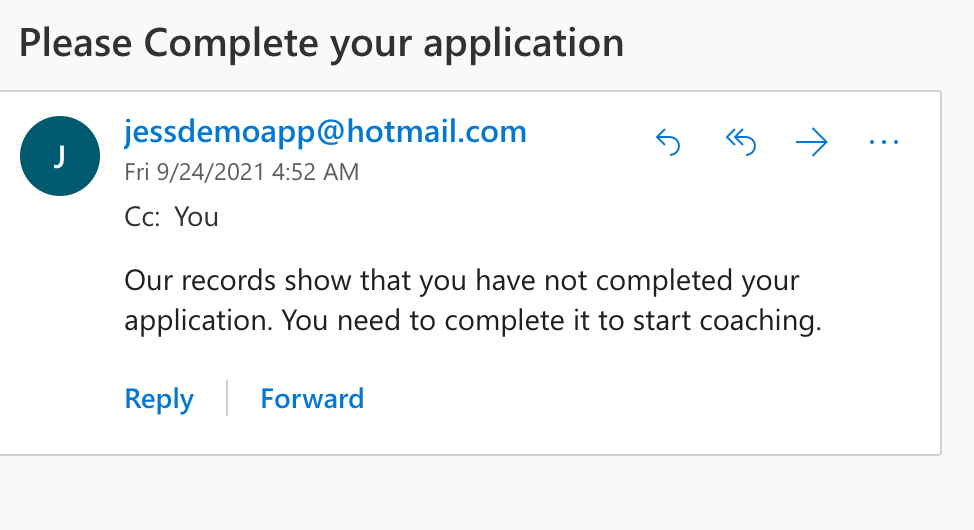
If the email was successful in going through, then the user is notified and the email message shows up in the demo email account.
If there is an error in sending the message, then the Controller will send that information to the View so the error message can be displayed to the user.
Conclusion
Model–View–Controller is a popular software pattern used to break up the logic of your application into three different components.
While the MVC pattern was initially used in desktop applications, it became popular to use in web applications during the late 1990's.
The Model is responsible for the data logic behind the application.
The View is what the user sees and interacts with in the application.
The Controller acts as the brains behind the application and communicates with the Model and View.
Web frameworks that use the MVC pattern include, Ruby on Rails, ASP.NET MVC, Laravel, and Angular.