Node.js is a runtime environment for executing JavaScript outside the web browser. From small scripts to large-scale back-end applications, Node.js provides the APIs and tools you need to build JavaScript applications for a variety of environments.
But learning Node.js can feel overwhelming. With so many APIs, packages, tools, and concepts to understand, it’s easy to feel lost.
That’s why this book focuses on the fundamental Node.js concepts you need to build practical applications without unnecessary distractions. You’ll learn how Node.js works, how to use its built-in APIs, and how to create applications that interact with files, URLs, events, HTTP requests, and more.
You’ll also learn how Express.js simplifies many common server-side tasks. We’ll explore routes, routers, controllers, views, and other concepts that help you organize and build web applications more efficiently.
Whether you’re learning backend development for the first time or expanding your JavaScript skills beyond the browser, this guide is designed to give you a clear and practical foundation for building with Node.js and Express.js.
Table of Contents
What You Should Already Know
This guide is for readers who know basic JavaScript and want to start building web applications with Node.js and Express.js. You'll get the most value from it if you're familiar with:
JavaScript fundamentals, including variables, functions, arrays, and objects.
Basic asynchronous JavaScript, including callbacks, promises, and
async/await.Basic HTML, including links, forms, and input elements.
Using a terminal to navigate folders and run commands.
You don't need previous experience with Node.js or Express.js. Familiarity with installing npm packages is helpful, but the examples will guide you through the commands you need.
The Tools You'll Need
Before you begin, have a code editor, a web browser, and the following installed:
Node.js 24.15.0 or later.
npm 11.14.0 or later.
Check your installed versions by running:
node --version && npm --version
Node.js includes npm, but the bundled version may be older than the one listed here. Check both versions and update npm separately if needed. The CodeSweetly package manager guide explains how to install, update, and check these tools.
The file-creation commands assume an environment with mkdir and touch available, such as Bash or zsh on macOS or Linux, Git Bash on Windows, or a Linux shell through Windows Subsystem for Linux (WSL). You can also create the files and folders directly in your editor.
Let's get started with Node.js.
What Exactly Is Node.js?
Node.js is not a framework or language. Instead, it is an asynchronous, event-driven environment that includes tools such as:
JavaScript engine (Google's V8)
Module system (CommonJS and ES modules)
Operating system APIs (
os)Filesystem access (
fs)Network servers (
http,net,https)Memory management tools
Event loop
These components make up Node.js's core infrastructure, enabling JavaScript to run outside of browsers.
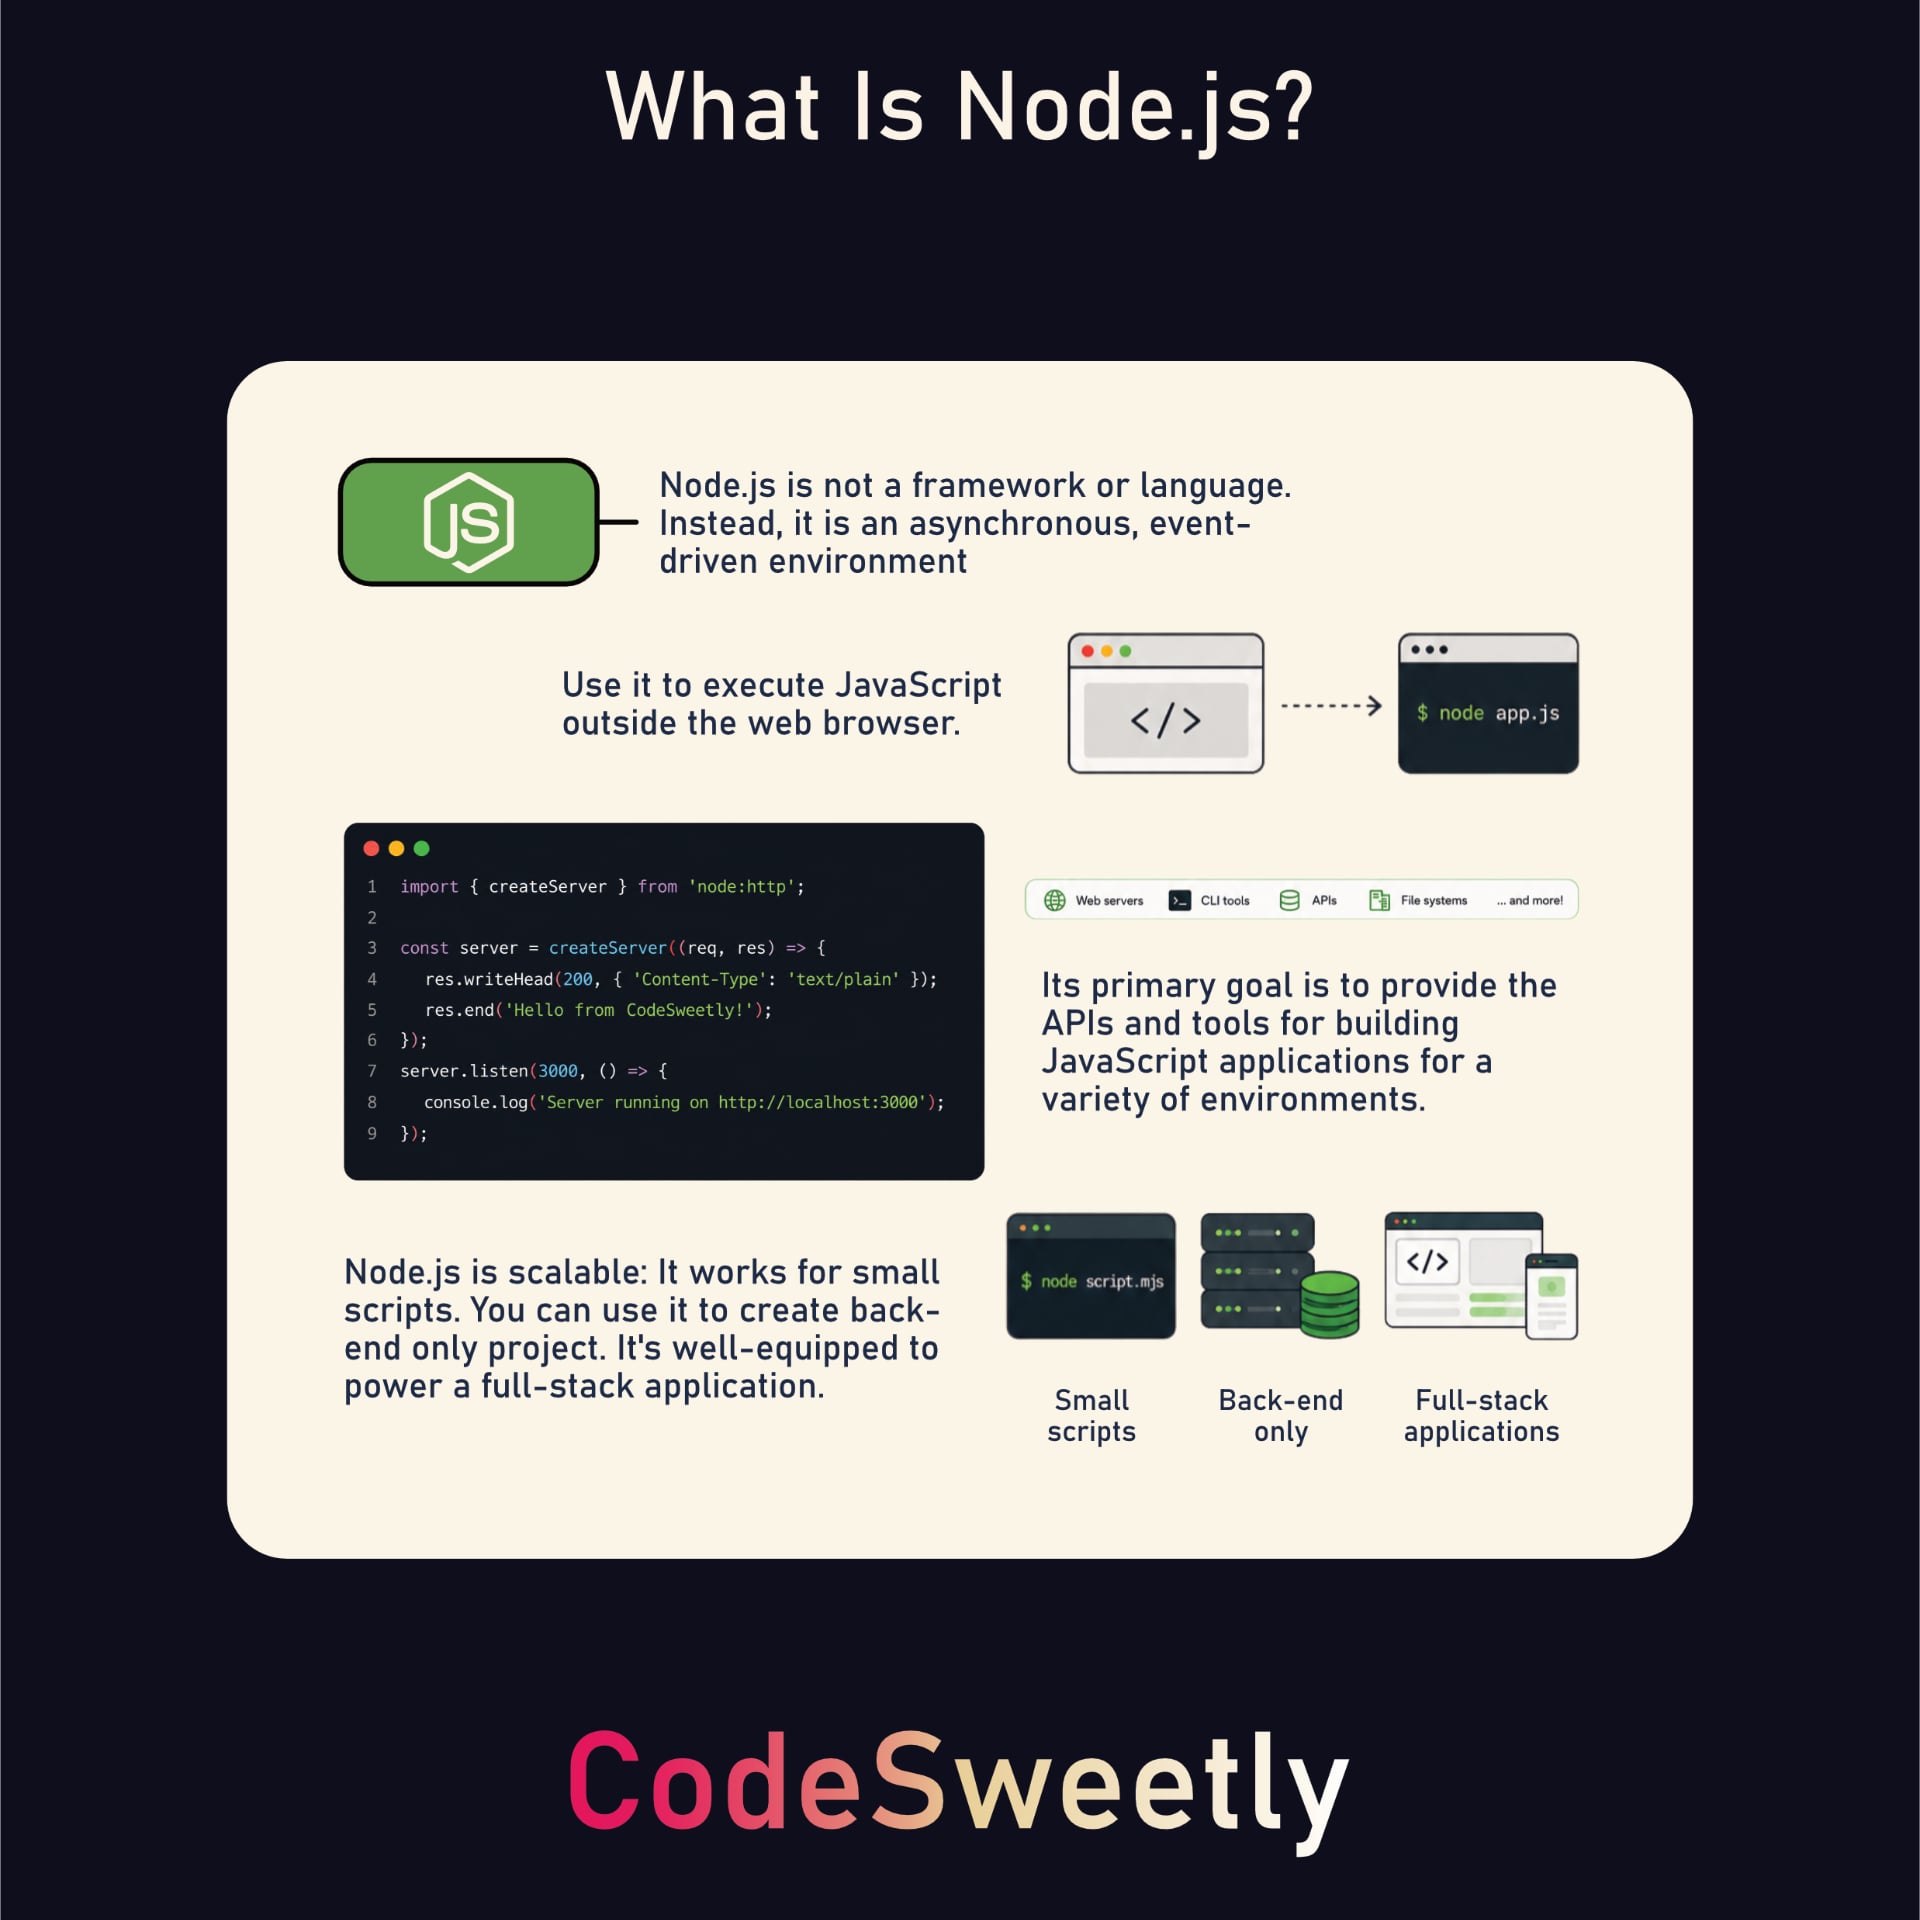
The image above illustrates Node.js as a well-equipped runtime environment providing the infrastructure to build and run any scale of JavaScript applications outside the browser, including servers, CLIs, scripts, and full-stack applications.
Let's discuss the points highlighted in the image by building applications with Node.js and Express.js. To begin, create the project directory.
Create a New Directory for Your Project
Use the mkdir CLI command to create a new project directory as follows:
mkdir codesweetly-nodejs-app-001
Note: You can use any name you prefer. In this guide, we'll use codesweetly-nodejs-app-001 for demonstration.
Afterward, navigate to your project directory using the command line.
cd codesweetly-nodejs-app-001
Create a package.json File
Use npm to initialize a package.json file after navigating into the project directory.
npm init -y
Next, use the following command to delete the optional main field from package.json:
npm pkg delete main
Tip: The main field in package.json identifies a package's entry point when another program loads the package. We do not need it for this project because we'll run our scripts directly. Leaving it in place is also harmless.
Why Node.js?
JavaScript was originally created for web browsers, but other environments also provide the infrastructure to execute it.
Node's 2009 release provided an environment for running JavaScript outside the web browser. For example, let's create a script to run from our system's terminal.
1. Create a JavaScript File
Create the JavaScript file you want Node to run.
In a shell that supports touch, such as Bash or zsh, use the following command. Otherwise, create the file in your code editor:
touch console.js
2. Write your JavaScript Program
Open the newly created JavaScript file and write your program:
console.log("=== Hello from the CodeSweetly Team! ===");
console.log("We hope you have fun Coding Sweetly with Node.js.");
console.log("Thank you for being part of the CodeSweetly community.");
console.log("=== Keep coding. Keep creating. Keep shipping. ===");
3. Run your JavaScript Program
Installing Node.js makes the node command available for running a Node application from your command line.
node console.js
node: The command for running Node.js scripts or the REPL.console.js: The JavaScript file you want Node to run.
You can also add the command to the "scripts" field of your project's package.json file:
{
  "scripts": {
    "start": "node console.js",
    "test": "echo \"Error: no test specified\" && exit 1"
  }
}
With this script in place, you can run your JavaScript program from your terminal like this:
npm run start
Once you execute your script, Node will print the file's output to your terminal. It will look like this:
$ npm run start

> codesweetly-nodejs-app-001@1.0.0 start
> node console.js

=== Hello from the CodeSweetly Team! ===
We hope you have fun Coding Sweetly with Node.js.
Thank you for being part of the CodeSweetly community.
=== Keep coding. Keep creating. Keep shipping. ===
As you can see, we've successfully executed JavaScript outside a web browser. That's precisely what Node.js helps us with. It is an asynchronous, event-driven runtime environment for running JavaScript code outside the web browser. You can also automate rerunning your program. Let's discuss how.
4. Automatically Rerun Your JavaScript Program
By default, Node.js requires you to manually rerun your JavaScript file each time you make changes.
Repeating the manual process of executing your application as you make changes can be burdensome. Luckily, Node provides the --watch flag for automating the process:
node --watch filename.extension
The snippet above uses the --watch flag to start Node.js in watch mode. This causes Node to re-execute the specified script whenever you update any of the files in its dependency graph.
node: The command for running Node.js scripts or the REPL.--watch: The flag for activating Node's watch mode.filename.extension: The script you want Node to execute.
Tip: Stop the running process using Ctrl + C on Windows, macOS, or Linux.
The --watch flag, by default, watches the entry point and all the modules it depends on. In other words, the watch command causes Node to monitor:
The entry file (
filename.extension)All files imported by the entry file
All files imported in those imports
And so on through the whole dependency graph
Node's default watch mode does not watch unrelated files. If you want Node to watch other files, use the --watch-path flag:
node --watch-path=./src --watch-path=./tests filename.extension
The --watch-path flag, in the snippet above, tells Node to watch all files in the src and tests directories, even if they are not in the entry point's dependency graph.
node: The command for running Node.js scripts or the REPL.--watch-path: The flag for specifying the path you want Node to watch for changes.filename.extension: The script you want Node to execute.
Tip:
The
--watch-pathflag causes Node to ignore the dependency graph's modules unless they are part of--watch-path. Instead, Node.js will watch only the exact paths you specified, and nothing else.--watch-pathenables watch mode itself. If you also pass--watch, Node still watches only the specified paths.--watch-pathis supported on macOS and Windows, but not Linux. On Linux, use--watchto monitor the entry file and its dependencies.Watch commands do not reload the browser automatically. They simply detect file changes, so Node reruns the program you specified. As such, if your program sends data to browsers, you will need to refresh the browser yourself or use a third-party tool for auto-reloading.
Node.js supports two module systems. Let's learn about them.
Node's Module Support
Node.js supports both CommonJS (.cjs) and ECMAScript (.mjs) modules. This allows you to use your preferred module type to create Node.js applications.
For example, below is a script.mjs JavaScript file. Node will treat it as an ECMAScript module because it has a .mjs file extension.
script.mjs
import http from "node:http";
On the other hand, Node will regard the script.cjs JavaScript file below as a CommonJS module because it has a .cjs file extension.
script.cjs
const http = require("node:http");
Suppose you want to specify the module type for the .js files in your project. In that case, specify a type field in your package.json file like so:
package.json
{
  "scripts": {
    "start": "node console.js",
    "test": "echo \"Error: no test specified\" && exit 1"
  },
  "type": "module",
  "license": "ISC"
}
The "type": "module" field in the snippet above makes Node treat .js files governed by this package.json as ES modules. A nested package.json establishes its own scope. .mjs and .cjs files retain their respective module types.
Set the "type" field to "commonjs" to make Node treat .js files in that scope as CommonJS.
Some notes:
The ES module system is the official standard for JavaScript.
Kevin Dangoor started the project that became CommonJS in January 2009, before JavaScript had an official standard module system.
ES modules became part of the ECMAScript standard in 2015. CommonJS remains supported in Node.js.
In this guide, we'll mainly use Node.js with ES modules, since ES modules are JavaScript's standard module system. To follow the examples, make sure the "type" field in your package.json file is set to "module". You can do this by running the following command from your project directory:
npm pkg set type=module
When relevant, we'll compare CommonJS syntax.
Let's now discuss using Node.js to create web servers that receive and respond to requests from browsers.
Create HTTP Servers with Node.js
An HTTP server lets your JavaScript application handle requests from clients, such as browsers, and send responses.
There are three main steps to configuring an app's HTTP server:
Create a new instance of the HTTP
Serverobject.Specify the system's port where you want the server to run.
Define how the server should respond to client requests.
Let's discuss the three steps in detail. To start, create an ES module for your project.
touch server.js
Afterward, open the newly created module and initialize a new instance of the HTTP Server object.
Initialize a New Instance of the HTTP Server Object
Node provides the createServer method for creating an instance of the HTTP Server object (http.Server).
You can use it in your project by importing it from Node's http module as follows:
server.js
import { createServer } from "node:http";

const server = createServer();
Here's what's going on:
importstatement: Imports thecreateServerAPI from Node'shttplibrary to theserver.jsES module.server: A variable for storing the HTTPServerobject that thecreateServer()function outputs.
Here's the CommonJS alternative:
server.cjs
const http = require("node:http");

const server = http.createServer();
Once you have created the local HTTP Server object, specify the server's port.
Configure the System's Port Where the Server Should Run
The HTTP Server object provides a listen() method to configure the port on which the server should run and accept client requests.
Syntax
import { createServer } from "node:http";

const server = createServer();

server.listen(port, hostname, backlog, callback);
This form of the listen() method accepts the following arguments:
port: (number) The port number where the server should run and listen for client requests. If omitted, the operating system will assign any unused port. You can useserver.address().portto retrieve the port the server is listening on after it starts listening for client connections.hostname: (string) The hostname or IP address on which the server should accept client connections. If omitted, the server will default to either an unspecified IPv6 (::) address or an IPv4 (0.0.0.0) address. These unspecified addresses bind to all network interfaces for the applicable address family. You can useserver.address().addressto retrieve the bound IP address once it starts listening for client connections.backlog: (number) Maximum length of the pending connections' queue. 511 is the default value.callback: (function) The function to execute once the server starts listening for client requests.
Example
server.js
import { createServer } from "node:http";

const server = createServer();

server.listen(3000, "127.0.0.1", 511, () => {
  const info = server.address();
  console.log(`Server running at http://${info.address}:
${info.port}/`);
});
Here's what's going on:
importstatement: Imports thecreateServerAPI from Node'shttplibrary to theserver.jsES module.server: A variable for storing the HTTPServerobject that thecreateServer()function outputs.server.listen(): Starts the server to listen for client connections. (Tip: The method emits alisteningevent once the server starts successfully.)
Here's the CommonJS alternative:
server.cjs
const http = require("node:http");

const server = http.createServer();

server.listen(3000, "127.0.0.1", 511, () => {
  const info = server.address();
  console.log(`Server running at http://${info.address}:
${info.port}/`);
});
What is the 127.0.0.1 address?
The 127.0.0.1 address is an IPv4 loopback address that refers to your local computer. The hostname localhost also refers to your local computer, but it may resolve to 127.0.0.1 or the IPv6 loopback address, ::1. You can use it as follows:
server.js
import { createServer } from "node:http";

const server = createServer();

server.listen(3000, "localhost", 511, () => {
  console.log("Server running at http://localhost:3000/");
});
If you run this server and visit its web address, the browser will wait for a response because we have not yet set up a request handler. Let's configure that now.
Configure the Server to Respond to Client Requests
The createServer() method accepts a requestListener callback that is invoked automatically whenever the server receives an HTTP request. Node allows you to use this callback to respond to requests.
Syntax
The createServer() method accepts two optional arguments. Here's the syntax:
import { createServer } from "node:http";

const server = createServer(options, callback);
options: An object for customizing the server's behavior.callback: TherequestListenerfunction for handling and responding to client requests. It accepts two parameters:
import { createServer } from "node:http";

const server = createServer(options, function (request, response) {
  // the requestListener function's body
});
requestparameter: Anhttp.IncomingMessageobject that provides details about the client request.responseparameter: Anhttp.ServerResponseobject for responding to the client requests.
Providing the requestListener callback function as createServer's second argument causes Node.js to automatically register it as a listener for the "request" event. So, the syntax above is equivalent to:
import { createServer } from "node:http";

const server = createServer(options);

server.on("request", function (request, response) {
  // the requestListener function's body
});
server.on("request", callback) tells the server to listen for a request event and execute the callback on such an event.
Example
server.js
// Add the Node.js HTTP module
import { createServer } from "node:http";

// Specify the hostname and port to run the server
const hostname = "localhost";
const port = 3000;

// Create a new Server instance with a requestListener callback
const server = createServer((req, res) => {
  res.statusCode = 200; // Set an OK success (200) response status code
  res.setHeader("Content-Type", "text/plain"); // Define the media type of the response data
  res.end("Hello World!"); // Specify the response data and close the response stream
});

// Run the server on the specified port and hostname
server.listen(port, hostname, () => {
  console.log(`Server running at http://${hostname}:
${port}/`);
});
The snippet above used the requestListener callback function's response parameter to configure the server to respond to client requests. Here's the server.on("request", callback) alternative:
server.js
// Add the Node.js HTTP module
import { createServer } from "node:http";

// Specify the hostname and port to run the server
const hostname = "localhost";
const port = 3000;

// Create a new Server instance
const server = createServer();

// Listen for a request event and execute the requestListener callback
server.on("request", (req, res) => {
  res.statusCode = 200; // Set an OK success (200) response status code
  res.setHeader("Content-Type", "text/plain"); // Define the media type of the response data
  res.end("Hello World!"); // Specify the response data and close the response stream
});

// Run the server on the specified port and hostname
server.listen(port, hostname, () => {
  console.log(`Server running at http://${hostname}:
${port}/`);
});
Now that your server is set up and the port configured, you can run the application.
node server.js
node: The command for running Node.js scripts or the REPL.server.js: The JavaScript file you want Node to run.
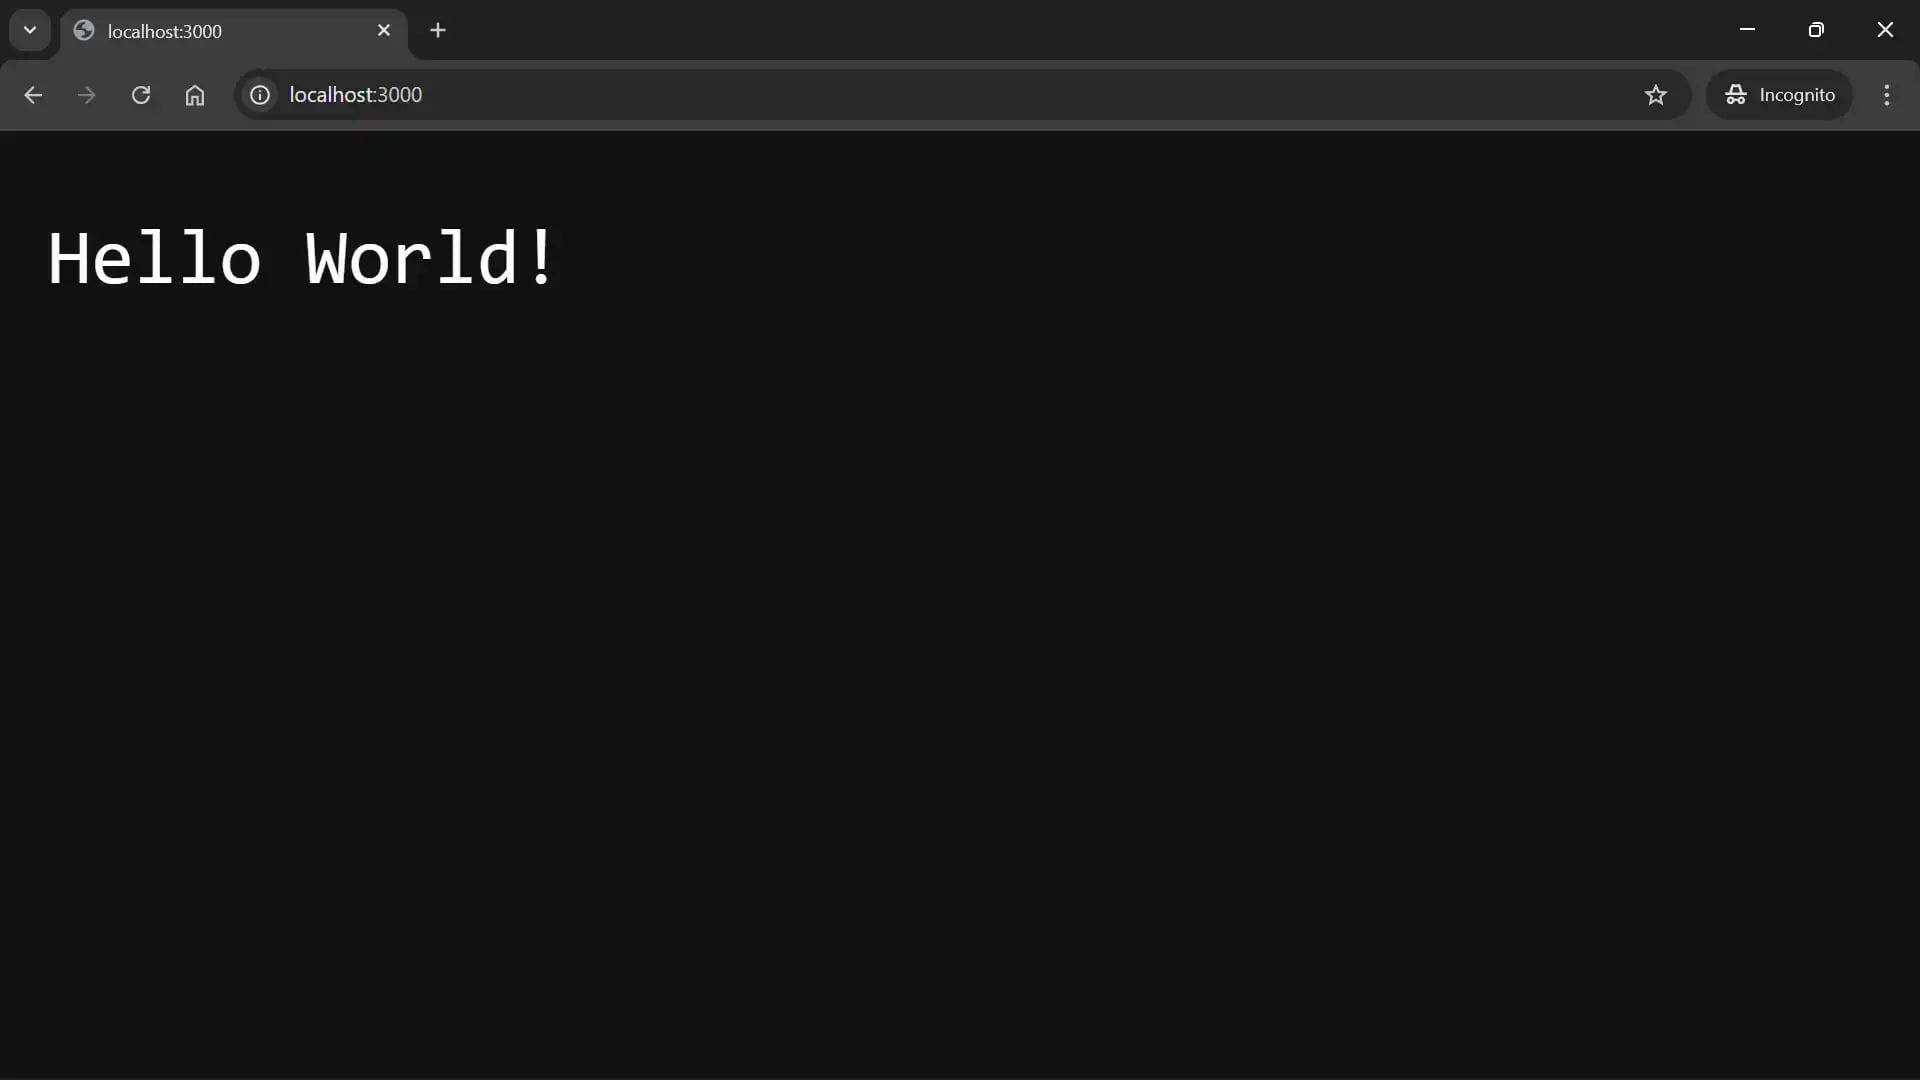
While the server is running, if users request the app's resource at the server's web address, they will see a Hello World! response as illustrated in the following image.
Tip: Stop the running process using Ctrl + C on Windows, macOS, or Linux.
Although the node:http module is Node.js's native API for handling HTTP requests, developers typically use frameworks to simplify the process. Some popular Node.js web frameworks include Express.js, Fastify, and Koa.js. Let's use Express.js as an example to see how a framework can simplify HTTP request handling in Node.
What Exactly Is Express.js?
Express.js is a web framework that simplifies server-side HTTP request handling in Node.js. It extends Node's HTTP module with built-in features such as routing and middleware, helping developers to build web applications and APIs efficiently without repetitive code. Here's how to use it in your Node.js project.
1. Install Express
npm install express@5.2.1
2. Use Express.js to Configure the Project's Node.js Web Server
Open the JavaScript server file and use Express.js to set up a web server:
server.js
// Add the Express module
import express from "express";

// Create a new Express application instance
const app = express();

// Set the port number where the server will run and listen for requests
const port = 3000;

// Create a route handler for GET requests to the "/" path
app.get("/", (req, res) => res.send("Hello, world!"));

// Run the server on the specified port
app.listen(port, () => {
  console.log(`Server running at http://localhost:${port}`);
});
Here's what the code above does:
Creates an Express application instance to access Express APIs, such as routers and middleware, simplifying HTTP request handling in Node.js.
Uses Express's
app.get()method to define how the server handles HTTP GET requests to the/route.Uses Express's
res.send()method to send an HTTP response and automatically set the appropriate headers based on the data type provided.Uses Express's
app.listen()method to start the Node.js HTTP server on a specific port and execute a callback when the server begins listening for client requests.
Tip:
In the statement
app.get("/", (req, res) => res.send("Hello, world!")),app.get()is the Express routing method."/"is the route path.(req, res) => ...is the route handler function.The entire statement is the route (or route definition).
The objects passed to an Express route handler's parameters (
reqandres) are enhanced versions of Node'shttp.IncomingMessageandhttp.ServerResponseobjects. Express adds properties and helper methods to simplify handling HTTP requests and responses.The order of route definitions matters. Express processes matching routes in the order they are defined. A handler can end the response or pass control to another handler using
next().
3. Run the Express.js Web Server
Use the node command followed by the script's filename to run a Node.js script, including one that uses Express.js to handle HTTP requests.
node server.js
Open http://localhost:3000 in your browser to see Hello, world!.
Tip: Stop the server using Ctrl + C on Windows or Control + C on macOS.
Raw Node.js Code vs. Express.js Code
While you can use Node's native HTTP API to handle web requests, it requires manual configuration, such as inspecting each request's method and URL, setting response headers, and converting objects to JSON.
Express abstracts repetitive request-handling logic into declarative methods, simplifying Node.js web server development.
Below are two examples comparing Node.js web server code written with the native HTTP module and with Express methods.
Example 1: Use raw Node.js to Handle Web Requests
The following web server uses Node's built-in HTTP module to handle GET requests to two endpoints—home (/) and books (/books)—and return a 404 response for unmatched requests.
server.js
import { createServer } from "node:http";
const port = 3000;

const server = createServer((req, res) => {
  if (req.method === "GET" && req.url === "/") {
    res.writeHead(200, { "Content-Type": "text/plain" });
    res.end("Welcome to the homepage!");
  } else if (req.method === "GET" && req.url === "/books") {
    const books = [
      { id: 1, name: "Code React Sweetly" },
      { id: 2, name: "Creating NPM Package" },
    ];
    res.writeHead(200, { "Content-Type": "application/json" });
    res.end(JSON.stringify(books));
  } else {
    res.writeHead(404, { "Content-Type": "text/plain" });
    res.end("Page not found");
  }
});

server.listen(port, () => {
  console.log(`Raw Node server running at http://localhost:${port}`);
});
The snippet above uses Node's native http module to build a web server that accepts and responds to browser connections. In this raw Node.js example, you manually handle the following tasks:
Routing to the correct endpoint:
if (req.method === "..." && req.url === "...")Response header configuration:
res.writeHead(...)JSON formatting:
JSON.stringify(...)
Now, let's see how to build a similar web server using Express. Run these examples one at a time, replacing the contents of server.js and restarting the server.
Example 2: Use Express.js to Handle Web Requests
The following web server uses Express routes to handle GET requests to two endpoints—home (/) and books (/books)—and return a 404 response for unmatched requests.
server.js
import express from "express";
const app = express();
const port = 3000;

app.get("/", (req, res) => {
  res.send("Welcome to the homepage!");
});

app.get("/books", (req, res) => {
  const books = [
    { id: 1, name: "Code React Sweetly" },
    { id: 2, name: "Creating NPM Package" },
  ];
  res.json(books);
});

app.use((req, res) => {
  res.status(404).send("Page not found");
});

app.listen(port, () => {
  console.log(`Express server running at http://localhost:${port}`);
});
The snippet above uses Express.js to build a web server that accepts and responds to browser connections. Express simplifies the following tasks:
Routing logic: Express.js provides simple route declarations like
app.get(),app.post(), andapp.delete(), eliminating the need for complex conditional ogic to checkreq.urlandreq.methodfor each route.Response header configuration: Express's
res.send()method automatically sets appropriate response headers based on the response body. Useres.status()when you need to set a status code, as in the 404 handler above.JSON formatting: Express's
res.json()method automatically converts JavaScript objects into valid JSON responses, handling serialization and headers for you.
Important Stuff to Know About Creating Express.js Web Servers in Node.js
Keep the following key points in mind when creating Express.js servers in your Node.js project.
It's Common to Call app.listen() Last
It's common to call app.listen() last in an Express.js app. This way, all your routes, middleware, and error handlers are set up before the server starts listening for requests.
You Can Set the Port Number Using Environment Variables
To read the port number from an environment variable, replace the existing port declaration with the following:
const port = process.env.PORT || 3000;
The above snippet instructs Node to use the PORT environment variable's value, or default to 3000 if it's unset or empty. In a shell such as Bash, the following command sets PORT to 8000 for this run of the server:
PORT=8000 node server.js
Common Express.js Response Methods
Here are some common response methods you'll use in Express.js:
res.send(): Send an HTTP response to the client and automatically set the appropriate response headers based on the data type provided as the method's argument.res.json(): Send JSON responses to the client and automatically set the response'sContent-Typeheader toapplication/json.res.redirect(): Redirect the client's request to a different URL.res.render(): Render a template engine's view and send the resulting HTML string to the client.res.status(): Set the response's HTTP status code without ending the request-response cycle. You can chain other response methods to it, for example,res.status(404).send("404 Error: Page not found"). You do not need to call this method to use the default status code of200.res.end(): End the response. When called without a data argument, it sends no additional response body data. It can also accept data to send before ending the response.
Express's Response Methods Do Not Terminate the HTTP Request Handler's Execution
While response methods like res.send() close the HTTP request-response cycle, they do not end the execution of the route handler function.
Here's an example:
app.get("/", (req, res) => {
  // This sends a text response to the client and ends the request-response cycle, but does not end the route handler's execution
  res.send("Hello, client!");

  // This logs the string to the console because the function is still running
  console.log("Hello, devs!");

  // This will cause an error because the request-response cycle is closed, so you cannot send additional responses to the client during the callback's execution
  res.send("Hello, client again!");
});
The console.log() statement in the example above works because the request handler is still running. The res.send("Hello, client!") line ends the response to that request. It does not stop the callback's execution.
Note that the app.get(...) code in the snippet above is called an Express route. But what exactly is a route in Express.js? Let's discuss it now.
What Is a Route in Express.js?
A route in Express.js consists of an HTTP method, a URL path, and a chain of one or more middleware functions for processing client requests to an endpoint.
Tip:
An endpoint consists of an HTTP method and a URL path. (Endpoint = HTTP method + URL path)
The route includes an HTTP method, a URL path, and the server-side logic that handles client requests. (Route = Server HTTP method + Server URL path + handler function)
Syntax of a Route in Express
app.METHOD(PATH, HANDLER);
app: An Express application instance that provides access to Express APIs, including methods and middleware, to simplify HTTP request handling in Node.js.METHOD: A lowercase HTTP request method, such asget,post, ordelete.PATH: The URL path the route will handle. It can be a string or a regular expression. Express 4 also supports string patterns whose syntax differs in Express 5.HANDLER: The callback (or middleware) function that Express executes when the request and route endpoints correspond. The handler may be:A single function
More than one function
An array of functions
A combination of an array of functions and individual function arguments.
Tip:
You can use the
app.all()method to set up handler functions that run for every supported HTTP request method on a specificPATH.The
app.use()method lets you set up middleware functions that can run for all HTTP request methods and paths when a request reaches them. If you specify a path argument,app.use()matches that path and its subpaths. For example,/bookmatches/book,/book/dashboard, and/book/dashboard/author/202605.
Middleware vs. Route Handler
Developers often use the term "route handler" to describe the final function responsible for resolving the request and sending the response, whereas preceding reusable functions are referred to as "middleware".
app.METHOD(PATH, MIDDLEWARE1, MIDDLEWARE2, HANDLER);
Note: Express does not mandate distinct names or categories for functions attached to a route. From Express's perspective, they are all handler functions, with next() passing control from one to the next. However, developers often differentiate between middleware and route handlers to enhance code organization, readability, and communication.
Middleware functions, often stored in a
/middlewaresdirectory, serve as utility components that perform cross-cutting or preparatory tasks such as authentication, validation, logging, and data loading. These functions are often reusable and typically invokenext()to pass control to the next function.Route handlers, sometimes organized as controllers in a
/controllersdirectory, contain the business logic that generates the endpoint's primary response, such asgetUserProfile,createBlogPost, ordeleteAccount. These functions may be specific to a route and usually conclude the request-response cycle by invoking methods such asres.send()orres.json().
Route Examples in Express.js
Here are some examples of routes in Express.js.
Express route with a single handler function
app.get("/single/handler", (req, res) => {
  res.send("Request handled with a single handler function!");
});
The example above uses a single callback function to handle GET requests to the GET /single/handler endpoint. The handler function, in this case, is an inline controller. A common approach is to keep controllers in a controllers directory. This makes the code easier to test and maintain while keeping the route definition readable.
Here's an example:
The following example shows a GET /single/handler route with a modular controller that has been moved to its own module (controllers/single-handler.js). This approach separates route definitions from the request-handling logic that generates the endpoint's response.
import express from "express";
import * as controller from "./controllers/single-handler.js";

const app = express();
const port = 3000;

app.get("/single/handler", controller.singleHandler);

app.listen(port, () => {
  console.log(`Express server running at http://localhost:${port}`);
});
Below is an example of a controller file that contains only the singleHandler handler function.
controllers/single-handler.js
function singleHandler(req, res) {
  res.send("Request handled with a single handler function!");
}

export { singleHandler };
Tip: A controller is a route handler or group of handlers that manages requests for specific endpoints. Controllers are often placed in separate modules to improve code organization and maintain a clear separation of concerns.
Express route with multiple middleware functions
app.get(
  "/multiple/middleware",
  (req, res, next) => {
    console.log("First callback: passing control to the next middleware >");
    next();
  },
  (req, res, next) => {
    console.log("Second callback: passing control to the next middleware >");
    next();
  },
  (req, res) => {
    res.send("Request handled with multiple middleware functions!");
  },
);
The example above uses multiple middleware functions to handle GET requests to the /multiple/middleware path.
Express route with an array of middleware functions
const arrayOfCallbacks = [
  function callback1(req, res, next) {
    console.log("First callback: passing control to the next middleware >");
    next();
  },
  function callback2(req, res, next) {
    console.log("Second callback: passing control to the next middleware >");
    next();
  },
  function callback3(req, res) {
    res.send("Request handled with an array of middleware functions!");
  },
];

app.get("/array/middleware", arrayOfCallbacks);
The example above uses an array of callback functions to handle GET requests to the GET /array/middleware endpoint.
Express route with a combination of an array of middleware functions and individual callbacks
const arrayOfCallbacks = [
  function callback1(req, res, next) {
    console.log("First callback: passing control to the next middleware >");
    next();
  },
  function callback2(req, res, next) {
    console.log("Second callback: passing control to the next middleware >");
    next();
  },
];

app.get(
  "/mix/middleware",
  arrayOfCallbacks,
  (req, res, next) => {
    console.log("Third callback: passing control to the next middleware >");
    next();
  },
  (req, res, next) => {
    console.log("Fourth callback: passing control to the next middleware >");
    next();
  },
  (req, res) => {
    res.send(
      "Request handled with a combination of an array of middleware functions and independent callback arguments!",
    );
  },
);
The example above uses both an array of callbacks and individual function arguments to handle GET requests to the /mix/middleware path.
Important Things to Know About the next Parameter
next()passes control to the next middleware function in the stack.next("route")skips the remaining handlers for the current route and continues looking for a matching route. Matching considers both the request method and path. It is only effective within middleware functions defined forapp.METHOD()orrouter.METHOD().next(new Error(value))passes control to the next error-handling middleware.If the currently running middleware does not end the request-response cycle, include a
nextparameter and invoke it within the callback to pass control to the next middleware. Otherwise, the client's request will remain pending.
Categories of Middleware in Express.js
Express middleware can be classified into five primary categories:
Application-level
Router-level
Error-handling
Built-in
Third-party
These categories describe where middleware is mounted, how it behaves, or its source.
Application-level middleware
This type of middleware is attached to the Express application instance (app).
Example:
import express from "express";
const app = express();

app.get("/profile", (req, res, next) => {
  console.log("Hi, there!");
  next();
});
Router-level middleware
This middleware is attached to an Express Router instance (router). It operates similarly to application-level middleware but is mounted on a router instead of the application.
Example:
import express from "express";
const router = express.Router();

router.get("/profile", (req, res, next) => {
  console.log("Hi, there!");
  next();
});
Error-handling middleware
This middleware handles errors during request processing and is identified by its four-parameter signature.
import express from "express";
const app = express();

app.use((err, req, res, next) => {
  console.error(err);
  res.status(500).send("Error 500: Encountered an unexpected error");
});
Note:
All four parameters must be present, even if some are unused. Otherwise, Express won't recognize the function as error-handling middleware. Express uses the number of declared parameters, not their names, to identify such middleware.
Define error-handling middleware after the routes and middleware whose errors it should handle. This placement ensures it processes errors passed from preceding middleware functions.
Built-in middleware
These middleware functions are included with Express and available by default, without requiring additional package installations.
Examples:
import express from "express";

express.static("public");
express.json();
express.urlencoded();
Third-party middleware
These middleware functions are provided by external packages developed and shared by the broader Express community. Examples include cors, morgan, and helmet.
import express from "express";
import cors from "cors";

const app = express();
app.use(cors());
Note: Middleware categories in Express are not mutually exclusive
Example 1:
import express from "express";

const app = express();
app.use(express.json());
The express.json() middleware in the snippet above is both:
Application-level, because it is attached to the
appinstanceBuilt-in, because Express provides it
Example 2:
import express from "express";
import cors from "cors";

const router = express.Router();
router.use(cors());
The cors() middleware in the snippet above is both:
Router-level, because it is attached to the
routerinstanceThird-party, because a package outside of Express provided it
Are you asking what the express.Router() method in the example above is? Let's discuss it.
What Is the express.Router() Method?
The express.Router() method creates a router object that groups related routes and middleware. You can attach this router to an Express application or another router using app.use() or router.use().
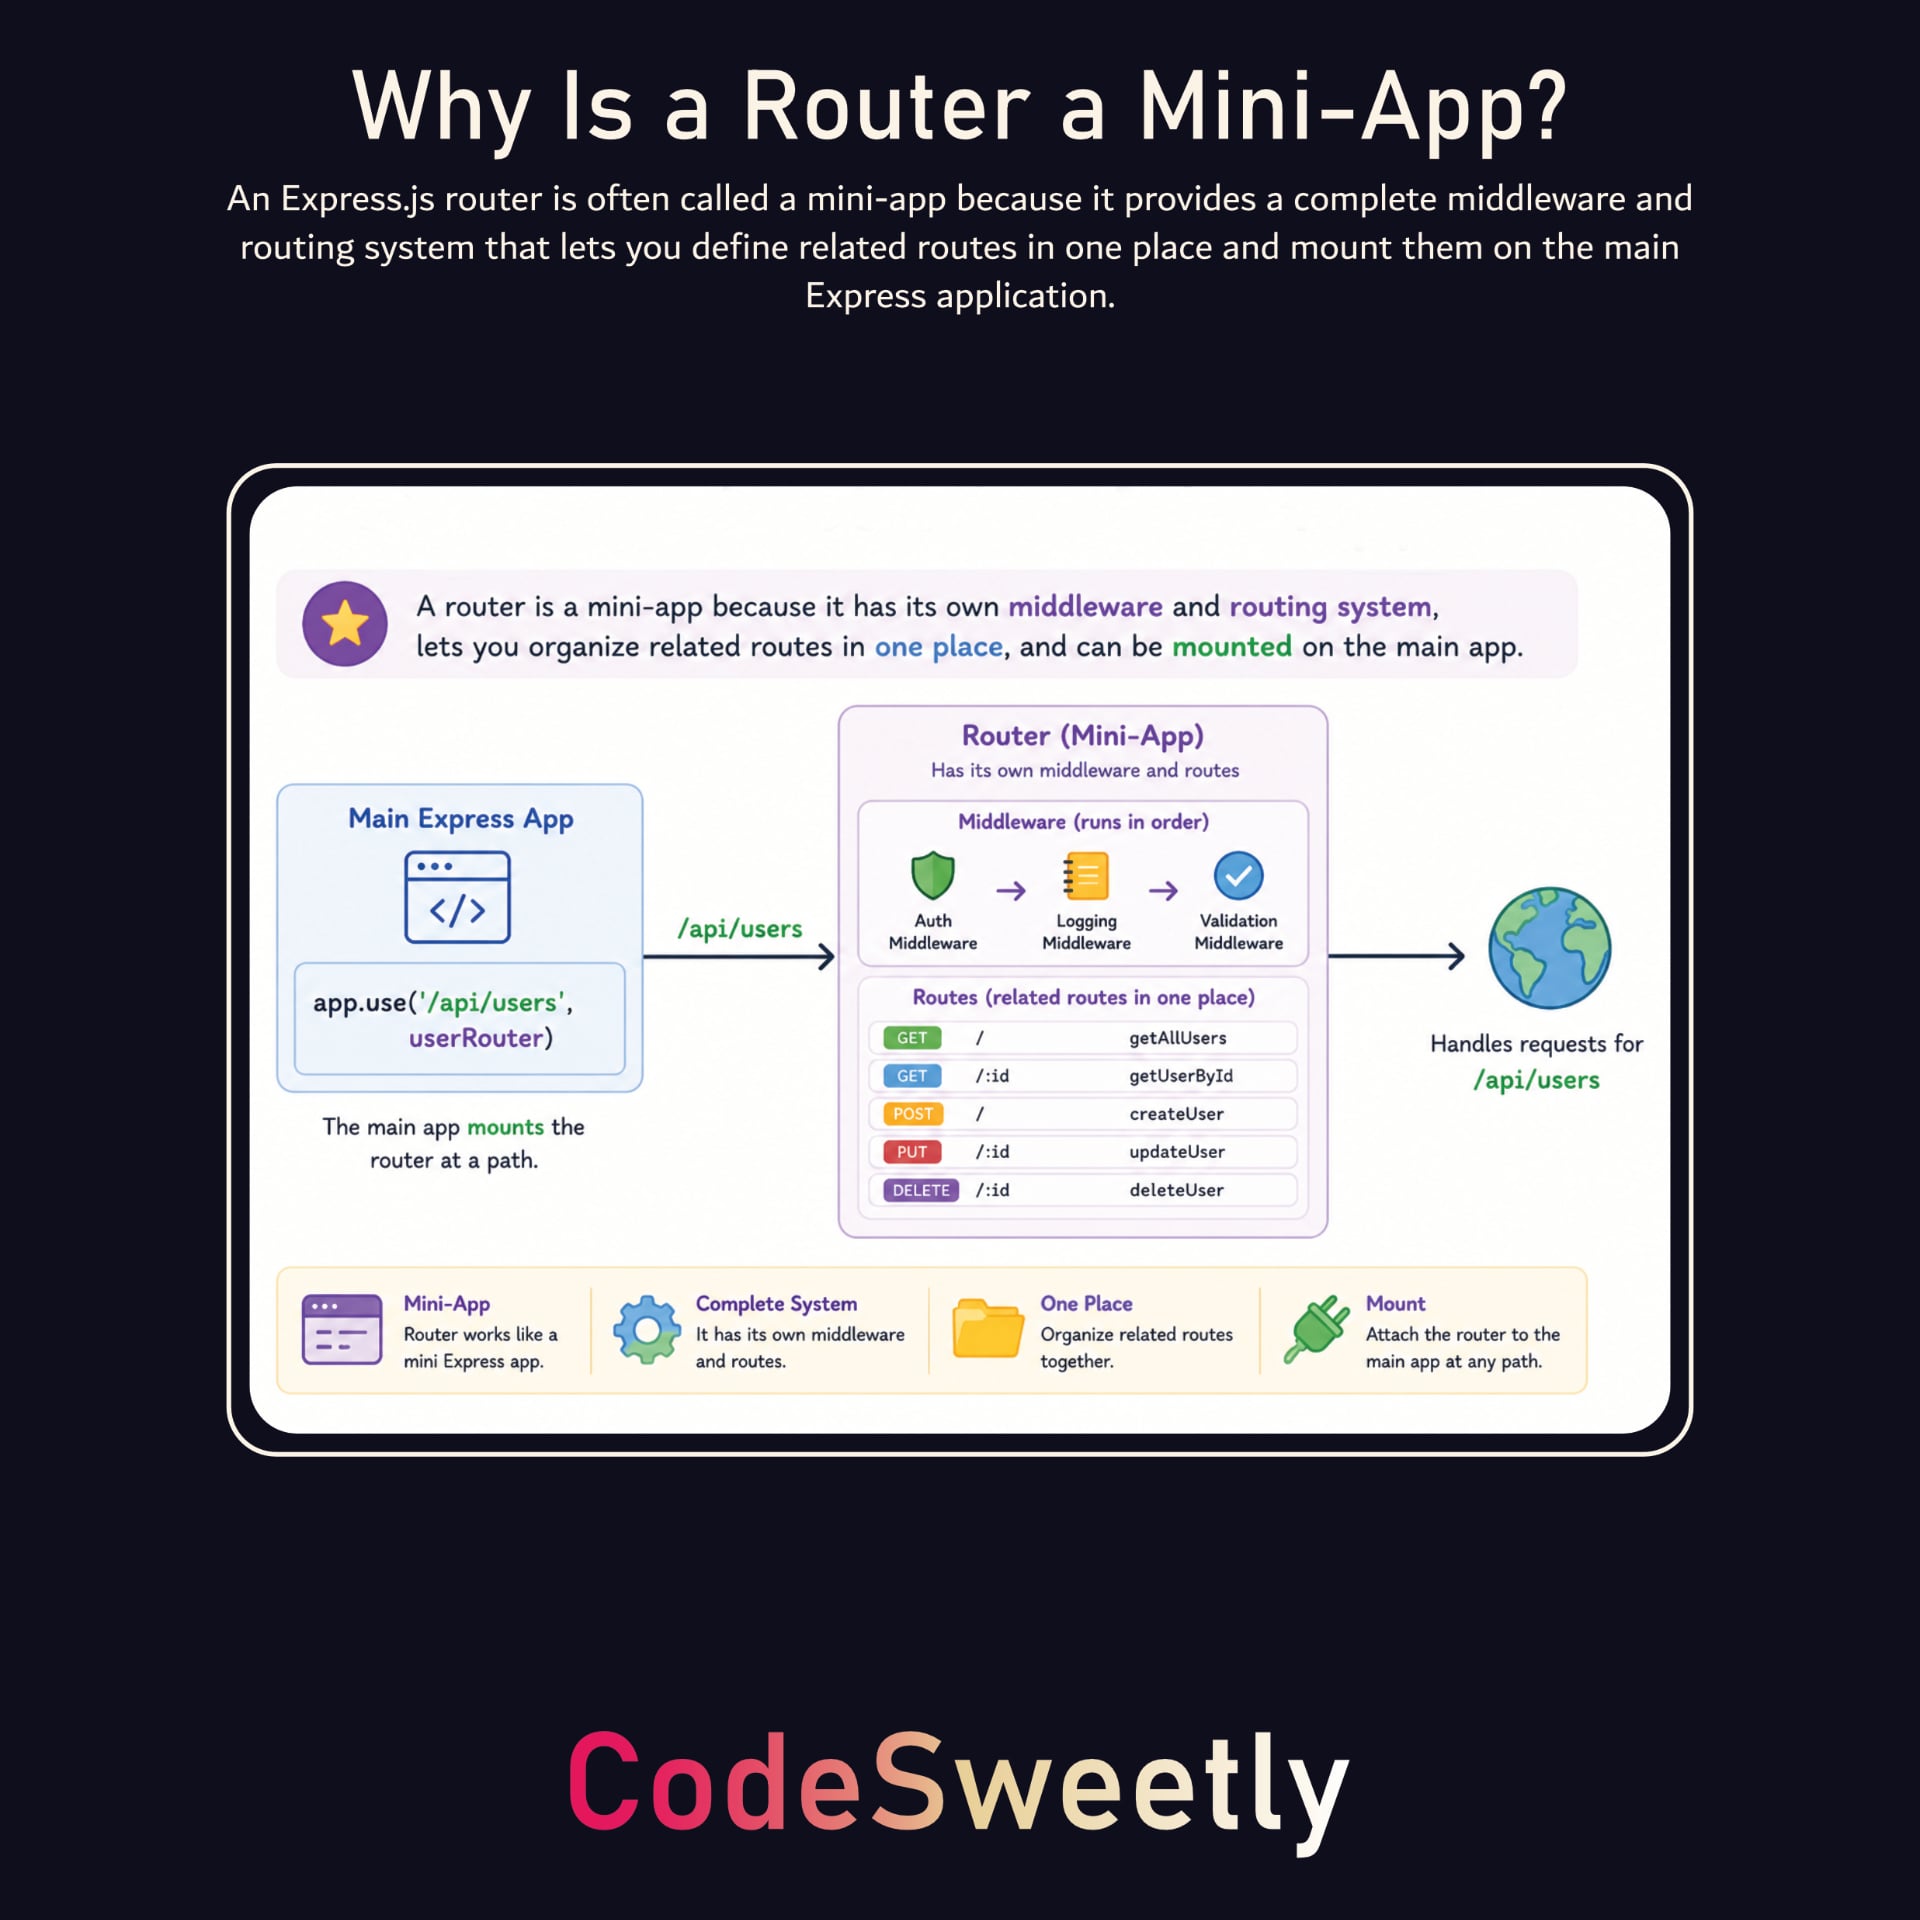
As illustrated in the image above, a router is often called a mini-app because it provides a complete middleware and routing system. It helps organize applications by allowing you to define related routes in one place and mount them onto the main Express application. For instance, suppose your Express application needs to handle the following categories of routes and middleware:
Index: For index-related routes and middleware.
Books: For book-related routes and middleware.
Videos: For video-related routes and middleware.
In this situation, you can use the express.Router() method to group related routes and middleware. This keeps things organized and makes each group easier to manage and reuse.
While you can create all router and app instances in one file, developers usually place routers in separate files for better organization and maintainability. Let's follow this approach by creating separate files for each route and middleware category.
Create a Directory for the Routers
Create a routes directory at your project's root to store all the app's routers.
mkdir routes
Note: You can name this folder whatever you like, but routes is a common name since it holds the files that define your app's routes (URL endpoints). The express.Router() method is just a tool that Express provides for managing those routes.
Create the Route Files
A route file is a module where you define related routes and export an Express router object. Each file usually represents a resource or feature, such as users, books, or authentication.
Create the route files in the routes directory.
touch routes/index.js routes/books.js routes/videos.js
Create a Mini-App for the Book-Related Routes and Middleware
Open the books.js file and use an express.Router() instance to group all the book-related routes and middleware.
routes/books.js
// Import the Router function from Express
import { Router } from "express";
// Create a new Express router instance
const bookRouter = Router();
// Define middleware specific to this router instance
bookRouter.use((req, res, next) => {
console.log("Book route accessed at: ", Date.now());
next();
});
// Define routes specific to this router instance:
bookRouter.get("/", (req, res) => {
res.send("<h1>List of All Books</h1>");
});
bookRouter.get("/:id", (req, res) => {
res.type("text/plain").send(`Details for book ${req.params.id}`);
});
bookRouter.get("/:id/draft", (req, res) => {
// Escape the ID before inserting it into HTML text
const bookId = req.params.id
.replaceAll("&", "&")
.replaceAll("<", "<")
.replaceAll(">", ">");
res.send(`<h1>New Draft for Book ${bookId}</h1>`);
});
export { bookRouter };
Here's what the code above does:
Creates a
bookRouterinstance to access Express APIs, such as.get(),.post(),.use(), and.route().Uses Express's
router.use()method to mount middleware onto thebookRouterinstance.Uses Express's
router.get()method to define how the server handles HTTP GET requests.Uses Express's
res.send()method to send an HTTP response and automatically set the appropriate headers based on the data type provided. The/:idhandler explicitly sets the response type to plain text, while the/:id/drafthandler escapes the ID before inserting it into HTML so it is displayed as text.Uses the
exportstatement to make the router object available for import wherever it is needed in the application.
Time to Practice with Routers
This is your moment to try out what you've learned about Express routers.
For this exercise, create mini-apps for the project's index and video-related routes and middleware. Export them as indexRouter from routes/index.js and videoRouter from routes/videos.js to match the imports in the next section.
Take a moment to try this on your own before moving on. If you need help, review the books.js file. Practicing will help you understand better.
After you finish the exercise, move on to setting up the main Express app.
Update the Main Express Application
Open your project's server.js file and attach the routers to the main Express application.
server.js
// Add the Express module
import express from "express";

// Import the routers from their separate files
import { indexRouter } from "./routes/index.js";
import { bookRouter } from "./routes/books.js";
import { videoRouter } from "./routes/videos.js";

// Create a new Express application instance
const app = express();

// Specify the host and port to receive requests
const host = "localhost";
const port = 3000;

// Mount the routers to specific paths:

// Mount indexRouter at /
app.use("/", indexRouter);

// Mount bookRouter at /books and its subpaths
app.use("/books", bookRouter);

// Mount videoRouter at /videos and its subpaths
app.use("/videos", videoRouter);

// Run the server on the specified port and host
app.listen(port, host, () => {
  console.log(`Server running live at http://${host}:
${port}!`);
});
Here's what the code above does:
Creates an Express application instance to access Express APIs, such as routers and middleware, which simplifies HTTP request handling in Node.js.
Uses Express's
app.use()method to add the mini-apps to the main Express application.Uses Express's
app.listen()method to start the Node.js HTTP server on a specific port and execute a callback when the server begins listening for client requests.
Note: The app.use() method's path serves as the router's base path or mount path. Routes defined in the router are matched relative to this mount path. For example:
bookRouter's/route matches requests to/books.bookRouter's/:idroute matches requests to/books/:id.bookRouter's/:id/draftroute matches requests to/books/:id/draft.
Run your Express.js Application
Once you've set up the routers, run your app by starting the server file with Node.js.
node --watch server.js
Then, check your app running live at the specified endpoints. For example, http://localhost:3000/books.
Tip: Stop the running process using Ctrl + C on Windows, macOS, or Linux.
Important Things to Know About Express Routers
Here are some important things to remember when using Express routers.
Routers do not inherit parent route parameters by default
By default, Express doesn't pass parameters from a router's mount path to routes inside that router.
Example:
// Add the Express module
import express from "express";

// Create a new Express application instance
const app = express();

// Create a new Express router instance
const bookRouter = express.Router();

// Define a sub-route
bookRouter.get("/books/:bookId", (req, res) => {
  const topic = req.params.topic; // undefined by default
  const bookId = req.params.bookId;
  res.json({ topic, bookId });
});

// Define a parent route
app.use("/codesweetly/:topic", bookRouter);

// Run the server on the specified port and host
const server = app.listen(3000, "127.0.0.1", () => {
  const { address, port } = server.address();
  console.log(`Server running live at http://${address}:
${port}!`);
});
If you run the web server in the example above and enter the following URL in the browser:
http://127.0.0.1:3000/codesweetly/CSS/books/91827
The req.params.topic parameter will be undefined because sub-routes can't access the parent route's path parameter by default. So, the server will only send a {"bookId":"91827"} response to the client.
To let a child route access its parent's path parameter, set mergeParams to true when you create the router.
Example:
// Add the Express module
import express from "express";

// Create a new Express application instance
const app = express();

// Create a new Express router instance
const bookRouter = express.Router({ mergeParams: true });

// Define a sub-route
bookRouter.get("/books/:bookId", (req, res) => {
  const topic = req.params.topic; // "CSS" for the URL below
  const bookId = req.params.bookId;
  res.json({ topic, bookId });
});

// Define a parent route
app.use("/codesweetly/:topic", bookRouter);

// Run the server on the specified port and host
const server = app.listen(3000, "127.0.0.1", () => {
  const { address, port } = server.address();
  console.log(`Server running live at http://${address}:
${port}!`);
});
If you run the web server in the example above and enter the following URL in your browser:
http://127.0.0.1:3000/codesweetly/CSS/books/91827
The req.params.topic parameter will be CSS because mergeParams: true lets the sub-route access the parent's path parameter. So, the server will send a {"topic":"CSS","bookId":"91827"} response to the client.
Tip:
The line
const { address, port } = server.address()uses object destructuring to get theaddressandportvalues from theserver.address()object.The
app.listen()method returns a native Node.jshttp.Serverinstance, allowing access to underlying server APIs such as.address(),.on(), and.maxHeadersCount.127.0.0.1is an IPv4 loopback address.localhostmay resolve to127.0.0.1or the IPv6 loopback address::1. Usehttp://127.0.0.1:3000for these examples because the server explicitly listens on that IPv4 address.
Routers can be mounted on other routers
You can attach one Express router to another.
Example:
// Add the Express module
import express from "express";

// Create a new Express application instance
const app = express();

// Create two Express router instances
const htmlRouter = express.Router();
const bookRouter = express.Router();

// Define a sub-route
bookRouter.get("/:bookId", (req, res) => {
  res
    .type("text/plain")
    .send(`Details for the HTML book with ID ${req.params.bookId}`);
});

// Mount bookRouter on htmlRouter's /books path
htmlRouter.use("/books", bookRouter);

// Mount htmlRouter at /html and its subpaths
app.use("/html", htmlRouter);

// Run the server on the specified port and host
const server = app.listen(3000, "127.0.0.1", () => {
  const { address, port } = server.address();
  console.log(`Server running live at http://${address}:
${port}!`);
});
The bookRouter's GET /:bookId route matches requests to GET /html/books/:bookId because, in this example, the book router is attached to htmlRouter.
Therefore, if you run the web server in the example above and enter the following URL in the browser:
http://127.0.0.1:3000/html/books/91827
The server will send a "Details for the HTML book with ID 91827" response to the client.
Now that you know what a router is, let's discuss how to use views to define the content and structure of the webpage your Express.js app returns to users.
What Is a View in Express.js?
A view is a template or document that defines the content and structure of a webpage returned to users by an Express.js application. It can be a static HTML file or a dynamic template rendered into HTML at runtime by a template engine.
In this guide, we'll work with two types of views:
Static views
Dynamic views
What Are Static Views in Express.js?
Static views contain the final HTML that the server sends to the browser as-is. For example, let's configure your Express.js application to serve four static views.
Create static views
Create index.html, about.html, contact.html, and 404.html files in your project's root directory.
touch index.html about.html contact.html 404.html
Open each view and add the following HTML content:
index.html (homepage)
<!doctype html>
<html lang="en">
  <head>
    <meta charset="UTF-8" />
    <meta name="viewport" content="width=device-width, initial-scale=1.0" />
    <title>Static Views in Express.js | CodeSweetly Tutorial</title>
  </head>
  <body>
    <h1>Welcome to the Static View Guide</h1>
    <p>Site's pages:</p>
    <ul>
      <li><a href="/about">About</a></li>
      <li><a href="/contact">Contact</a></li>
    </ul>
  </body>
</html>
about.html (about page)
<!doctype html>
<html lang="en">
  <head>
    <meta charset="UTF-8" />
    <meta name="viewport" content="width=device-width, initial-scale=1.0" />
    <title>About Us | Static Views in Express.js</title>
  </head>
  <body>
    <h1>About Us</h1>
    <p>
      Lorem ipsum dolor sit amet consectetur adipisicing elit. Libero soluta
      voluptas reprehenderit minus veniam! Corrupti a esse quidem nostrum harum,
      explicabo tempore tempora aut, sint et voluptatem magni ea vel?
    </p>
    <div><a href="/">Return to the home page</a></div>
  </body>
</html>
contact.html (contact page)
<!doctype html>
<html lang="en">
  <head>
    <meta charset="UTF-8" />
    <meta name="viewport" content="width=device-width, initial-scale=1.0" />
    <title>Contact | Static Views in Express.js</title>
  </head>
  <body>
    <h1>Contact Us</h1>
    <ul>
      <li><a href="https://codesweetly.com">Website</a></li>
      <li><a href="https://x.com/oluwatobiss">X (Twitter)</a></li>
    </ul>
    <div><a href="/">Return to the home page</a></div>
  </body>
</html>
404.html (error page)
<!doctype html>
<html lang="en">
  <head>
    <meta charset="UTF-8" />
    <meta name="viewport" content="width=device-width, initial-scale=1.0" />
    <title>404 - Page not found | Static Views in Express.js</title>
  </head>
  <body>
    <h1>Page not found</h1>
    <div>Sorry, we couldn't find that page</div>
    <div><a href="/">Go back to the home page</a></div>
  </body>
</html>
Next, configure your project to handle browser connections.
Configure the project's web server to serve static views
Open the project's server.js module and configure the web server to serve the appropriate static HTML view in response to requests.
// Add the required modules
import express from "express";
import { dirname, join } from "node:path";
import { fileURLToPath } from "node:url";

// Create a new Express application instance
const app = express();

// Specify the hostname and port to receive requests
const host = "localhost";
const port = 3000;

// Get the directory name of the current file's path
const __dirname = dirname(fileURLToPath(import.meta.url));

// Use the index.html static view as a response to 'GET /' requests
app.get("/", (req, res) => res.sendFile(join(__dirname, "index.html")));

// Use the about.html static view as a response to 'GET /about' requests
app.get("/about", (req, res) => {
  res.sendFile(join(__dirname, "about.html"));
});

// Use the contact.html static view as a response to 'GET /contact' requests
app.get("/contact", (req, res) => {
  res.sendFile(join(__dirname, "contact.html"));
});

// Use the 404.html static view as a response to unmatched requests
app.use((req, res) => {
  res.status(404).sendFile(join(__dirname, "404.html"));
});

// Run the server on the specified port and hostname
app.listen(port, host, () => {
  console.log(`Server running live at http://${host}:
${port}`);
});
Here are the main things the snippet above does:
Create an Express application instance to access Express APIs, such as routers and middleware, which simplify HTTP request handling in Node.js.
Get the directory name of the current file's path.
dirname()returns a path's directory name.fileURLToPath()converts a URL to a valid path string.import.meta.urlreturns the absolute URL of the current file.
Create routes to receive and respond to clients' requests.
appis an Express application instance.The
app.get()method defines how the server handles HTTP GET requests to the specified path (the method's first argument).The
res.sendFile()method sends a file from the server to the client.join()joins multiple path segments into a single, normalized path string using the current operating system’s path separator.The
app.use()method lets you set up handler functions that Express runs for all HTTP request methods and paths. If you specify a path argument,app.use()treats it as a prefix for matching routes. For example,/bookmatches/book,/book/dashboard, and/book/dashboard/author/202605.res.status(404)sets the HTTP status code to 404 for a request that reaches this final handler without receiving a response.
Use Express's
app.listen()method to start the Node.js HTTP server on a specific port and execute a callback when the server begins listening for client requests.
Run your Express.js application
Once you've set up the server, run it with Node.js.
node --watch server.js
Afterward, check your app running live at http://localhost:3000.
Tip: Stop the running process using Ctrl + C on Windows, macOS, or Linux.
To keep things organized, put all your static views in a public directory. This is a common practice.
Create a directory for static views
Create a public directory at your project's root to store all static views.
mkdir public
Note: You can name this folder whatever you like, but public is a common choice to indicate that its files (HTML, CSS, client-side JavaScript, images) are intended to be served to clients. The folder's name alone does not make its contents accessible. The server must be configured to serve them. Don't put sensitive information in it.
Move all static views into the public folder
mv index.html about.html contact.html 404.html public/
Update the server to retrieve static views from the public folder
server.js
import express from "express";
import { dirname, join } from "node:path";
import { fileURLToPath } from "node:url";

const app = express();
const host = "localhost";
const port = 3000;
const __dirname = dirname(fileURLToPath(import.meta.url));

// Serve static assets (HTML, CSS, images) from the 'public' folder
app.use(express.static(join(__dirname, "public")));

// Use the index.html static view as a response to 'GET /' requests
app.get("/", (req, res) => {
  res.sendFile(join(__dirname, "/public/index.html"));
});

// Use the about.html static view as a response to 'GET /about' requests
app.get("/about", (req, res) => {
  res.sendFile(join(__dirname, "/public/about.html"));
});

// Use the contact.html static view as a response to 'GET /contact' requests
app.get("/contact", (req, res) => {
  res.sendFile(join(__dirname, "/public/contact.html"));
});

// Use the 404.html static view as a response to unmatched requests
app.use((req, res) => {
  res.status(404).sendFile(join(__dirname, "/public/404.html"));
});

// Run the server on the specified port and hostname:
app.listen(port, host, () => {
  console.log(`Server running live at http://${host}:
${port}`);
});
Note The app.use(express.static(join(__dirname, 'public'))) line tells Express to check the public folder first for static asset requests. If it finds the file there, it immediately serves it to the browser and stops the request-response cycle.
Example:
If a user requests
localhost:3000/about.html,express.staticchecks thepublicfolder for theabout.htmlfile. If found, Express automatically sends it without running the route handlers that follow the static middleware.If a user asks for
localhost:3000/about,express.staticchecks thepublicfolder for anaboutfile (no extension). If it finds anaboutdirectory instead, it redirects to/about/, where it looks forindex.htmlby default. With the files created in this guide, neither anaboutfile nor anaboutdirectory exists, so Express uses theGET /aboutcustom route to handle the request.
Let's now discuss dynamic views.
What Are Dynamic Views in Express.js?
Dynamic views contain placeholders that template engines, such as EJS, replace with data at runtime.
Express.js supports template engines such as EJS, Pug, and Handlebars. Let's use EJS as an example to discuss how dynamic views work.
What is EJS?
EJS (Embedded JavaScript templating) is a templating language that lets you create dynamic HTML views by embedding JavaScript code within HTML templates using template tags.
When the server renders a template, the EJS engine executes the embedded JavaScript and generates the final HTML sent to the client.
For instance, consider the following code. Install EJS with npm install ejs before running this example:
// Add the Express and EJS modules
import express from "express";
import ejs from "ejs";

// Create a new Express application instance
const app = express();

// Specify the host and port to receive requests
const host = "localhost";
const port = 8000;

// Define the data object
const friendsArray = ["Sarah", "Abraham", "Mary"];
const replacementObject = { friends: friendsArray };

// Use backticks to define a template string with embedded JavaScript
const templateString = `
  <h1>Hello, <%= friends.join(", "); %>!</h1>
  <p>Welcome to CodeSweetly.</p>
`;

// Compile and render the template string to HTML (the rendered view)
const html = ejs.render(templateString, replacementObject);

// Use the dynamic view as a response to 'GET /' requests
app.get("/", (req, res) => res.send(html));

// Run the server on the specified port and hostname
app.listen(port, host, () => {
  console.log(`Server running live at http://${host}:
${port}!`);
});
The above snippet tells Express to send the rendered view to the client when users request the / path.
At runtime, EJS evaluates friends.join(", ") using the array passed as friends and inserts the result, Sarah, Abraham, Mary, into the HTML. Here, rendering happens once when the script starts. Each request receives that same rendered HTML.
What are EJS template tags?
EJS template tags are special tags written using the <% ... %> syntax. They allow JavaScript code and values to be embedded into EJS view templates.
When EJS renders the template, scriptlet tags execute JavaScript, output tags insert values, and comment tags are ignored.
For example, the <%= %> tags below allow you to embed a JavaScript friend variable into the view template.
<h1>About <%= friend %>, my special pal</h1>
Note: Output tags such as <%= %> must contain a valid JavaScript expression. Scriptlet tags can contain JavaScript statements and parts of control-flow structures, while comment tags contain comments.
Example:
<%= <p>I love CodeSweetly</p> %>will throw an error because<p>I love CodeSweetly</p>is HTML, not JavaScript.<%= "<p>I love CodeSweetly</p>" %>is valid because"<p>I love CodeSweetly</p>"is embedded as a JavaScript string data type.
Types of EJS template tags
The nine EJS tag forms covered here are as follows:
Tip: Wrap JavaScript code in EJS tags to distinguish it from the surrounding template content. A single pair of tags can contain multiple lines of JavaScript.
Closing tag (%>)
Use the closing tag to end an EJS tag. It has no special behavior on its own.
Scriptlet tag (<%)
Use the scriptlet tag to run JavaScript code without outputting anything into the generated HTML. This tag is commonly used for control flow, such as if, for, and forEach logic.
<ul>
  <% friends.forEach(function () { %>
  <li>My friend</li>
  <% }) %>
</ul>
The snippet above wraps <% %> around the control-flow syntax to indicate to EJS that the JavaScript code is only for logic and should not be rendered to the generated HTML.
Escaped output tag (<%=)
Use the escaped output tag to evaluate JavaScript expressions and output the result into the generated HTML while escaping HTML characters. This tag helps prevent HTML injection.
<%= 100 + 200 %>
The above snippet wraps <%= %> around the arithmetic expression to tell EJS to render the code's value into the generated HTML.
Note: If the expression evaluates to a string containing HTML, <%= %> escapes the HTML syntax so the browser displays it as text. For example, <%= "<h1>About CodeSweetly</h1>" %> will render <h1>About CodeSweetly</h1> as text, not an actual <h1> element.
Unescaped output tag (<%-)
Use the unescaped tag to evaluate JavaScript expressions and output the result into the generated HTML without escaping HTML characters.
<%- "<h1>About CodeSweetly</h1>" %>
The snippet above wraps <%- %> around a string containing an <h1> element so the browser renders it as HTML. Use unescaped output only for trusted HTML.
Literal opening tag (<%%)
Use the literal tag to output a literal <% sequence instead of treating it as an EJS tag. This is useful when you want to show EJS syntax in the generated output.
<%% "<p><strong>Name:</strong> <em>Oluwatobi</em></p>" %>
The snippet above outputs a literal <% followed by the remaining text, without evaluating it as JavaScript. The generated HTML source is:
<% "
<p><strong>Name:</strong> <em>Oluwatobi</em></p>
" %>
The HTML tags remain unescaped, so this shows the generated source, not how the browser displays the page.
Newline-trimmed ending tag (-%>)
Use the newline-trimmed ending tag to remove the newline immediately after the closing tag.
<ul>
  <% friends.forEach(function (friend) { %>
  <li><%= friend -%></li>
  <% }) %>
</ul>
The snippet above wraps <%= -%> around the friend variable to tell EJS to trim any newline following the closing EJS tag.
Tip: The newline-trimmed ending tag is also called the newline slurp tag.
Whitespace slurp opening tag (<%_)
Use the whitespace slurping tag to remove spaces and tabs immediately before the opening EJS tag on the same line.
<ul>
  <%_ friends.forEach(function (friend) { %>
  <li><%= friend %></li>
  <%_ }) %>
</ul>
The snippet above wraps <%_ %> around the control-flow syntax to tell EJS to trim the indentation before the template tags.
Whitespace slurp closing tag (_%>)
Use the whitespace slurping ending tag to remove spaces and tabs immediately after the closing tag, followed by one newline if present.
<ul>
  <% friends.forEach(function (friend) { _%>
  <li><%= friend %></li>
  <% }) _%>
</ul>
The snippet above wraps <% _%> around the control-flow syntax to tell EJS to trim the newline after each closing tag. The indentation on the following line remains.
Comment tag (<%#)
Use the comment tag to add EJS comments that are ignored during rendering and do not appear in the generated HTML.
<ul>
  <%# Loop through the friends array %>
  <% friends.forEach(function (friend) { _%>
  <li><%= friend %></li>
  <% }) _%>
</ul>
The snippet above wraps the comment in <%# %>.
Tip: EJS allows you to combine some tags. For example, the following combinations are possible:
<%_ _%>: Combine the whitespace slurping scriptlet and ending tag to remove adjacent spaces and tabs on the same line, plus one following newline if present.<% -%>: Combine the control-flow with the newline slurp.<%= -%>: Combine the escaped tag with the newline slurp.
How to use EJS in an Express project
The following sections will guide you through the process of using EJS in your Express.js project.
Install EJS
First, install EJS in your Express project.
npm install ejs@6.0.1
Next, open your project's server.js module and configure the web server to serve the appropriate dynamically generated HTML view in response to requests.
server.js
// Add the Express and EJS modules
import express from "express";
import ejs from "ejs";

// Create a new Express application instance
const app = express();

// Specify the host and port to receive requests
const host = "localhost";
const port = 8000;

// Define the data object
const friendsData = {
  bestFriend: "Sarah",
  codingFriend: "Abraham",
  dreamFriend: "Mary",
};
const replacementObject = { friends: friendsData };

// Use backticks to define a template string with embedded JavaScript
const templateString = `
<html>
  <body>
    <h1>List of Friends</h1>
    <ul>
    <%# Loop through the friends object %>
    <% for (const eachFriend in friends) { -%>
      <li><%= friends[eachFriend] %> is my <%= eachFriend %></li>
    <% } -%>
    </ul>
  </body>
</html>
`;

// Compile and render the template string to HTML (the rendered view)
const htmlData = ejs.render(templateString, replacementObject);

// Use the dynamic view as a response to 'GET /' requests
app.get("/", (req, res) => res.send(htmlData));

// Run the server on the specified port and hostname
app.listen(port, host, () => {
  console.log(`Server running live at http://${host}:
${port}!`);
});
Here are the main things the snippet above does:
Create an Express application instance to access Express APIs, such as routers and middleware, which simplify HTTP request handling in Node.js.
Render the template string once when the script starts to generate the HTML that the server sends to each client.
Create routes to receive and respond to clients' requests.
Use Express's
app.listen()method to start the Node.js HTTP server on a specific port and execute a callback when the server begins listening for client requests.
Run the Express app
After setting up the server, run it with Node.js.
node --watch server.js
Afterward, check your app running live at http://localhost:8000.
Tip: Stop the running process using Ctrl + C on Windows, macOS, or Linux.
To keep things organized, put all your view templates in a views directory. This is a common practice.
Create a directory for view templates
Create a views directory at your project's root to store all view templates.
mkdir views
Create an index view template
touch views/index.ejs
Tip: EJS template files use the .ejs extension.
Open the file and move the HTML template from server.js into it.
views/index.ejs
<html>
  <body>
    <h1>List of Friends</h1>
    <ul>
      <%# Loop through the friends object %>
      <% for (const eachFriend in friends) { -%>
      <li><%= friends[eachFriend] %> is my <%= eachFriend %></li>
      <% } -%>
    </ul>
  </body>
</html>
Update the server to retrieve view templates from the views folder
server.js
import express from "express";
import { dirname, join } from "node:path";
import { fileURLToPath } from "node:url";

const app = express();
const host = "localhost";
const port = 8000;
const __dirname = dirname(fileURLToPath(import.meta.url));

// Specify the app's views directory
app.set("views", join(__dirname, "views"));

// Specify the app's view engine
app.set("view engine", "ejs");

// Define the data object
const friendsData = {
  bestFriend: "Sarah",
  codingFriend: "Abraham",
  dreamFriend: "Mary",
};
const replacementObject = { friends: friendsData };

// Compile and render the index view template to HTML and use it as a response to 'GET /' requests
app.get("/", (req, res) => {
  res.render("index", replacementObject);
});

// Run the server on the specified port and hostname
app.listen(port, host, () => {
  console.log(`Server running live at http://${host}:
${port}`);
});
The snippet above uses Express's render() method to generate HTML from the index.ejs template file.
Note:
- If you omit the
app.set("view engine", "ejs")line, then therender()method's view template argument must include a file extension like this:
app.get("/", (req, res) => {
  res.render("index.ejs", replacementObject);
});
Express has no default template engine. Express also supports engines such as Pug (formerly called Jade), EJS, Mustache, and Handlebars.
app.set()is the method for adding a key-value pair to the application's settings. You can retrieve the setting's value withapp.get()as follows:
app.set("my name", "Oluwatobi");

const bio = app.get("my name");

console.log(bio); // Outputs: "Oluwatobi"
How to create reusable EJS templates (partials)
EJS provides the include() method for including (nesting) one view template into another.
Tip: In EJS, partials are reusable templates.
Syntax of the include() method
The include() method accepts two arguments. Here's the syntax:
<%- include("path/to/partial", data) %>
"path/to/partial": (required) The path to the reusable template, relative to the current file (the parent template). For example, if the current file is at"./views/index.ejs"and the partial is at"./views/partials/footer.ejs", theinclude()path argument would be"partials/footer".data: (optional) An object containing the properties to pass to the partial.
How to include a partial in a view template
Consider the following server file:
server.js
import express from "express";
import { dirname, join } from "node:path";
import { fileURLToPath } from "node:url";

const app = express();
const host = "localhost";
const port = 8080;
const __dirname = dirname(fileURLToPath(import.meta.url));

app.set("views", join(__dirname, "views"));
app.set("view engine", "ejs");

const friendsData = {
  bestFriend: "Sarah",
  codingFriend: "Abraham",
  dreamFriend: "Mary",
};
const replacementObject = { friends: friendsData };

app.get("/", (req, res) => {
  res.render("index", replacementObject);
});

app.listen(port, host, () => {
  console.log(`Server running live at http://${host}:
${port}`);
});
The snippet above will render an index template when users send a GET request to the "/" path. Below is the index.ejs template file.
views/index.ejs
<html>
  <body>
    <h1>List of Friends</h1>
    <ul>
    <%# Loop through the friends object %>
    <% for (const eachFriend in friends) { -%>
      <li><%= friends[eachFriend] %> is my <%= eachFriend %></li>
    <% } -%>
    </ul>
  </body>
</html>
If you need the <li> element to be reusable in multiple templates, extract it into a separate file and use the include() method to add it to any template as needed. Here's how:
Create a partials directory
Create a partials directory in your views folder to store all reusable view templates.
mkdir views/partials
Create a partial view template
Create a partial view template for the <li> element.
touch views/partials/friendLi.ejs
Open the file and add the <li> element.
views/partials/friendLi.ejs
<li><%= friend %> is my <%= friendType %></li>
Update the main view template
Open the index.ejs file and use the include() method to add the friendLi.ejs partial view template.
views/index.ejs
<html>
  <body>
    <h1>List of Friends</h1>
    <ul>
    <%# Loop through the friends object %>
    <% for (const eachFriend in friends) { -%>
      <%- include("partials/friendLi", { friend: friends[eachFriend], friendType: eachFriend }) %>
    <% } -%>
    </ul>
  </body>
</html>
Using include() to add the <li> element makes it reusable in multiple templates, rather than restricting it to the index.ejs view template.
Run your server from the root directory
node --watch server.js
Then, check your app running live at http://localhost:8080.
Note: Although the steps above demonstrate EJS partials with a simple <li> element, you can use the same concept to reuse your application's navbar, footer, and other components across multiple view templates.
Overview
In this handbook, we explored the core concepts you need to start building applications with Node.js and Express.js. We discussed how Node.js works, its module support, and how to create HTTP servers. We also explored how Express.js simplifies server-side development through routes, routers, and views.
Whether you’re considering a small personal project or a full-stack application for a larger user base, you now have a solid starting point for building with Node.js and Express.js.
Thanks for reading!
Dive Deeper into Node.js and Express.js
This handbook has given you a peek inside my Node.js and Express.js Simplified book.
Whether you’re learning backend development for the first time, expanding your JavaScript skills beyond frontend development, or looking for a practical introduction to Node.js and Express.js, the book will help you build on what you’ve learned here and develop the skills to create, test, and deploy complete applications.
You’ll dive deeper into Node.js and Express.js through practical explanations and hands-on examples covering topics such as file management, file uploads, forms, sessions, frontend-to-backend communication, testing, TypeScript, and deployment.