

Path-finding algorithms are algorithms used to find optimal path between two locations. These algorithms are widely used in map applications like Google Maps, for example.
In this tutorial we will be building a path finding algorithm visualizer with React. It will support Breadth-First Search (BFS), Depth-First Search (DFS), adding walls, and weighting nodes for weighted graph algorithms like Dijkstra's. This will help us identify features like streets with high traffic that you don't want to take.
To go through this tutorial, you should have a basic understanding of BFS and DFS. In case you need to review, I will leave a link for a YouTube video explaining the two algorithms.
You should also have a basic understanding of React.
Here's the final version of what we're going to build and here's the source code on my GitHub account.
In this tutorial we will be using Visual Studio Code (but you can use any editor you want), a command line prompt, some basic React, ES6 JavaScript, and HTML and CSS.
So let's start coding!
Project Setup
For this tutorial I will be using Vite, which is a tool that helps you start projects way faster than npm create-react-app.
First, install Vite if you haven't done that yet. Create a folder in a well-known directory on your machine. Then using the terminal, navigate to this directory and run these commands:
$ npm create vite@latest my-app
$ cd my-app
$ npm install
Now inside the src folder, create a components folder, a contexts folder, and a utils folder – and you're done. Here's a screenshot of what your project should look like:
 Project folder structure
How to Add Bootstrap
Now we need to add bootstrap to our project for the buttons and icons we're going to add, since we need to focus on the JavaScript part.
To do this, just add the Bootstrap CDN to the head tag in your HTML file. After adding these links you should notice the font changing.
<link href="https://cdn.jsdelivr.net/npm/bootstrap@5.2.2/dist/css/bootstrap.min.css" rel="stylesheet" integrity="sha384-Zenh87qX5JnK2Jl0vWa8Ck2rdkQ2Bzep5IDxbcnCeuOxjzrPF/et3URy9Bv1WTRi" crossorigin="anonymous">
<link rel="stylesheet" href="https://cdn.jsdelivr.net/npm/bootstrap-icons@1.9.1/font/bootstrap-icons.css">
How to Represent the Cells
For the representation of the grid and the cells, I will be building a two dimensional array of objects containing all the properties we need to represent a certain cell.
Now in the utils folder, create a startingGrid.js file. Here, you'll write a function that returns a grid which is a two dimensional array of objects representing the cells.
Each object will have these properties: x, y, isstarting, istarget, iswall, and weight.
x and y represent the coordinates of the cell. isstarting is a Boolean that's only true for the starting cell. istarget is similar, but for the target node. iswall is a Boolean that's only true for walls. And weight is an integer.
All normal cells have a weight of 1, and the weighted cells have a weight of 5. The function should look like this:
export function getGrid(width,height){
    let grid=[]
    for (let i =0 ; i<height ; i++){
      let local=[]
      for (let j =0 ; j<width ; j++){
          local.push({x:j,y:i,isstart:false,istarget:false,weight:1,
          iswall:false})
          }
      grid.push(local)
      }
    grid[Math.floor(height/2)][Math.floor(width/2)].isstart=true
    grid[height-2][width-2].istarget=true
    return  grid
    }
How to Create the Context
In React, passing props from parent to child may become unmaintainable. For this reason, it's better to store all of our state in a single place where state will be accessible to all elements. That's what a context is.
In React we can create a context with createContext and access all its variables using the useContext hook.
Now let's create a context with everything we need. When we hover over a cell we will control the behavior of the event listener based on a variable called mode. For example, if the mode is addwalls, then hovering over a cell makes it a wall.
We will use the same logic for adding weighted cells, and also for setting the starting and ending cells.
The structure I will be using for creating the context is very simple. You can make use of it in all of your projects, and it will look like this:
import { useContext,createContext } from "react";

const context = createContext()

export const useParams=()=>{
    return useContext(context)
}

export const ParamsProvider = ({children}) => {

      return (<div>
       <context.Provider value={}>
        {children}
       </context.Provider>
      </div>)

}
Now we will create state for:
- The mode we're in, either building walls or setting the starting cell.
- The algorithm that we will run.
- The grid which we will equal by default to the grid returned by the function we already created.
- Determining if we're editing or not.
- For the starting and target node coordinates.
- Determining that we want to run the algorithm and clear the grid when changed using
useEffect(A separate state for each that, when we change its value, we run a useEffect with an appropriate side effect).
The code will look like this:
import { useContext, useState,createContext, useEffect, useRef } from "react";
import { getGrid } from "../utils/startinggrid";

const context = createContext()

export const useParams=()=>{
    return useContext(context)
}

export const ParamsProvider = ({children}) => {

     const [mode,setmode] = useState(null)
     const [algo,setalgo] = useState('')
     const [run,setrun] = useState(false)
     const [grid,setgrid] = useState(getGrid(50,25))
     const [editing,seteditFlag] = useState(false)
     const [res,setres] = useState(false)
     const start=useRef({x:25,y:12})
     const end=useRef({x:48,y:23})

     useEffect(()=>{
      restart()
     },[res])


     function restart(){
      setgrid(getGrid(50,25))
     }


      return (<div>
      <context.Provider value={{mode,
        setmode,
        algo,
        setalgo,
        grid,
        setgrid,
        setres,
        editing,
        seteditFlag,
        start,
        end,
        run,
        setrun,
        res}}>
         {children}
       </context.Provider>
       </div>)

     }
And finally, we'll wrap the app component with the ParamsProvider like this:
import React from 'react'
import ReactDOM from 'react-dom/client'
import App from './App'
import './index.css'
import {ParamsProvider} from './context/context'

ReactDOM.createRoot(document.getElementById('root')).render(
  <React.StrictMode>
      <ParamsProvider>
      <App />
      </ParamsProvider>
  </React.StrictMode>

)
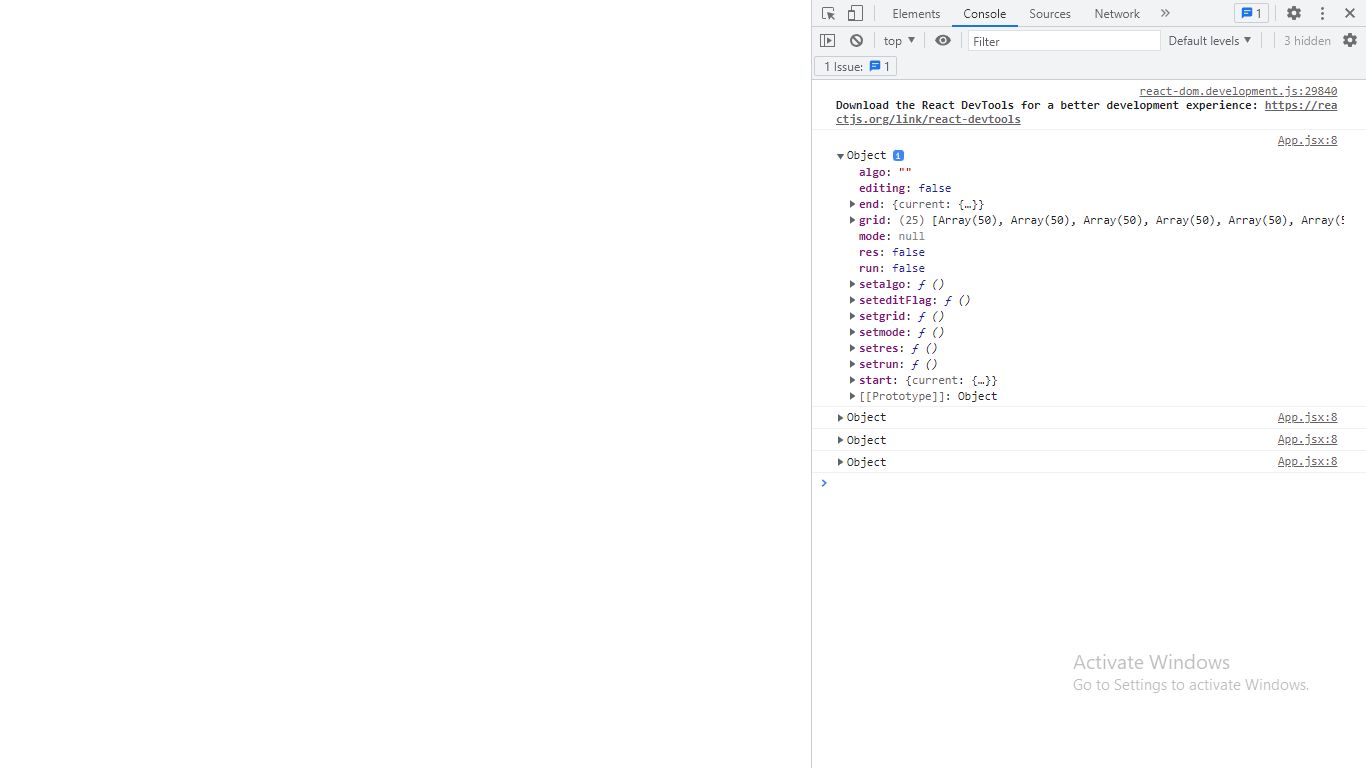
Now to make sure everything is working, import the useParams custom hook to your any components. Now use the console to check its return value. It should return an object with all the variables we've added to the store.
import './App.css'
import {useParams} from './context/context'


function App() {

console.log(useParams())

return ( <div></div>)

}

export default App
How to Create the Navbar
Now it's time for the navbar which we'll use to control the modes. First, create a Navbar folder with two files: Navbar.jsx and Navbar.css. This structure is very useful, especially when using Sass (so each component and its CSS can be found in the same folder).
The navbar will consist of six buttons: two for setting the mode for starting/ending node editing, two for setting the mode for building blocks/adding weighted cells, and two for clearing the board and running the algorithm.
The code will look like this:
import React, { useState } from 'react'
import './Navbar.css'
import { useParams } from '../../context/context'


export default function Navbar() {

  // const [algo,setalgo] = useState('')
  const {mode,setmode,algo,setalgo,setres,setrun}=useParams()


  return (
    <div className='navbar'>
      <div className='container'>
       <button type="button" className={['btn' ,'btn-primary', mode=='setstart'? 'selected' : ''].join(' ')} onClick={()=>{
        if(mode == 'setstart') setmode(null)
        else {setmode('setstart')}
       }}>
        <i className="bi bi-geo-alt"></i>
       </button>
       <button type="button" className={['btn' ,'btn-primary', mode=='settarget'? 'selected' : ''].join(' ')} onClick={()=>{
        if(mode == 'settarget') setmode(null)
        else {setmode('settarget')}
       }}>
       <i className="bi bi-geo"></i>
       </button>
       <button type="button" className={['btn' ,'btn-primary', mode=='addbricks'? 'selected' : ''].join(' ')} onClick={()=>{
        if(mode == 'addbricks') setmode(null)
        else {setmode('addbricks')}
       }}>
       <i className="bi bi-bricks"></i>
       </button>
       <button type="button" className={['btn' ,'btn-primary', mode=='addweight'? 'selected' : ''].join(' ')} onClick={()=>{
        if(mode == 'addweight') setmode(null)
        else {setmode('addweight')}
       }}>
       <i className="bi bi-virus"></i>
       </button>
       <button type="button" className="btn btn-primary" onClick={()=>{setres((old)=>{ return !old})}}>
       <i className="bi bi-arrow-counterclockwise"></i>
       </button>
       <button type="button" className="btn btn-primary" onClick={()=>{setrun((old)=>{return !old})}}>
       <i className="bi bi-caret-right"></i>
       </button>
       <div>
       <select className="form-select" aria-label="Default select example"  value={algo} onChange={(e)=>{
        setalgo(e.target.value)
       }}>
       <option value=''>Choose your algorithm</option>
       <option value="dijkstra">dijkstra</option>
       <option value="BDS">BDS</option>
       <option value="BFS">BFS</option>
</select>
       </div>
      </div>
    </div>
  )
}
Each button sets the mode to the desired value – or to null if it's already set to the button's mode.
The run and restart button change the values of the state context variables res and run. We'll use these with a useEffect hook to run the algorithm or clear the board. The select input element is to select the algorithm.
Now, for example, if the building blocks mode button is selected, we want this button to have a different styling from other buttons. We'll do that by using the selected class that will be added for the button depending on which mode is selected. The CSS will look like this:
.navbar{
    width:100%;
    height:min(20vh , 100px);
    background:black;
}

.navbar .selected {
    box-shadow: rgb(204, 219, 232) 3px 3px 6px 0px inset, rgba(255, 255, 255,     0.5) -3px -3px 6px 1px inset;
}
This is how the app is going to look right now. To test it out, you can check for context variable changes on button clicks:
 Current state of the app
How to Create the Grid
Now the cells are divs contained in a div with the class of board which will contain all the cells. The grid will look like an Excel sheet where each cell has an x and y coordinate.
First, create a Grid folder in the components folder. Then add two files in it: Grid.jsx and Grid.css.
Now let's create the grid. First we will create a function that takes the grid and returns an array of refs for each cell.
When we run the algorithms, there will be a lot of state changes if we use regular state and the application will crash. So the solution is to create a ref for each cell, and when we render the cells, each will have its corresponding ref. This lets us manipulate the div without re-rendering the component.
This approach comes with a cost, though, which is unexpected behavior – because this is not the way React is supposed to work. But if we don't use this approach, the application will crash because of the re-renders.
We will create a state to save the ref array. The algorithm will look like this:
  const {grid,setgrid,editing,seteditFlag,mode,start,end,run,res,algo}  =       useParams()

  const [refarray,mm]=useState(getrefarray(grid))

  function getrefarray(grid){
    let array=[]
    grid.forEach((elem)=>{
     elem.forEach((child)=>{
      array.push(useRef())
    })
   })
   return array
   }
First we will render a div with class of board. Inside the board and for each element of refarray we will render a div with a ref property (the element itself) so we can access and modify it without rendering the component again.
Each div will have the cell class and the wall class if its corresponding cell object in the grid has the iswall property equal to true. Also we will add the corresponding icon to the cell based on its cell object.
{refarray.map((elem,index)=> {
        let classList=['cell']

        let yindex=Math.floor(index/50)
        let xindex=index % 50
        let cell=grid[yindex][xindex]

        if (cell.iswall) {
          classList.push('wall')
        }

        return <div key={`${index}`} ref={elem}  className={classList.join('         ')} >


          {cell.weight > 1 ? <i className="bi bi-virus"></i> : null}
          {cell.isstart ? <i className="bi bi-geo-alt"></i> : null }
          {cell.istarget ? <i className="bi bi-geo"></i> : null }

        </div>
})
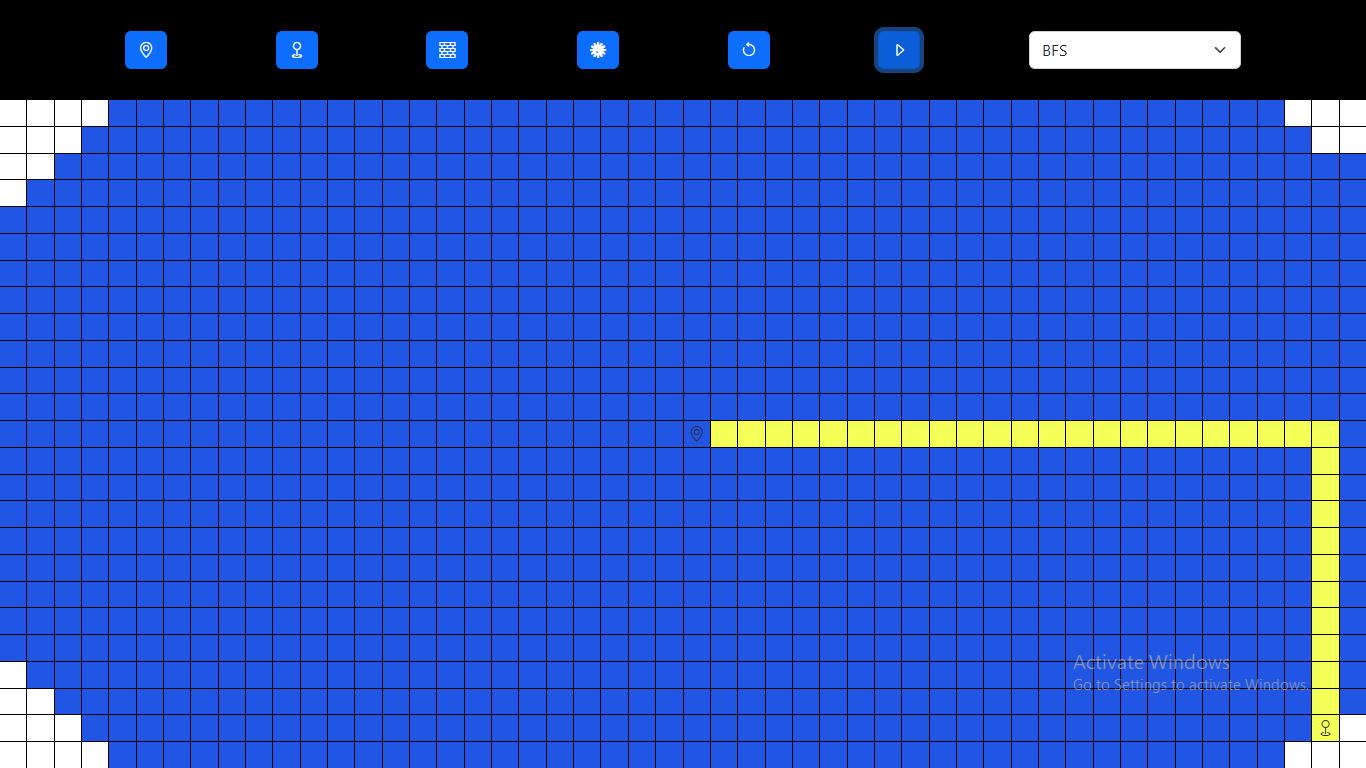
This is how the grid is going to look:
 App showing the grid
Now we need to add three event listeners to each cell. First, we'll add onMouseDown and onMouseUp event listeners – we use these to set the editing context variable. Then we'll add an onMouseOver which will determine – based on the mode and that editing flag – what changes are being applied to the grid.
We will be updating the grid as usual – we will only use the ref method when running the algorithm. The code will look like this:
return (
    <div className='board'>
      {refarray.map((elem,index)=> {
        let classList=['cell']
        let yindex=Math.floor(index/50)
        let xindex=index % 50
        let cell=grid[yindex][xindex]

        if (cell.iswall) {
          classList.push('wall')
        }

        return <div key={`${index}`} ref={elem}  className={classList.join(' ')}
        onMouseDown={()=>{seteditFlag(true)}}
        onMouseUp={()=> {seteditFlag(false)}}
        onMouseMove={()=>{
          if (!editing) return
          const current= grid[yindex][xindex]
          if (current.isstart || current.istarget ) return
          switch(mode){
            case 'setstart':
              var newgrid=grid.map((elem)=>{
              return elem.map((elem)=>{
                if (!elem.isstart) return elem
                return {...elem,isstart:false}
              })
              })
              newgrid[yindex][xindex]={...newgrid[yindex][xindex],isstart:true,istarget:false,weight:1,iswall:false}
             start.current={x:xindex,y:yindex}
             setgrid(newgrid)
             break;

           case 'settarget':
                var newgrid=grid.map((elem)=>{
                return elem.map((elem)=>{
                  if (!elem.istarget) return elem
                  return {...elem,istarget:false}
                })
               })
               newgrid[yindex][xindex]={...newgrid[yindex][xindex],isstart:false,istarget:true,weight:1,iswall:false}
               end.current={x:xindex,y:yindex}
               setgrid(newgrid)
               break;

             case 'addbricks':
                var newgrid=grid.slice()
               newgrid[yindex][xindex]={...newgrid[yindex][xindex],weight:1,iswall:true}
               setgrid(newgrid)
               break;

            case 'addweight':
                var newgrid=grid.slice()
               newgrid[yindex][xindex]={...newgrid[yindex][xindex],weight:5,iswall:false}
               setgrid(newgrid)
               break;
           default:
             return
            }}}>


          {cell.weight > 1 ? <i className="bi bi-virus"></i> : null}
          {cell.isstart ? <i className="bi bi-geo-alt"></i> : null }
          {cell.istarget ? <i className="bi bi-geo"></i> : null }

         </div>
      })}
    </div>
  )
If the editing flag is false, we will return. The same applies if the cell is a starting cell or a target one – then we don't want to modify them. Else if the mode is equal to addwalls, then we will modify the corresponding cell in the grid and set the iswall property to true.
Also if the mode is equal to addweight we will modify the corresponding cell in the grid and set the weight property to 5 instead of 1.
For the setstart we will create a copy of the grid where all the cells have the isstart set to false. Then we'll set the corresponding cell for the new start cell to true. The same goes for the settarget mode.
Now you should be able to add walls, weights and change the position of the starting and ending node:

The Algorithms
We can find the shortest path using the algorithms we will implement. Each algorithm finds a path in a unique way and, depending on the algorithm, the output will change.
Let's start with the breath-first search (or BFS) algorithm. We will create a function BFS that takes 5 arguments:
- the graph
- the start and end point coordinates, start and target
- prevmap, which is a hashmap used to track the previous cell for each cell in the grid when the algorithm runs
- hashmap, which is a hashmap that we will use to track visited cells. A hashmap is an object with key value pairs, like a dictionary in Python.
For each cell in the graph, we will create an id x-y which will be unique. We'll set its value to false for hashmap and null for prevmap. Here is how we will implement those in a useEffect later:
  let hashmap={}
  let prevmap={}
  for (let j=0;j<25;j++){
   for (let i=0;i<50;i++){
     hashmap[`${i}-${j}`]=false
     prevmap[`${i}-${j}`]=null
   }
 }
Now we will start with an array with one element – the starting node's coordinates – and a counter set initially to zero. While the length of the array is not zero, we will pop the last element off the array and increment the counter.
Now using the coordinates of the element, we will access its ref and add the visited class with a transition delay proportional to the counter.
Then we will access the siblings of the element from the grid and check if they are visited or not from the hashmap. If they are visited we will ignore them, but if they are not visited we will mark them as visited and add them to the top of the array. Then we'll mark their value in the prevmap to the current element.
When popping elements off, if we come to an element with x and y coordinates equal to those of the target, we will return this object with the current counter.
Depth-first search is very similar: with small changes in the order, we can remove and add elements to the array. Here is Alvin's YouTube video which explains the topic in a helpful way.
Finally, if there is no path from a to b – for example if a is surrounded by walls – we will return null. This will happen only when the array gets empty before returning a value. The code will look like this:
  function BFS(graph,hashmap,prevmap,start,target){
    let queue=[start]
    let count=0
    hashmap[`${start.x}-${start.y}`]=true
    while (queue.length > 0){
      count+=1
      let c=queue.pop()
      refarray[c.x+c.y*50].current.style['transition-delay']=`${count * 8}ms`
      refarray[c.x+c.y*50].current.classList.add('visited')
      if (c.x == target.x && c.y == target.y) return [c,count]

      if(c.x+1 < 50 && !hashmap[`${c.x+1}-${c.y}`] && !graph[c.y][c.x+1].iswall){
        queue.unshift({x:c.x +1,y:c.y})
        prevmap[`${c.x+1}-${c.y}`]={...c}
        hashmap[`${c.x+1}-${c.y}`]=true
      }
      if(c.x-1 >=0 && !hashmap[`${c.x-1}-${c.y}`] && !graph[c.y][c.x-1].iswall){
        queue.unshift({x:c.x -1,y:c.y})
        prevmap[`${c.x-1}-${c.y}`]={...c}
        hashmap[`${c.x-1}-${c.y}`]=true
      }
      if(c.y+1 < 25 && !hashmap[`${c.x}-${c.y+1}`] && !graph[c.y+1][c.x].iswall){
        queue.unshift({x:c.x ,y:c.y+1})
        prevmap[`${c.x}-${c.y+1}`]={...c}
        hashmap[`${c.x}-${c.y+1}`]=true
      }
      if(c.y-1 >=0 && !hashmap[`${c.x}-${c.y-1}`] && !graph[c.y-1][c.x].iswall){
        queue.unshift({x:c.x ,y:c.y-1})
        prevmap[`${c.x}-${c.y-1}`]={...c}
        hashmap[`${c.x}-${c.y-1}`]=true
      }
    }
    return null
  }

  function BDS(graph,hashmap,prevmap,start,target){
    let queue=[start]
    let count=0
    hashmap[`${start.x}-${start.y}`]=true
    while (queue.length > 0){
      count+=1
      let c=queue[0]
      queue.shift()
      refarray[c.x+c.y*50].current.style['transition-delay']=`${count * 8}ms`
      refarray[c.x+c.y*50].current.classList.add('visited')
      if (c.x == target.x && c.y == target.y) return [c,count]


      if(c.y+1 < 25 && !hashmap[`${c.x}-${c.y+1}`] && !graph[c.y+1][c.x].iswall){
        queue.unshift({x:c.x ,y:c.y+1})
        prevmap[`${c.x}-${c.y+1}`]={...c}
        hashmap[`${c.x}-${c.y+1}`]=true
      }
      if(c.x-1 >=0 && !hashmap[`${c.x-1}-${c.y}`] && !graph[c.y][c.x-1].iswall){
        queue.unshift({x:c.x -1,y:c.y})
        prevmap[`${c.x-1}-${c.y}`]={...c}
        hashmap[`${c.x-1}-${c.y}`]=true
      }
      if(c.y-1 >=0 && !hashmap[`${c.x}-${c.y-1}`] && !graph[c.y-1][c.x].iswall){
        queue.unshift({x:c.x ,y:c.y-1})
        prevmap[`${c.x}-${c.y-1}`]={...c}
        hashmap[`${c.x}-${c.y-1}`]=true
      }
      if(c.x+1 < 50 && !hashmap[`${c.x+1}-${c.y}`] && !graph[c.y][c.x+1].iswall){
        queue.unshift({x:c.x +1,y:c.y})
        prevmap[`${c.x+1}-${c.y}`]={...c}
        hashmap[`${c.x+1}-${c.y}`]=true
      }
    }
    return null
  }
We will be running the algorithm only when the run button in the navbar is clicked. That will change the value of run, so we will run a useEffect for this with the context variable run in its dependency array.
We will save the return value in a result variable. If the result is null, we will do nothing and there will be no path. Otherwise, we will use the coordinates of the target and the prevmap to get the path from the starting point and the target. Then we will run a timeout with a callback that will add the path class and the corresponding transition delay to each cell.
This is how the code will look:
 useEffect(()=>{

if (algo == 'BFS'){
  let hashmap={}
  let prevmap={}
  for (let j=0;j<25;j++){
   for (let i=0;i<50;i++){
     hashmap[`${i}-${j}`]=false
     prevmap[`${i}-${j}`]=null
   }
 }
 let result=BFS(grid,hashmap,prevmap,start.current,end.current)
 let path=[]
 if (result !=null){
  let current=result[0]
  while (prevmap[`${current.x}-${current.y}`] != null){
    path.push(current)
    current=prevmap[`${current.x}-${current.y}`]
  }
  setTimeout(()=>{path.reverse().forEach((elem,index)=>{
    refarray[elem.x+elem.y*50].current.style['transition-delay']=`${( index) * 15}ms`
      refarray[elem.x+elem.y*50].current.classList.add('path')
  })},result[1]*9)

 }


}
if (algo == 'BDS'){
  let hashmap={}
  let prevmap={}
  for (let j=0;j<25;j++){
   for (let i=0;i<50;i++){
     hashmap[`${i}-${j}`]=false
     prevmap[`${i}-${j}`]=null
   }
 }
  let result=BDS(grid,hashmap,prevmap,start.current,end.current)
  let path=[]
  if (result !=null){
   let current=result[0]
   while (prevmap[`${current.x}-${current.y}`] != null){
     path.push(current)
     current=prevmap[`${current.x}-${current.y}`]
   }
   setTimeout(()=>{path.reverse().forEach((elem,index)=>{
     refarray[elem.x+elem.y*50].current.style['transition-delay']=`${( index) * 15}ms`
       refarray[elem.x+elem.y*50].current.classList.add('path')
   })},result[1]*9)

  }


 }
 },[run])
Now after pressing the start button this is the output we're going to get:
How to Clear the Board
The side effects of running these algorithms are the classes we've added and the transition delay property (which we need to clear before running the algorithm once again). That's what we're going to do to reset the grid.
The last thing we need to worry about is clearing the board. This will happen when the clear button in the navbar gets clicked, and it will change the value of the res context variable.
So the final useEffect will iterate over every ref of the refarray and reset its classes and transition delay. Also in the context there is another useEffect that will regenerate a new grid (you can check the context code out). It will look like this:
 useEffect(()=>{
  refarray.forEach((elem)=>{elem.current.style['transition-delay']='0ms'})
  refarray.forEach((elem)=>{elem.current.classList.remove('visited');elem.current.classList.remove('path')})
 },[res])
Here's the CSS for the grid:
.board{
    width:100%;
    height:calc(100vh - min(20vh , 100px));
    background:black;
    display:grid;
    grid-template-rows: repeat(25 , 1fr);
    grid-template-columns: repeat(50 , 1fr);
    gap: 1px;

}

.board .cell{
    display:flex;
    justify-content: center;
    align-items: center;
    background: white;
}

.wall {
    background:black !important
}

.visited{
    background:rgb(33, 85, 228) !important;
    transition:all 8ms cubic-bezier(0.075, 0.82, 0.165, 1);

}

.path{
    background:rgb(244, 255, 87) !important ;
    transition:all 8ms cubic-bezier(0.075, 0.82, 0.165, 1);


}
Now when you click the restart button the board will be back to normal.
Conclusion
Finally in this tutorial we've learned a lot about path finding algorithms, React, contexts, refs, algorithmic thinking and much more.
Hopefully you enjoyed this tutorial as much as I enjoyed writing it. This is one of many tutorials that I will be creating for freeCodeCamp.
You will find the code for this project on my GitHub and here's the hosted version. If you want to support me, follow me on LinkedIn It means a lot for me.