By Gant Laborde
3 Frameworks for Machine Learning on the Raspberry Pi
The revolution of AI is reaching new heights through new mediums. We’re all enjoying new tools on the edge, but what are they? What products frameworks will fuel the inventions of tomorrow?
If you’re unfamiliar with why Machine Learning is changing our lives, have a read here.
If you’re already excited about Machine Learning and you’re interested in utilizing it on devices like the Raspberry Pi, enjoy!
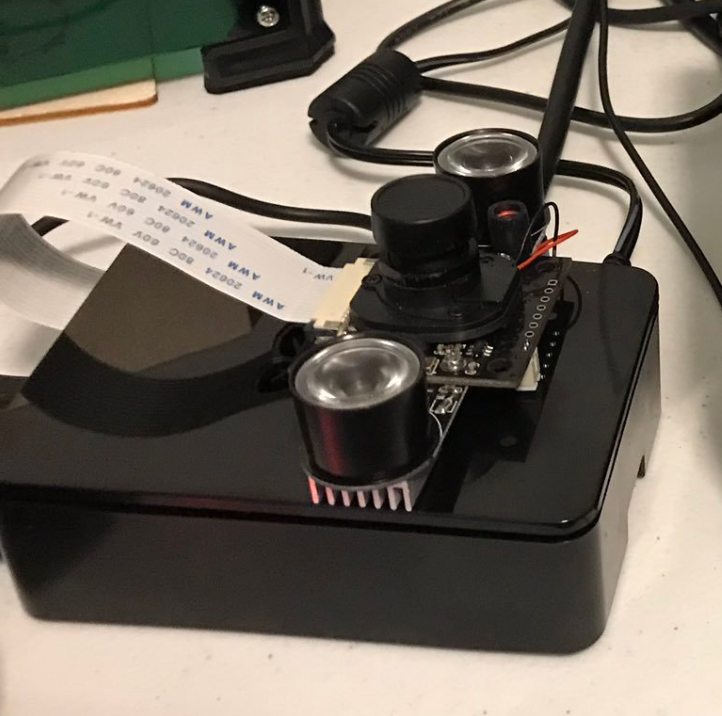
Simple object detection on the Raspberry Pi
I’ve implemented three different tools for detection on the Pi camera. While it’s a modern miracle that all three work, it’s important for creators to know “how well” because of #perfmatters.
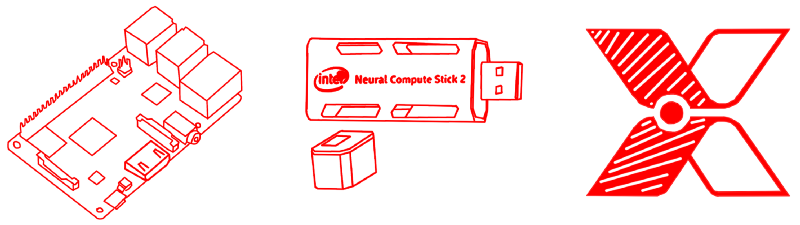
Our three contenders are as follows:
- Vanilla Raspberry Pi 3 B+— No optimizations, but just using a TensorFlow framework on the device for simple recognition.
- Intel’s Neural Compute Stick 2 — Intel’s latest USB interface device for Neural Networks, boasting 8x perf over the first stick! Around $80 USD.
- Xnor.ai — A proprietary framework that reconfigures your model to run efficiently on smaller hardware. Xnor’s binary logic shrinks 32-bit floats to 1-bit operations, allowing you to optimize deep learning models for simple devices.
Let’s evaluate all three with simple object detection on a camera!
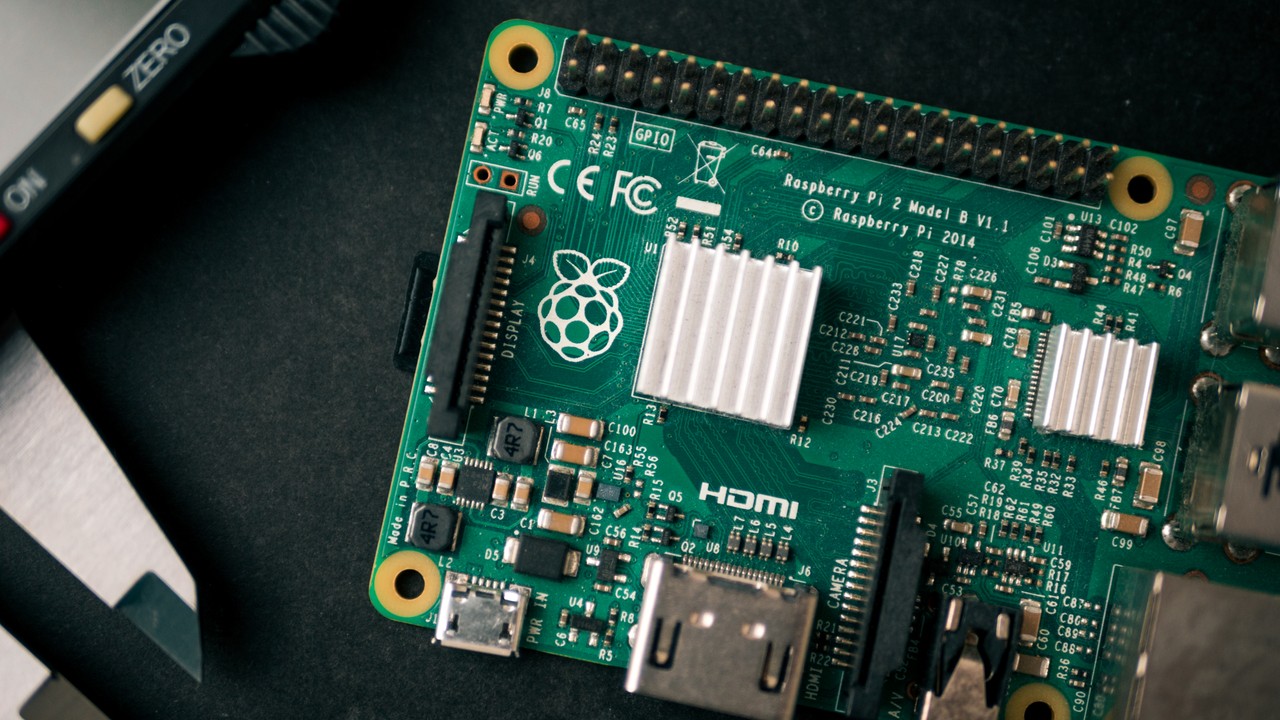
Vanilla Raspberry Pi 3 B+
A Raspberry Pi is like a small, wimpy, Linux machine for $40. It allows you to run high-level applications and code on devices like IoT made easy. Though it sounds like I can basically use laptop machine learning on the device, there’s one big gotcha. The RPi has an ARM processor, and that means we’ll need to recompile our framework, i.e. TensorFlow, to get everything running.
⚠️ While this is not hard, this is SLOW. Expect this to take a very… very… long time. This is pretty much the fate of anything compiled on the Raspberry Pi.
Setup
Here are all the steps I did, including setting up the Pi camera for object detection. I'm simply including this for posterity. Feel free to skip reading it.
Install pi, then camera, then edit the /boot/config.txt
Add disable_camera_led=1 to the bottom of the file and rebooting.
Best to disable screensaver mode, as some follow-up commands may take hours
sudo apt-get install xscreensaver
xscreensaver
Then disable screen saver in the “Display Mode” tab.
Now get Tensorflow Installed
sudo apt-get update
sudo apt-get dist-upgrade
sudo apt-get update
sudo apt-get install libatlas-base-dev
sudo apt-get install libjasper-dev libqtgui4 python3-pyqt5
pip3 install tensorflow
sudo apt-get install libjpeg-dev zlib1g-dev libxml2-dev libxslt1-dev
pip3 install pillow jupyter matplotlib cython
pip3 install lxml # this one takes a long time
pip3 install python-tk
OpenCV
sudo apt-get install libtiff5-dev libjasper-dev libpng12-dev
Sudo apt-get install libavcodec-dev libavformat-dev libswscale-dev libv4l-dev
sudo apt-get install libxvidcore-dev libx264-dev
sudo apt-get install qt4-dev-tools
pip3 install opencv-python
Install Protobuff
sudo apt-get install autoconf automake libtool curl
Then pull down protobuff and untar it.
https://github.com/protocolbuffers/protobuf/releases
Then cd in and then run the following command which might cause the computer to become unusable for the next 2+ hours. Use ctrl + alt + F1, to move to terminal only and release all UI RAM. Close x process with control + c if needed. You can then run the long-running command. Base username “pi” and password “raspberry”
make && make check
You can then install simply with
sudo make install
cd python
export LD_LIBRARY_PATH=../src/.libs
python3 setup.py build --cpp_implementation
python3 setup.py test --cpp_implementation
sudo python3 setup.py install --cpp_implementation
export PROTOCOL_BUFFERS_PYTHON_IMPLEMENTATION=cpp
export PROTOCOL_BUFFERS_PYTHON_IMPLEMENTATION_VERSION=3
sudo ldconfig
Once this is done, you can clean up some install crud with sudo apt-get autoremove, delete the tar.gz download and then finally reboot with sudo reboot now which will return you to a windowed interface
Setup Tensorflow
mkdir tensorflow1 && cd tesorflow1
git clone --recurse-submodules \ https://github.com/tensorflow/models.git
modify ~/.bashrc to contain new env var named PYTHONPATH as such
export PYTHONPATH=$PYTHONPATH:/home/pi/tensorflow1/models/research:/home/pi/tensorflow1/models/research/slim
Now go to the zoo: https://github.com/tensorflow/models/blob/master/research/object_detection/g3doc/detection_model_zoo.md
We’ll take the ssdlite_mobilenet, which is the fastest! Wget the file and then tar -xzvf the tar.gz result and delete the archive once untarred. Do this in the object_detection folder in your local tensorflow1 folder. Now cd up to the research dir. Then run:
protoc object_detection/protos/*.proto --python_out=.
This converted the object detection protos files to python in the proto folder
Done Installing!!
Special thanks to Edje Electronics for sharing their wisdom on setup, an indispensable resource for my own setup and code.
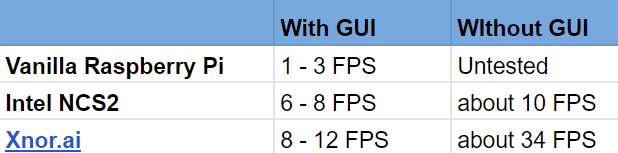
Once I got Tensorflow running, I was able to run object recognition (with the provided sample code) on Mobilenet for 1 to 3 frames per second.
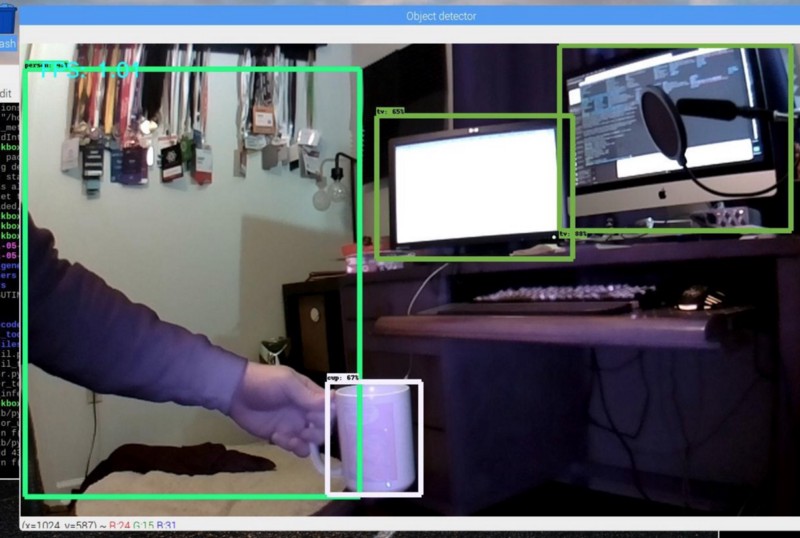
Vanilla Pi Results
For basic detection, 1 to 3 frames per second aren’t bad. Removing the GUI or lowering camera input quality speeds up detection. This means the tool could be an excellent detector for just simple detection. What a great baseline! Let’s see if we can make it better with the tools available.
Intel’s Neural Compute Stick 2
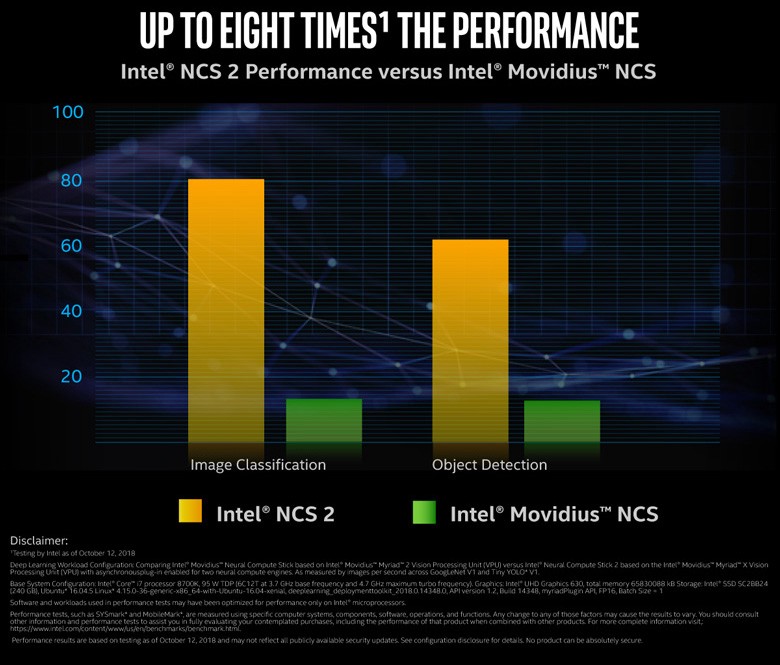
This concept excites me. For those of us without GPUs readily available, training on the edge instead of the cloud, and moving that intense speed to the Raspberry Pi is just exciting. I missed the original stick, the “Movidius”, but from this graph, it looks like I chose a great time to buy!
Setup
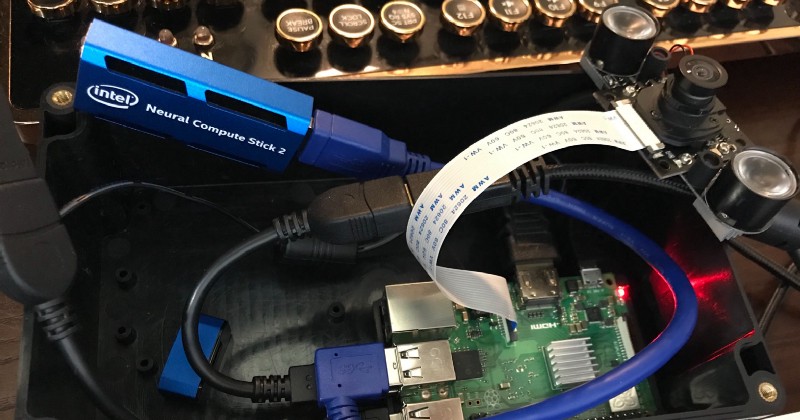
My Intel NCS2 arrived quickly and I enjoyed unboxing actual hardware for accelerating my training. That was probably the last moment I was excited.
Firstly, the USB takes a lot of space. You’ll want to get a cable to keep it away from the base.
That’s a little annoying but fine. The really annoying part was trying to get my NCS 2 working.
There are lots of tutorials for the NCS by third parties, and following them got me to a point where I thought the USB stick might be broken!
Everything I found on the NCS didn’t work (telling me the stick wasn’t plugged in!), and everything I found on NCS2 was pretty confusing. For a while, NCS2 didn’t even work on ARM processors!
?????????????????
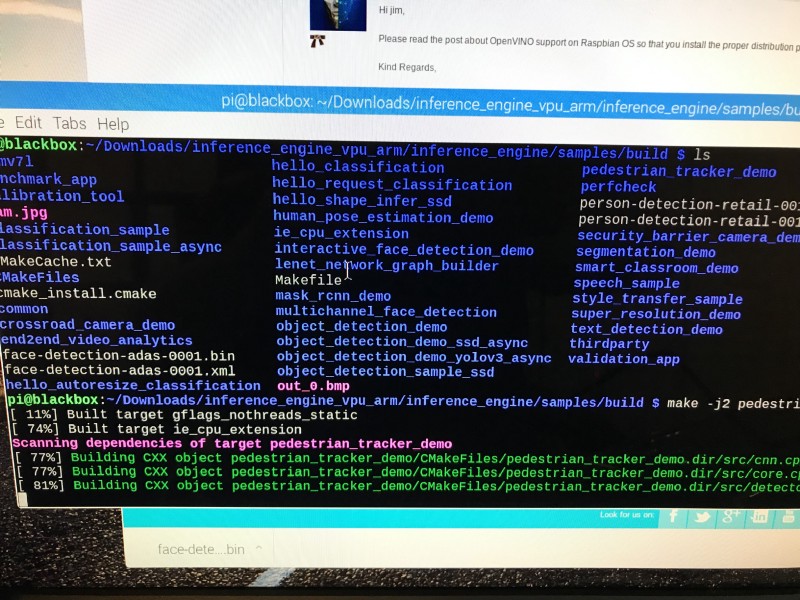
After a lot of false-trails, I finally found and began compiling C++ examples (sorry Python) that only understood USB cameras (sorry PiCam). Compiling the examples was painful. Often the entire Raspberry Pi would become unusable, and I’d have to reboot.
 locked up at 81% for 24 hours
The whole onboarding experience was more painful than recompiling Tensorflow on the raw Pi. Fortunately, I got everything working!
The result!? ??????????????????????
NC2 Stick Results
6 to 8 frames per second… ARE YOU SERIOUS!? After all that?
It must be a mistake, let me run the perfcheck project.
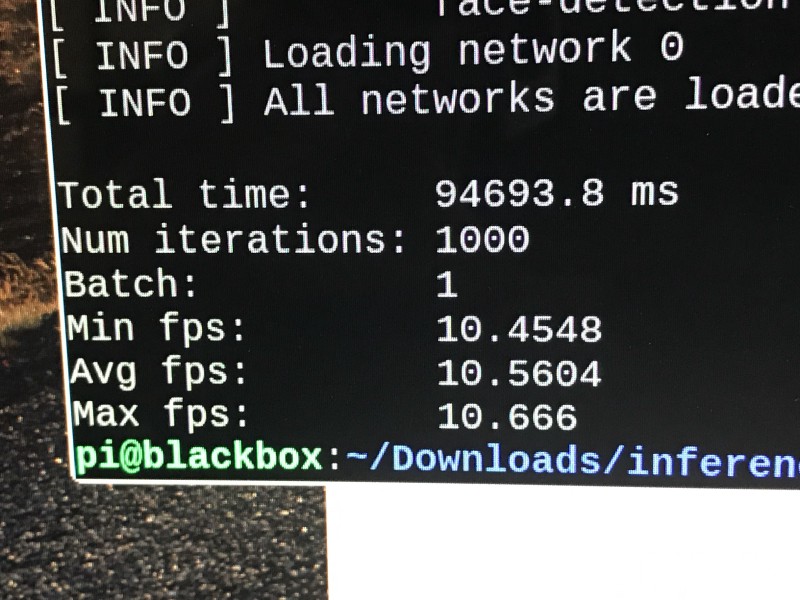
10 frames per second…
From videos on the original NCS on python I saw around 10fps.. where’s the 8x boost? Where’s the reason for $80 hardware attached to a $40 device? To say I was let down by Intel’s NCS2 is an understatement. The user experience and final results were frustrating, to put it lightly.
Xnor.ai

Xnor.ai is a self-contained software solution for deploying fast and accurate deep learning models to low-cost devices. As many discrete logic enthusiasts might have noticed, Xnor is the logical complement of the bitwise XOR operator. If that doesn’t mean anything to you, that’s fine. Just know that the people who created the YOLO algorithm are alluding to the use of the logical operator to compress complex 32-bit computations down to 1-bit by utilizing this inexpensive operation and keeping track of the CPU stack.
In theory, avoiding such complex calculations required by GPUs should speed up execution on edge devices. Let’s see if it works!
Setup
Setup was insanely easy. I had an object detection demo up and running in 5 minutes. 5 MINUTES!**
The trick with Xnor.ai is that, much like the NCS2 Stick, the model is modified and optimized for the underlying hardware fabric. Unlike Intel’s haphazard setup, everything is wrapped in friendly Python (or C) code.
model = xnornet.Model.load_built_in()
That’s nice and simple.
But it means nothing if the performance isn’t there. Let’s load their object detection model.
Again, no complexity, they have one with no overlay, and one with. Since the others (except for perfcheck on NCS2) were with overlays, let’s use that.
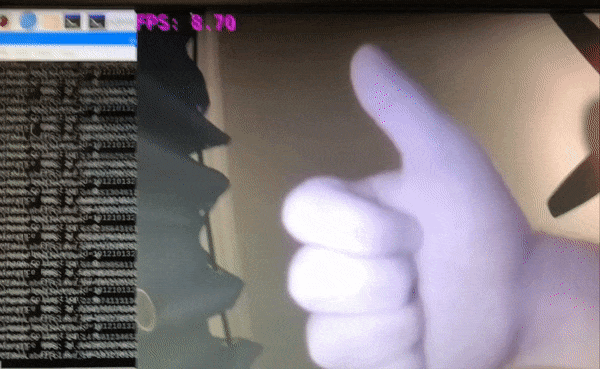
Xnor.ai Results
JAW… DROPPING… PERFORMANCE. I not only get a stat on how fast inference could work, but I also get an overall FPS with my overlay that blew everything else out of the water.
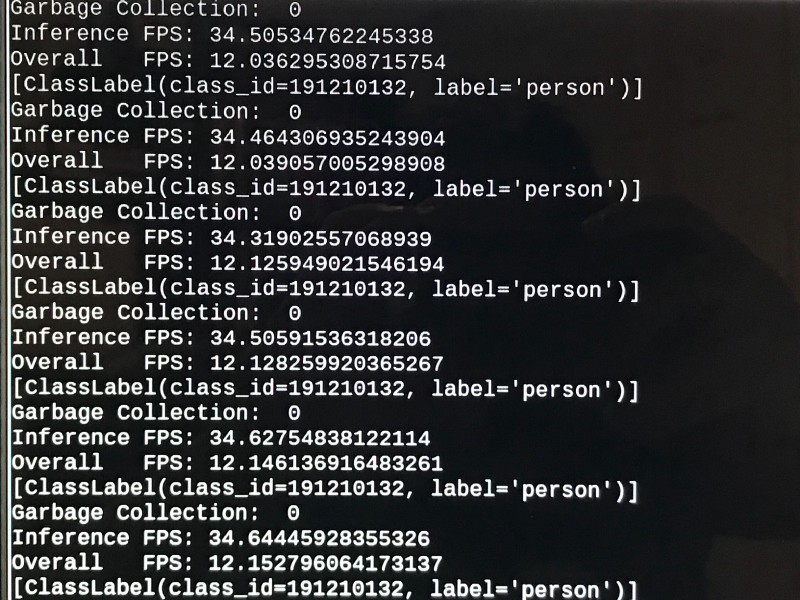
OVER 12FPS and an inference speed over 34FPS!?
This amazing throughput is achieved with no extra hardware purchase!? I’d call Xnor the winner at this point, but it seems a little too obvious.
I was able to heat up my device and open a browser in the background to get it down to 8+ FPS, but even then, it’s a clear winner!
 Xnor hype is real
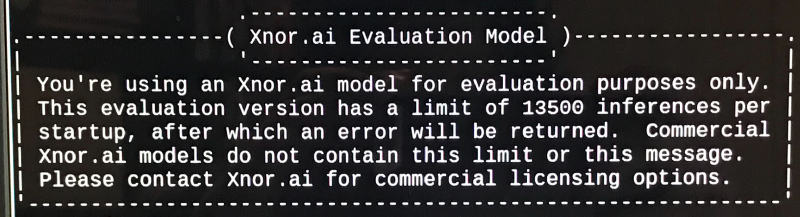
The only negative I can give you on Xnor.ai is that I have no idea how much it costs. The Evaluation model has a limit of 13,500 inferences per startup.
While emailing them to get pricing, they are just breaking into non-commercial use, so they haven’t created a pricing system yet. Fortunately, the evaluation model would be fine for most hobbyists and prototypes.
In Summary:
If you need to take a variety of models into account, you might be just fine getting your Raspberry Pi setup from scratch. This would make it a great resource for testing new models and really customize your experience.
When you’re ready to ship, it’s no doubt that both the NCS2 and the Xnor.ai frameworks speed things up. It’s also no doubt that Xnor.ai outperformed the NCS2 in both onboarding and performance. I’m not sure what Xnor.ai’s pricing model is, but that would be the final factor in what is clearly a superior framework.
Post Publish Updates:
This is an excellent blog post on setting up the NCS2
Getting Started with the Intel Neural Compute Stick 2 and the Raspberry Pi
_Getting started with Intel’s Movidius hardware_medium.com
Additionally, if you’re looking to play around with Xnor.ai, the link is www.xnor.ai/ai2go

Gant Laborde is Chief Technology Strategist at Infinite Red, a published author, adjunct professor, worldwide public speaker, and mad scientist in training. Clap/follow/tweet or visit him at a conference.
Expect more awesome edge blog posts coming soon!
Have a moment? Read more by Gant
Avoid Nightmares — NSFW JS
_Client-side indecent content checking for the soul_shift.infinite.red