
In this article, we will talk about the queue data structure, its operations, and how to implement these operations using an array in Java.
What Is a Queue?
A queue is linear data structure that consists of a collection is of items that follow a first-in-first-out sequence. This implies that the first item to be inserted will be the first to be removed. You can also say that items are removed in the order they were inserted.
Using a real world example, we can compare a queue data structure to a queue of individuals standing in line for a service. Once one individual is attended to, they leave the queue for the next person to be attended to. They are helped in the order which they came.
Structure of a Queue
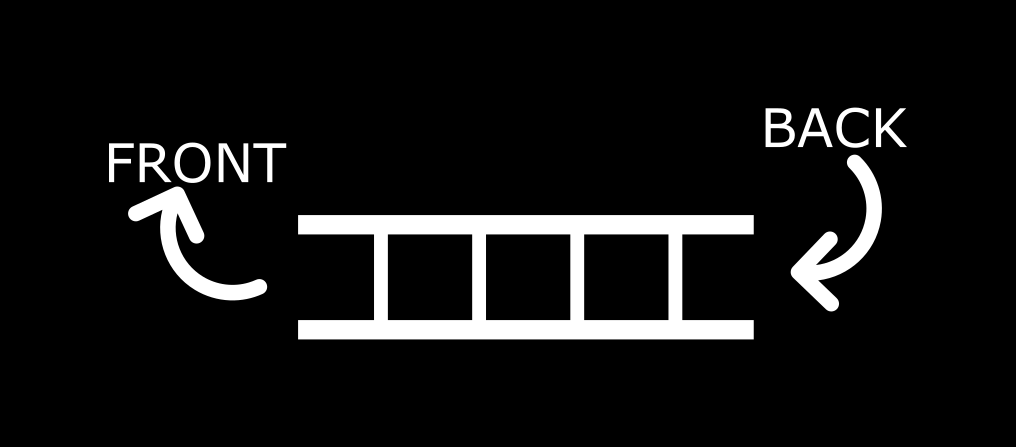
A queue is mainly made up of two parts: the front/head and the rear/tail/back. For the purpose of clarity and consistency, we will stick to using front and back.
The back is where the items are inserted and the front is the part of the queue where items are removed/deleted.
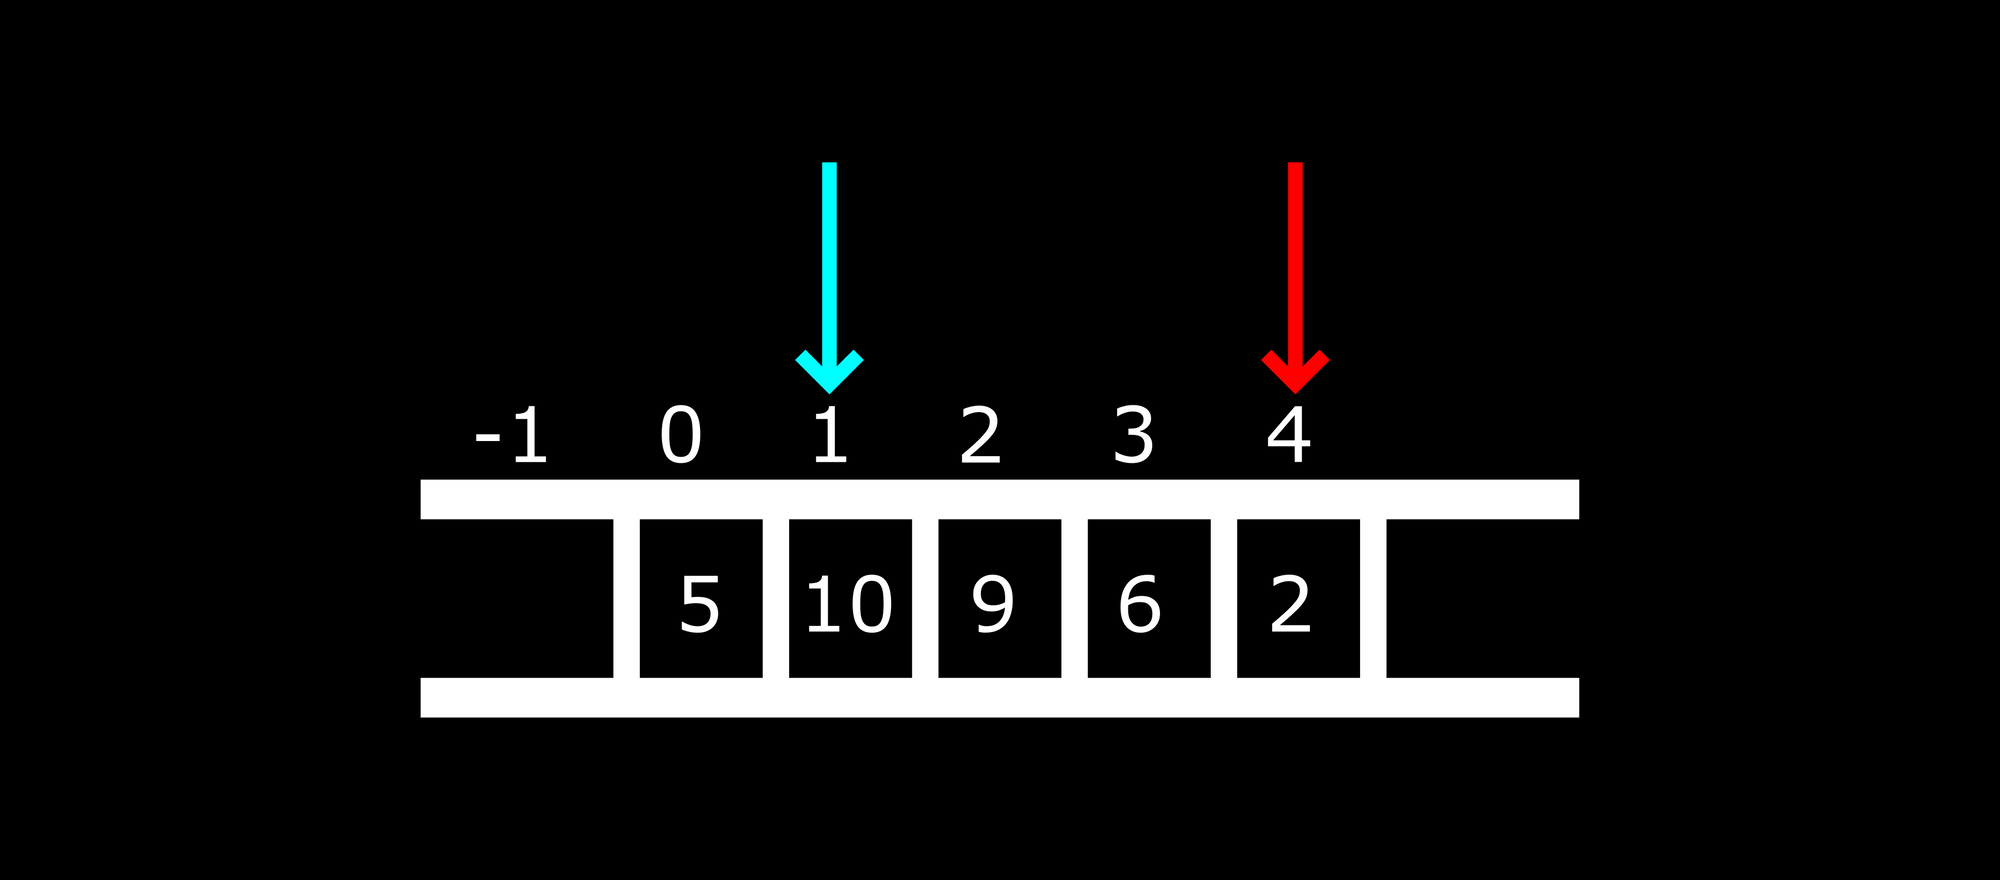
Here is a diagram to help you understand better:
The image shows an array with various cells. The items are inserted through the back and removed through the front. There are terms used for the insertion and deletion of items in a queue which we will cover in the next section.
Note that you can reverse the structure of your queue – you can have the front on the right and the back on the left side. Whichever structure you go with, always remember that insertion of items happens through the back and deletion through the front.
Common Operations of a Queue
The following operations are commonly used in a queue:
- Enqueue: Adds an item from the back of the queue.
- Dequeue: Removes an item from the front of the queue.
- Front/Peek: Returns the value of the item in front of the queue without dequeuing (removing) the item.
- IsEmpty: Checks if the queue is empty.
- IsFull: Checks if the queue is full.
- Display: Prints all the items in the queue.
Before we see how to implement this with code, you need to understand how the enqueue and dequeue operations work and how they affect the front and back positions.
The indices of arrays in most programming languages start from 0. While implementing our code, we are going to set the index of the front and back values of our array to -1. This will enable us move the front and back position properly as values are added.
Consider the image below:
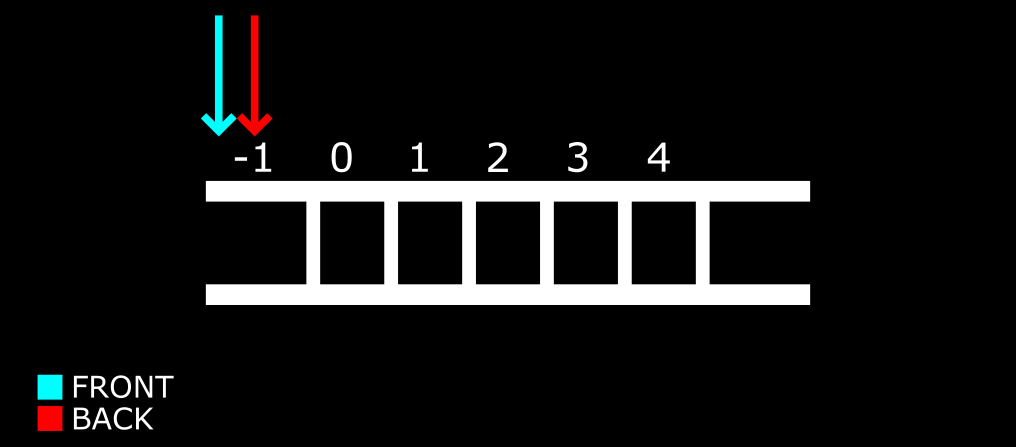
The arrows show the position of the front and back of our array. When both positions are at -1, it means the array is empty.
Let us add some items into our array and see what happens.
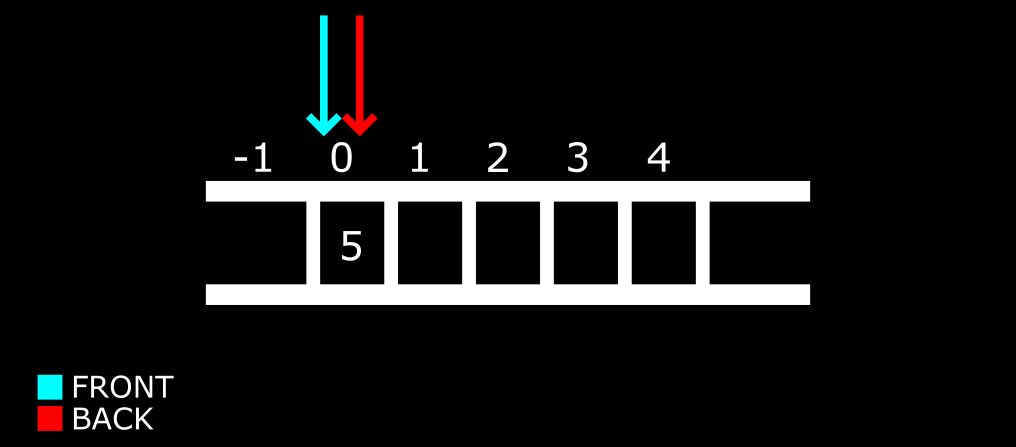
We have inserted (enqueued) our first item – 5. The position of the front and back have moved as well. Next, we will see what happens as we enqueue more items
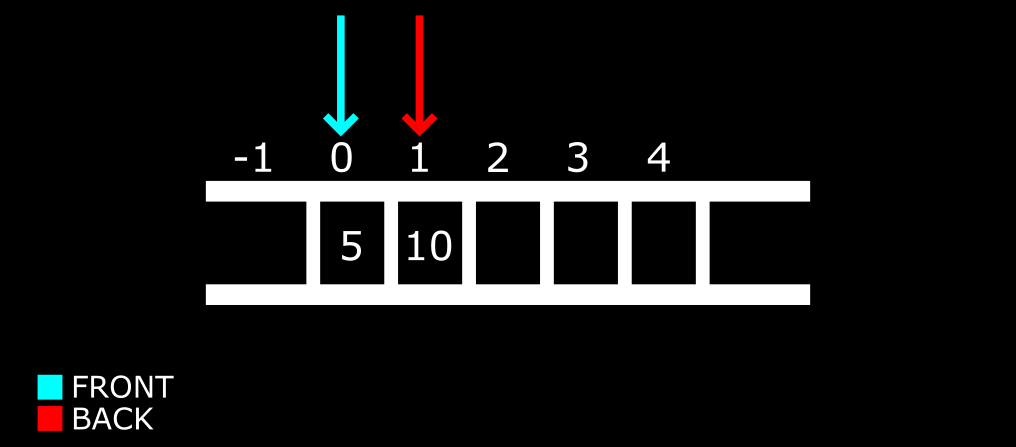
A second item has been added but only the back moved. This will continue as we enqueue more items. The front and back moved together in the last example so that the front could assume the position of the first item.
Since that was the first and only item then, the front and back sat at that position. But now that we have enqueued more items, the back will keep following the last item.
We will go on and fill up the array so we can see what happens when we dequeue.
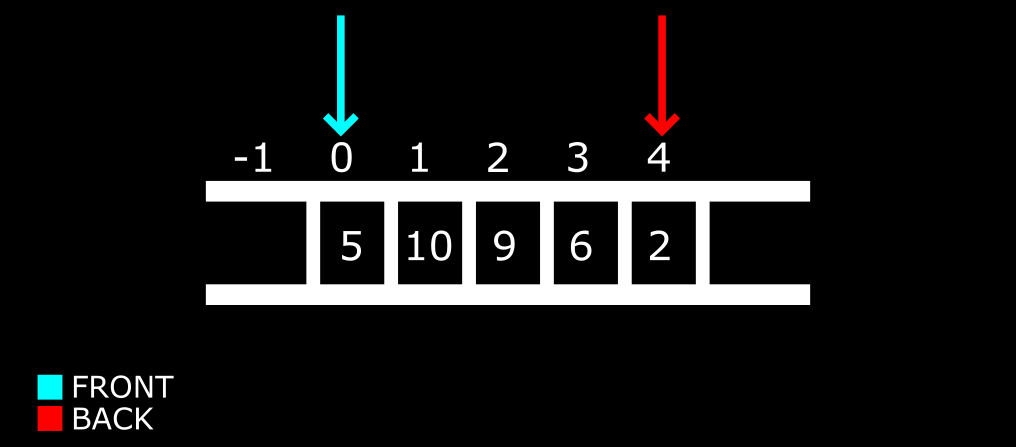
So the back arrow followed the items in the order they were added all the way to the last. Now let's delete (dequeue) some items.
Remember the first-come-first-out sequence? When we execute the dequeue operation, it will first remove 5 from the queue. If we execute it again then it will move to the next number which is 10 and continue in that order for as long as we call it.
Here, the first dequeue operation:
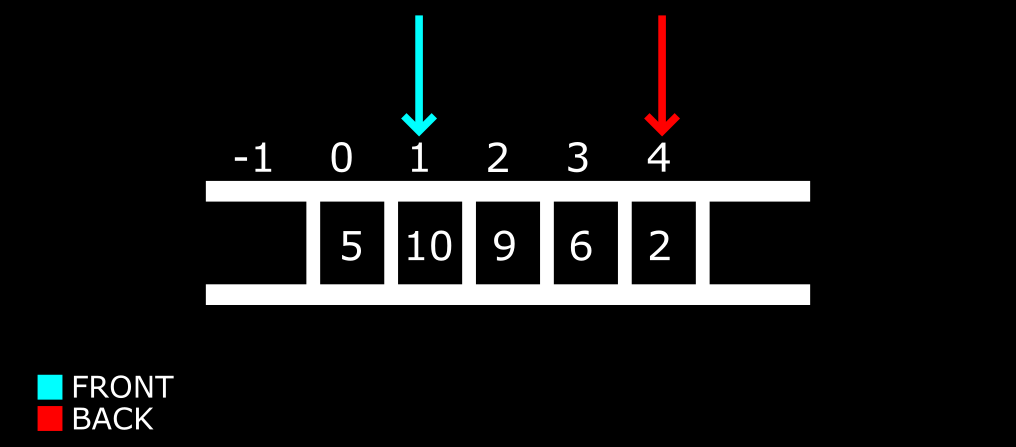
Now the front arrow has moved to index 1. This implies that the item at index 0 has been removed. By removed, we do not mean from the array but from the queue – only items from the front position to the back position are part of the queue.
In the same order, if we keep removing items, it will get to a point where the front arrow meets the back arrow at the end of the queue. If we dequeue again at that point, the front arrow will move past the back arrow and then the queue will be considered empty because there is nothing there to delete. When this happens, we will reset their index to -1 (their initial starting point).
Time for some code!
Queue Implementation in Java
We will break this section down by creating each operation and then putting everything together at the end.
int queueLength = 3;
int items[] = new int[queueLength];
int front = -1;
int back = -1;
We have created our variables and their parameters. We are using 3 as the maximum number of items that can be enqueued in the array. Like we saw in the images from the previous section, we have set the initial index of the front and back to -1.
Next, we'll define the isEmpty and isFull functionalities.
For isEmpty:
boolean isEmpty(){
      if(front == -1 && back == -1){
          return true;
      } else {
          return false;
      }
  }
Pretty easy to grasp if you followed along in the last section. The array is empty only if the index of front and back is -1.
For isFull:
boolean isFull(){
      if(back == queueLength - 1){
          return true;
      } else {
          return false;
      }
  }
This one might seem a little tricky, but here's the logic: our maximum number of items allowed in the array is 3 but three items in an array is not denoted by index 3 but 2 since the first index is 0. So maximum length minus 1 gives us index 2 which is the third cell in an array.
When all the cells have been enqueued with a value up to the third cell, the array is full.
For enQueue:
void enQueue(int itemValue) {
      if(isFull()){
          System.out.println("Queue is full");
      } else if(front == -1 && back == -1){
          front = back = 0;
          items[back] = itemValue;
      } else{
          back++;
          items[back] = itemValue;
      }
  }
If the array is full then we get a message saying it is full. If the front and back is -1 then the item is assigned to the first cell which is index 0 – otherwise, the value is inserted and the back position is incremented.
For deQueue:
void deQueue(){
      if(isEmpty()){
          System.out.println("Queue is empty. Nothing to dequeue");
      } else if (front == back){
          front = back = -1;
      } else {
          front++;
      }
  }
Here, if the array is empty, we get the corresponding message. If the front has met the back, we reset their index back to -1 like we saw in the images from the previous section. If the last two conditions are not applicable, then the front is incremented.
For display:
void display(){
      int i;

      if(isEmpty()){
          System.out.println("Queue is empty");
      } else {
          for(i = front; i <= back; i++){
              System.out.println(items[i]);
          }
      }
  }
Here, if the array is not empty, we loop through and print all the items.
Lastly, for peek:
void peak(){
      System.out.println("Front value is: " + items[front]);
  }
This simply prints the value of the front item.
These are all the operations for our queue. Here is all of them in one piece below:
// Queue implementation in Java

public class Queue {

  int queueLength = 3;
  int items[] = new int[queueLength];
  int front = -1;
  int back = -1;

  boolean isFull(){
      if(back == queueLength - 1){
          return true;
      } else {
          return false;
      }
  }

  boolean isEmpty(){
      if(front == -1 && back == -1){
          return true;
      } else {
          return false;
      }
  }


  void enQueue(int itemValue) {
      if(isFull()){
          System.out.println("Queue is full");
      } else if(front == -1 && back == -1){
          front = back = 0;
          items[back] = itemValue;
      } else{
          back++;
          items[back] = itemValue;
      }
  }

  void deQueue(){
      if(isEmpty()){
          System.out.println("Queue is empty. Nothing to dequeue");
      } else if (front == back){
          front = back = -1;
      } else {
          front++;
      }
  }

  void display(){
      int i;

      if(isEmpty()){
          System.out.println("Queue is empty");
      } else {
          for(i = front; i <= back; i++){
              System.out.println(items[i]);
          }
      }
  }

  void peak(){
      System.out.println("Front value is: " + items[front]);
  }

}
Now let us execute the operations:
 public static void main(String[] args) {
    Queue myQueue = new Queue();

    myQueue.enQueue(3);
    myQueue.enQueue(2);
    myQueue.enQueue(1);


    myQueue.display();

    myQueue.peak();


  }
enQueue(3) inserts 3 to our queue, similar to the next two lines of code.
display() prints out the items in the array.
peak() prints the value of the front item.
We did not execute deQueue so you can go on and try it yourself – display your array and take a peek after you dequeue and see what happens. There are various ways to modify the code, so have fun!
Conclusion
In this article, we defined a queue and its structure. We went on to see some examples using images to show how the front and back positions of a queue react when items are enqueued and dequeued.
Lastly, we saw how to implement the queue data structure using arrays in Java.
Thank you for reading and happy coding!