
By Nishant Kumar
Hey everyone, in this tutorial we'll use React with Firebase V9 to setup authentication for an application.
We will create Firebase functions for Login and Register, we will add toast messages for errors, and we will add private routes using session-based authentication. It's going to be fun.
We will use the following packages or dependencies:
- Firebase V9.
- React Router V6.
- Material UI.
- React Toastify.
So, let's get started.
How to Set Up the Project
Let's create a React application first. Make sure you have Node installed, but if you don't, install it from https://nodejs.org/en/download/.
To create a React application, we will use the command below:
npx create-react-app react-firebase-v9
Then, go into the project folder and type npm start to start the project.
We will see this screen. But let's clear it for the Login and the Register Form.
How to Create the Login and Register Form
For these forms, let's install Material UI. Head over to https://mui.com/ to read the documentation.
To install it, simply use the command below:
// with npm
npm install @mui/material @emotion/react @emotion/styled

// with yarn
yarn add @mui/material @emotion/react @emotion/styled
Meanwhile, let's create a folder inside the src folder, which will be called components. And inside that component, we will create another folder called common. This will contain all our common components that we will use, like Forms, Buttons, and so on.
Create a file called Form.js inside the common folder. Make it a functional component. We will use Form from Material UI.
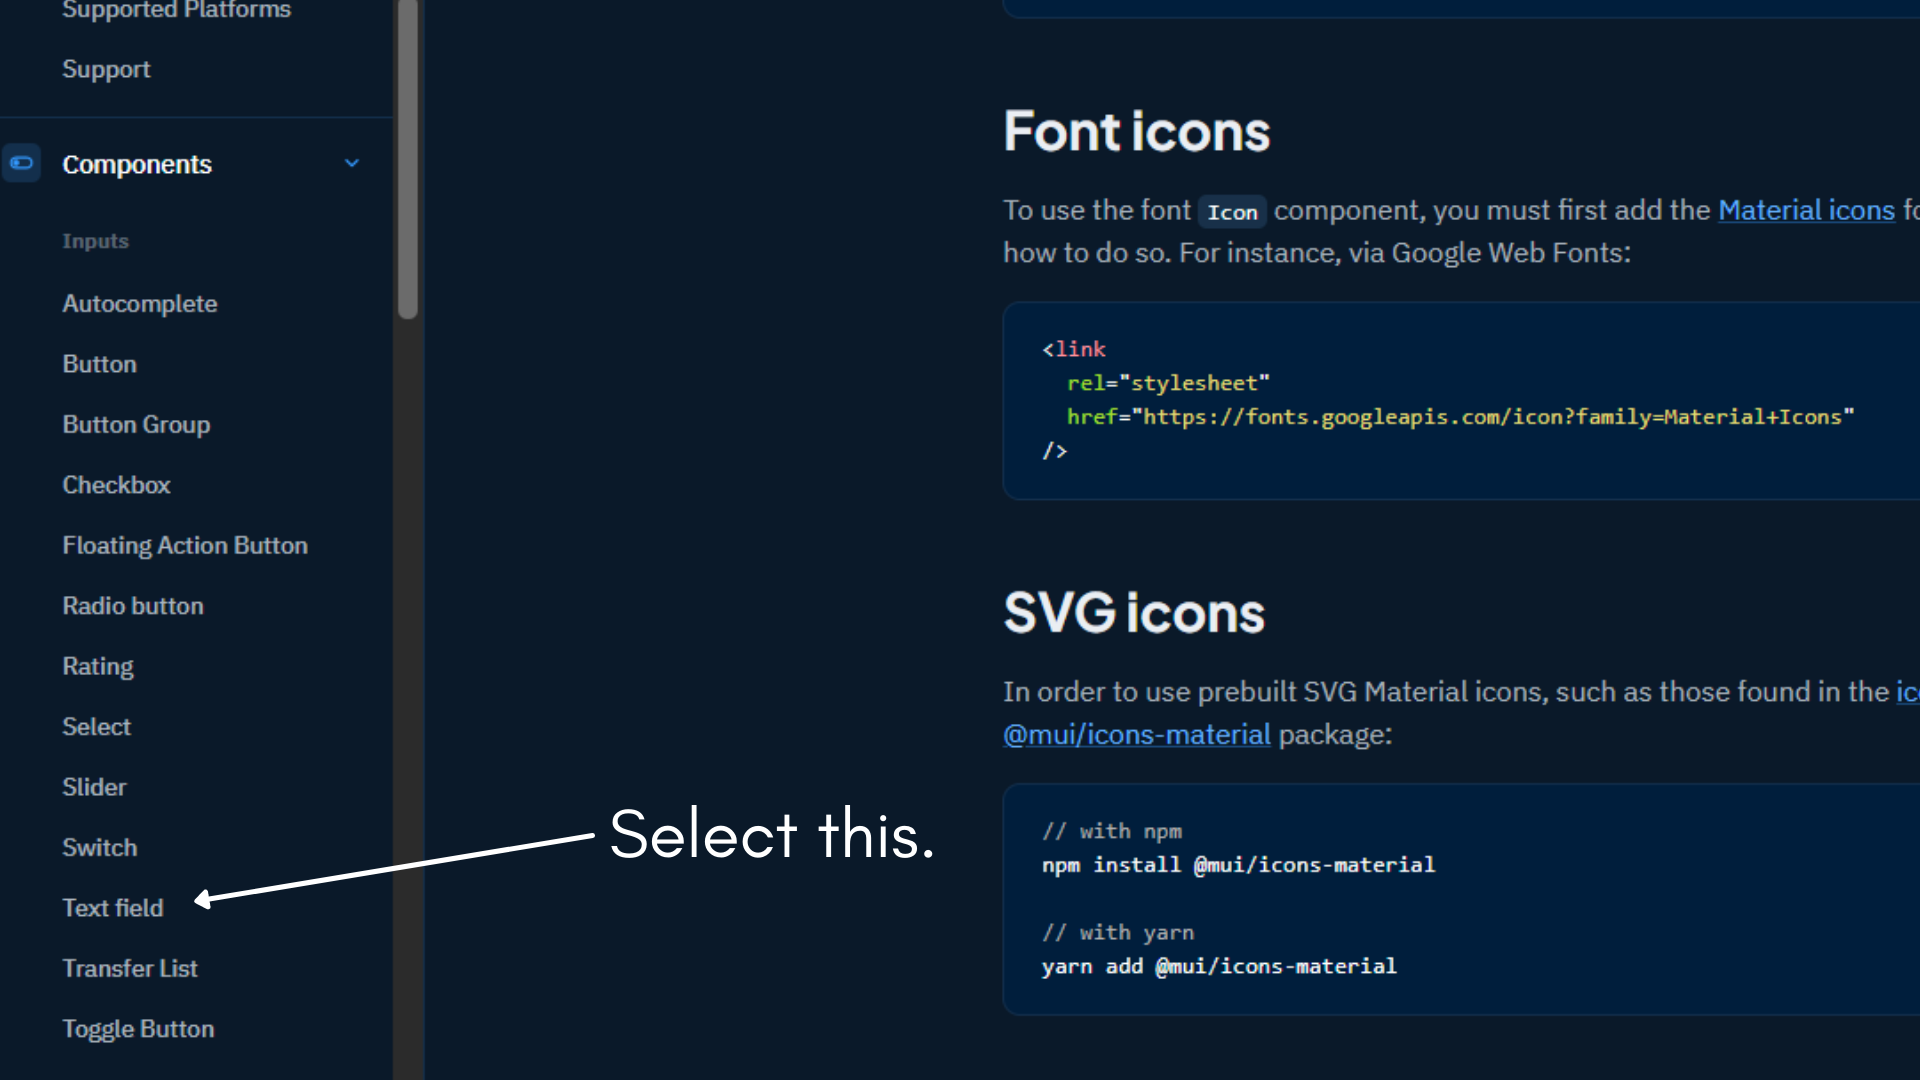
Select this text field to get the input fields, and choose any input field type you want.
import * as React from 'react';
import Box from '@mui/material/Box';
import TextField from '@mui/material/TextField';

export default function BasicTextFields() {
    return (
        <Box
            component="form"
            sx={{
                '& > :not(style)': { m: 1, width: '25ch' },
            }}
            noValidate
            autoComplete="off"
        >
            <TextField id="outlined-basic" label="Outlined" variant="outlined" />
        </Box>
    );
}
Then, import this component into the App.js file:
import './App.css';
import Form from './Components/Common/Form'

function App() {
  return (
    <div className="App">
      <Form />
    </div>
  );
}

export default App;
This is what we will see:

Now, let's create our Login and Register Forms. We will use a single component, but the data will be different. And we will pass data as props.
Let's also create a Form Heading like this:
import * as React from 'react';
import Box from '@mui/material/Box';
import TextField from '@mui/material/TextField';

export default function BasicTextFields() {
    return (
        <div>
            <div className="heading-container">
                <h3>
                    Login Form
                </h3>
            </div>

            <Box
                component="form"
                sx={{
                    '& > :not(style)': { m: 1, width: '25ch' },
                }}
                noValidate
                autoComplete="off"
            >
                <TextField id="email" label="Enter the Email" variant="outlined" />
                <TextField id="password" label="Enter the Password" variant="outlined" />
            </Box>
        </div>
    );
}
The form heading is static now, but we will change it via props.
Now, let's add a button to perform certain actions – login and sign up in our case.
Create a component called Button.js in the common folder.
import * as React from 'react';
import Button from '@mui/material/Button';

export default function BasicButtons() {
    return (
        <Button variant="contained">Log in</Button>
    );
}
And import it into Form.js like this:
import * as React from 'react';
import Box from '@mui/material/Box';
import TextField from '@mui/material/TextField';
import Button from './Button';
export default function BasicTextFields() {
    return (
        <div>
            <div className="heading-container">
                <h3>
                    Login Form
                </h3>
            </div>

            <Box
                component="form"
                sx={{
                    '& > :not(style)': { m: 1, width: '25ch' },
                }}
                noValidate
                autoComplete="off"
            >
                <TextField id="email" label="Enter the Email" variant="outlined" />
                <TextField id="password" label="Enter the Password" variant="outlined" />
            </Box>

            <Button />
        </div>
    );
}
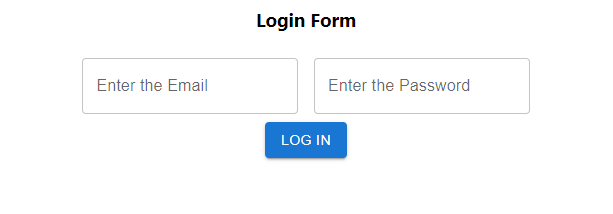
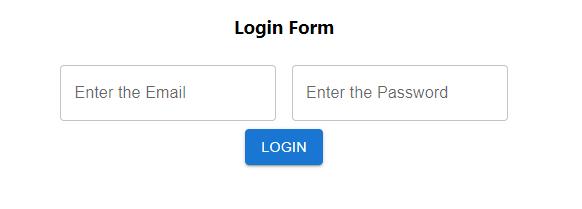
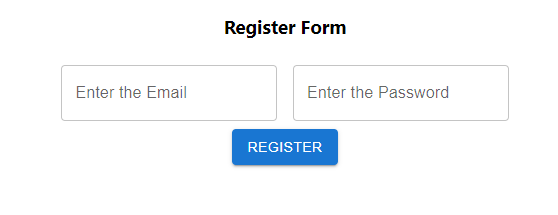
Here, in Form.js, we have two fields – Email and Password. We also have a button to trigger Login and Sign up, depending on the scenario.
And this is what our user interface looks like:
How to Create a Firebase Application
Now, let's install a few additional things that we need – React Router and Firebase. But before installing these two, we need to create a project in Firebase.
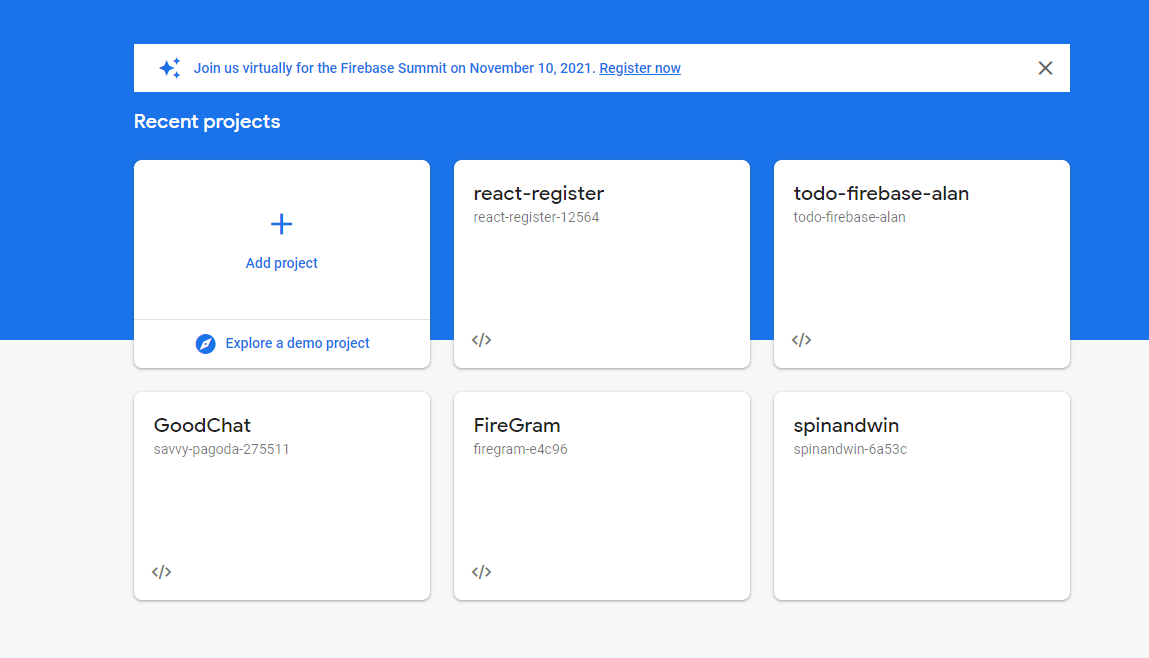
So, head over to https://firebase.google.com/ and create a project.
Click "Add Project" in the Firebase console.
After you have created a new project in Firebase, you need to create an application.
Click Add app, and choose Web.
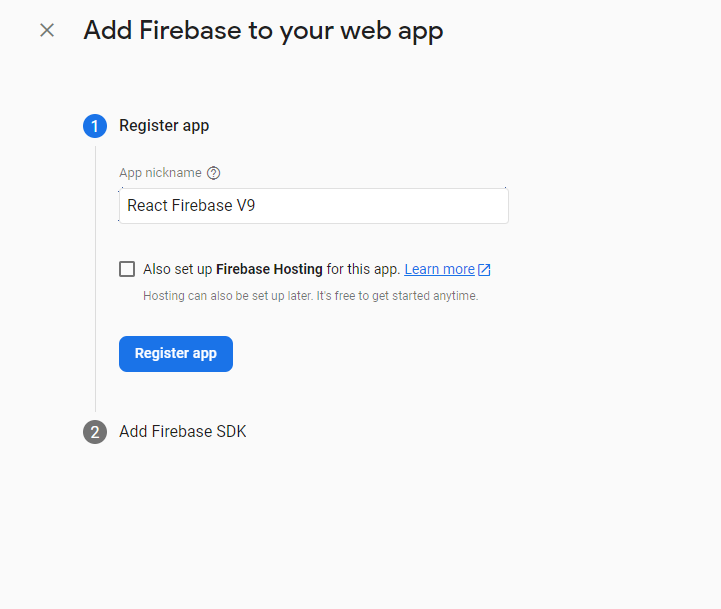
Give the application a name of your choice, and Register the App.
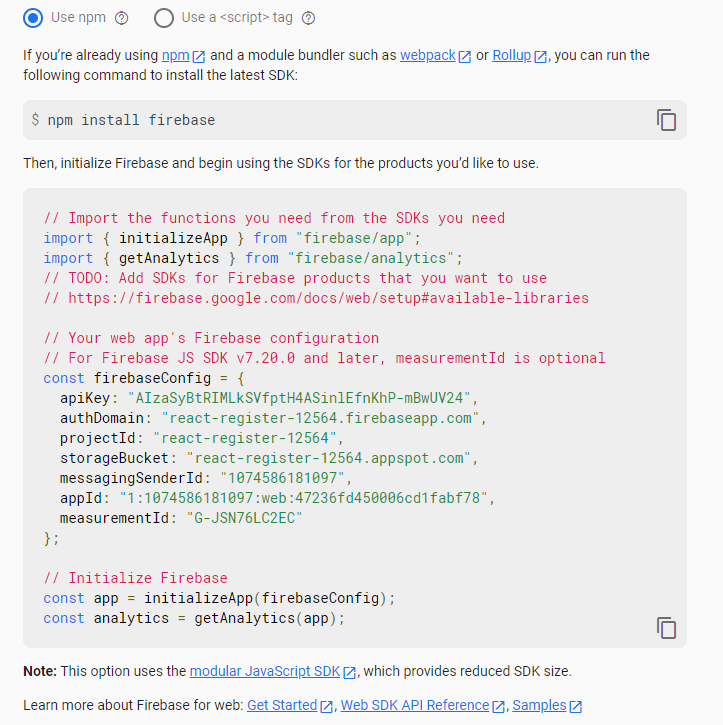
You'll see the above screen. And we need a file where we can store all this config data, so we'll go ahead and create it.
Create a file called firebase-config.js and store all these config data in that file.
import { initializeApp } from "firebase/app";

const firebaseConfig = {
    apiKey: "AIzaSyBtRIMLkSVfptH4ASinlEfnKhP-mBwUV24",
    authDomain: "react-register-12564.firebaseapp.com",
    projectId: "react-register-12564",
    storageBucket: "react-register-12564.appspot.com",
    messagingSenderId: "1074586181097",
    appId: "1:1074586181097:web:47236fd450006cd1fabf78",
    measurementId: "G-JSN76LC2EC"
};

export const app = initializeApp(firebaseConfig);
Now, let's install React Router and Firebase using the command below.
npm install firebase react-router-dom
How to Create Routes for the Register and Login Screens
And now, we need to create separate routes for Register and Login Screen.
In the App.js file, import BrowerRouter as Router and wrap the whole div inside the Router like this:
import './App.css';
import Form from './Components/Common/Form'
import { BrowserRouter as Router } from 'react-router-dom'

function App() {
  return (
    <Router>
      <div className="App">
        <Form />
      </div>
    </Router>
  );
}

export default App;
Doing this ensures that our whole application will be now able to use routes, because we are adding this Router at a root level.
Now, let's create routes for Login and Register Pages.
import './App.css';
import Form from './Components/Common/Form'
import {
  BrowserRouter as Router,
  Routes,
  Route
} from "react-router-dom";

function App() {
  return (
    <Router>
      <div className="App">
        <>
          <Routes>
            <Route path='/login' element={<Form />} />
            <Route path='/register' element={<Form />} />
          </Routes>
        </>
      </div>
    </Router>
  );
}

export default App;
If we go to the /login route in the address bar, we will see the login page. And on /register, we will see the register page.
Here, we are using the same Form component for both Login and Register. Let's pass props to the component to make them into Login and Register Screens.
import './App.css';
import Form from './Components/Common/Form'
import {
  BrowserRouter as Router,
  Routes,
  Route
} from "react-router-dom";

function App() {
  return (
    <Router>
      <div className="App">
        <>
          <Routes>
            <Route path='/login' element={<Form title="Login" />} />
            <Route path='/register' element={<Form title="Register" />} />
          </Routes>
        </>
      </div>
    </Router>
  );
}

export default App;
And we'll receive the props in the Form.js component, as a title in the function parameters.
Then, use the title to define which component is which. So, replace the Login Form with the {{title}} Form. And the button's title too.
import * as React from 'react';
import Box from '@mui/material/Box';
import TextField from '@mui/material/TextField';
import Button from './Button';
export default function BasicTextFields({title}) {
    return (
        <div>
            <div className="heading-container">
                <h3>
                    {title} Form
                </h3>
            </div>

            <Box
                component="form"
                sx={{
                    '& > :not(style)': { m: 1, width: '25ch' },
                }}
                noValidate
                autoComplete="off"
            >
                <TextField id="email" label="Enter the Email" variant="outlined" />
                <TextField id="password" label="Enter the Password" variant="outlined" />
            </Box>

            <Button title={title}/>
        </div>
    );
}
We are passing the props into the Button component. And we'll receive it into the Button component.
import * as React from 'react';
import Button from '@mui/material/Button';

export default function BasicButtons({title}) {
    return (
        <Button variant="contained">{title}</Button>
    );
}
Now, if we go to /login, we will see the login screen like this:
And on /register we will see the register screen:
How to Store Data in States
Now, let's create the states for the input fields that will store our form data.
In the App.js file, create two states – email and password – using the useState Hook.
import { useState } from 'react';

const [email, setEmail] = useState('');
const [password, setPassword] = useState('')
In the code above, we have imported useState from React and created two states. Then we passed the functions setEmail and setPassword to the Form component.
<Routes>
            <Route
              path='/login'
              element={
                <Form
                  title="Login"
                  setEmail={setEmail}
                  setPassword={setPassword} />}
            />
            <Route
              path='/register'
              element={
                <Form
                  title="Register"
                  setEmail={setEmail}
                  setPassword={setPassword} />}
            />
          </Routes>
And in the Form.js component, we will set the email and password using the onChange event. Now, you know how props work in React.
Now, we need a function to trigger the Login or Register functionality, so let's create it.
const handleAction = () => {

}
And pass this function into the Form component as props.
<Routes>
            <Route
              path='/login'
              element={
                <Form
                  title="Login"
                  setEmail={setEmail}
                  setPassword={setPassword}
                  handleAction={() => handleAction()}
                />}
            />
            <Route
              path='/register'
              element={
                <Form
                  title="Register"
                  setEmail={setEmail}
                  setPassword={setPassword}
                  handleAction={() => handleAction()}
                />}
            />
          </Routes>
And just like before, receive it in the Form.js component.
import * as React from 'react';
import Box from '@mui/material/Box';
import TextField from '@mui/material/TextField';
import Button from './Button';
export default function BasicTextFields({ title, setPassword, setEmail, handleAction }) {
    return (
        <div>
            <div className="heading-container">
                <h3>
                    {title} Form
                </h3>
            </div>

            <Box
                component="form"
                sx={{
                    '& > :not(style)': { m: 1, width: '25ch' },
                }}
                noValidate
                autoComplete="off"
            >
                <TextField
                    id="email"
                    label="Enter the Email"
                    variant="outlined"
                    onChange={(e) => setEmail(e.target.value)}
                />
                <TextField
                    id="password"
                    label="Enter the Password"
                    variant="outlined"
                    onChange={(e) => setPassword(e.target.value)}
                />
            </Box>

            <Button title={title} />
        </div>
    );
}
And then pass the handleAction into the Button component as props.
<Button title={title} handleAction={handleAction}/>
And receive it in the Button.js component.
import * as React from 'react';
import Button from '@mui/material/Button';

export default function BasicButtons({title, handleAction}) {
    return (
        <Button variant="contained" onClick={handleAction}>{title}</Button>
    );
}
So, when a user clicks the Login or Sign up Button, it'll trigger the handleAction function.
Now, come back to App.js file, in the handleAction function. We need to determine which action we are going to take, whether it is Login, or Register. So, we need to pass a unique identifier for Login and Register, as function params.
So, let's say we are passing '1' for Login and '2' for Register.
<Routes>
            <Route
              path='/login'
              element={
                <Form
                  title="Login"
                  setEmail={setEmail}
                  setPassword={setPassword}
                  handleAction={() => handleAction(1)}
                />}
            />
            <Route
              path='/register'
              element={
                <Form
                  title="Register"
                  setEmail={setEmail}
                  setPassword={setPassword}
                  handleAction={() => handleAction(2)}
                />}
            />
          </Routes>
And in the function, let's receive it. We'll also check in the console what output we are getting.
const handleAction = (id) => {
    console.log(id)
  }
So, fill out the form and click the button. We will get '1' in the console if we are on the Login Screen, and '2' if we are on the Register Screen.
Now, our form is ready.
How to Use Firebase Functions to Login and Register
In order to use Firebase functions, we need to import our firebase-config file into App.js.
import { app } from './firebase-config';
Now, we need a few other things too. So, let's import them:
import { getAuth, signInWithEmailAndPassword, createUserWithEmailAndPassword } from 'firebase/auth'
We use getAuth for authentication. And we use signInWithEmailAndPassword and createUserWithEmailAndPassword for Signing in and Registering using the email and password, respectively.
In the Firebase console, go to Authentication, then Sign in Method, and enable the Email/Password method.

Now, we need to destructure the getAuth that we imported. So, in the handleAction function, let's do it.
 const handleAction = (id) => {
    const authentication = getAuth();
  }
Now, let's create a user by using the createUserWithEmailAndPassword function.
It will take three parameters – authentication, the email state, and the password state – that we created previously.
const handleAction = (id) => {
    const authentication = getAuth();

    createUserWithEmailAndPassword(authentication, email, password)
}
Now, we need to create a check using the id parameter. If it is '1', we will trigger the Login function, and if it is '2', we will trigger the Register function.
We created the Register function first, so we will use '2' for the id.
const handleAction = (id) => {
    const authentication = getAuth();
    if (id === 2) {
      createUserWithEmailAndPassword(authentication, email, password)
    }
 }
Now, to check if this whole operation is working or not, we will use a then statement – that is, a promise.
const handleAction = (id) => {
    const authentication = getAuth();
    if (id === 2) {
      createUserWithEmailAndPassword(authentication, email, password)
        .then((response) => {
          console.log(response)
      })
   }
}
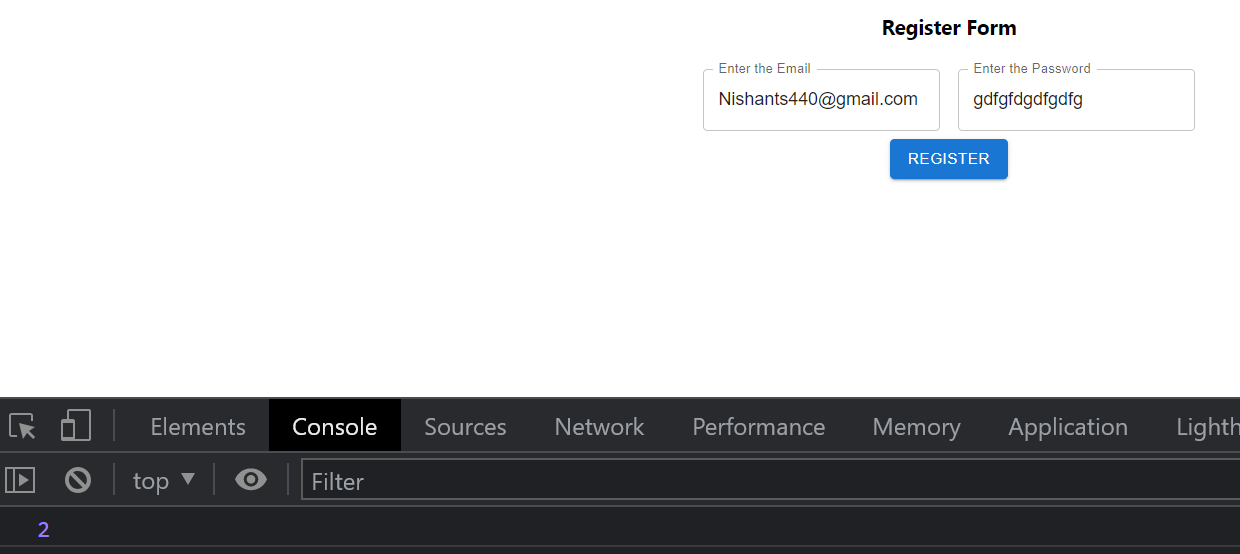
Now fill in the email and password, and click the Register button.

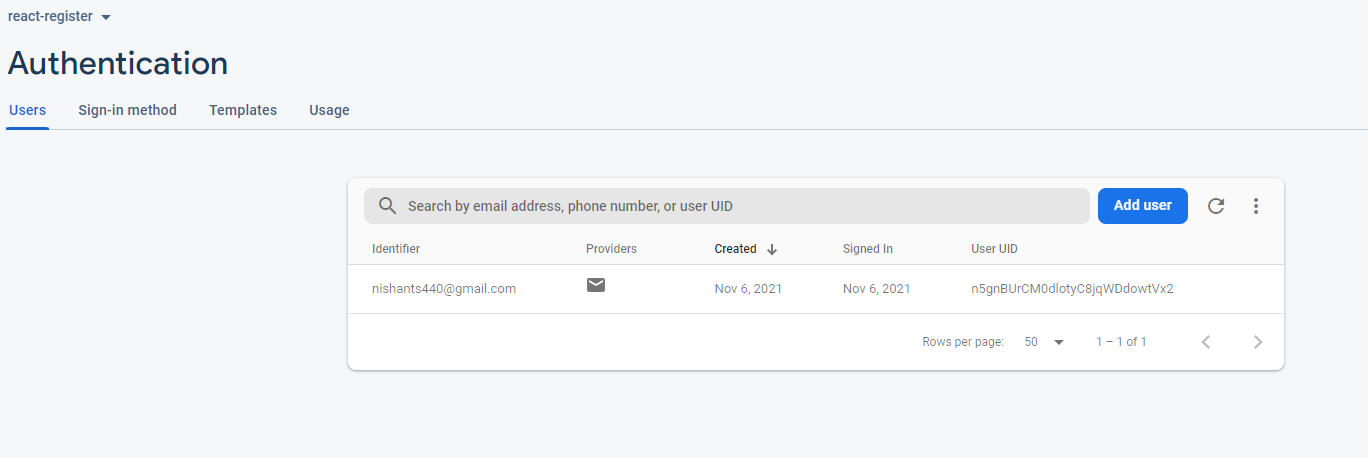
You see that we are getting a whole ton of data in our console. And if you check the Firebase Users, you will see the email that we used while creating the account.
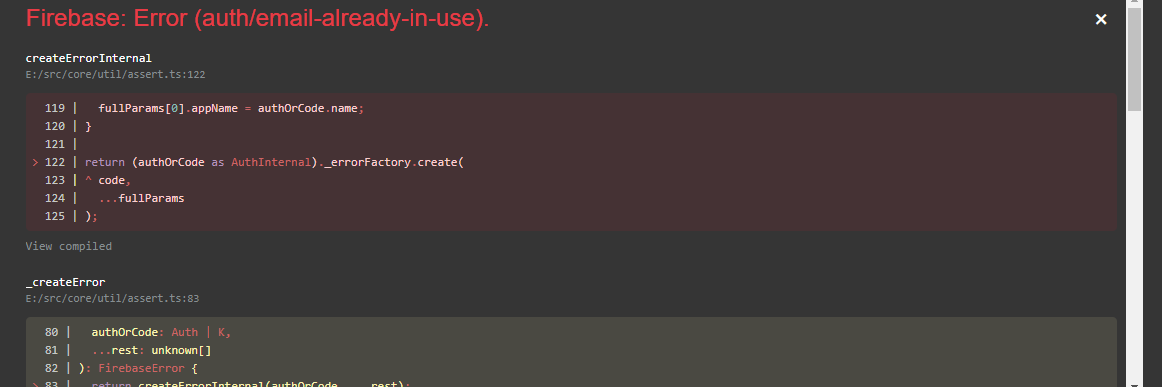
And if we try to create an account with the same email, we will get an error.
How to Store the Token in Session Storage
Now, let's store the token response in the session storage. We do this because we are going to create private routes now.
So, if that token exists in session storage, we will be on that private route, let's say a Home Page. But if the token doesn't exist, we will be pushed back to the Register or Login Screen.
I have chosen session storage because it gets destroyed when the browser is closed.
const handleAction = (id) => {
    const authentication = getAuth();
    if (id === 2) {
      createUserWithEmailAndPassword(authentication, email, password)
        .then((response) => {
          sessionStorage.setItem('Auth Token', response._tokenResponse.refreshToken)
        })
    }
  }
Set is like this in the Session Storage.
Then, create a component called Home.js, and give it some title or text.
import React from 'react'

export default function Home() {
    return (
        <div>
            Home Page
        </div>
    )
}
Then, if we Register successfully, we should be in the Home Component. And for that, we will use useNavigate from React Router.
import {
  BrowserRouter as Router,
  Routes,
  Route,
  useNavigate
} from "react-router-dom";
const navigate = useNavigate();
And the navigation in the handleAction Function.
navigate('/home')
But before that, we need to make some changes. Since we are using React Router v6, we can't use useNavigate in the current configuration, because useNavigate needs to be in Routes too. So, move the routes into the index.js file.
import React from 'react';
import ReactDOM from 'react-dom';
import './index.css';
import App from './App';
import reportWebVitals from './reportWebVitals';
import {
  BrowserRouter as Router,
} from "react-router-dom";
ReactDOM.render(
  <React.StrictMode>
    <Router>
      <App />
    </Router>
  </React.StrictMode>,
  document.getElementById('root')
);

// If you want to start measuring performance in your app, pass a function
// to log results (for example: reportWebVitals(console.log))
// or send to an analytics endpoint. Learn more: https://bit.ly/CRA-vitals
reportWebVitals();
And now, let's set up the route for the Home page.
<Route
            path='/home'
            element={
              <Home />}
          />
Here is the whole App.js file at this point:
import { useState } from 'react';
import './App.css';
import Form from './Components/Common/Form';
import Home from './Components/Home';
import {
  Routes,
  Route,
  useNavigate
} from "react-router-dom";
import { app } from './firebase-config';
import { getAuth, signInWithEmailAndPassword, createUserWithEmailAndPassword } from 'firebase/auth'
function App() {
  const [email, setEmail] = useState('');
  const [password, setPassword] = useState('');
  let navigate = useNavigate();
  const handleAction = (id) => {
    const authentication = getAuth();
    if (id === 2) {
      createUserWithEmailAndPassword(authentication, email, password)
        .then((response) => {
          navigate('/home')
          sessionStorage.setItem('Auth Token', response._tokenResponse.refreshToken)
        })
    }
  }
  return (
    <div className="App">
      <>
        <Routes>
          <Route
            path='/login'
            element={
              <Form
                title="Login"
                setEmail={setEmail}
                setPassword={setPassword}
                handleAction={() => handleAction(1)}
              />}
          />
          <Route
            path='/register'
            element={
              <Form
                title="Register"
                setEmail={setEmail}
                setPassword={setPassword}
                handleAction={() => handleAction(2)}
              />}
          />

          <Route
            path='/home'
            element={
              <Home />}
          />
        </Routes>
      </>
    </div>
  );
}

export default App;
Go to the Home route using the address bar. You will see the following:
Now, try registering using a different Email and Password. You will be pushed to the Home Page.
How to Create the Private Routes Functionality
But the thing is, the Home routes aren't private. So let's change that. We will use the stored token in the session storage.
In the Home.js component, create a useEffect hook. useEffect is a function that runs every time our component loads or mounts.
import React, { useEffect } from 'react'

export default function Home() {
    useEffect(() => {

    }, [])
    return (
        <div>
            Home Page
        </div>
    )
}
And inside useEffect, we will create a token check.
import React, { useEffect } from 'react'
import { useNavigate } from 'react-router-dom'

export default function Home() {
    let navigate = useNavigate();
    useEffect(() => {
        let authToken = sessionStorage.getItem('Auth Token')

        if (authToken) {
            navigate('/home')
        }

        if (!authToken) {
            navigate('/login')
        }
    }, [])
    return (
        <div>
            Home Page
        </div>
    )
}
If the token exists, we will remain on the Home Page. Otherwise we will be pushed back to the Login screen unless we find a way to destroy the token.
Now, we will create the same check in the App.js file.
useEffect(() => {
    let authToken = sessionStorage.getItem('Auth Token')

    if (authToken) {
      navigate('/home')
    }
  }, [])
Try to go back to the /register route after successfully registering. You will be pushed back to the /home page (and vice versa for /home to /register).
How to Create the Login Functionality
And now, let's create the Login functionality. It's very simple. Just like we did with createUserWithEmailAndPassword, we will use the signInWithEmailAndPassword function.
if (id === 1) {
      signInWithEmailAndPassword(authentication, email, password)
        .then((response) => {
          navigate('/home')
          sessionStorage.setItem('Auth Token', response._tokenResponse.refreshToken)
        })
    }
If the id is '1', this function will be triggered.
Let's try logging in using the email and password we used while registering. You will see that we are on the Home page.
How to Handle Errors using Catch Block and React Toastify
If we try to login with an incorrect email or password, we will get errors.
So, let's handle these errors using a catch block.
First, let's handle the Register Method errors. And we are going to use another package for handling toast error messages called React Toastify. Install it using this command:
npm i react-toastify
Then, create a catch block in both functions, which are Login and Register.
.catch((error) => {
         console.log(error)
})
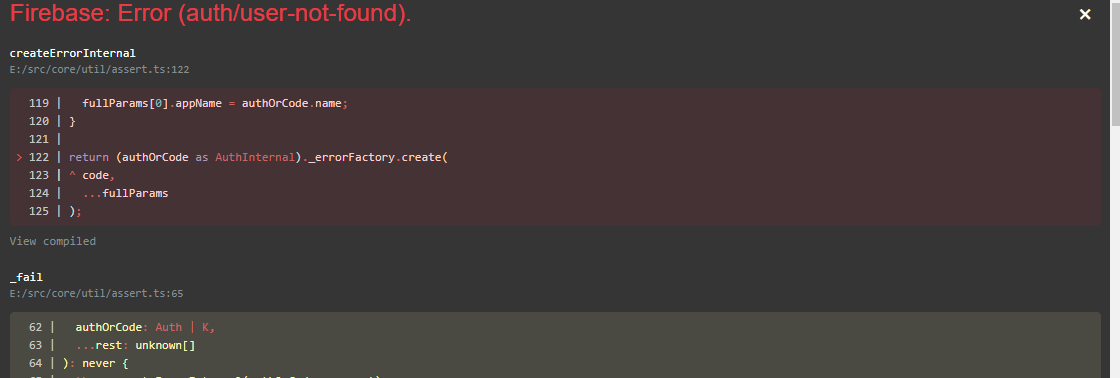
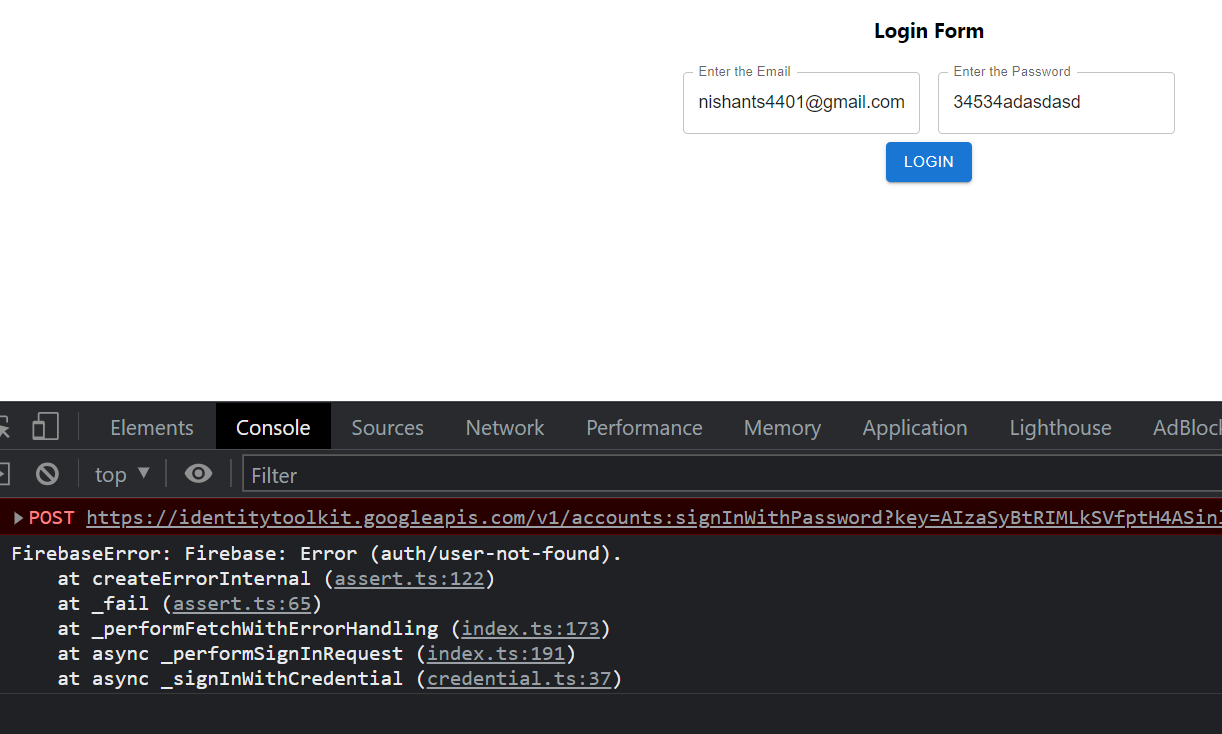
First, try entering the wrong email and the wrong password. You will get this error:
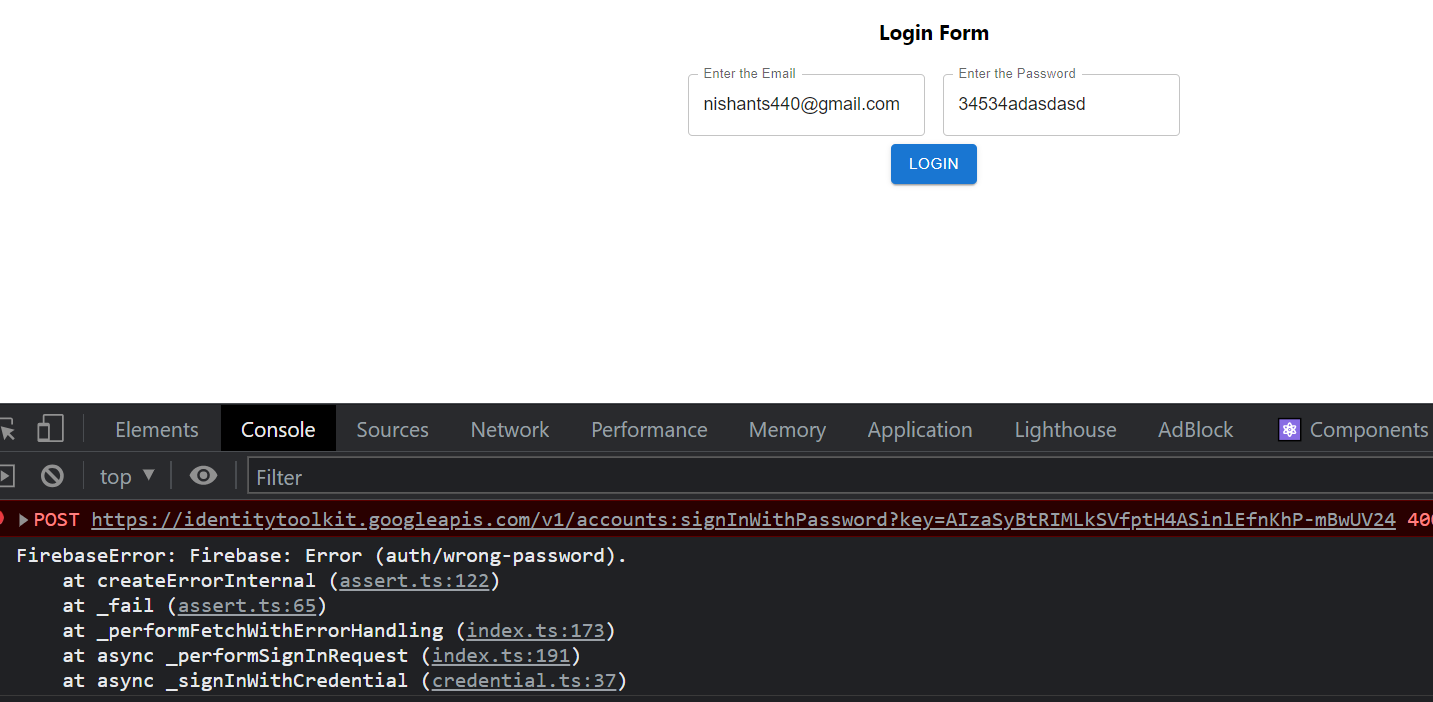
And if the Email ID is correct, but the password is wrong, you will get this error:
Now let's add the toast messages for our errors.
First, we need to import a few things:
import { ToastContainer, toast } from 'react-toastify';
import 'react-toastify/dist/ReactToastify.css';
Then add the <ToastContainer /> in the function return.
Now, we will check what the error code is based on. If it is auth/wrong-password, we will show a toast error of Please check the Password.
Or if it is auth/user-not-found, we will show the Please check the Email error.
.catch((error) => {
          if(error.code === 'auth/wrong-password'){
            toast.error('Please check the Password');
          }
          if(error.code === 'auth/user-not-found'){
            toast.error('Please check the Email');
          }
        })
 Error for Wrong Email
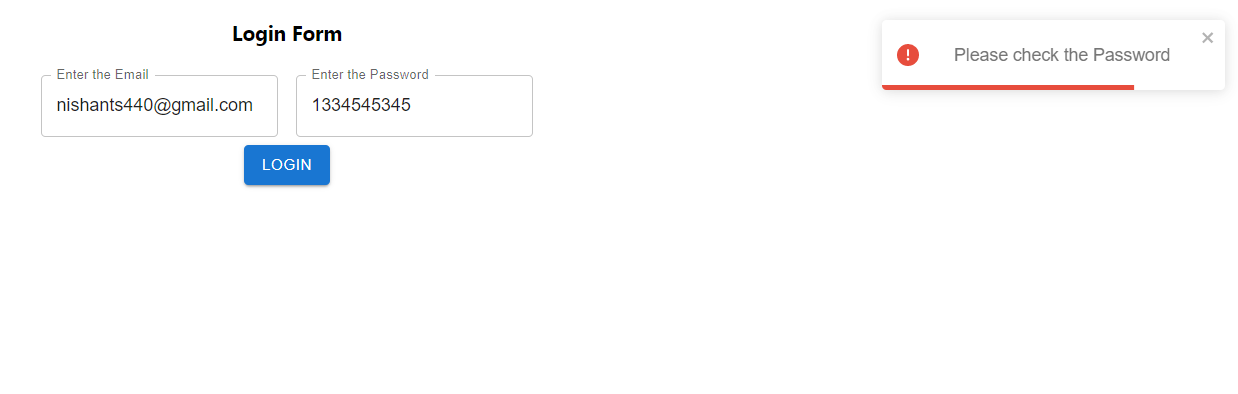 Error for Wrong Password
We can do the same for the Register function. If we try to register with the same Email twice, it will throw us this error:
.catch((error) => {
          if (error.code === 'auth/email-already-in-use') {
            toast.error('Email Already in Use');
          }
        })

How to Create the Logout Functionality
Let's create the functionality that lets users logout.
In the Home component, create a button. And create a function called handleLogout.
Assign anonClick event to the button, with the function handleLogout. So when someone clicks the button, this button will be triggered.
And in the function body we won't do anything except destroy the token from the session, and it will push us back to the Login Page.
import React, { useEffect } from 'react'
import { useNavigate } from 'react-router-dom'

export default function Home() {
    const handleLogout = () => {
        sessionStorage.removeItem('Auth Token');
        navigate('/login')
    }
    let navigate = useNavigate();
    useEffect(() => {
        let authToken = sessionStorage.getItem('Auth Token')
        console.log(authToken)
        if (authToken) {
            navigate('/home')
        }

        if (!authToken) {
            navigate('/register')
        }
    }, [])
    return (
        <div>
            Home Page

            <button onClick={handleLogout}>Log out</button>
        </div>
    )
}
Try it to make sure that it works – it should.
Conclusion
Now you know how to add authentication to a React application using Firebase.
You can check out my playlist on the same at Firebase Authentication and CRUD Operations using React, which is on my YouTube channel.
And here's the whole code on GitHub for your reference.
Happy Learning.