
Payments are an essential part of any online business. But the process of setting up those payments can be incredibly complex at times.
To accept payments, developers were traditionally required to set up code both on the client and server. This was in addition to learning complex third-party APIs which required parsing through large amounts of documentation.
Fortunately tools like Stripe Checkout make handling purchases on the web and mobile devices easier than ever before.
In this tutorial, you'll take a look at how to set up Stripe Checkout to accept credit card, Apple Pay, and Google Pay payments in our React apps.
What is Stripe Checkout?
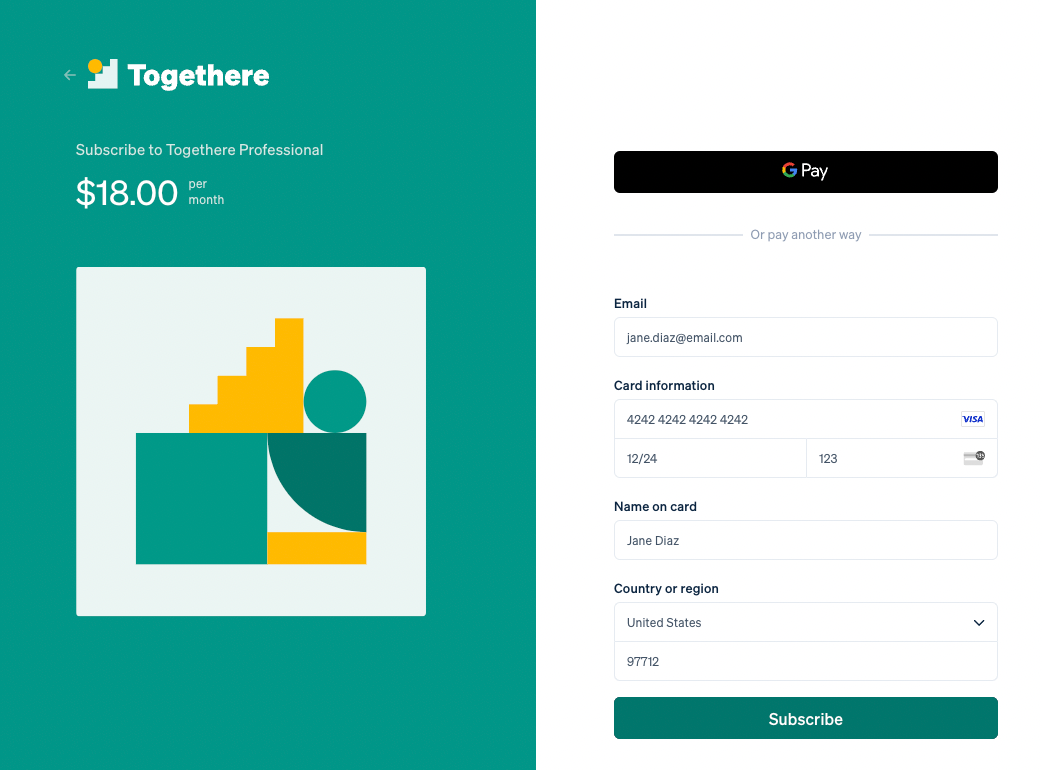 Example Stripe Checkout page
Stripe Checkout is an all-in-one tool that not only streamlines and simplifies the process of checking out for us as developers. It also gives us a user interface for our customers to use that's optimized for performance and usability.
When using Stripe checkout over alternative options such as Stripe Elements, the benefit is that you have to write far less code to achieve the same end result. Additionally, you get features such as automatic translations for global users in their language.
You also get the ability to customize this user interface without having to write a single React component.
Stripe Checkout is Hosted on Stripe
Be aware that Stripe Checkout is hosted on Stripe's servers and it involves taking the user to checkout.stripe.com. This, however, shouldn't be viewed as a downside.
Because trust is such an important part of the checkout process, it's often a large benefit to know that Stripe is handling the payment. As a result, customers can be far more secure and confident in the payment process.
In short, it's a wise decision to use a pre-made solution such as Stripe Checkout, considering it will not only mean less work for you, but will also create higher trust in your product.
How to Setup Stripe Checkout
- Go to stripe.com and create a free account.
- You will be navigated to your dashboard at dashboard.stripe.com
In the top right corner of your dashboard, make sure to turn "Test Mode" on.
 Make sure you are in test mode
- Create a new product in Stripe.
The fastest way to get there is to search for "Create Product" in the search and click on the "Create a Product" result.
 Go to "Create a Product"
- Add your product information, including its name, description and image.
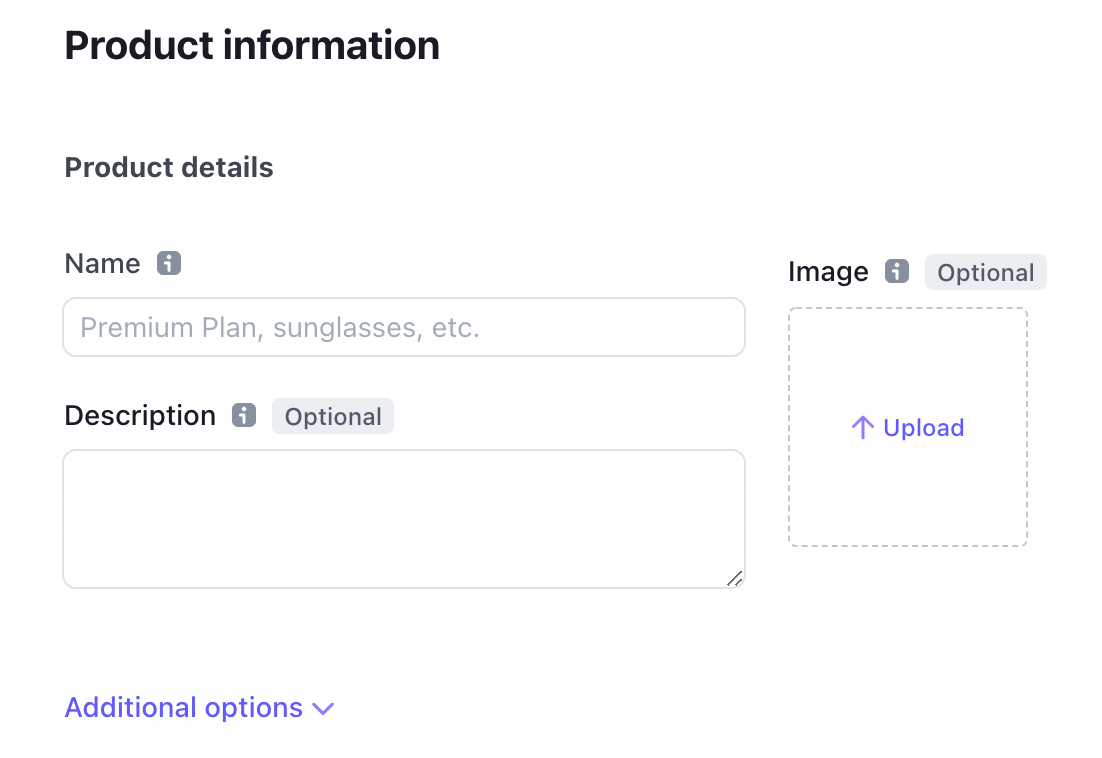 Provide your product information
- On the same page, add your price information for that product.
In this example, we will choose a recurring (monthly) pricing model. Be aware that you can select a one-time payment for your products as well.
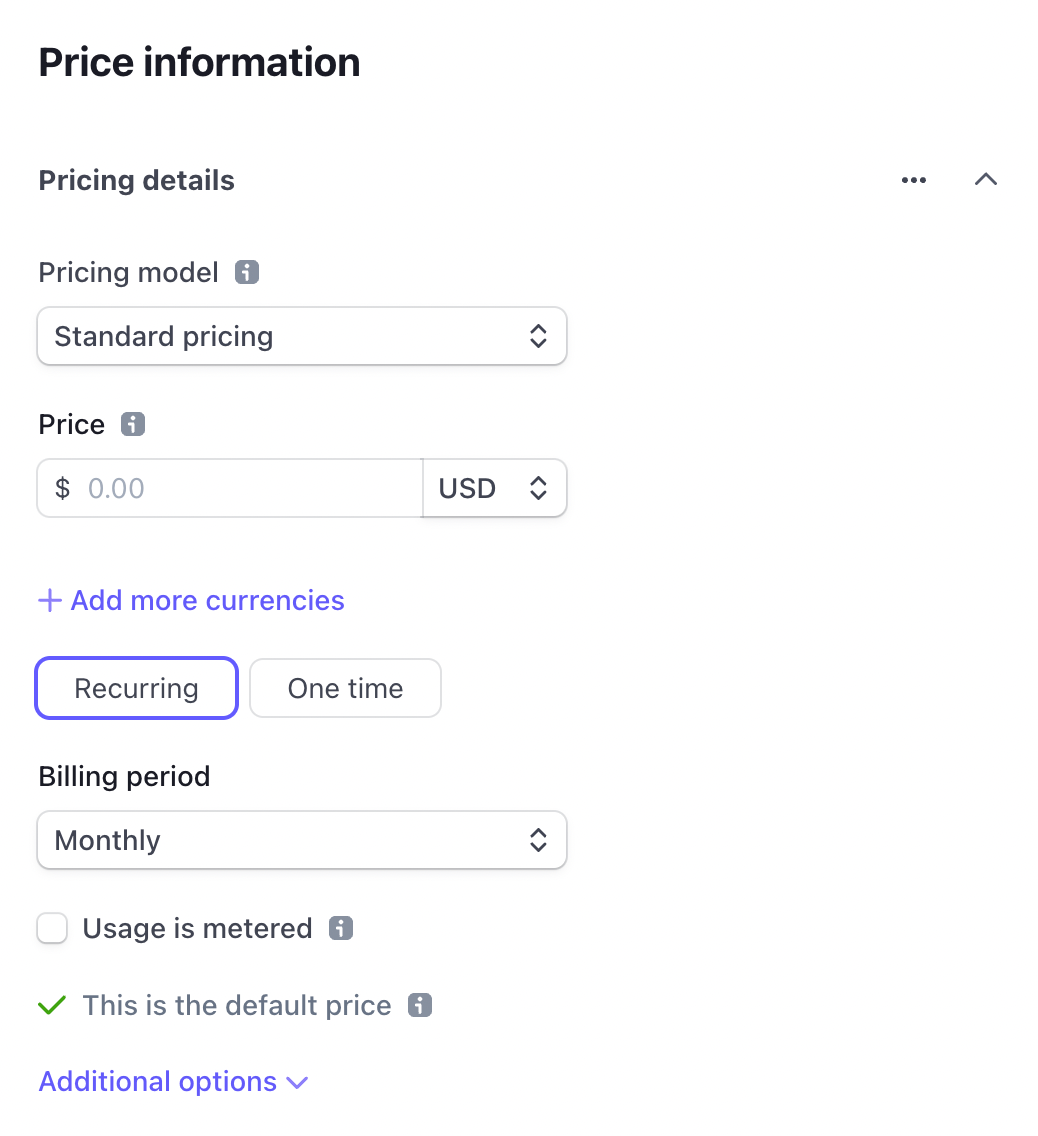 Select your pricing details
- Save your new product and get your price id
After your product has been created, if you go down to the pricing section, you will see an id beginning with price_ next to your price. You will need to this create a checkout session with Stripe.
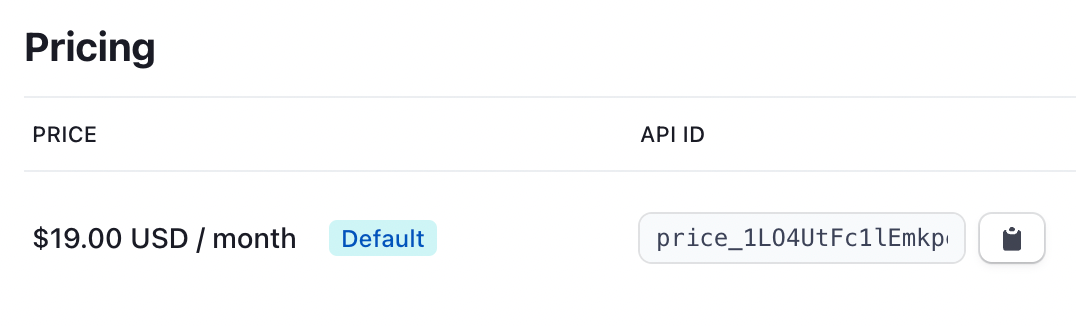 Grab the created price id for your product
- Get your publishable key.
The last step is to get the publishable (test) key from Stripe. We also need this for creating a checkout session with Stripe.
This time, we can search for "api key" and choose the first result.
 Search for "api key"
On the API keys page (once again, in test mode), you will grab the publishable key that begins with pk_test
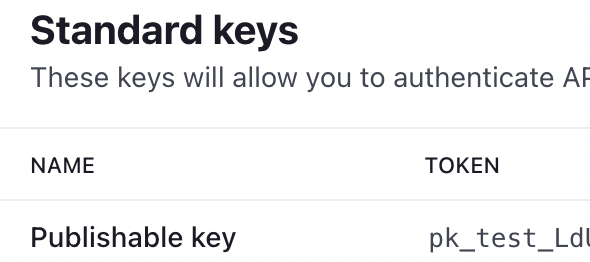 Grab the publishable key, under "token"
How to Add Stripe Checkout to React
Now that we have everything we need to setup Stripe Checkout with React, namely the price id and the publishable key, we can create our React app.
For this tutorial, I will be using Next.js, which is a React framework. You can create your own Next.js app instantly using StackBlitz by going to next.new.
We'll begin by creating a button to check out on our homepage (pages/index.js). When a user clicks on this button, Stripe will redirect our user to the checkout page.
// pages/index.js

export default function Home() {
  return <button>Checkout</button>;
}
To communicate with Stripe, we need to install the following package with NPM or Yarn:
npm install @stripe/stripe-js
Once installed, we will create a new folder and file within it: lib/getStripe.js in the root of our project.
In this file, we will handle loading Stripe only once. To do so, we pass Stripe our publishable key.
import { loadStripe } from '@stripe/stripe-js';

let stripePromise;
const getStripe = () => {
  if (!stripePromise) {
    stripePromise = loadStripe(process.env.NEXT_PUBLIC_STRIPE_PUBLISHABLE_KEY);
  }
  return stripePromise;
};

export default getStripe;
Here, we are loading the publishable key from a .env file. Make sure to create that in the root of your project with the following two values, for your publishable key and price key:
NEXT_PUBLIC_STRIPE_PUBLISHABLE_KEY='pk_test_my_key'

NEXT_PUBLIC_STRIPE_PRICE_ID='price_my_id'
Once you have added your environment variables, we'll head back to the home page and create a function called handleCheckout.
It will first call getStripe which we need to await because this function returns a promise. Make sure to import our getStripe function from the lib folder.
import getStripe from '../lib/getStripe';

export default function Home() {
  async function handleCheckout() {
    const stripe = await getStripe();
    const { error } = await stripe.redirectToCheckout({
      lineItems: [
        {
          price: process.env.NEXT_PUBLIC_STRIPE_PRICE_ID,
          quantity: 1,
        },
      ],
      mode: 'subscription',
      successUrl: `http://localhost:3000/success`,
      cancelUrl: `http://localhost:3000/cancel`,
      customerEmail: 'customer@email.com',
    });
    console.warn(error.message);
  }

  return <button onClick={handleCheckout}>Checkout</button>;
}
Then we will call stripe.redirectToCheckout, which is also a function we need to await.
To this function will pass an object which includes four main properties:
lineItems: an array of objects including the products and quantity of those products in our order.mode: whether our transaction is recurring or one-timesuccessUrl: the page the user will be navigated to upon successful purchase (feel free to set this up on your own)cancelUrl: the page the user will be navigated to upon successful purchase (again, easy to setup)
There are many more properties that you can pass to this object, such as passing in the customerEmail to pre-populate the user's email input.
How to Test Stripe Checkout
Once we hit our checkout button, we should be directed to a complete page which in test mode will allow us to provide a test credit card number to verify the checkout process (repeat the number 4242 repeating for all fields).
If our user cancels and attempts to go back, they will be taken to the cancelUrl we specified. Otherwise, if they successfully complete this process, they will be taken to the successUrl.
Once you are ready to go live and accept your customers' money, all you need to do is swap out your test publishable key with a non-test one.
Hopefully that gave you a good understanding of how to get started with Stripe Checkout and how to more easily accept payments in your React apps!
You can find the final code for this example here: https://stackblitz.com/edit/nextjs-4ts4y4?file=pages%2Findex.js
Become a Professional React Developer
React is hard. You shouldn't have to figure it out yourself.
I've put everything I know about React into a single course, to help you reach your goals in record time:
Introducing: The React Bootcamp
It’s the one course I wish I had when I started learning React.
Click below to try the React Bootcamp for yourself:
 Click to get started