

In this tutorial, we are going to be building a simple movie generator which automatically generates a new movie every 40 seconds. It will also contain a button called “Generate New Movie” to display another movie on demand.
This app will display a movie along with its title, release date, fan rating, time duration, a short description, star casts, name of directors and finally a button which links to the movie’s IMDb page.
You can access the complete code for this project from its Github repository.
How Are We Going to Build This?
As it is with most other web apps, this app will consist of both a front end and a back end.
The front end is the part the user sees and interacts with. In our app, our front end will be made up of the movie's cover image, its information, and a button which will link to the movie’s IMDb page.
The back end is where our movie data – such as the movie title, description, actors, picture, and so on – will be coming from.
The app is going to automatically generate a new random movie every 40 seconds.
We'll build the front end of our app using React. React is a front end JavaScript library used for building reusable UI components such as buttons, navigation menus, images, cards and more.
We will also style our components using pure CSS.
How We'll Build the Back End
The back end of a website typically contains a database, which is a program you use to store and manage data. The database also has to be accessible via an API so that our front end can access the data and display it to the user.
To accomplish this, we'll use an interesting and fun tool called HarperDB.
What is HarperDB?
HarperDB is database and data management software that's incredibly fast – it's even been proven to be 37 times faster than MongoDB.
A database’s speed refers to how fast it can read and write data into its records as well as make computations on such data.
HarperDB is also incredibly flexible. It allows you do the following:
Make queries to a single endpoint
Use both SQL and NoSQL to query your database
Upload data in JSON and with SQL queries.
If you are working with lots of data, you can import it all in one step in a CSV file. Pretty neat!
You don’t have to define the data types for your data, as HarperDB dynamically does it for you. Not to mention their simple interface for managing your cloud instance without any hassle.
As I said, very flexible.
Prerequisites for this Tutorial
To build this app, I'll assume you have some basic knowledge of the following languages and tools:
Npm or any other package managers: We'll need this to install React and a React HarperDB hook called use-harperdb to your project.
NPM stands for Node Package Manager. It's a tool which connects your local project to the npm registry, where millions of public code packages, such as React and useharperdb, are hosted. It also helps you manage this code, once it's installed.
Make sure to have a Node version of at least 12.xx installed on your machine. You can check your node version with this command: node -v
SQL: In this project, we are only going to be using one or two basic queries, so don’t worry if you don’t know much about SQL.
SQL stands for Structured Query Language. It is a popular language used in querying relational databases. We will use it in our hook to query our HarperDB cloud instance for data.
React: Our user interface is going to be built with React. If you know JavaScript, then learning React is relatively easy.
A HarperDB account: If you don’t have a HarperDB account, you will need to create one. Don’t worry, it's completely free. I will show you how to create an account below.
And finally, CSS: we'll use a little CSS to style our elements.
What are React Hooks?
In the past, to work with data in a React component, you had to define the component as a class component. This changed when React introduced hooks.
Simply put, hooks are functions which allow you to work with data in a non-class (that is, functional) React component.
Thanks to this, you don’t have to define a React class component just to manage state data inside of it.
The use-harperdb hook allows you to hook your app into your cloud database instance to obtain data. Think of it as a bridge between your React app (front end) and the HarperDB database (back end).
How to Set Up the Database
HarperDB is a flexible database, as I mentioned before. It allows you to use its services either by setting up your own local HarperDB server or using the serverless architecture.
In this project, we will be using the serverless architecture. This means that we will not be implementing a server (that is, the back end) on our local machine. Instead, we will leverage HarperDB’s cloud infrastructure to manage our movie data and make it available for our app.
Set Up the HarperDB Cloud Instance
First, I am going to assume that you have created your free account like I asked earlier. If you haven’t, go ahead and sign up.
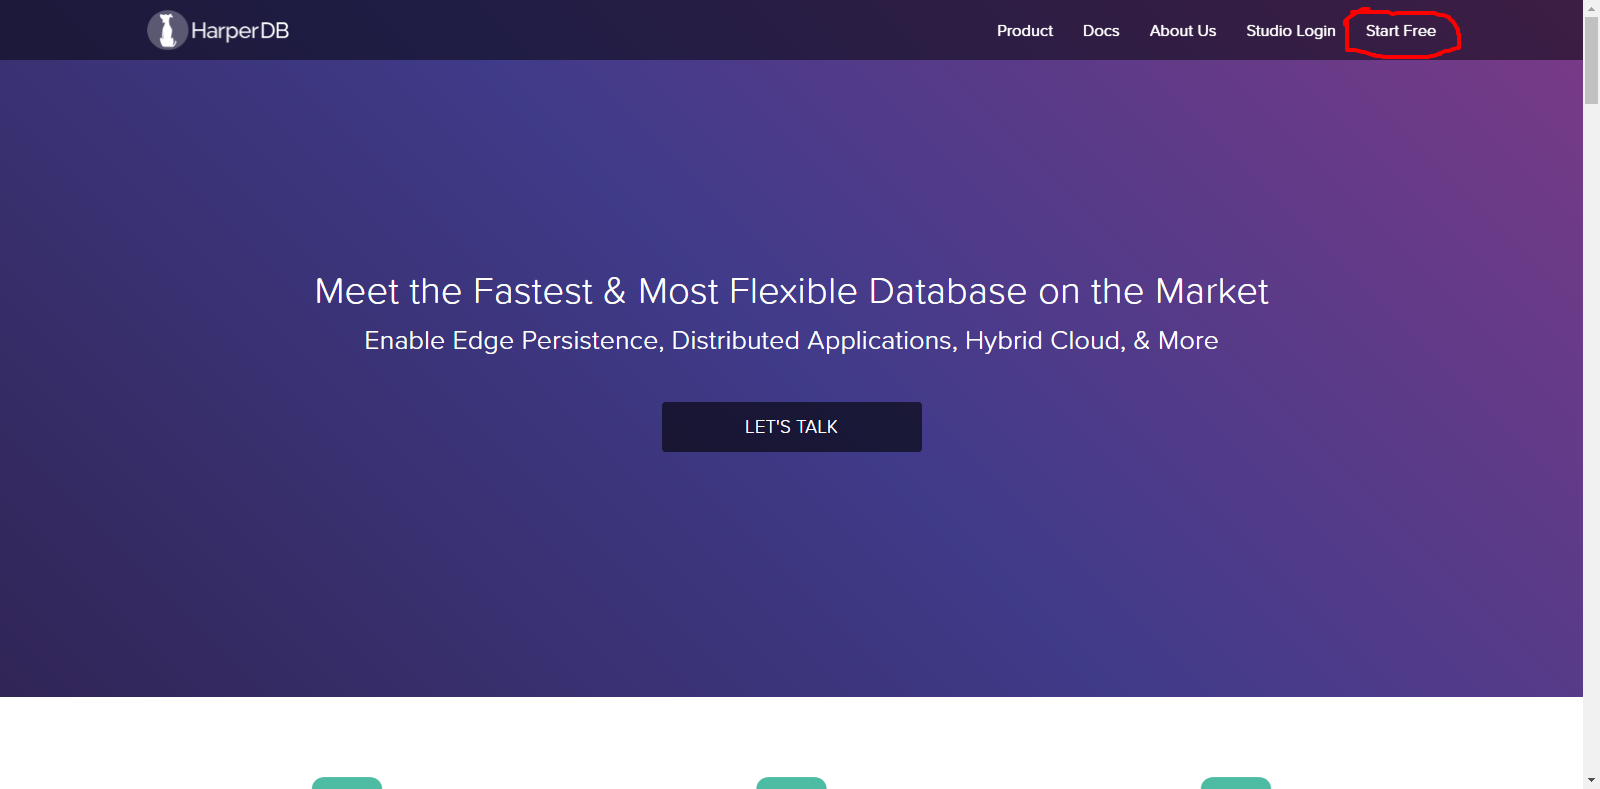
Sign Up for HarperDB
You will be asked to provide your name, a valid e-mail, and a sub-domain name for your cloud instance. With it, HarperDB will create a sub-domain name for you.
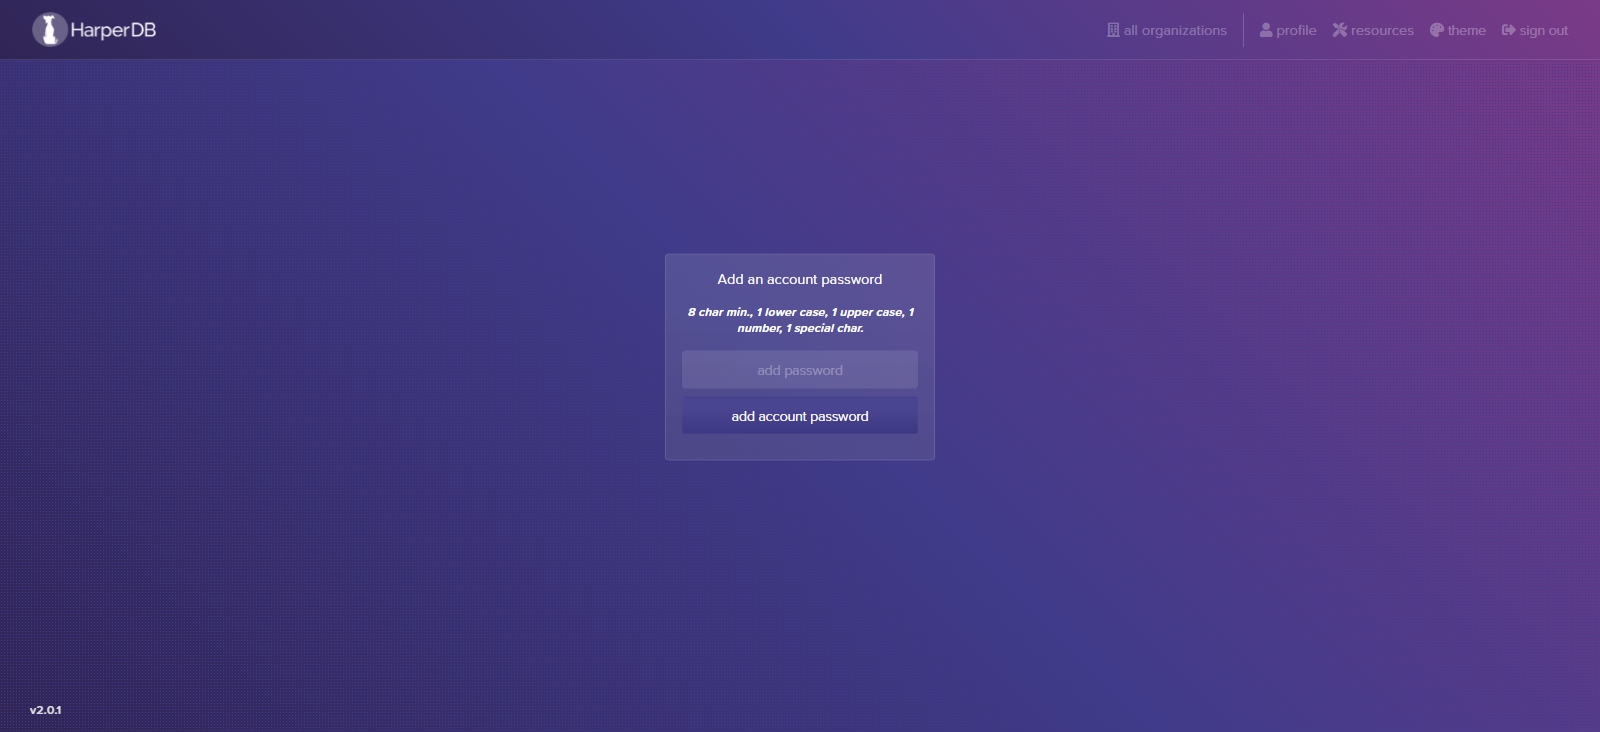
Make sure to choose a strong password
Next, we'll create a cloud instance:
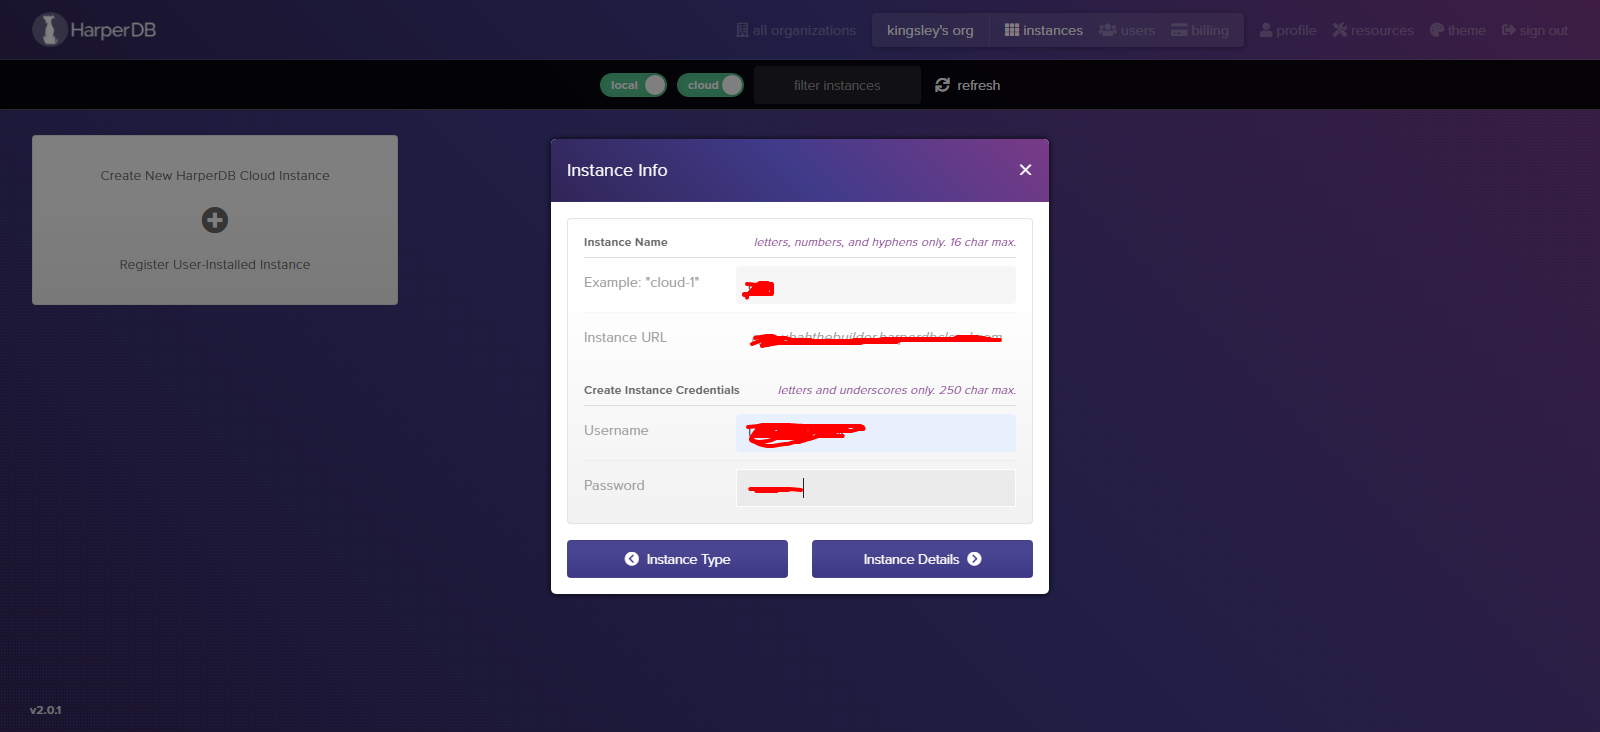
Fill in your details
Here, you will be asked to add an Instance name. Don’t worry, you can name it whatever you can easily remember, but it is best to make it descriptive.
To create your Instance URL, which you will need on your app when querying for data, HarperDB will combine your Instance Name with your Subdomain Name. You will also be prompted to set your Instance credentials (username and password).
Next, we select the Instance Specifications. For the sake of this tutorial, we will go with the free plans. Also, you will need to pick a region for your instance.
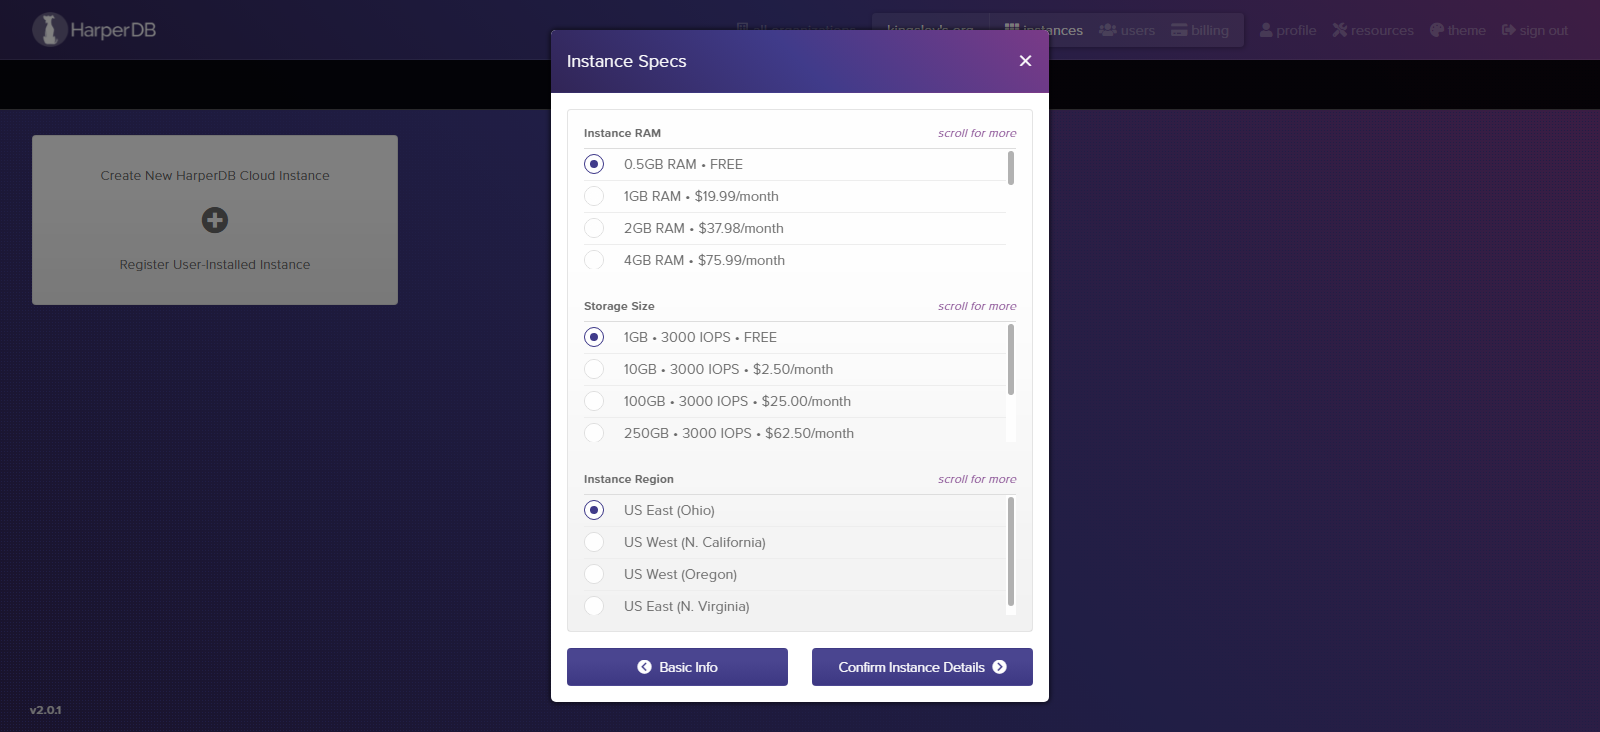
Choosing the free plans
Click on “Confirm Instance Details” and you will be moved to a page which contains all your instance’s information. Now, copy your instance URL, your username, and your password and save it somewhere as you will need it later.

Save your URL, username and password
When you're done, click the “Add Instance” button. You will be moved to a page which shows your instance card. Your instance will need some time to set up initially before you can use it, but we can do a few things while we wait.
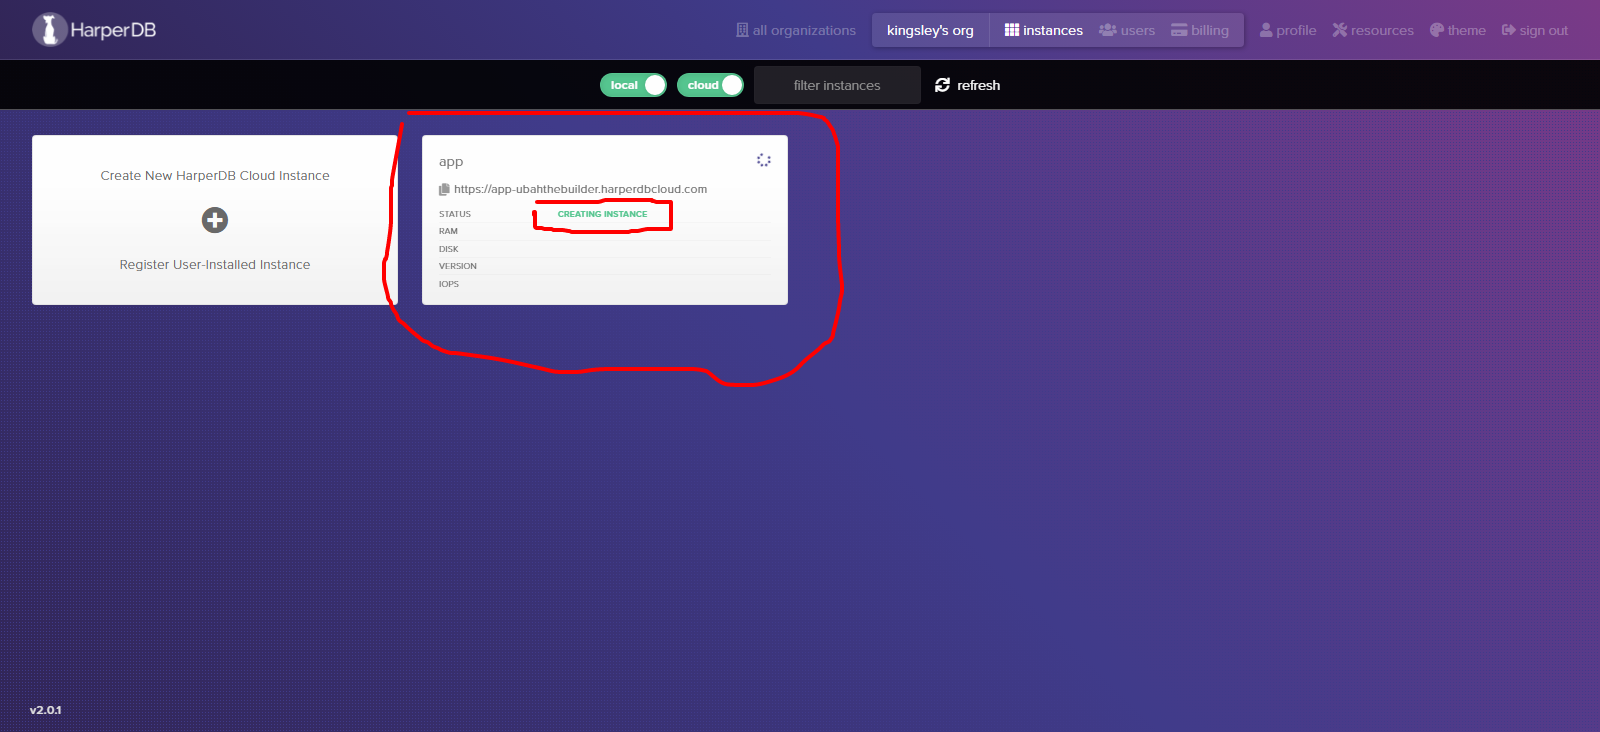
Setting it up
How to Set up the React App
While our cloud instance is still being set up, we can take the opportunity to set up the project directory for our app.
First, we initialize our project by running the following command on any command terminal:
npx create-react-app harperdb-movies-generator
This command will create a folder called harperdb-movies-app as well as install all of the dependencies we need for our project. This includes React and the ReactDOM, so we don’t have to do it manually.
Next we are going to run the command to bring the use-harperdb hook into our project. This hook will help us connect to our cloud instance. To install it, we run the following command on our command line:
npm install use-harperdb
That’s all for the setup!
How to Integrate HarperDB to your React App
Now that the use-harperdb hook has been installed, we have to do one more thing to be able to access data from your database and make CRUD operations on it: We have to connect your app to your cloud instance. We will do this with the HarperDBProvider.
Before getting into that, we have to do something first. When building a CRUD application, it is not a good practice to expose private credentials such as our API keys to other people, especially if we are intending on pushing the code to a public repo like GitHub.
To protect any sensitive credentials, we will need to store them as environmental variables. This is just a file where we store sensitive credentials such as our passwords, API keys, and in our current case, our cloud instance credentials (URL, username, and password).
Create an .env in the root of your directory. You create this file in your code editor, right click on the root directory (harperdb-movie-generator) and select the “create new file” option.
Name this file .env and press enter. This will create a .env file inside of harperdb-movie-generator. After this, define the following variables:
REACT_APP_DB_URL=**
REACT_APP_USER=**
REACT_APP_PASSWORD=**
Make sure you use the same format and pass in the correct details about your own cloud instance in place of the double asterisks. Fill in your Instance URL, your Instance Username, and your Instance Password, which I earlier told you to save somewhere.
React will read all environmental variables that use the REACT_APP as prefix, and will then dynamically pass in the value where needed.
With the .env file created, our next action will be to wrap our entire React app inside the imported HarperDBProvider
HarperDBProvider will ensure that our app has the context of the HarperDB database.
To wrap our React App inside the provider, we'll go over to index.js inside our project, import the provider, and securely pass in those environmental variables into the provider. This lets it know which instance to connect our front end to:
import React from 'react';
import ReactDOM from 'react-dom';
import './index.css';
import App from './App';
import { HarperDBProvider } from 'use-harperdb';


ReactDOM.render(
  <React.StrictMode>
    <HarperDBProvider
    url={process.env.REACT_APP_DB_URL}
    user={process.env.REACT_APP_USER}
    password={process.env.REACT_APP_PASSWORD}
    >
      <App />
    </HarperDBProvider>
  </React.StrictMode>,
  document.getElementById('root')
);
How to Populate Our Database with Data
If you remember, we left the cloud instance while it was still being set up. By now, we should have our instance all set and ready to serve data. In that case, you will see the OK status on your instance:
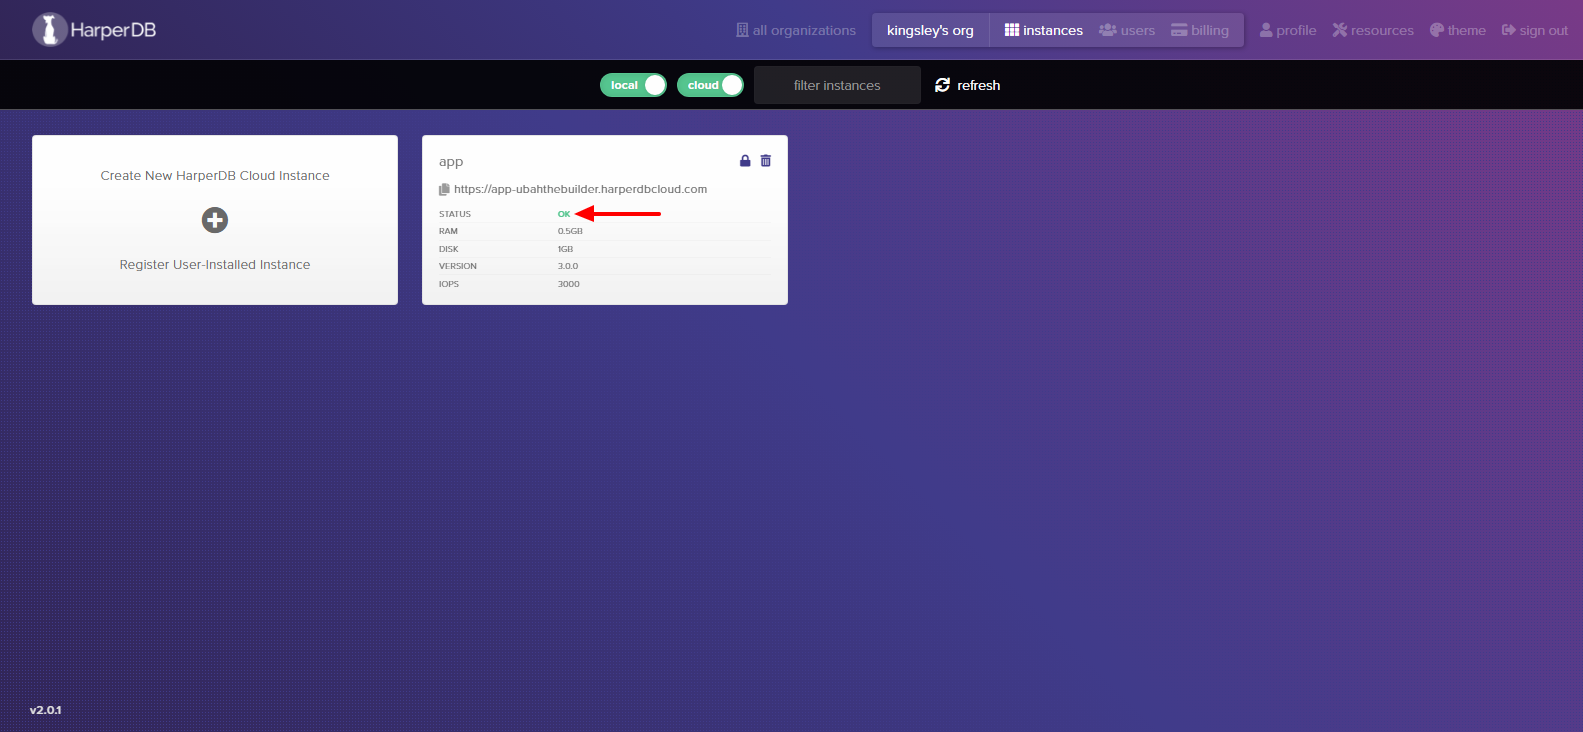
Instance now set
Your cloud instance should be good-to-go with your front end hooked up to your instance as well. However, the front end will be useless if it doesn’t have any data (that is, movies) to display to the user.
So first we need to populate our database with data.
But before that, we will need to create a schema for our movie data. You can think of a schema as a collection of tables in our database. I simply call my own schema "collection":
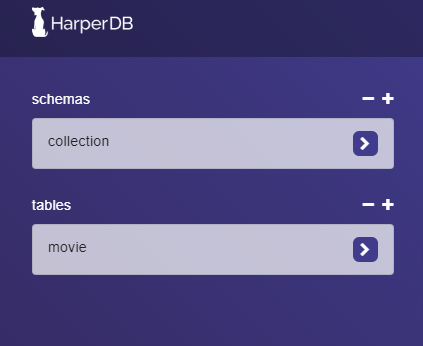
Creating our schema and a table inside of it
Next, we'll create our table. I'll called mine "movie". A table will consist of records of individual movies.
Each movie record must have a hash_attribiute. A hash_attribute is simply a column with unique keys which identifies that particular row of data and distinguishes it from the next row. We are simply using the “id” column as our hash_attribute.
Since we are creating an app with more than one movie, our table will consist of more than one row of movies (that is, records of data). Also, since each movie has many properties such as title, year, release date ,and so on, it will have more than one field of information.
You can upload the movies one by one with a single JSON object or upload a full collection of movies with an array of JSON objects.
HarperDB allows you to upload data in three main ways:
By making SQL or NoSQL queries to create data on our database.
By defining a single JSON object (for only one record) and an array of JSON data (for multiple records)
By importing and loading data with a CSV file
To upload a single movie's data, we create a JSON object which contains all the movie information. Here is an example of the JSON data:
{
  cover: 'https://res.cloudinary.com/ubahthebuilder/image/upload/v1627129180/avengers_endgame_ilqzqj.png',
  date: 2017,
  description: 'After the devastating events of Avengers: Infinity War (2018), the universe is in ruins. With the help of remaining allies, the Avengers assemble once more in order to reverse Thanos actions and restore balance to the universe.',
  directors: [
    'Anthony Russo',
    'Joe Russo'
  ],
  genres: [
    'Action',
    'Adventure',
    'Drama'
  ],
  hours: 3,
  id: 1,
  minutes: 1,
  rating: 8.4,
  stars: [
    'Robert Downey',
    'Chris Evans',
    'Mark Ruffalo'
  ],
  title: 'Avengers: End Game',
  website: 'https://www.imdb.com/title/tt4154796/',
  writers: [
    'Christopher Markus',
    'Stephen McFeely'
  ]
}
Navigate to the movie table inside the collection and click on the + sign at the top right corner of the page, which is highlighted in the following image:

Adding a new movie record into our table
Copy the previously defined JSON object and paste it into the space provided, replacing everything there for formatting reasons. Click the green button to save the information into the movies table.

Paste in the JSON object
Once we are done with uploading, our table should look something like this:

Eight Movies inside of our table
Note that you can make use of the data from this project’s GitHub repository to insert multiple records of movies at once.
How to Build Up Our UI and Query the Database
Now that the data is ready, we need to display it on our front end for the user to see and interact with.
First, we need to alter our app.js file:
import React from 'react';
import './App.css';
import Movie from './components/Movie';

function App() {
  return (
    <div className="App">
      <div className="main-container">
        <header>
          <h1 className="heading">Movie List</h1>
          <h3> A Simple Movie Generator built with React and HarperDB</h3>
        </header>
        <div>
          <Movie />
        </div>
      </div>
    </div>
  );
}

export default App;
This will be the top level component in our project.
Next, we'll import the React and React DOM libraries as well as the stylesheet App.css for our entire app.
Next, in the App.css file we define our app component which returns the Header elements as well as the Movie component.
Here is the style for our entire app:
@import url('https://fonts.googleapis.com/css2?family=Lato:wght@300&display=swap');
@import url('https://fonts.googleapis.com/css2?family=Roboto:wght@500&display=swap');

/* Base Styles */

body {
  font-family: "lato", sans-serif;
  color: white;
  background-color: #082032;
}

a {
  color: black;
  font-family: "roboto", sans-serif;
  font-size: 50px;
  text-decoration: none;
  display: inline-block;
}


h1 {
  text-align: center;
  font-family: "roboto", sans-serif;
  font-size: 60px;
  font-weight: 80px;
}

h3 {
  text-align: center;
}

p {
  font-weight: 400px;
}

span {
  color: #FFF338;
}

ul {
  list-style-type: none;
  display: flex;
  margin-left: 339px;
}


li {
  outline-color: #2C394B;
  outline-style: inset;
  outline-width: 2px;
  outline-offset: 5px;
  margin: 11px;
  padding: 0px, 20px;
}

img {
  height: 500px;
  width: 100%;
}


/* Classes */

.movie-cover {
  max-width: 800px;
  width: 800px;
  background-color: #2C394B;
  margin: 0 auto;
  border-radius: 10px;
}

.circle {
    background-color: transparent;
    margin-right: 37px;
    text-align: center;
    margin-top: 50px;
    border:3px solid #FFF338;
    height:90px;
    border-radius:50%;
    -moz-border-radius:50%;
    -webkit-border-radius:50%;
    width:90px;
}

.ratings {
  font-size: 30px;
  margin-top: 12px;
}

.big-half , .small-half {
  font-family: "roboto", sans-serif;
  font-style: oblique;
  color: white;
}

.small-half {
  color: #DAD0C2;
  font-size: 19px;
}


.visit-movie-button {
  margin: 30px, 20px;
  padding: 10px, 30px;
  position: relative;
  top: 50px;
  left: 120px;
  font-size: 20px;
  outline-style: solid;
  color: #FFF338;
  outline-color: #FFF338;
  outline-offset: 10px;
}


.generate-movie-button {
background-color: #FFF338;
padding: 0.5em 1.2em;
font-size: 20px;
text-decoration: none;
position: relative;
top: 50px;
left: 250px;
text-transform: uppercase;
}

.action-buttons {
  width: inherit;
}


.title {
  font-size: 50px;
  padding-top: 40px;
  padding-left: 30px;
  margin-bottom: 0;
}

.top-information {
  display: flex;
  justify-content: space-between;
}

.supporting-info {
  padding-left: 30px;
  font-weight: bold;
  margin-bottom: 20px;
}

.lower-information {
  font-family: "roboto", sans-serif;
  width: 800px;
  max-width: 800px;
  margin-left: 380px;
}
Once again, you can access the complete code for this project from its Github repository.
How to Add the Movie Component
We now need to add our movie component. We will start by creating a new folder under the 'src' directory named component. We then need to create a new file inside that new file named 'movie.js'. This is where the spicy things start to happen.
In addition to the React and ReactDOM libraries, we are going to import the use-harperdb hook (function) as well.
We are going to execute the use-harperdb function, passing in an object as an argument. Inside the object, we need to supply at least a single query property. This property determines what kind of operation we want to carry out on our database.
import React from 'react';
import { useHarperDB } from 'use-harperdb';

function Movie() {
let [data, loading, error, refresh] = useHarperDB({
    query: {
      operation: 'sql',
      sql: `select * from collection.movie where id = ${Math.floor(Math.random() * 8) + 1}`
    },
    interval: 40000 // 40 Seconds
  }
  )

  // CODE CONTINUES
The first property, which is the operation property, specifies how you want to query the data. In our example, we are going to do so with a SQL command.
The second property within the query is the SQL property. This is where we write our SQL queries for any CRUD operation we want to carry out. In our case, we simply want to select all fields from a randomly selected movie between 1-8, from the database, which we have denoted by the following SQL clause:
select * from collection.movie where id = ${Math.floor(Math.random() * 8) + 1}`
After the query, another optional property we can define is the interval property. With this property, you can specify how long you want your app to wait before it automatically generates a fresh query to the database.
Executing the useHarperDB function with those parameters correctly passed in will return us an array containing some important things. Below are four important items we will get from useHarperdDB:
loading: This is a Boolean which specifies if the database is still processing data or not. That way, you can optionally display a “loading” spinnererror: This indicates if an error was encountered while querying the database.refresh: Assuming you don’t set an interval property, you can call this function whenever you want to fetch new data.data: The main thing. If all things go well, HarperDB will return our data to this variable.
How to Display Data in our Front End
With our data now successfully returned from the database, it’s time pass it into our React template:
if(loading) {
    return <div> Loading... </div>
  }

if(data) {
      return (
<>
<div className="movie-cover">
  <div className="top-information">
    <h2 className="title">{data[0].title}</h2>
    <div className="circle">
      <div className="ratings">
        <span className="big-half">{data[0].rating}</span>/<span className="small-half">10</span>
      </div>
    </div>
  </div>

  <div className="supporting-info">
    <span className="year">{data[0].date}</span> -
    <span className="time">{data[0].hours}h:{data[0].minutes}m</span>
  </div>
  <div className="image">
    <img src={data[0].cover} alt="Movie Image" />
  </div>
</div>

<div className="genres">
  <ul className="movie-genres">
    {data[0].genres.map((genre, index) => {
    return (
    <li key={index}><span className="movie-genre-item">{genre}</span></li>
  )
    })}
  </ul>
</div>

<div className="lower-information">
  <p>{data[0].description}</p>

  <hr />
  <p> Starring: {data[0].stars.map((star, index) => {
    return (
    <span key={index}>{star} - </span>
    )
    })}
  </p>
  <hr />
  <p> Writers:
    {data[0].writers.map((writer, index) => {
      return (
    <span key={index} className="writer">{writer} - </span>
    )
    })}
  </p>
  <hr />
  <p>Directors:
    {data[0].directors.map((director, index) => {
      return (
    <span key={index} className="director">{director} - </span>
    )
    })}
  </p>
  <hr />
  <div className="action-buttons">
    <a href={data[0].website} className="visit-movie-button">Visit Movie</a>
    <a href="" className="generate-movie-button" onClick={refresh}>GENERATE NEW MOVIE</a>
  </div>
</div>
</>
)
} else {
    return (
      <div>Sorry No Data
        {error}
      </div>
  )
}

}
If you are familiar with React, this shouldn’t be foreign to you. But I am still going to explain what we did here:
As I stated, the
useHarperDBfunction will return our data. If you query to get all of the movies, it will return an array of movies. Since we queried for only a single movie, it will return an object containing the data of a single movie.Next, we have to check if the data was returned. If there is no data, we display a simple div displaying a "Sorry No Data" message.
Since we did receive data, we passed in the data into our template. We extract each field from the object and pass it into the correct template.
When finished, we run the following command on the command line:
npm start
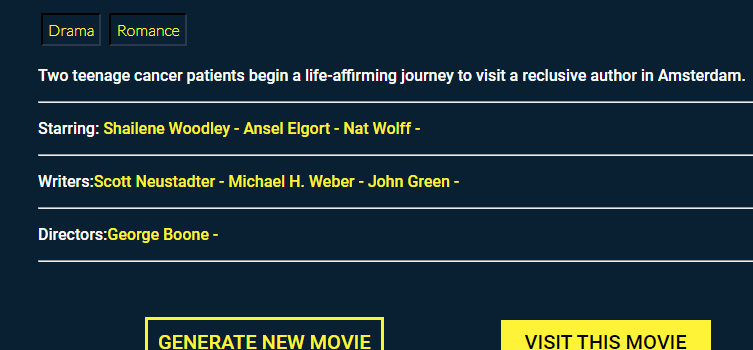
That should start our development server at https://localhost:3000. If everything goes well, we should see our app live on the browser with some cool movie data!

How our app should look
That's it for our app!
How to Deploy the App to GitHub Pages
Welcome to the last section of the tutorial. We will be deploying our new app to GitHub pages for the world to see.
Deploy on GitHub Pages
If you have another hosting provider, then you are absolutely welcome to deploy your app there. If you don’t, or you want something free, then GitHub Pages is great.
First, you need to have a GitHub account. If you don’t, you can create one for yourself here.
Also, you need to have Git version control software installed on your local machine. This is something every software developer should already have. However, if you don’t, you can install it from here.
The first thing to do is to create a new repository for your project on your GitHub account:
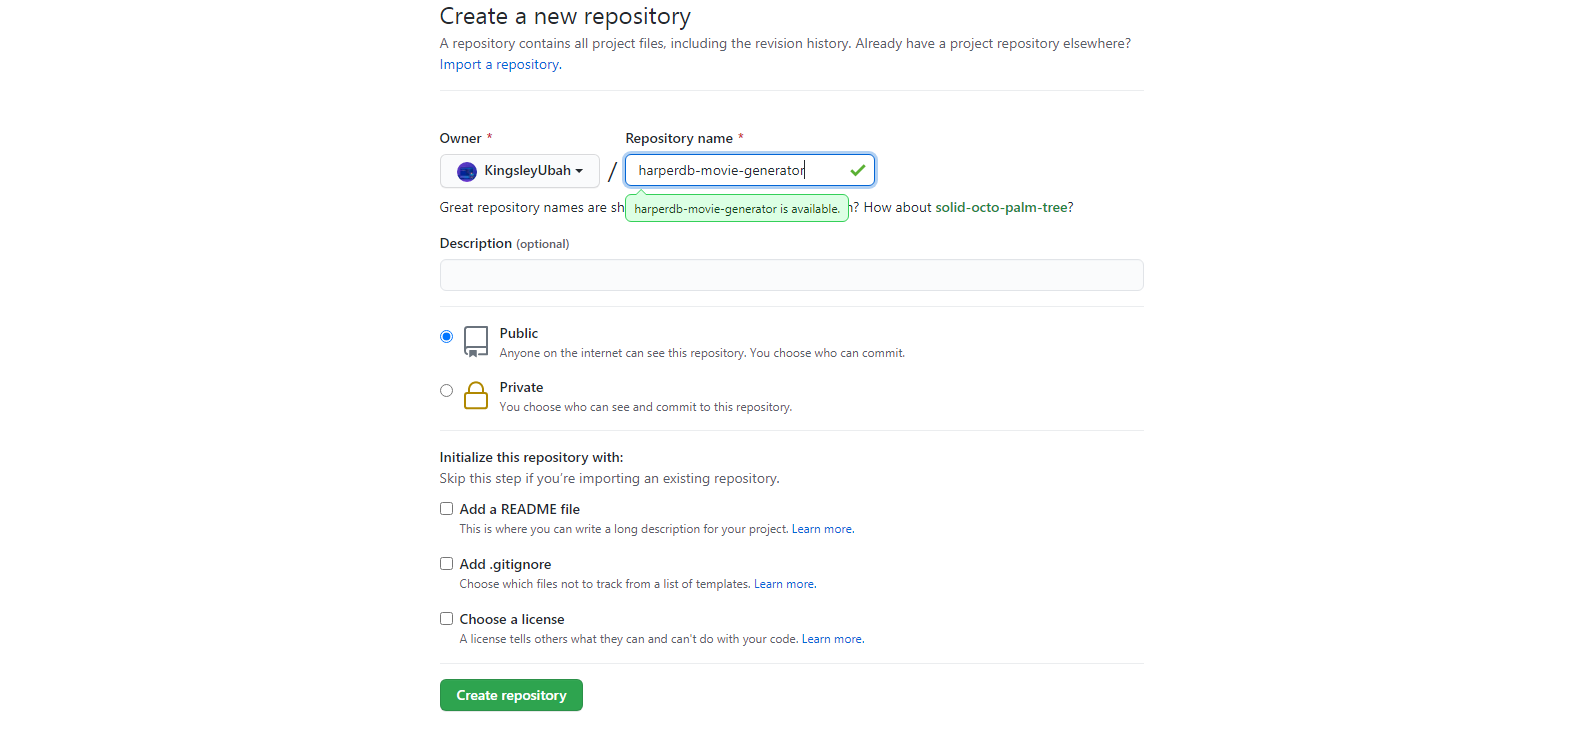
Creating a new GitHub repo
Then go back to the terminal and run the following command:
npm install gh-pages --save-dev
This will save GitHub Pages to your project as a dev dependency.
When this is done, go over to your project folder and open the package.json file. You should find gh-page safely installed there under the dev dependency:
"devDependencies": {
    "gh-pages": "^3.2.3"
  }
Next, we'll do the following three things:
- Navigate to your project directory (harperdb-movie-generator) and select the package.json file. On the top of your package json, you will add the following data (replace the template with yours):
"homepage": https://{Your GitHub username here}.github.io/{Your Project Name}.git
To find your GitHub username and the name of your repository, navigate to the newly created repo on GitHub. At the top, you can find your GitHub username and the project name next to it. Copy both of them and fill it into the aforementioned template – make sure to append .git at the end of your project name.
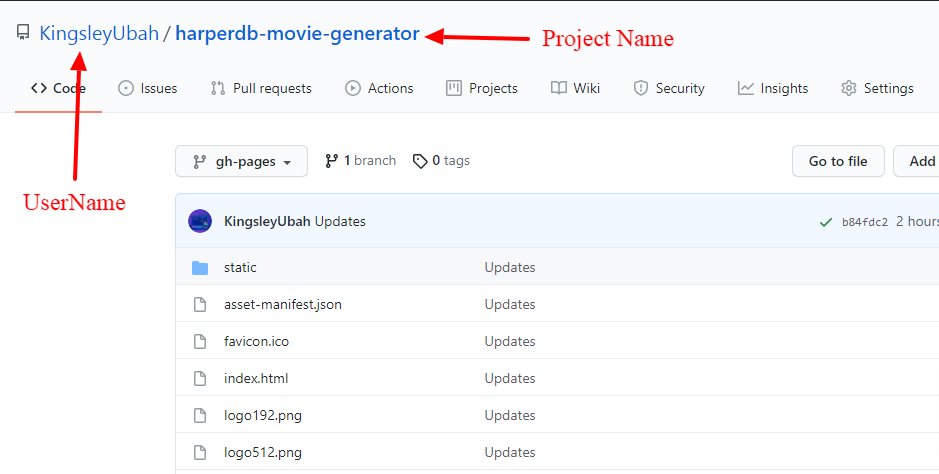
Github information for your package.json
The essence of adding the “homepage” field is to specify the URL where our app will eventually get hosted. Make sure to put a comma at the end, so your package json will be parsed correctly.
- Go over to the "scripts" field within the same file and pass in the following data being sure you maintain proper indentation:
"predeploy": "npm run build",
"deploy": "gh-pages -d build"
This is what you will run when you are ready to deploy to GitHub pages.
- Finally, you are going to initialize Git in your project. To do this, simply navigate to your project directory on the command line and run the following command:
cd projects/harperbd-movie-generator

git init
Now, everything is set!
The only thing left to do is deploy your app to GitHub pages. To do this, run the following command:
npm run deploy
And voilà! Your app will immediately be deployed to GitHub pages.
How to View Your Live App
Your app is now live at this point, but you have to see what it looks like. So you have to get its URL.
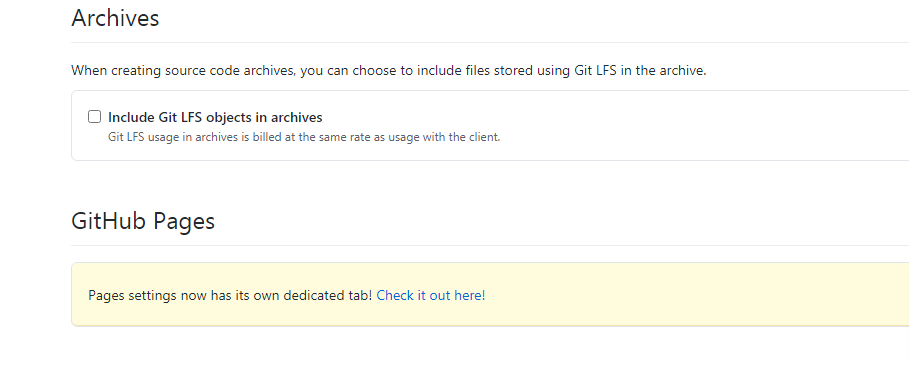
Go over to your GitHub profile and click the repository tab. Select your newly created repo, go to the settings page, and scroll down a bit. You will find the GitHub pages section. Click on “check it out here!”
In the following page, inside Source, switch the Branch to “gh-pages” and file-path to “root”. Within a few minutes, your app will be all set. Copy the URL from the page and paste into a new browser window.
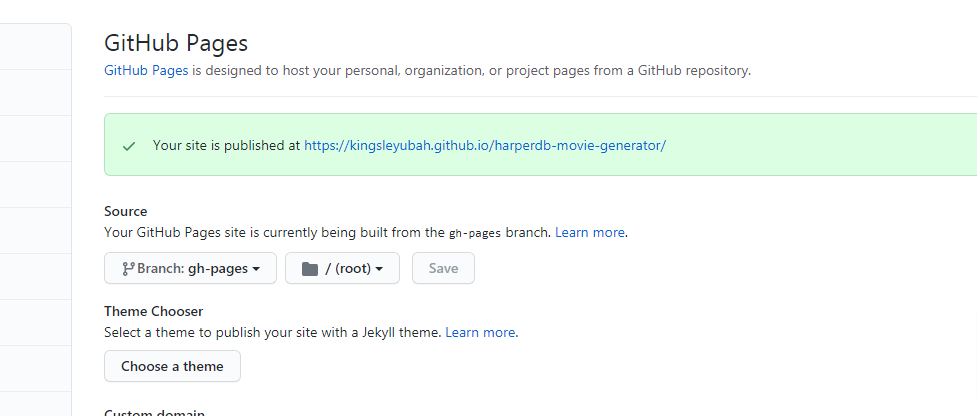
Project now live at the provided URL
And behold, you'll see your live project.
Wrapping Up
We built this project with React and HarperDB. HarperDB is a great choice for your data management and back-end operations.
Not only is it flexible but also very easy to integrate, as we have seen in this tutorial.
You shouldn’t stop here. You can improve on your skills by building some other cool projects with this same stack. Thanks to HarperDB’s free plan, you don’t have to pay anything.
You can grab the code for this project from its GitHub repository.
Want to reach out for any suggestions? You can get me on Twitter
That’s it. Thank you for following along and have a great week.