
By Nishant Kumar
In this article, I'll show you how to build a text translator application using React. It will support 17 languages, and you can do cross translation too.
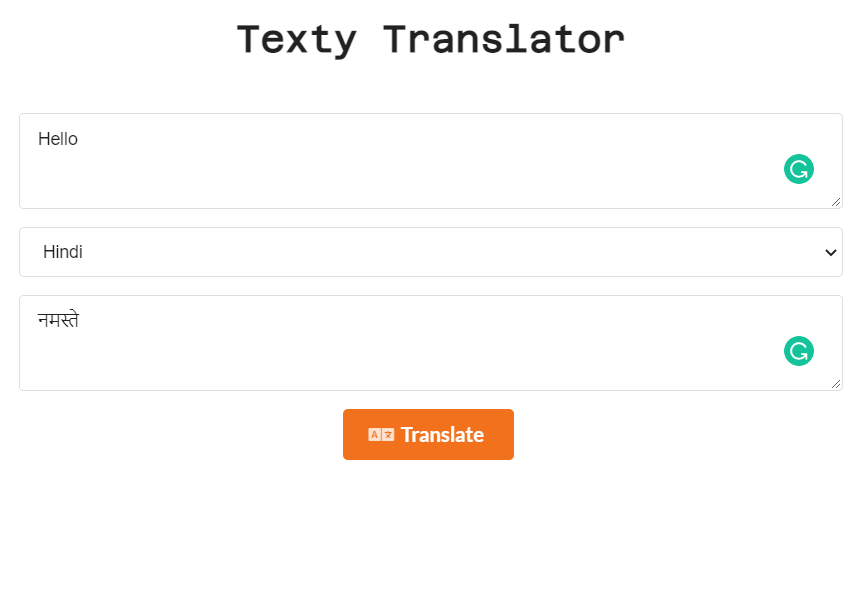
Here's what we'll create:

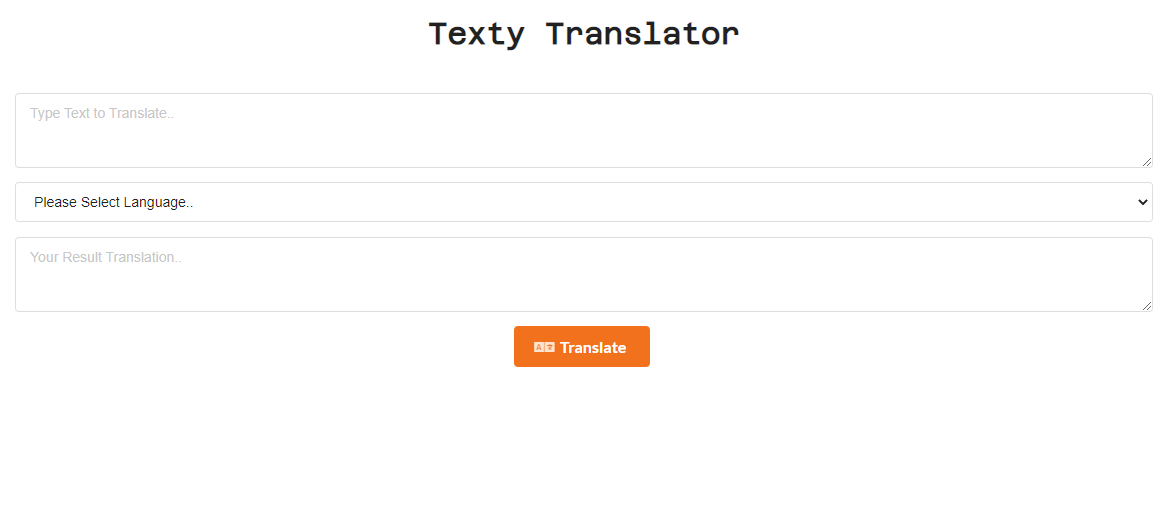
This is how our application will look after we're done building it. It has two text area inputs – one will contain our Source Text, and other will contain our Result Text. We also have a select field where the user can choose their desired languages.
So, let's get right into it.
How to Build the UI
In order to create the interface effortlessly, we will use a UI Library called Semantic UI.
So, navigate to Semantic UI's Website at https://react.semantic-ui.com/.
Then, select Get Started from the sidebar menu:

Install it using one of the below commands. You can use yarn add or npm install.
$  yarn add semantic-ui-react semantic-ui-css
## Or
$  npm install semantic-ui-react semantic-ui-css
After it finishes installing, we need to import the package into our index.js file like this:
import 'semantic-ui-css/semantic.min.css'
Now, we can use Semantic UI.
How to Create the App's Components
Let's create a component called Translate. This will contain all the elements that we need.
First, we need an application title heading. So, inside the Translate component, create a heading like this:
import React from 'react';

export default function Translate() {
    return (
        <div>
            <div className="app-header">
                <h2 className="header">Texty Translator</h2>
            </div>
        </div>
    )
}
Now let's add a little styling to it with CSS:
@import url('https://fonts.googleapis.com/css2?family=Azeret+Mono&display=swap');

.app-header{
  text-align: center;
  padding: 20px;
}

.header{
  font-family: 'Azeret Mono', monospace;
  font-size: 30px;
}
Here, we are using a font called Azeret Mono from Google Fonts, and we've aligned the header and given it some padding.
This is how our header will look at this point:
We also need four other elements. First is our input text area, second is the select dropdown to select the language, the third is the output text area where our translated text will be reflected, and the last one is a button which will translate our text.
We can import the Form, TextArea, Button, and Icon elements directly from Semantic UI like this:
import {
    Form,
    TextArea,
    Button,
    Icon
} from 'semantic-ui-react';
Next, we'll create another div after app-header called app-body with the following code:
import React from 'react';
import {
    Form,
    TextArea,
    Button,
    Icon
} from 'semantic-ui-react';

export default function Translate() {
    return (
        <div>
            <div className="app-header">
                <h2 className="header">Texty Translator</h2>
            </div>

            <div className='app-body'>
                <div>
                    <Form>
                        <Form.Field
                            control={TextArea}
                            placeholder='Type Text to Translate..'
                        />

                        <select className="language-select">
                            <option>Please Select Language..</option>
                        </select>

                        <Form.Field
                            control={TextArea}
                            placeholder='Your Result Translation..'
                        />

                        <Button
                            color="orange"
                            size="large"
                        >
                            <Icon name='translate' />
                            Translate</Button>
                    </Form>
                </div>
            </div>
        </div>
    )
}
And we'll add some styling to it with the following CSS:
@import url('https://fonts.googleapis.com/css2?family=Azeret+Mono&display=swap');

.app-header{
  text-align: center;
  padding: 20px;
}

.header{
  font-family: 'Azeret Mono', monospace;
  font-size: 30px;
}

.app-body{
  padding: 20px;
  text-align: center;
}

.language-select{
  height: 40px !important;
  margin-bottom: 15px;
  outline: none !important;
}
This is how our application will look now. You can see that we have the text areas, select options, and a button to translate.
How to Set Up the APIs
To enable translation, we'll use the LibreTranslate API. So, go to their website to choose your API.

As you can see in the image above, it has four API's.
To start, we need to detect our input language using the /detect POST API.
How to Install Axios
But first, let's install Axios, as we'll need to use it to make API requests.
To install Axios, simply type the below command:
yarn add axios

##OR

npm i axios
We can either use yarn add axios or npm i axios, depending on your package manager you installed.
Now, let's import it in our Translate Component.
import axios from 'axios';
We also need the useState and useEffect hooks.
import React, { useState, useEffect } from 'react';
Then, create one state called inputText.
const [inputText, setInputText] = useState('');
And in the input text area field, bind it to an onChange event handler.
<Form.Field
 control={TextArea}
 placeholder='Type Text to Translate..'
 onChange={(e) => setInputText(e.target.value)}
/>
If we enter any text, it will be stored it the inputText state.
How to Call the Language Detect API
Now, let's call the detect language API to detect our input language.
Create a function called getLanguageSource() like this:
const getLanguageSource = () => {
        axios.post(`https://libretranslate.de/detect`, {
            q: inputText
        })
        .then((response) => {
            console.log(response.data[0].language)
        })
    }
Here, we are calling the detect API, and we are passing our input as the body.
We are using axios.post to send the input text as body, and we're using q as the header parameter.
Also, we'll want to call this function on the click of the Translate button, so bind this function to the Translate button like this:
<Button
                            color="orange"
                            size="large"
                            onClick={getLanguageSource}
                        >
                            <Icon name='translate' />
                            Translate</Button>
Type something in the first input box, then press the Translate button. You will see the detected language object key in the console, which we need.

Now, we need to store this language key in a state. So, create a state called detectLanguageKey.
Then, set the state from the response like this:
const getLanguageSource = () => {
        axios.post(`https://libretranslate.de/detect`, {
            q: inputText
        })
            .then((response) => {
                setdetectedLanguageKey(response.data[0].language)
            })
    }
We are setting the zeroth index from the response data, because that's where our data starts.
Here is the whole code up to this point:
import React, { useState, useEffect } from 'react';
import {
    Form,
    TextArea,
    Button,
    Icon
} from 'semantic-ui-react';
import axios from 'axios';

export default function Translate() {
    const [inputText, setInputText] = useState('');
    const [detectLanguageKey, setdetectedLanguageKey] = useState('')
    const getLanguageSource = () => {
        axios.post(`https://libretranslate.de/detect`, {
            q: inputText
        })
            .then((response) => {
                setdetectedLanguageKey(response.data[0].language)
            })
    }

    return (
        <div>
            <div className="app-header">
                <h2 className="header">Texty Translator</h2>
            </div>

            <div className='app-body'>
                <div>
                    <Form>
                        <Form.Field
                            control={TextArea}
                            placeholder='Type Text to Translate..'
                            onChange={(e) => setInputText(e.target.value)}
                        />

                        <select className="language-select">
                            <option>Please Select Language..</option>
                        </select>

                        <Form.Field
                            control={TextArea}
                            placeholder='Your Result Translation..'
                        />

                        <Button
                            color="orange"
                            size="large"
                            onClick={getLanguageSource}
                        >
                            <Icon name='translate' />
                            Translate</Button>
                    </Form>
                </div>
            </div>
        </div>
    )
}
How to Call the Supported Languages API for the Select Dropdown
Now, the second API gets the supported languages. We will use the list in our select dropdown.
Create a useEffect hook to call our supported languages API. useEffect is a function that will run every time our component renders or loads.
useEffect(() => {
        axios.get(`https://libretranslate.de/languages`)
            .then((response) => {
                console.log(response.data)
            })
    }, [])
Here we are calling the API for supported languages using the axios.get method. Then we are consoling the response in the console.
Open up the console to check the languages list. You should see something like this:

Let's set this data into a state. So, create a state called languagesList. It will be an empty array.
const [languagesList, setLanguagesList] = useState([])
useEffect(() => {
        axios.get(`https://libretranslate.de/languages`)
            .then((response) => {
                setLanguagesList(response.data)
            })
    }, [])
Then, in the useEffect Hook, we need to set the languages list using setLanguagesList.
We need to show this languages list in the select option. So, let's map the select dropdown using the languagesList state like this:
<select className="language-select">
                            <option>Please Select Language..</option>
                            {languagesList.map((language) => {
                                return (
                                    <option value={language.code}>
                                        {language.name}
                                    </option>
                                )
                            })}
                        </select>
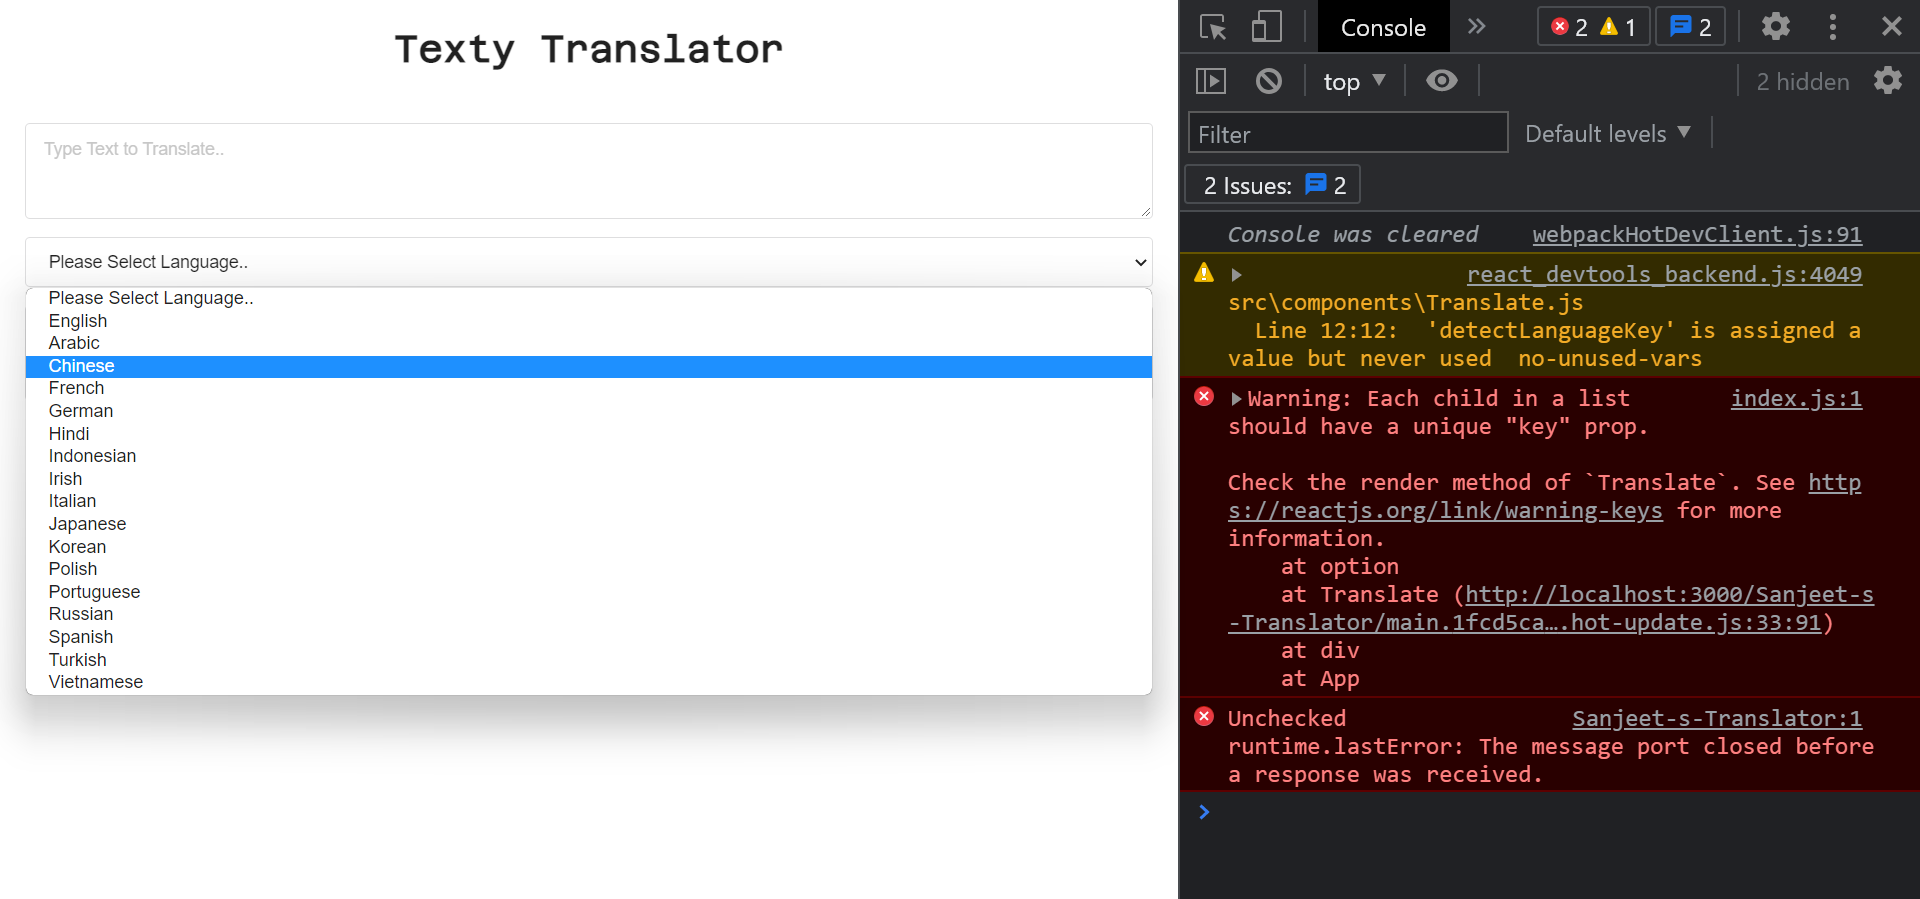
Now, we can select our language from the select dropdown.
How to Get the Selected Language Code
Now, if we select a language – let's say Spanish – we need to get the language code, as we need that language code in our final Translate API.
Create a function called languageKey() like this:
const languageKey = () => {

}
And on the select option, bind this function using onChange:
<select className="language-select" onChange={languageKey}>
                            <option>Please Select Language..</option>
                            {languagesList.map((language) => {
                                return (
                                    <option value={language.code}>
                                        {language.name}
                                    </option>
                                )
                            })}
                        </select>
Also, we need to store the language code in a state, so let's create it.
Create a state called selectedLanguageKey, which will contain our selected language key from the select input.
const [selectedLanguageKey, setLanguageKey] = useState('')
This languageKey function will accept a parameter called selectedLanguage. And we will store this data in the selectedLanguageKey state, which we are getting from the select option.
const languageKey = (selectedLanguage) => {
        setLanguageKey(selectedLanguage.target.value)
}
Now, if you look at the LibreTranslate documentation, we need three data inputs:
- The text to translate.
- The source language code.
- The target language code.
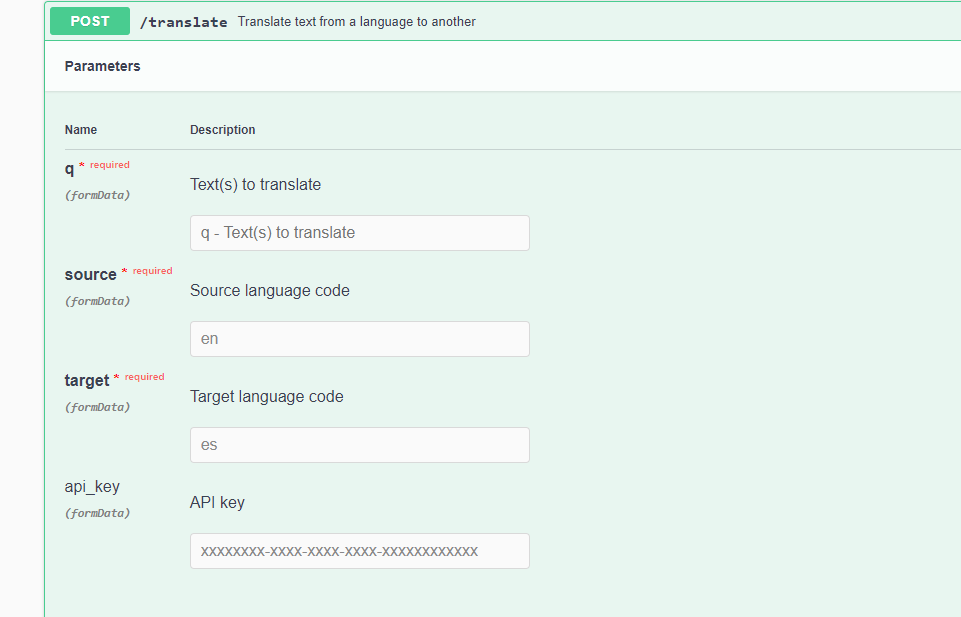
We don't need the API key because this service is free.
We have all three inputs that we need to send in the body contained in these states below:
const [inputText, setInputText] = useState('');
const [detectLanguageKey, setdetectedLanguageKey] = useState('');
const [selectedLanguageKey, setLanguageKey] = useState('')
Now, let's call our final API, which is /translate.
How to Call the Translate API to Translate our Text
Create one final state called resultText. This state will contain our output translated text.
const [resultText, setResultText] = useState('');
Create a function that will call the translate API:
const translateText = () => {
       getLanguageSource();

        let data = {
            q : inputText,
            source: detectLanguageKey,
            target: selectedLanguageKey
        }
        axios.post(`https://libretranslate.de/translate`, data)
        .then((response) => {
            setResultText(response.data.translatedText)
        })
    }
As you can see, we are setting inputText in the resultText state, and we are calling the getLanguageSource function inside translateText function. So, whenever this function runs, getLanguageSource will trigger them automatically to get the language source.
In other words, onClick of this function via the Translate button, it will set the language source via getLanguageSource(), then it will call the translate API.
So, on the Translate Button, bind this function:
<Button
                            color="orange"
                            size="large"
                            onClick={translateText}
                        >
                            <Icon name='translate' />
                            Translate</Button>
Next let's create an object called data. Inside it we will send all the data we got previously, like inputText, detectLanguageKey, and the selectedLanguage key as q, source, and the target respectively.
let data = {
            q : inputText,
            source: detectLanguageKey,
            target: selectedLanguageKey
        }
Then, we call the translate API using axios.post and send the data object as a body parameter.
let data = {
            q : inputText,
            source: detectLanguageKey,
            target: selectedLanguageKey
        }
        axios.post(`https://libretranslate.de/translate`, data)
Lastly, we set the incoming response data into the resultText state.
.then((response) => {
            setResultText(response.data.translatedText)
        })
So, now type something in the input box, select the language, and click Translate. You will get your translated text.
Here is the whole code up to this point, for your reference:
import React, { useState, useEffect } from 'react';
import {
    Form,
    TextArea,
    Button,
    Icon
} from 'semantic-ui-react';
import axios from 'axios';

export default function Translate() {
    const [inputText, setInputText] = useState('');
    const [detectLanguageKey, setdetectedLanguageKey] = useState('');
    const [selectedLanguageKey, setLanguageKey] = useState('')
    const [languagesList, setLanguagesList] = useState([])
    const [resultText, setResultText] = useState('');
    const getLanguageSource = () => {
        axios.post(`https://libretranslate.de/detect`, {
            q: inputText
        })
            .then((response) => {
                setdetectedLanguageKey(response.data[0].language)
            })
    }
    useEffect(() => {
        axios.get(`https://libretranslate.de/languages`)
            .then((response) => {
                setLanguagesList(response.data)
            })
    }, [])

    const languageKey = (selectedLanguage) => {
        setLanguageKey(selectedLanguage.target.value)
    }

    const translateText = () => {
        getLanguageSource();

        let data = {
            q : inputText,
            source: detectLanguageKey,
            target: selectedLanguageKey
        }
        axios.post(`https://libretranslate.de/translate`, data)
        .then((response) => {
            setResultText(response.data.translatedText)
        })
    }

    return (
        <div>
            <div className="app-header">
                <h2 className="header">Texty Translator</h2>
            </div>

            <div className='app-body'>
                <div>
                    <Form>
                        <Form.Field
                            control={TextArea}
                            placeholder='Type Text to Translate..'
                            onChange={(e) => setInputText(e.target.value)}
                        />

                        <select className="language-select" onChange={languageKey}>
                            <option>Please Select Language..</option>
                            {languagesList.map((language) => {
                                return (
                                    <option value={language.code}>
                                        {language.name}
                                    </option>
                                )
                            })}
                        </select>

                        <Form.Field
                            control={TextArea}
                            placeholder='Your Result Translation..'
                            value={resultText}
                        />

                        <Button
                            color="orange"
                            size="large"
                            onClick={translateText}
                        >
                            <Icon name='translate' />
                            Translate</Button>
                    </Form>
                </div>
            </div>
        </div>
    )
}
Now, the last step. In the useEffect Hook, call the getLanguageSource() function, and set inputText in the dependency array. This means that whenever our inputText text changes, or this state gets updated, the useEffect function will run, and it will call getLanguageSource() every time it runs.
useEffect(() => {
       axios.get(`https://libretranslate.de/languages`)
       .then((response) => {
        setLanguagesList(response.data)
       })

       getLanguageSource()
    }, [inputText])
Now, let's check our output:
Type some text as input, and select the language. Press Translate, and you will see your translated data in the output.
Conclusion
Now you know how to build a Text Translator using React. You can create your own UI if you want.
So go ahead, build and experiment with it a bit. There are tons of things you can do.
You can check out my video on Let's Build a Text Translator Application using React, which is on my YouTube channel.
Feel free to download the code here: https://github.com/nishant-666/Sanjeet-s-Translator. Just please don't mind the name.
Happy Learning.