

Redux can be confusing for beginner React developers to understand. There are a lot of concepts you need to know to use it properly, like reducers, actions, store, pure functions, immutability, and much more.
But every React developer should know the basics of how to work with Redux, since industry projects often use Redux to manage larger projects.
So in this article, we'll explore the basics of Redux and how to use it.
Here's a preview of the app which we'll be building in this article. It's a great project you can add to your portfolio and resume.
What Is Redux?
Redux is a state management library that helps you better manage state in your applications.
The Redux library is not specific to React. It's a library that you can use in any other library or framework like Angular, Vue, and even vanilla JavaScript.
But developers mostly use Redux when working with React.
Redux provides a single store that you can use to manage a large amount of data.
How to Get Started with Redux
Let's create a new React project so we can learn Redux basics.
Execute the following command in the terminal/command prompt to create a new React project using create-react-app:
npx create-react-app redux-demo
npxin this case allows us to use thecreate-react-appnpm package to create a new React project without installing it on our local machine.
Once you've created the project, delete all the files from the src folder and create a new file index.js inside the src folder.
Now open the terminal again and execute the following command from the redux-demo folder:
npm install redux@4.1.0
The above command will install the Redux library with version 4.1.0 to use in your project (which is the latest version at the time of writing this article).
How to Create the Redux Store
In Redux, you use the store to manage and track the data that's changing in the application.
To create a store, we need to import the createStore function like this:
import { createStore } from 'redux';
The createStore function accepts three arguments:
- the first argument is a function that is normally known as a reducer (required)
- the second argument is the initial value of the state (optional)
- the third argument is an enhancer where we can pass middleware, if any (optional)
Take a look at the below code:
import { createStore } from 'redux';

const reducer = (state, action) => {
  console.log('reducer called');
  return state;
};

const store = createStore(reducer, 0);
Here, we've first defined a reducer function using ES6 arrow function syntax. You can use the normal function instead of the arrow function if you want.
Inside the reducer function, we're logging some text to the console and then returning the value of the state from the function.
Then we pass that reducer function to the createStore function as the first argument and 0 as the initial value of the state as the second argument.
The createStore function returns a store that we can use to manage the application data.
The reducer function receives state and action as the parameters.
The initial value of the state which we passed as 0 for the createStore function is automatically passed as the value of the state parameter.
But it's a much more common practice to initialize the state inside the reducer itself rather than passing it as a second argument to the createStore function like this:
import { createStore } from 'redux';

const reducer = (state = 0, action) => {
  console.log('reducer called');
  return state;
};

const store = createStore(reducer);
Here, we're using ES6 default parameter syntax for initializing the state parameter to value 0.
Once the store is created, we can use the subscribe method provided by the store to subscribe to the changes in the store as shown below:
store.subscribe(() => {
  console.log('current state', store.getState());
});
Here, using the subscribe function, we're registering a callback function that will be called once the store is changed.
And inside the callback function, we're calling the store.getState method to get the current value of the state.
Now, open the src/index.js file and add the following contents inside it:
import { createStore } from 'redux';

const reducer = (state = 0, action) => {
  console.log('reducer called');
  return state;
};

const store = createStore(reducer);

store.subscribe(() => {
  console.log('current state', store.getState());
});
Now, if you run the application by executing the npm start command from the terminal and access http://localhost:3000/, you will see the reducer called message printed in the console.
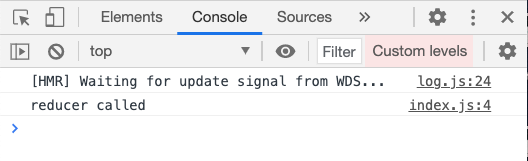
This is because the reducer gets called immediately once we pass it to the createStore function.
How to Change the Store
Now we're done with creating the store. But the store is not much use to us right now. This is because the store is connected using the reducer function, but we have not added any code inside the reducer to manage the store. So let's do that.
The only way to change the store is by dispatching actions.
An action is an object sent to the store like this:
store.dispatch({
  type: 'INCREMENT'
})
Here, we're calling the dispatch function available on the store to send an action with the type INCREMENT to the store.
The dispatch function takes an object as a parameter which is known as an action.
The action must have a type property as shown above. If you don't pass the type property then you will get an error.
It's a common practice and recommended to specify the
typevalue in uppercase.
The type can be any operation you want to perform, like ADD_USER, DELETE_RECORD, GET_USERS and so on.
If you have multiple words, you can separate them with underscores like this { type: 'INCREMENT_NUMBER' }.
Now, open the index.js file and replace its contents with the following code:
import { createStore } from 'redux';

const reducer = (state = 0, action) => {
  if (action.type === 'INCREMENT') {
    return state + 1;
  } else if (action.type === 'DECREMENT') {
    return state - 1;
  }

  return state;
};

const store = createStore(reducer);

store.subscribe(() => {
  console.log('current state', store.getState());
});

store.dispatch({
  type: 'INCREMENT'
});

store.dispatch({
  type: 'INCREMENT'
});

store.dispatch({
  type: 'DECREMENT'
});
Now, if you run the application by executing the npm start command from the terminal, you will see the following logs printed in the console:
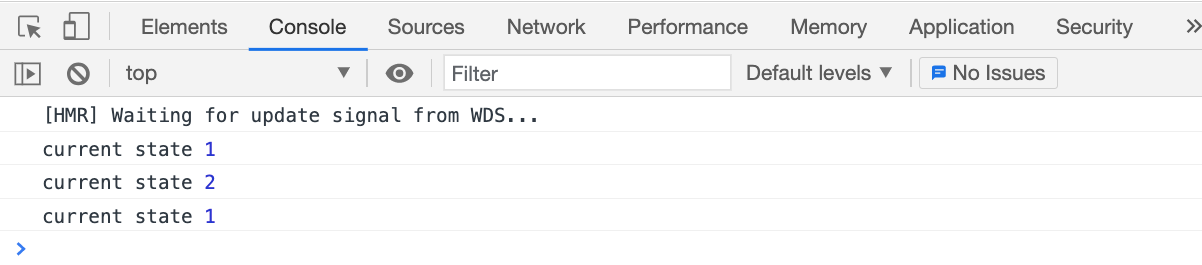
As you can see, for every action dispatched to the store, the store gets changed. So we're able to see the different values of the state in the console.
In the above code, our reducer function looks like this:
const reducer = (state = 0, action) => {
  if (action.type === 'INCREMENT') {
    return state + 1;
  } else if (action.type === 'DECREMENT') {
    return state - 1;
  }

  return state;
};
Whenever we call the store.dispatch function, the reducer function will be called. Whatever is returned from the reducer will become the new value of the store.
So the first time we dispatch an action to the store like this:
store.dispatch({
  type: 'INCREMENT'
});
the first if condition inside the reducer function will be executed. It will increment the state value to 1 which was initially initialized to 0 using ES6 default parameter syntax. Then it will be returned from the reducer function.
Note that we're using the value of the state to calculate the new value and we're not modifying the original state value like this:
if (action.type === 'INCREMENT') {
   state = state + 1;
   return state;
}
So the above code is not correct, because in the reducer we should not modify the original state. Doing so will create issues in your application and so it's not recommended.
And because we've added the store.subscribe function in the index.js file, we get notified about the changing store as we can see the logs in the console.
So when we again call the dispatch with type INCREMENT, the first if condition will be executed again. So it'll add 1 to the previous state value which was 1, and the final state value will become 2.
Then we're dispatching the DECREMENT action to the store like this:
store.dispatch({
  type: 'DECREMENT'
});
which will execute the else condition inside the reducer and it will decrement the state value by 1 (so 2 - 1 will become 1).
Note that, inside the reducer, we're also returning state at the end. So if none of the condition matches, the default previous state will be returned from the function.
It's a common practice to use a switch statement inside the reducer instead of the if-else condition like this:
const reducer = (state = 0, action) => {
  switch (action.type) {
    case 'INCREMENT':
      return state + 1;
    case 'DECREMENT':
      return state - 1;
    default:
      return state;
  }
};
In addition to the type, we can also pass extra information as a part of the action.
Replace the contents of the index.js file with the following code:
import { createStore } from 'redux';

const reducer = (state = 0, action) => {
  switch (action.type) {
    case 'INCREMENT':
      return state + action.payload;
    case 'DECREMENT':
      return state - action.payload;
    default:
      return state;
  }
};

const store = createStore(reducer);

store.subscribe(() => {
  console.log('current state', store.getState());
});

store.dispatch({
  type: 'INCREMENT',
  payload: 1
});

store.dispatch({
  type: 'INCREMENT',
  payload: 5
});

store.dispatch({
  type: 'DECREMENT',
  payload: 2
});
Now, if you run the application by executing the npm start command from the terminal, you will see the following logs printed in the console:
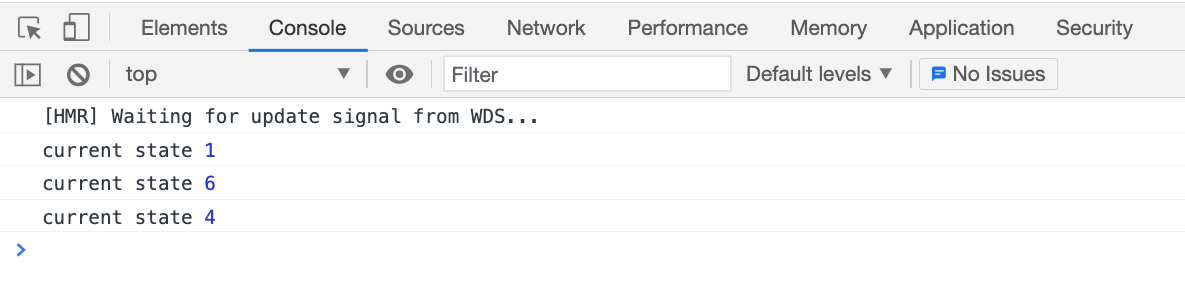
Here, while dispatching an action to the store, we're passing a payload with some value which we're using inside the reducer to increment or decrement the store value.
Here, we've used payload as a property name but you can name it whatever you want.
Our reducer function looks like this now:
const reducer = (state = 0, action) => {
  switch (action.type) {
    case 'INCREMENT':
      return state + action.payload;
    case 'DECREMENT':
      return state - action.payload;
    default:
      return state;
  }
};
So when we dispatch actions with type INCREMENT like this:
store.dispatch({
  type: 'INCREMENT',
  payload: 1
});

store.dispatch({
  type: 'INCREMENT',
  payload: 5
});
the following code from the reducer will be executed:
return state + action.payload;
This will first add 1 and then 5 to the previous value of the state, so we go from 1 to 6. And because of the DECREMENT action type:
store.dispatch({
  type: 'DECREMENT',
  payload: 2
});
we go from 6 to 4. So the final value of the store will become 4.
Here's a Code Sandbox Demo.
Thanks for reading!
This was a quick introduction to Redux from my Mastering Redux course. If you want to learn Redux in detail and build a complete food ordering app, you can check it out.
In the course, you will learn:
- Basic and advanced Redux
- How to manage the complex state of array and objects
- How to use multiple reducers to manage complex redux state
- How to debug a Redux application
- How to use Redux in React using the react-redux library to make your app reactive.
- How to use the redux-thunk library to handle async API calls
and much more.
Finally we'll build a complete food ordering app from scratch with stripe integration for accepting payments and deploy it to production.
You can get the course for just $12 instead of the original price of $19 along with the free copy of my popular Mastering Modern JavaScript book if you purchase by 19th May, 2021.
Want to stay up to date with regular content regarding JavaScript, React, Node.js? Follow me on LinkedIn.